Form Upgrade in CRM Online Fall '13 Edition
If you are an existing CRM Online customer upgrading to the new CRM Online Fall ’13 edition – and you have one or more customized forms – there is a few things to notice around your new forms.
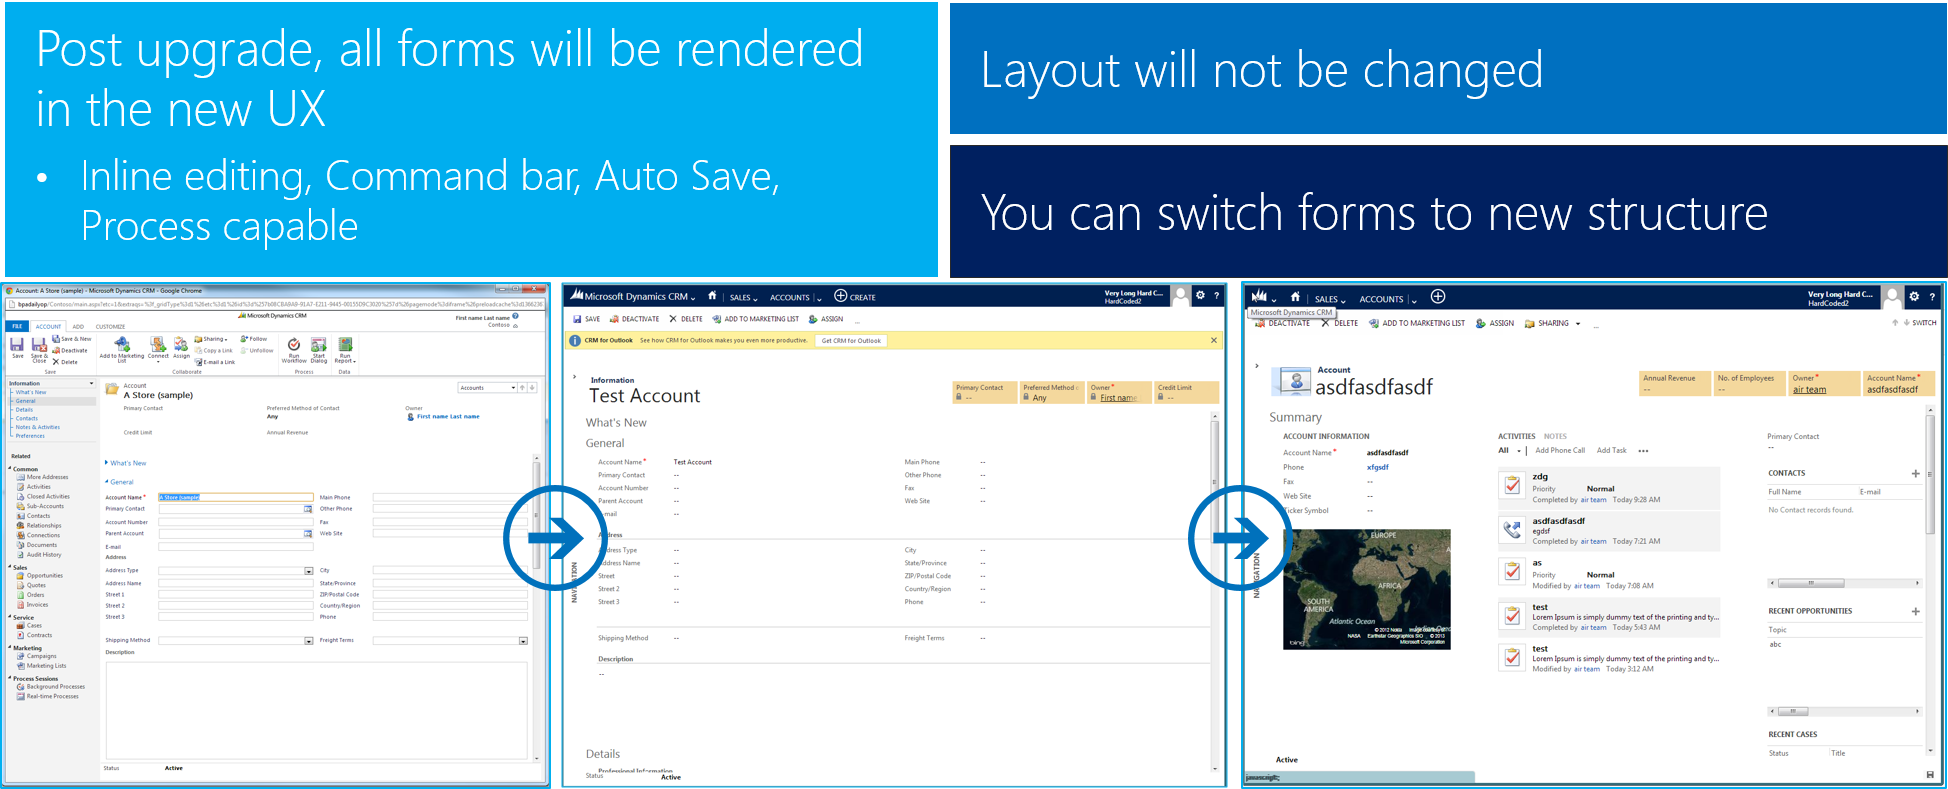
Your upgraded customized forms will render in the new UI, and the forms will reflect your layout. You can then choose to upgrade your forms fully to the CRM Online Fall '13 forms.
I will try to explain in an example.
Example
In this example lets pretend you have a entity "Affiliate", originally based on the "Account" entity i CRM Online 2011. The "Affilliate" entity leverages a heavily customized form (see below).
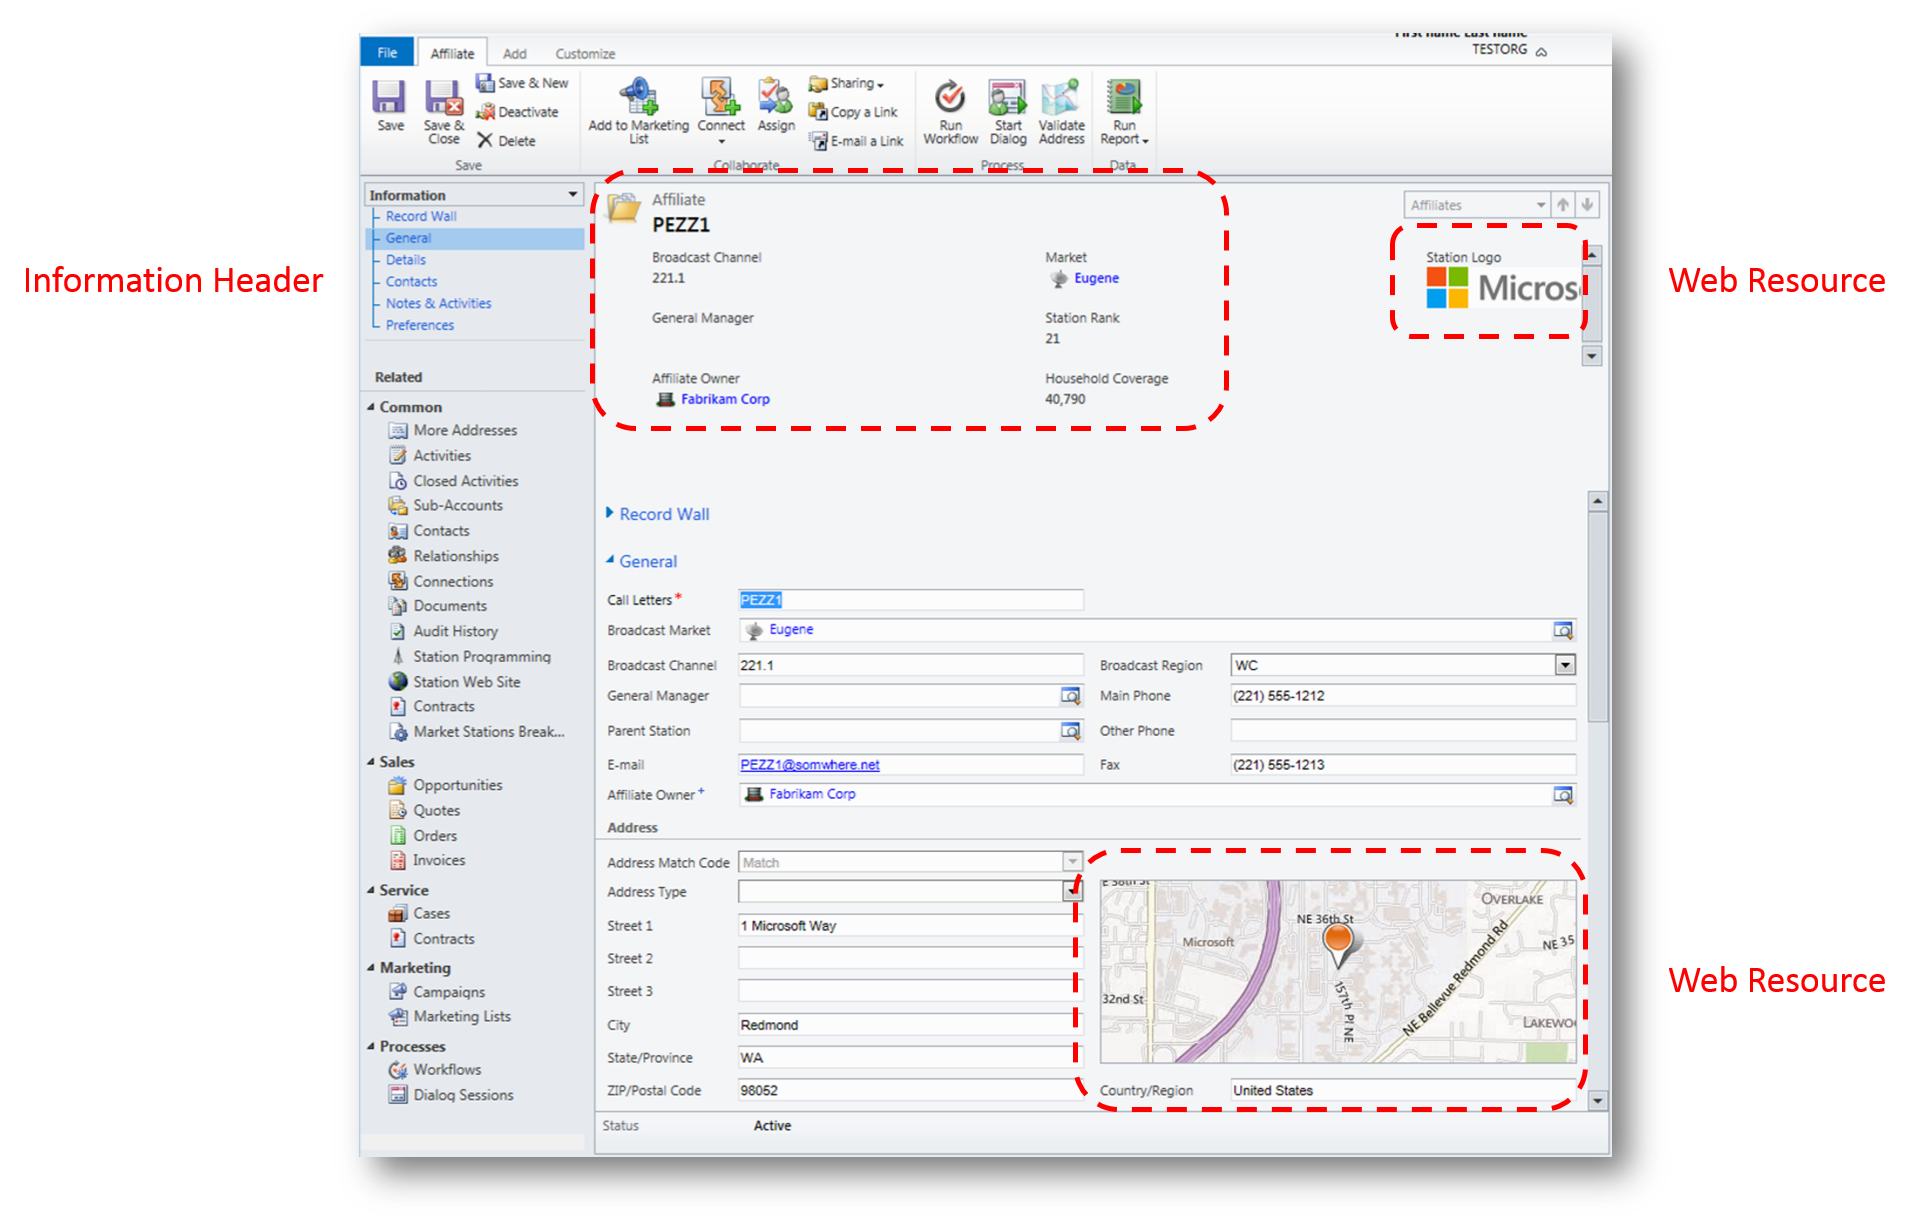
Fig. 1 - Customized form "Affiliate" in CRM Online 2011
Old and new form
After the upgrade to CRM Online Fall ‘13 the "Affiliate" entity will have (amongst others) an 'old' and a 'new' form.
- The 'old' form will have the name “Information” and be of type “Main”.
- The 'new' form will have the same name as the original entity – ”Account”. The new form will be in a deactivated state
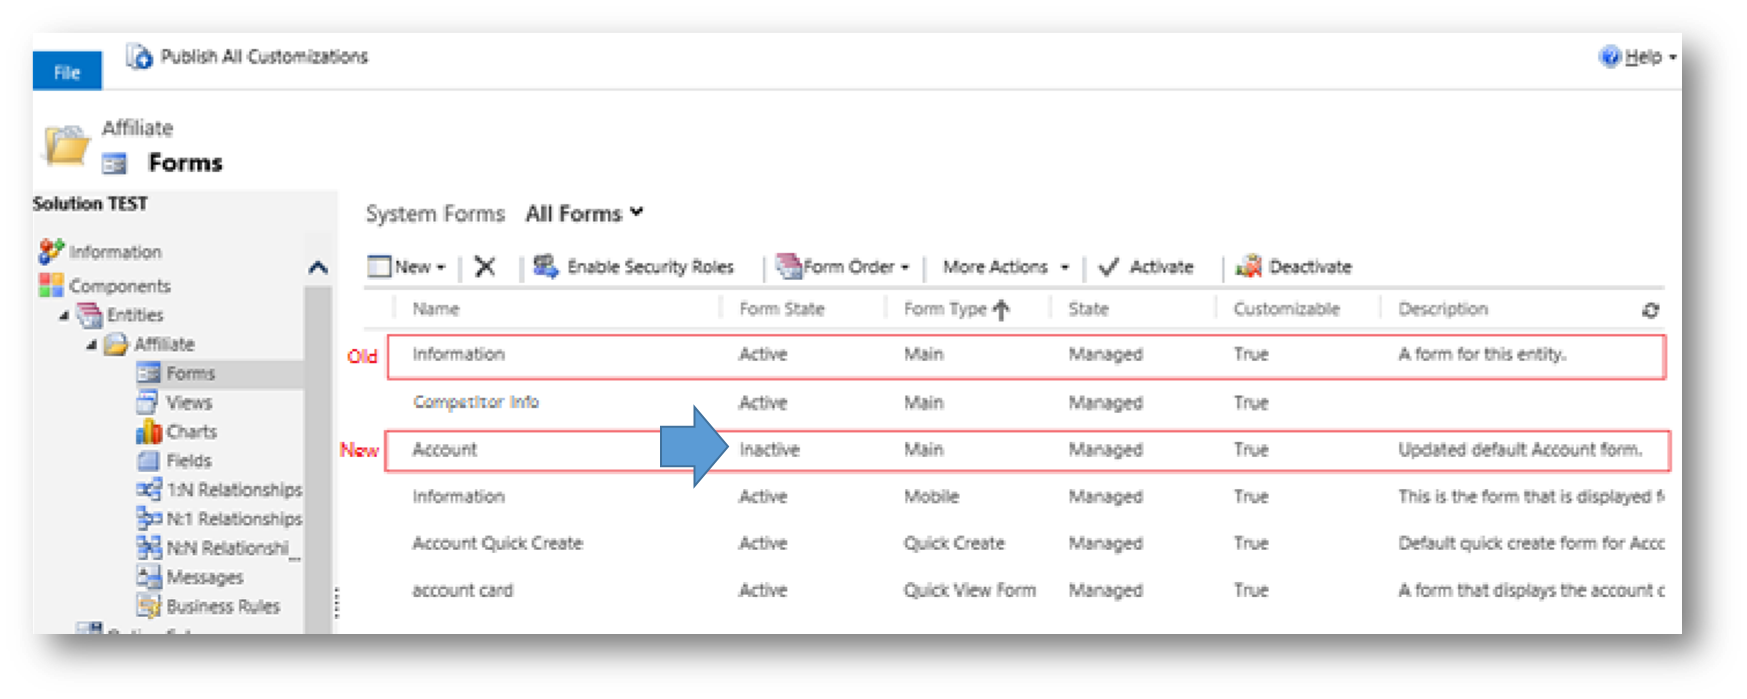
Fig. 2 - Forms for the entity
The form "Information" will reflect your original layout, and you could leave it at that and use the "Information" form onwards. But the form wont be fully taking advantage of the new capabilities in CRM Online Fall ’13. If you want to fully take advantage of the new capabilities you will need to switch to the new form by going through a process which is basically merging the two forms and after that move things around, delete what’s not needed etc
To Merge the Two Forms.
Open the new form “Account” in your form editor.
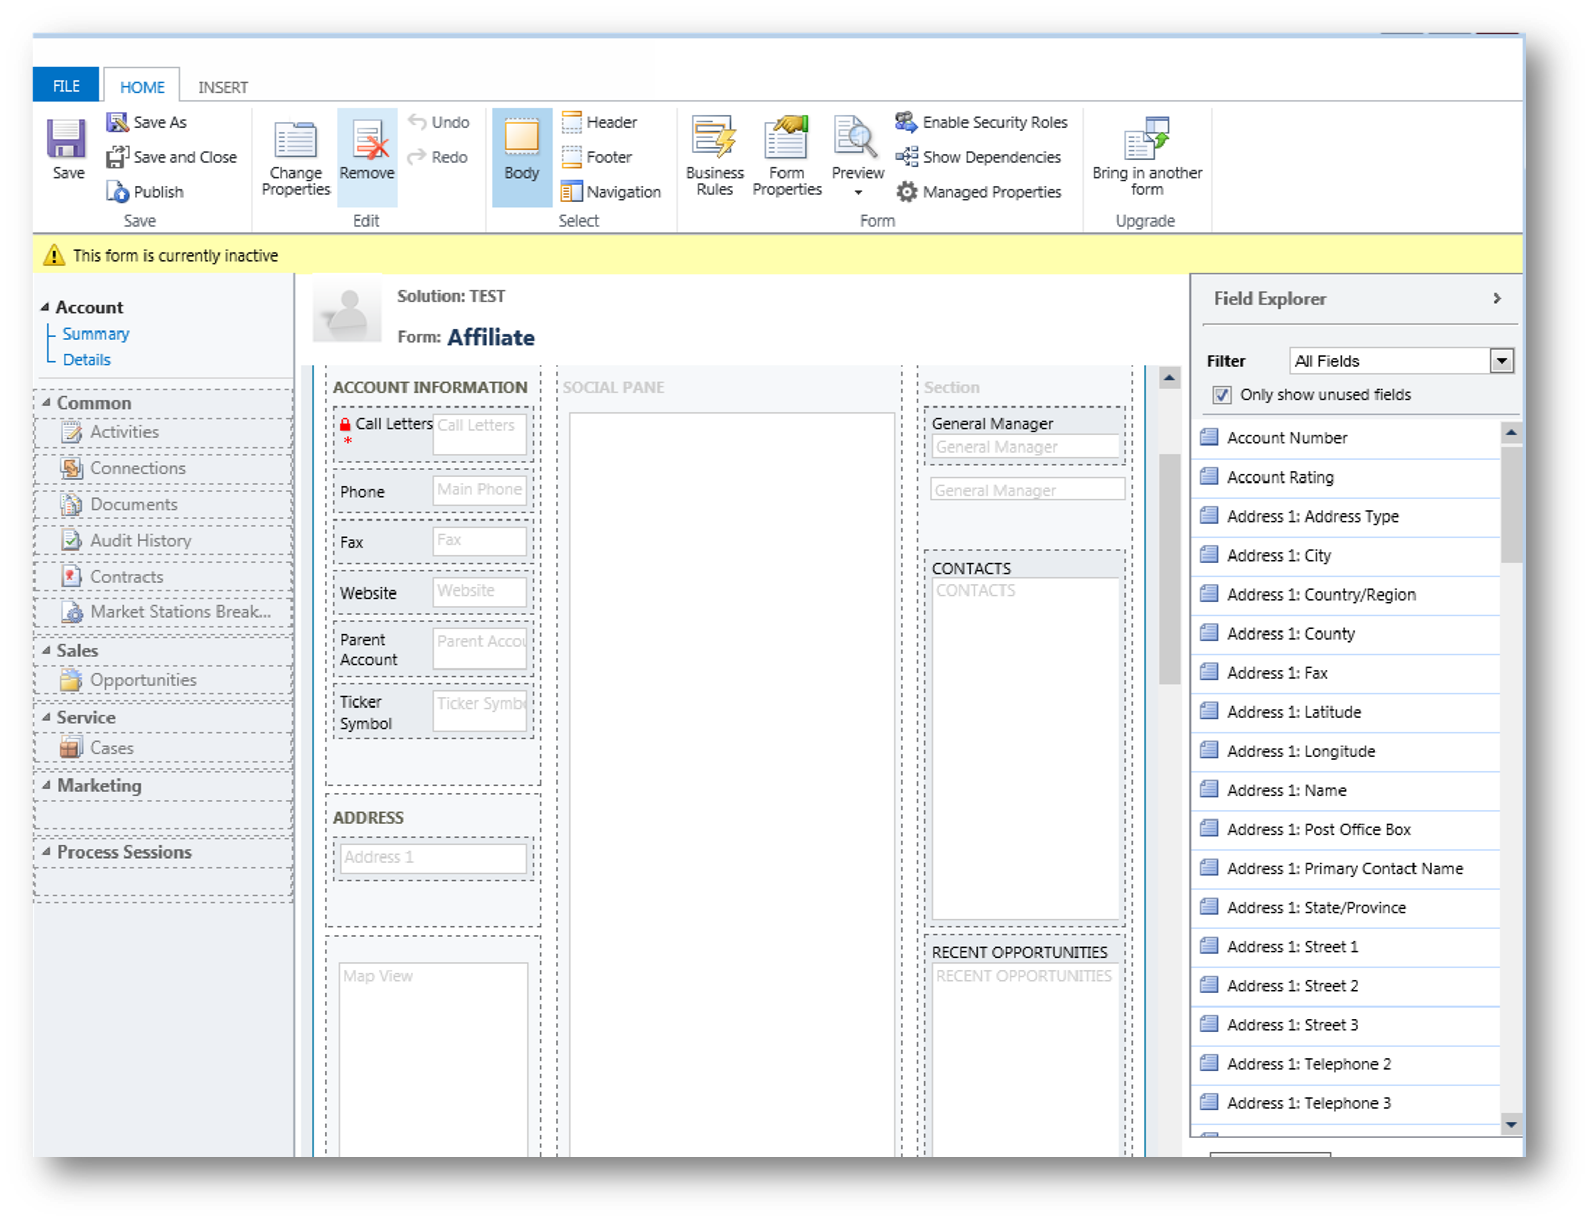
Fig. 3 - New (inactive) form opned in the Form EditorThis is the CRM Online Fall ‘13 version of the "Affiliate" form. As you can see, it’s clearly not in the format or structure that you had in the previous version of the form.
To assist you in updating forms to the new style, we provide a tool that will allow you to import the form elements from another form into your CRM Online Fall ‘13 form. The tool is accessed via a button "Bring in another form" located in the top right corner of the ribbon in the form editor. What it does is offer you to append any form to the form you've opened in the Form Editor to easily merge their contents
In the form editor, click the Bring in another form button:
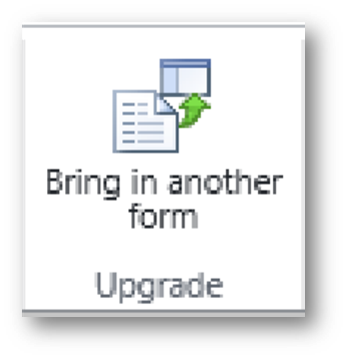
Fig. 4 - new button "Bring in another form"Clicking that button will present you with a list of forms from the previous version that you can choose from.
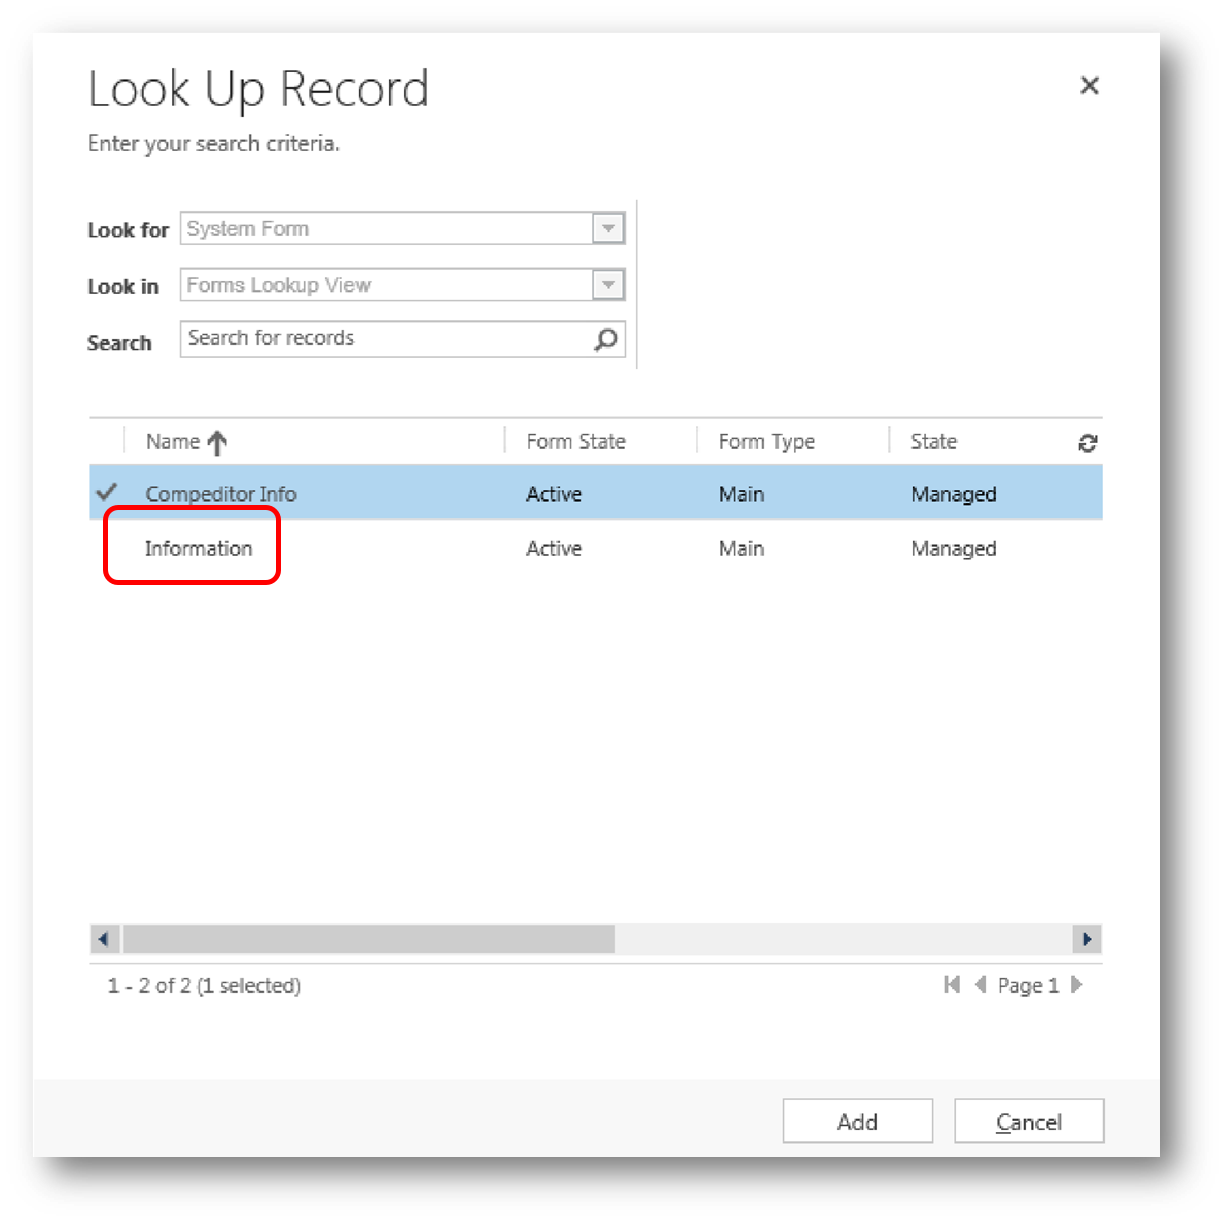
Fig. 5 - Choose form to bring inChoose the "Information" form, as that is the form that has the current layout of your form, and then click Add.
The content will be added to the form editor:
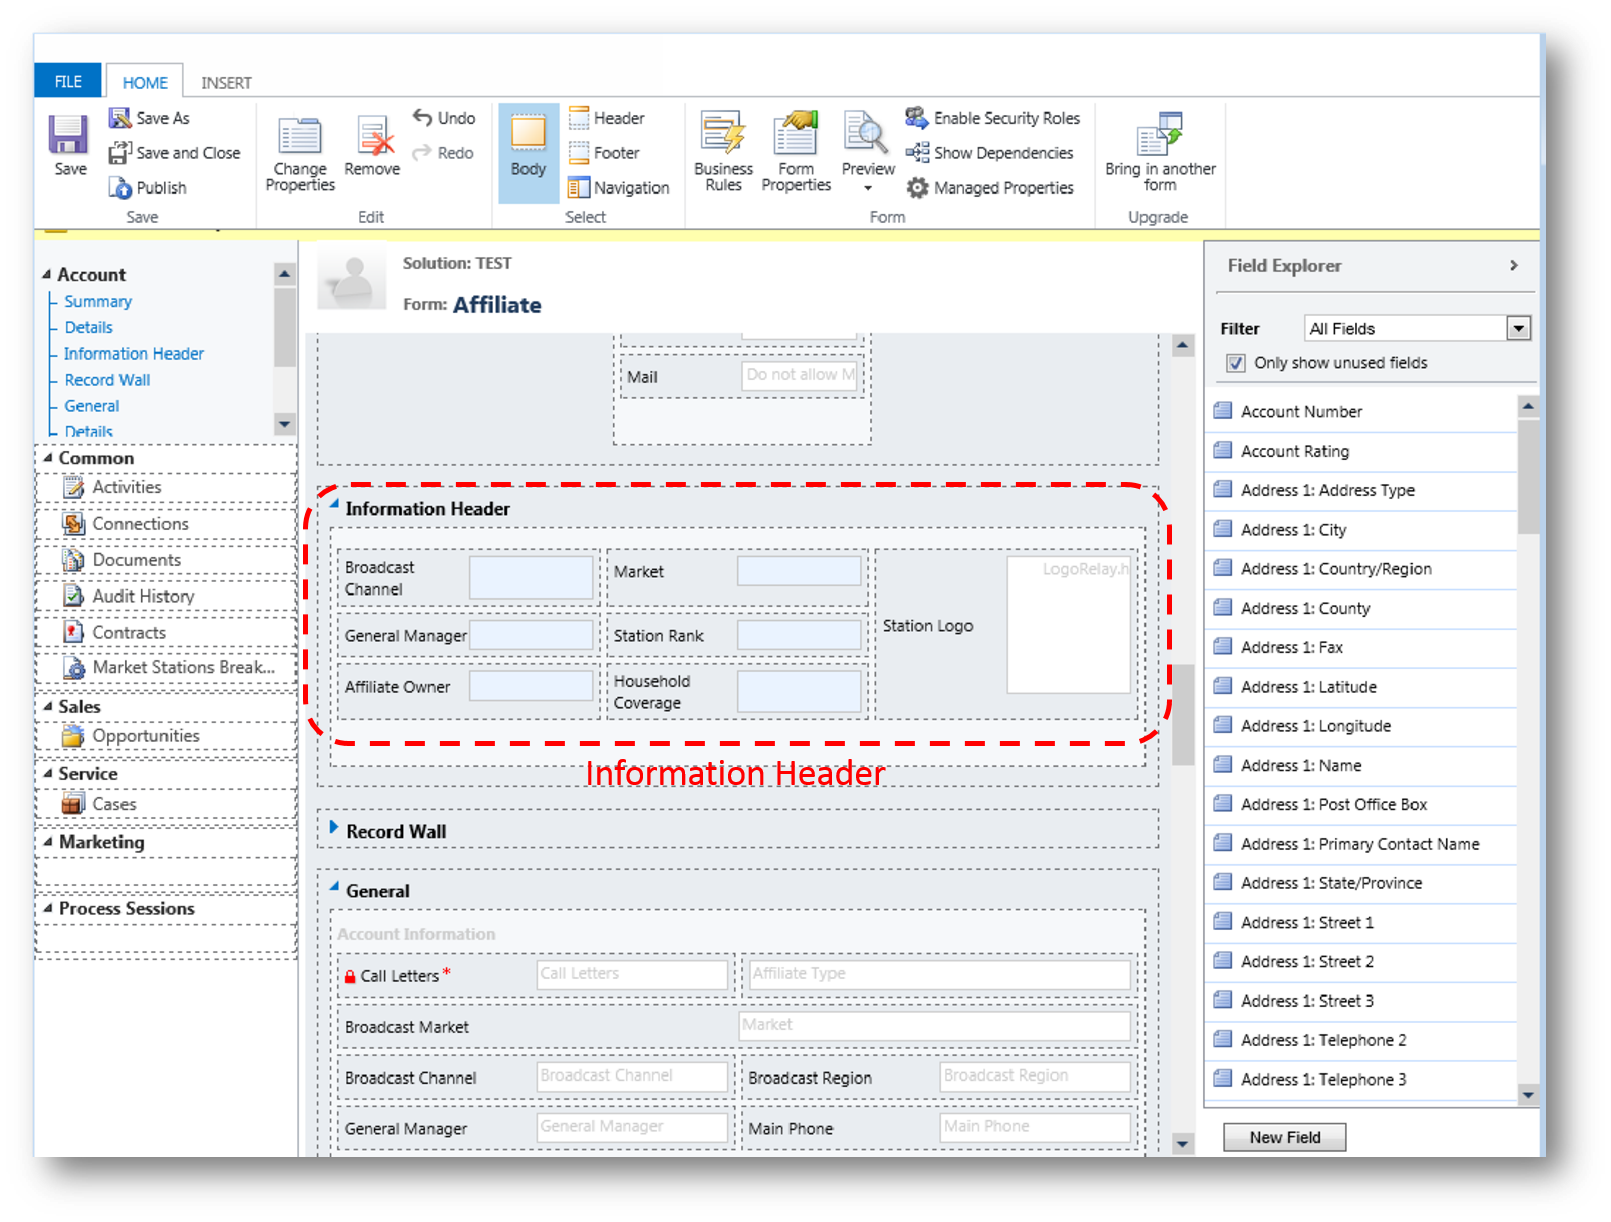
Fig. 6 - Elements appended to the form.
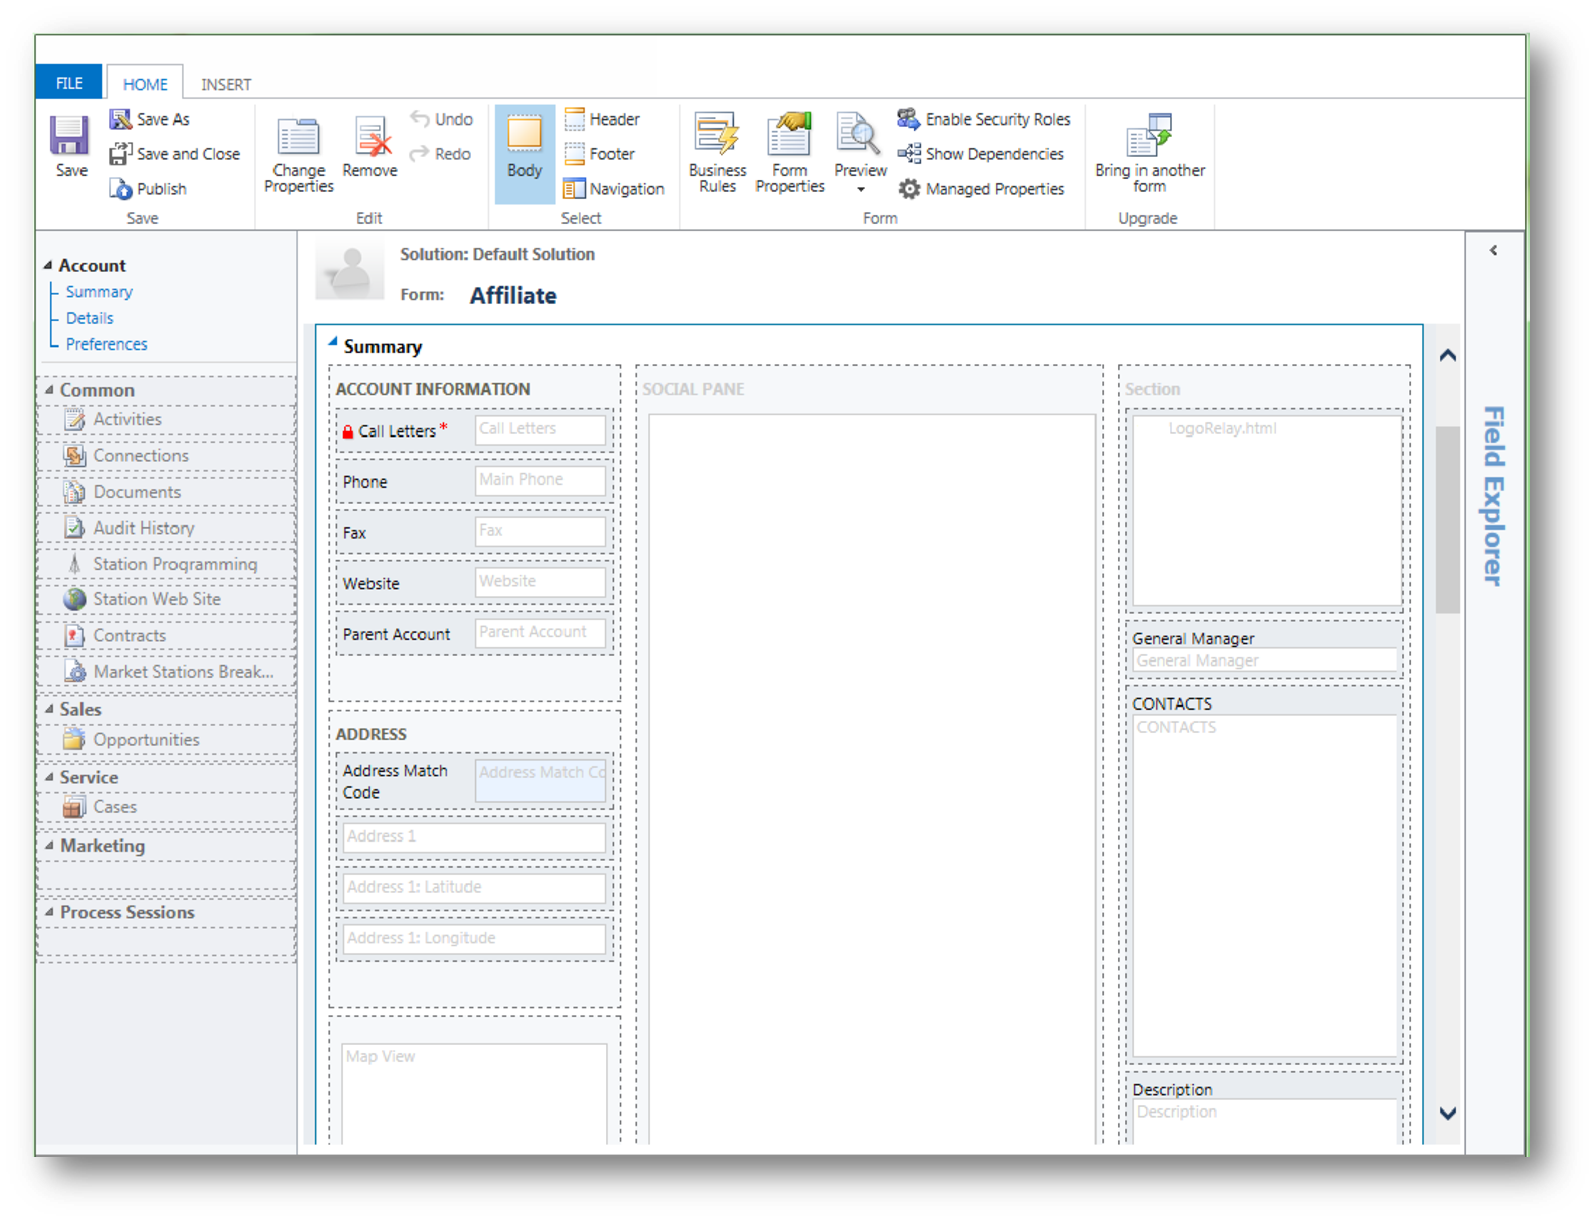
Fig. 7 - The result of the merge processPost merge handling
In this example, lets assume the 2011 version of the "Affiliate" form used a web resource that was connected to Bing to display the location of the entity on a map. With the CRM Online Fall ‘13 update, CRM includes this functionality out of the box, so you can remove that and use this new feature instead.
You can also remove the address block, notes, and activities area, from the copy of the original form, using the new controls that CRM Online Fall ‘13 provides.
The updated form now looks like this:
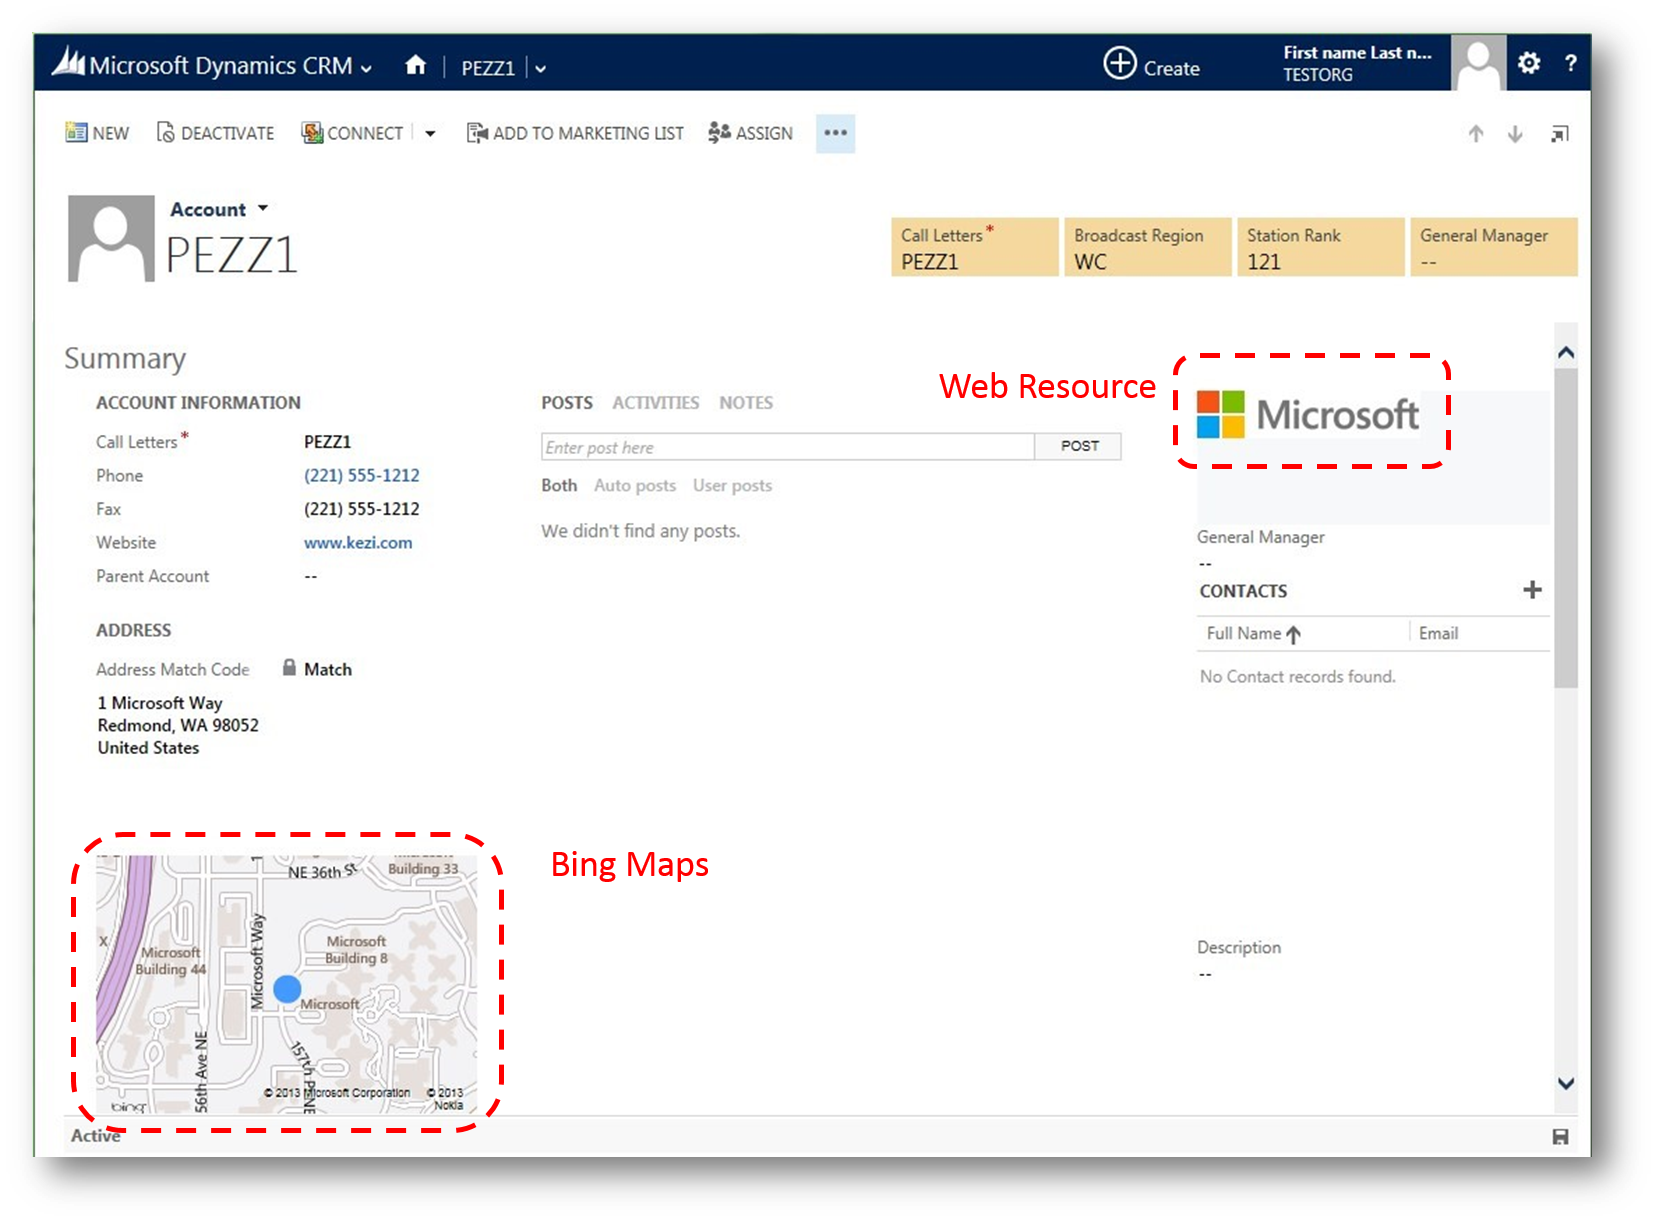
Fig. 8 - Updated formIn the original form, the logo displayed in a web resource. CRM Online Fall ‘13 also includes a new Image data type that is associated to the account, so a few quick changes to the design and now it looks like this:
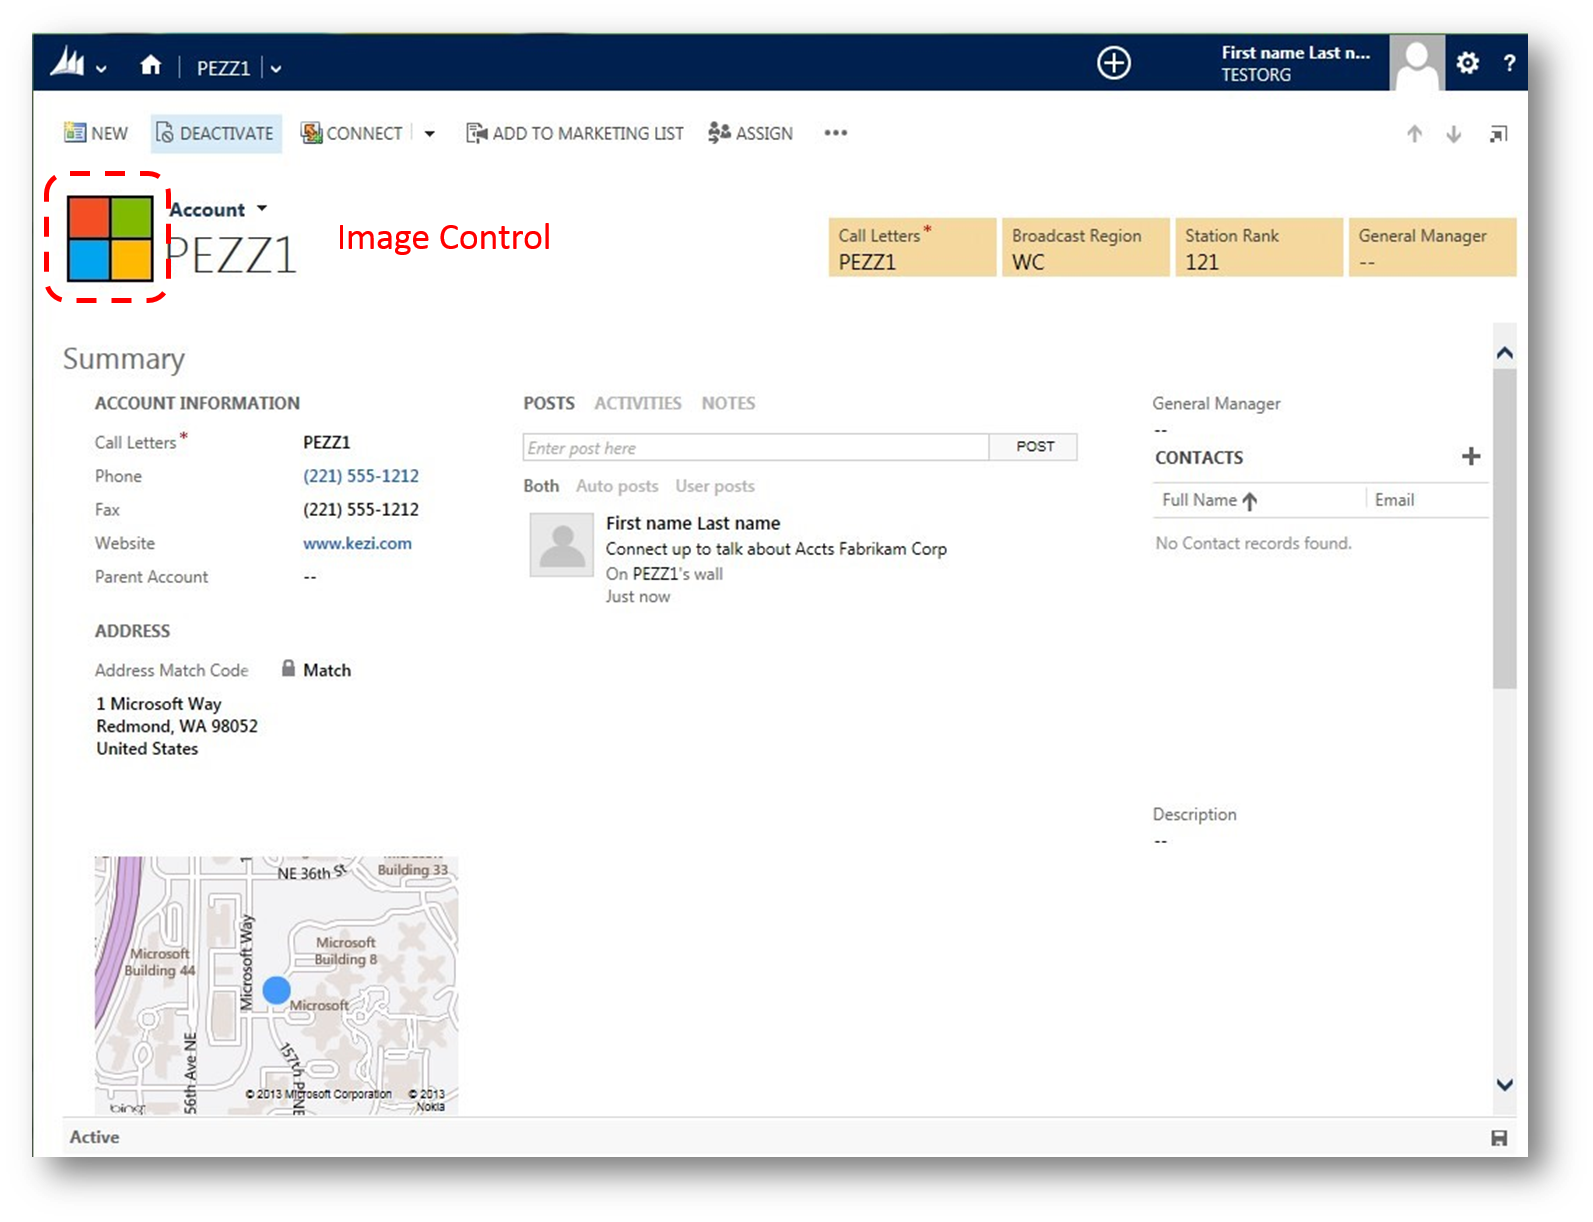
Fig. 9 - logo added using new Image controlActivate the "Account" form to start using that form instead of the "Information" form

I hope this example helps you understand some of the process involved around the forms upgrade after your organisation has been upgraded to CRM Online Fall '13. Obviously there is other things you will want to do, which you can read more about in the "Get Ready for the Next Release" section of the CRM Customer Center.
Notes
To view the forms, navigate to Settings > Customizations > Customize the System.
If you have a custom solution installed, navigate to Settings > Customizations > Solutions.
In either case, once you have expanded an entity you can see the forms for that entity.
See also
- CRM Customer Center - link
- Check your JavaScript code to prepare for your upgrade - link (really Important you check your code prior to the upgrade)
Disclaimer
"Microsoft Dynamics CRM Online Fall '13" is a pre-release service under development. The information in this blog post represents my personal understanding and expectations as of the date of this blog post. All pre-release service release dates and features specified are preliminary based on current expectations, and are subject to change without notice.