Winning combination - a shared mailbox in Exchange Online and a queue in CRM Online
A very popular feature in Exchange Online is shared mailboxes. A shared mailbox is a mailbox that multiple users can open to read and send e-mail message. It does not require a license if it doesn’t exceed 5 GB in size, and you are free to create as many shared mailboxes as you like.
It can provide a generic e-mail address, such as info@contoso.com or sales@contoso.com, which customers can use to inquire about your company. It allows multiple users to monitor and reply to e-mail sent to an e-mail address, such as a help desk.
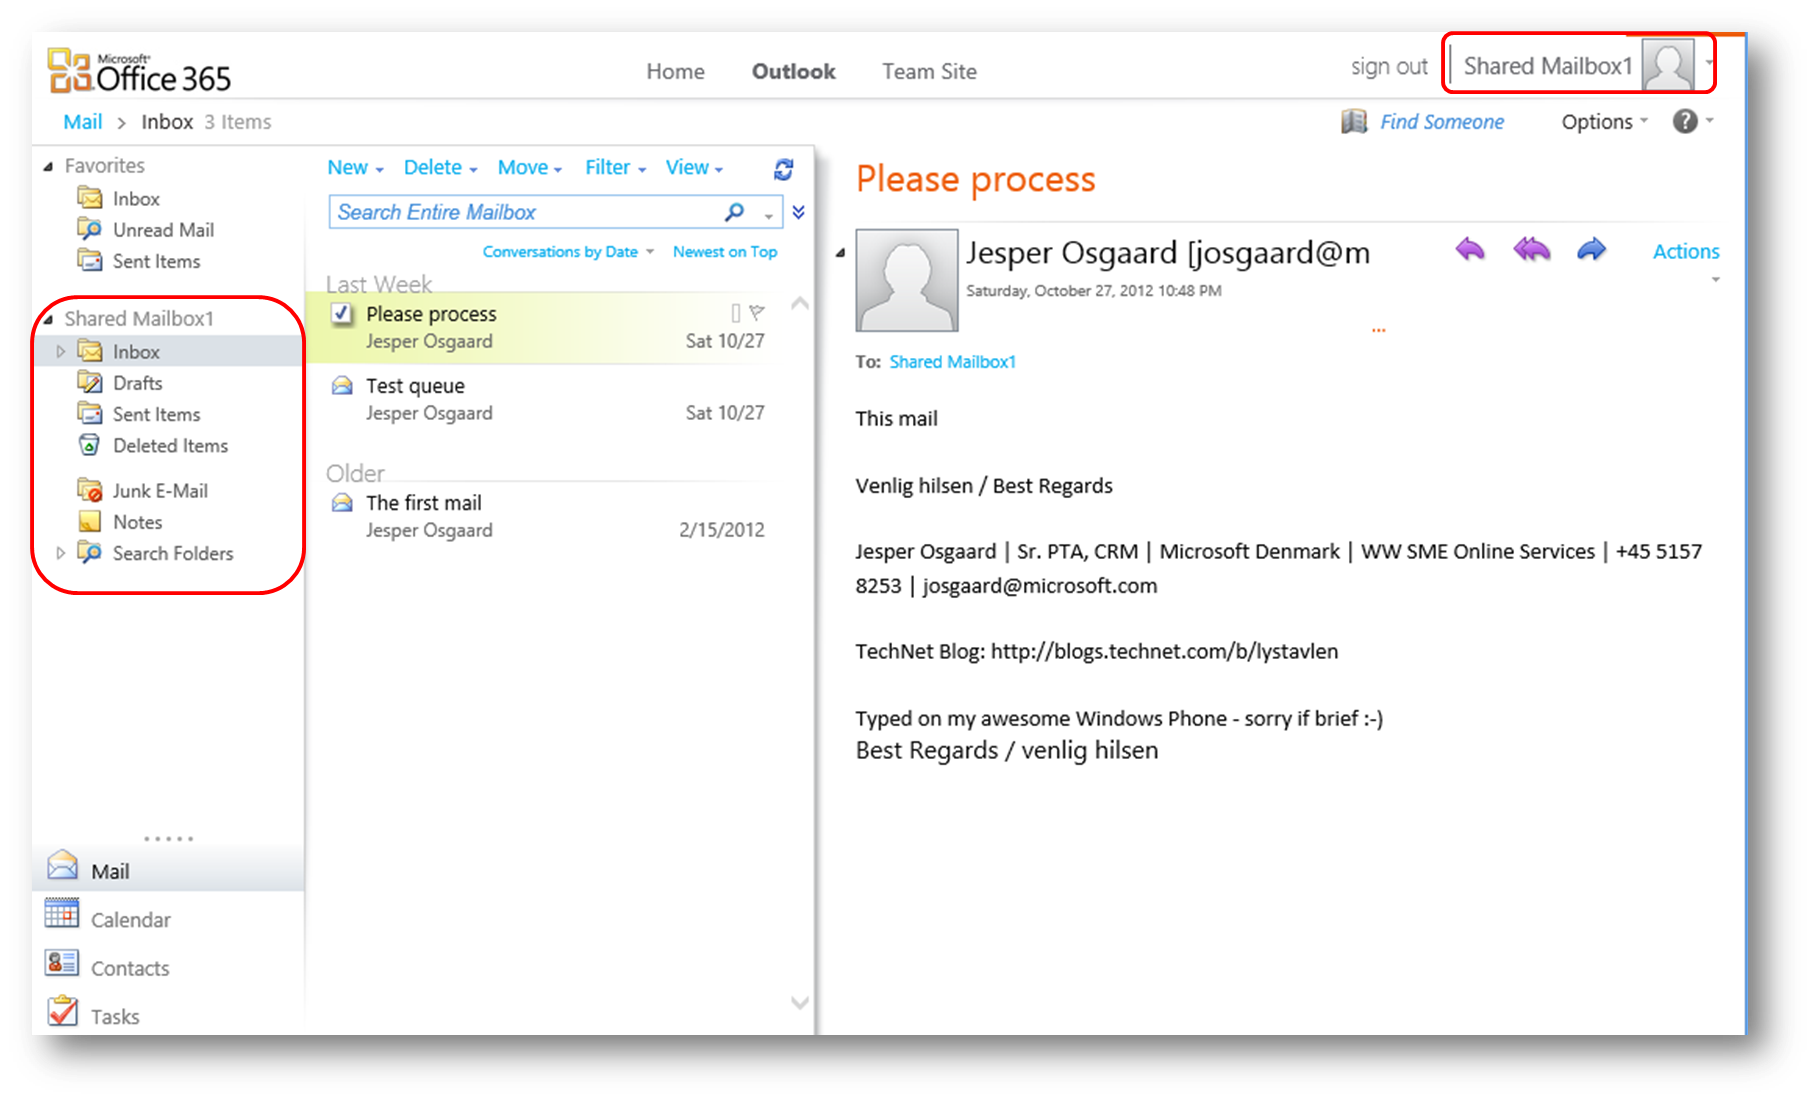
In an Outlook Web App-only setup it may feel somewhat cumbersome to switch between your own Inbox and your shared mailboxes - and if responding to mails in a shared mailbox is a shared responsibility of your team, it’s important to know if one of your team members already is working on one of the mails in the mailbox, before you take action on that same mail.
To ease the job of working with mails in a shared mailbox AND to keep track of which colleague is working on which mails you can consider adding CRM Online’s mail-enabled queues to the mix.
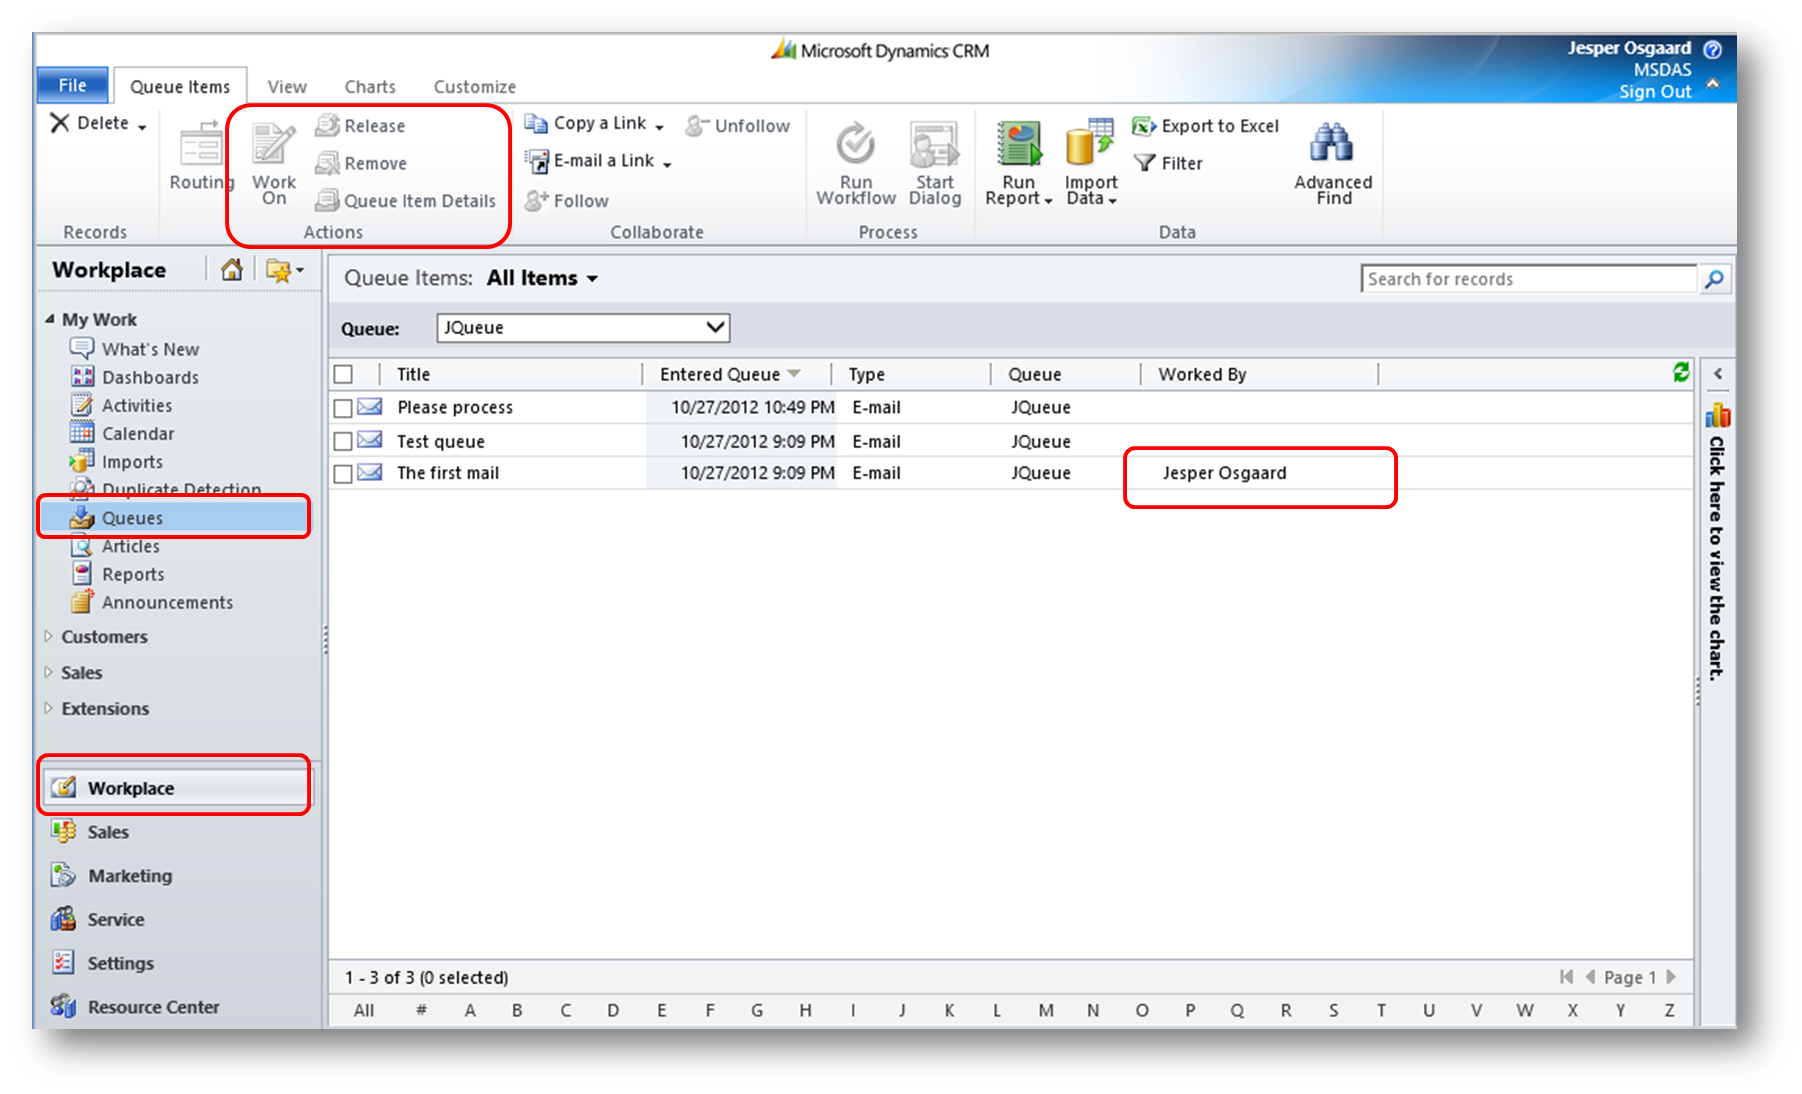
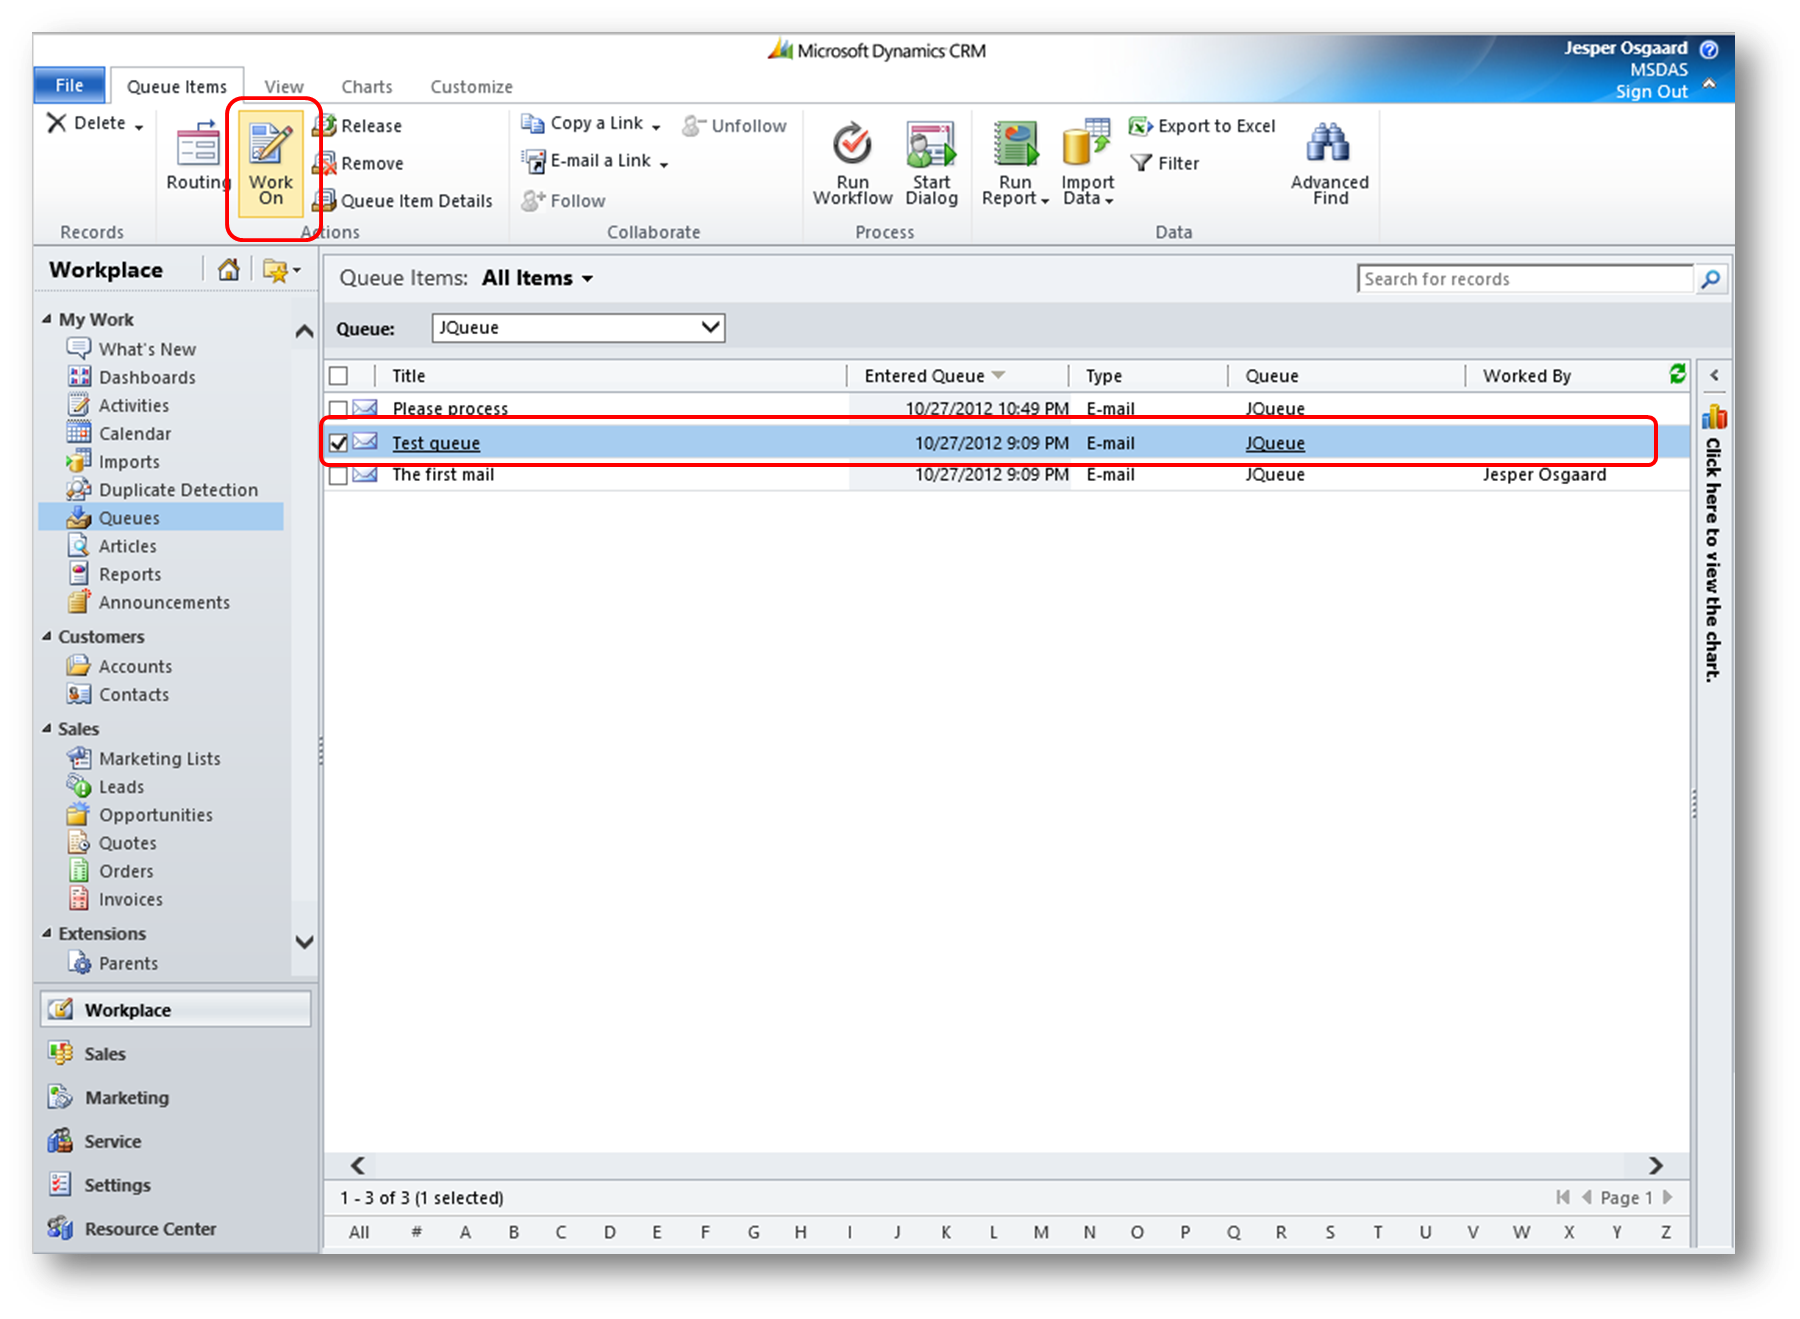
If you hook a mail-enabled queue into your shared mailbox you'll be able access the shared mailbox' mails from the CRM Online queue, and mark one or more mails in the queue as mails you are working on.
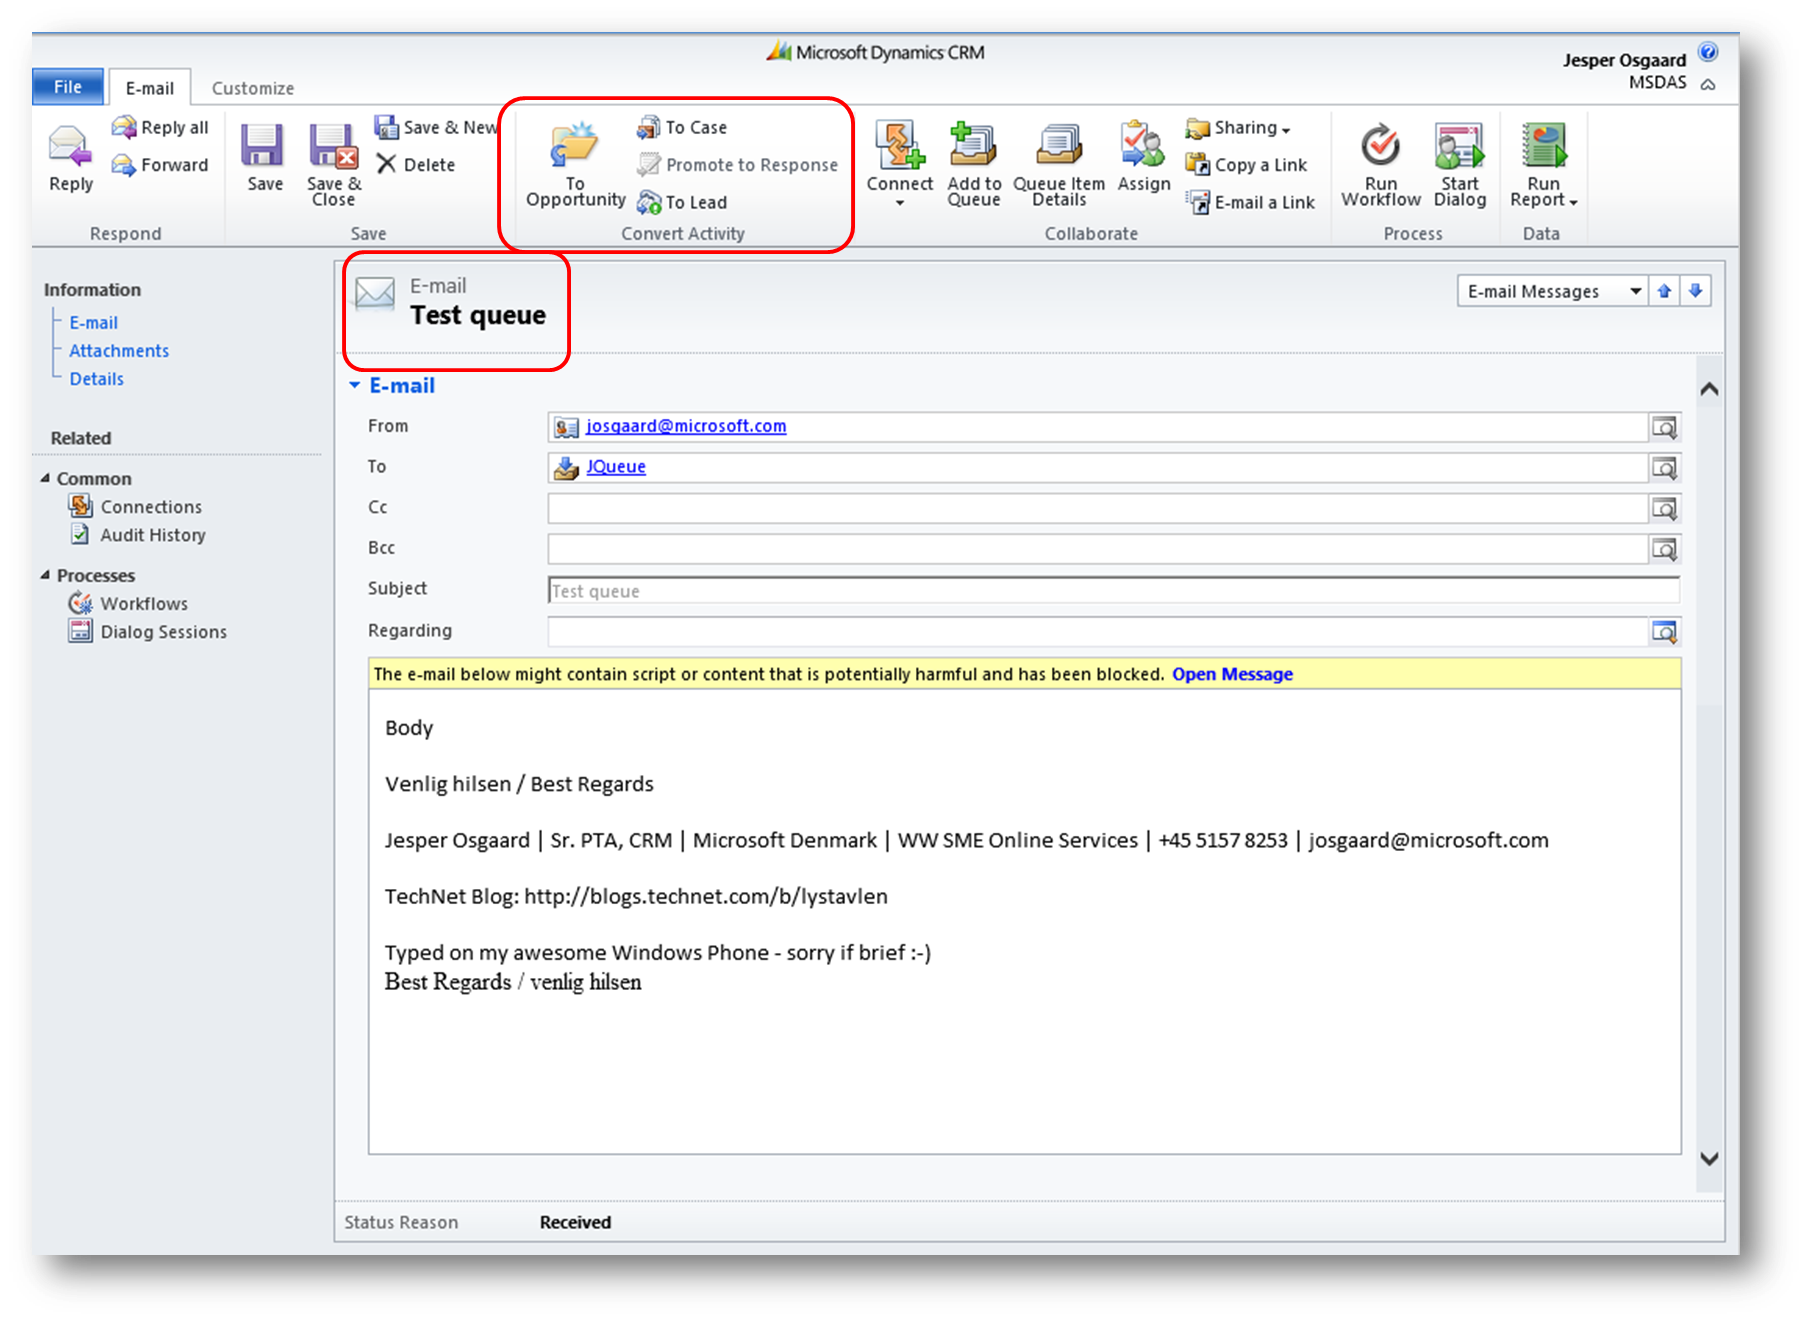
If you open a queue item (holding one of the mails from the shared mailbox) you can even convert it to a Lead, an Opportunity, a Case and take lots of other actions on it to ensure a structured handling of the mail.
The components
To bridge the shared mailbox in Exchange Online and the email enabled queue in CRM Online in terms of emails, you'll need an email router (a piece of software sitting on a computer). So the components in the above setup would be:
- A shared mailbox
- A mail-enabled queue
- An email router
1. Setting up a shared mailbox in Exchange Online
To setup a shared mailbox you can either use PowerShell or a graphical tool. In either case you'll first need to create a security group to hold the users who'll access the shared mailbox.
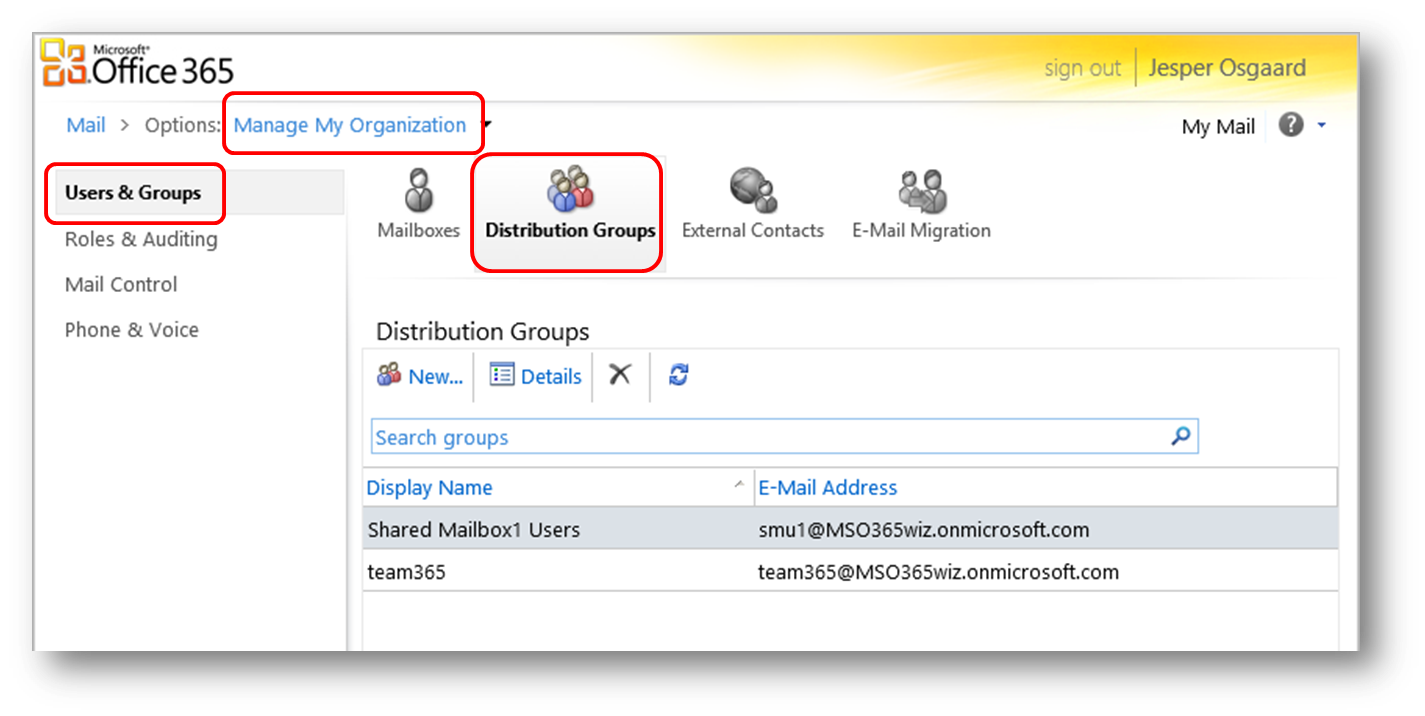
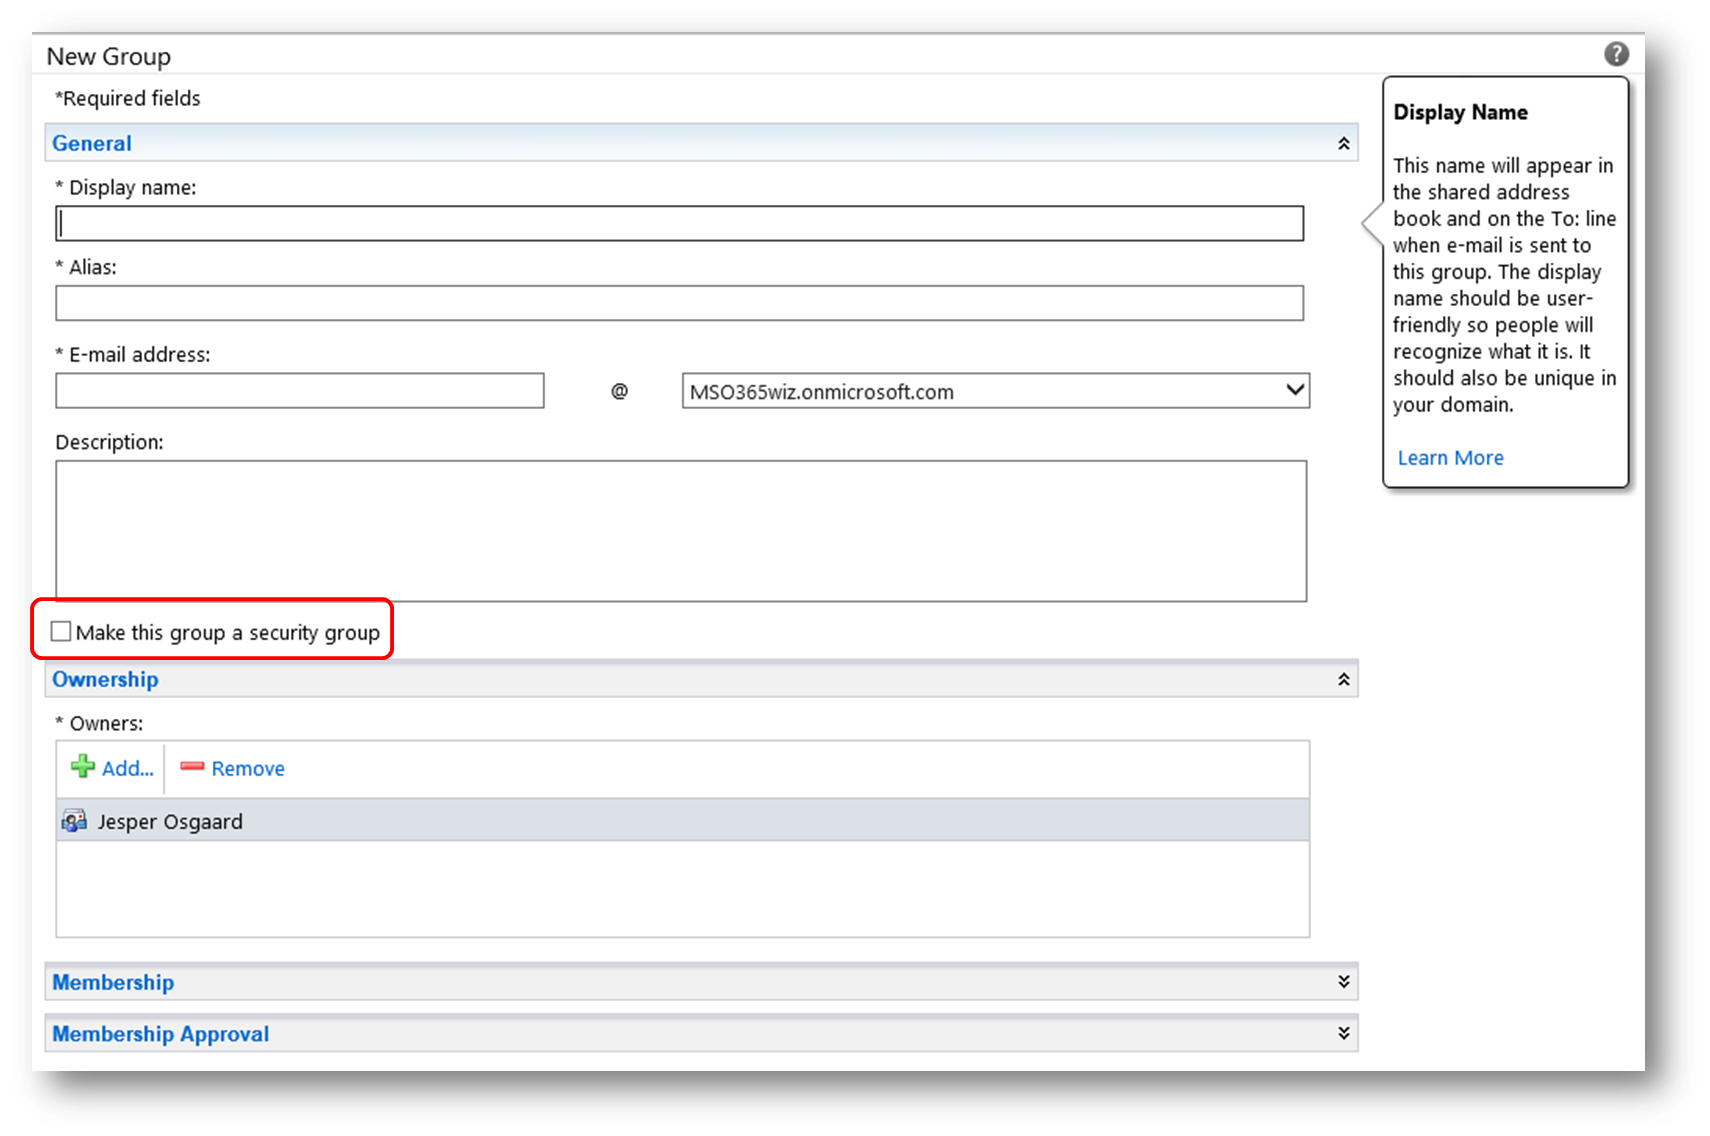
Go to Exchange Online Administration, select Manage My Organization -> Users & Groups -> Distribution Groups. Fill out the required information and select the "Make this group a security group" check box.
To enable members of the security group to open the shared mailbox, read e-mail, and use the calendar, you'll need to provide the parameter FullAccess to the PowerShell command Add-MailboxPermission. To enable members of the security group to send e-mail from the shared mailbox, you'll need to provide the parameter SendAs to the PowerShell command Add-RecipientPermission
The links in the paragraph above should take you through the process of creating the shared mailbox either using PowerShell or the GUI based tool. In my example I'm using the email address print@mso365wiz.onmicrosoft.com for my shared mailbox.
2. Creating a mail-enabled queue in CRM Online
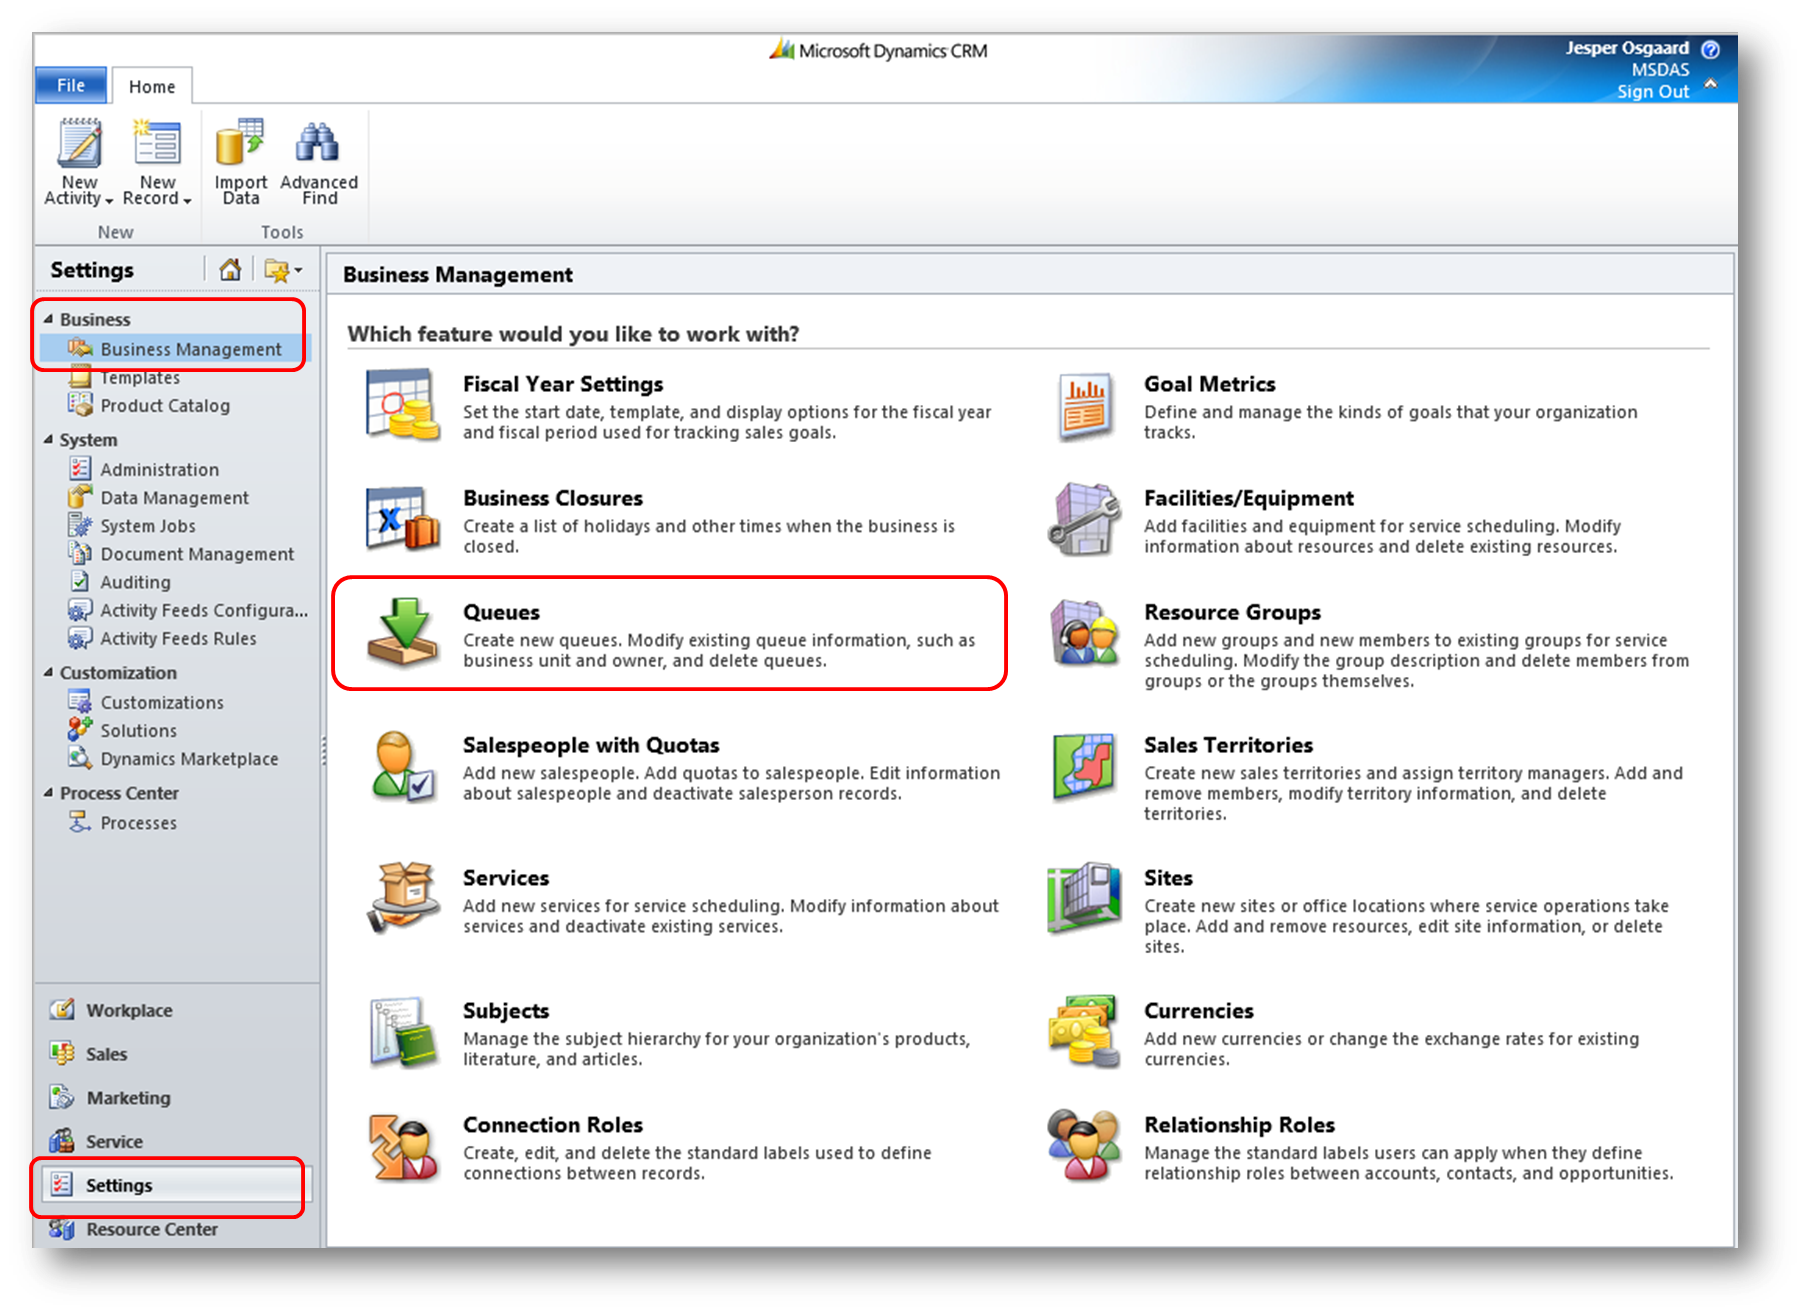
To create an email enabled queue go to Settings, then Business Management and then click Queues
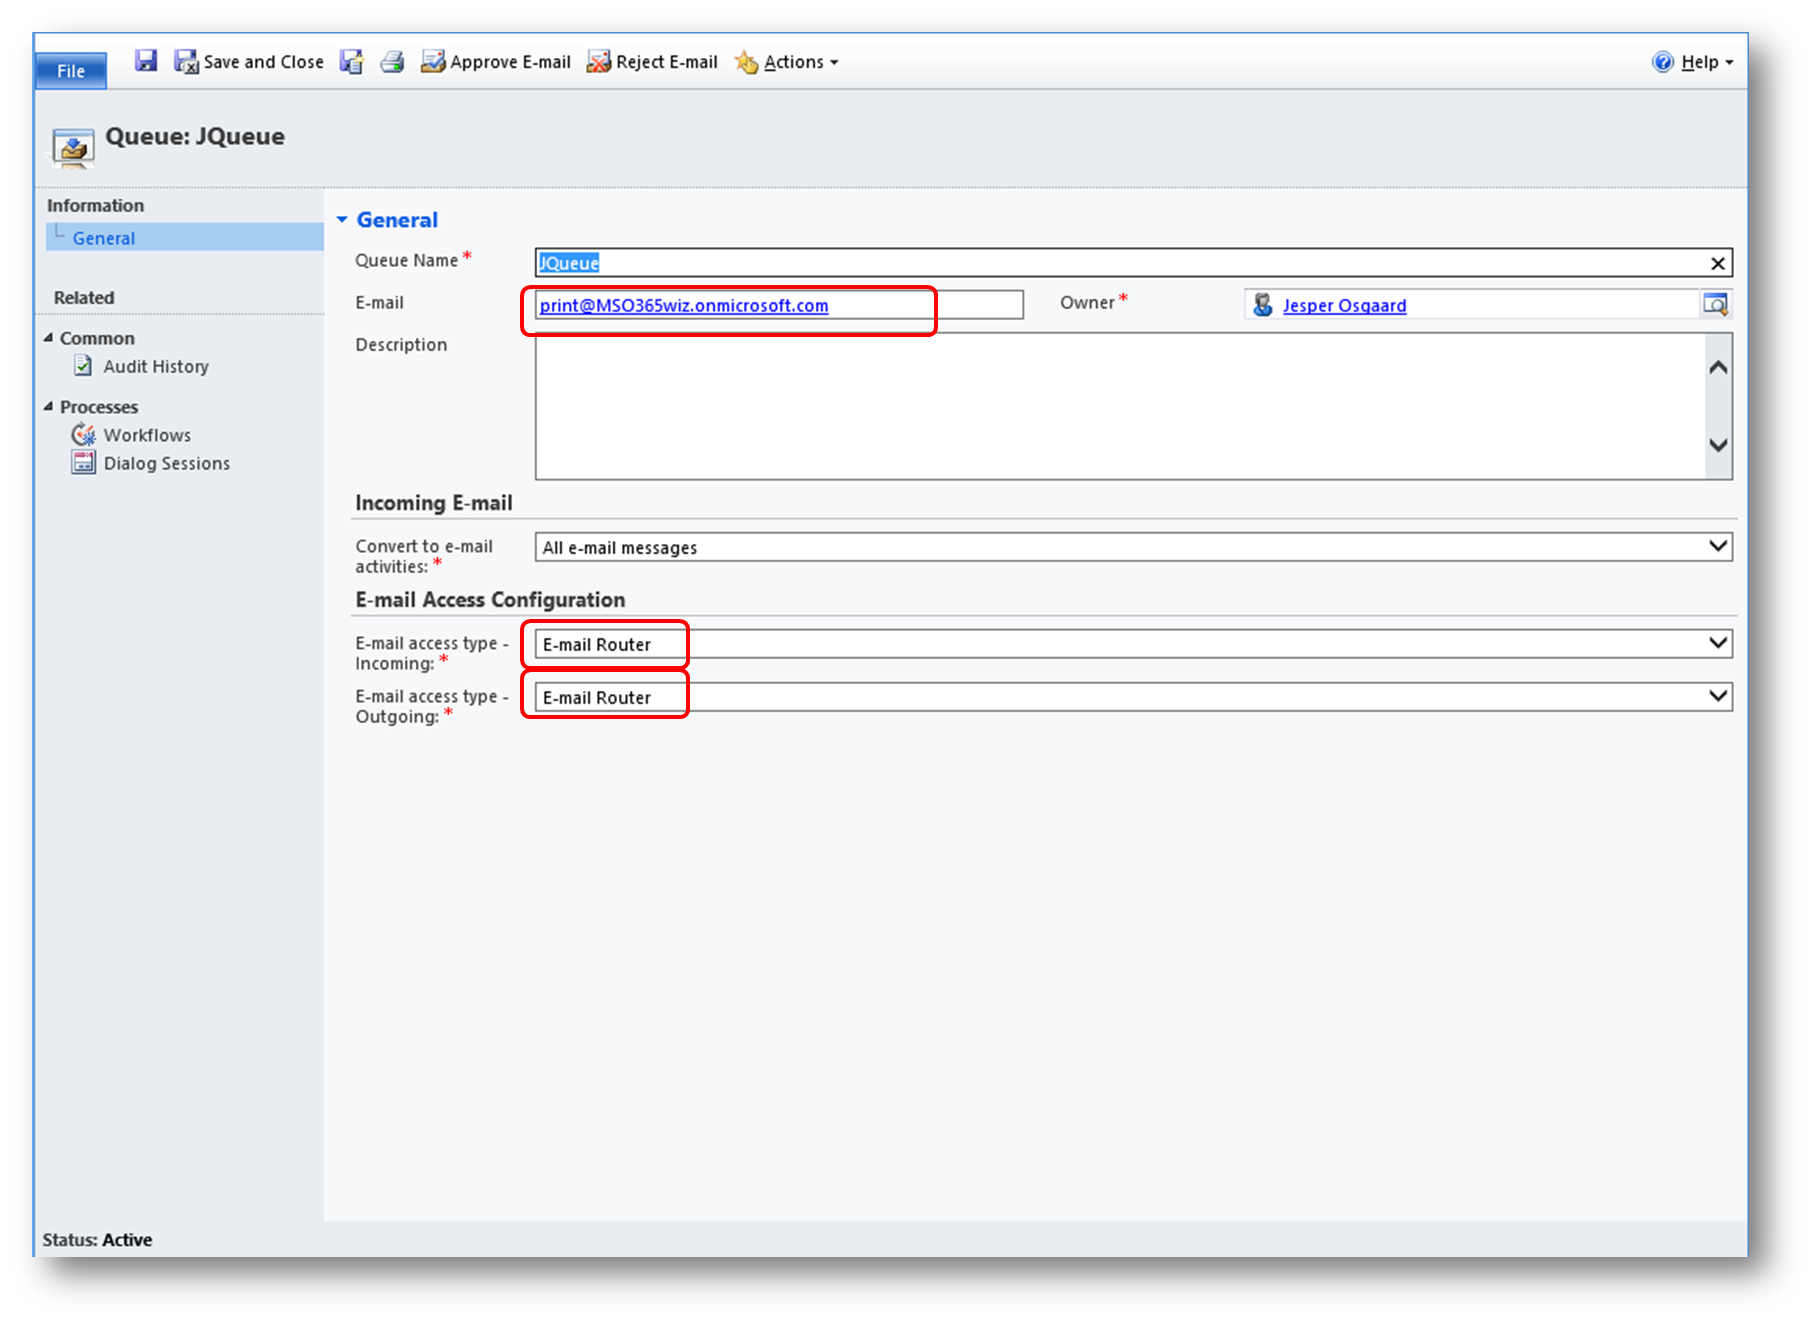
Specify the email address of the queue (the smtp address of the shared mailbox - in my example print@mso365wiz.onmicrosoft.com) and make sure the e-mail access configurations are set to "Email Router"
3. Installing and configuring an email router
You can download the email router here and then configure the email router according to the directions in these articles:
- "Configuring the Microsoft Dynamics CRM Email Router with Office 365 Exchange Online"
- "Configure the E-mail Router"
- "Microsoft Dynamics CRM E-mail Router"
- "E-mail Router Configuration – CRM 2011 Online & Exchange Online"
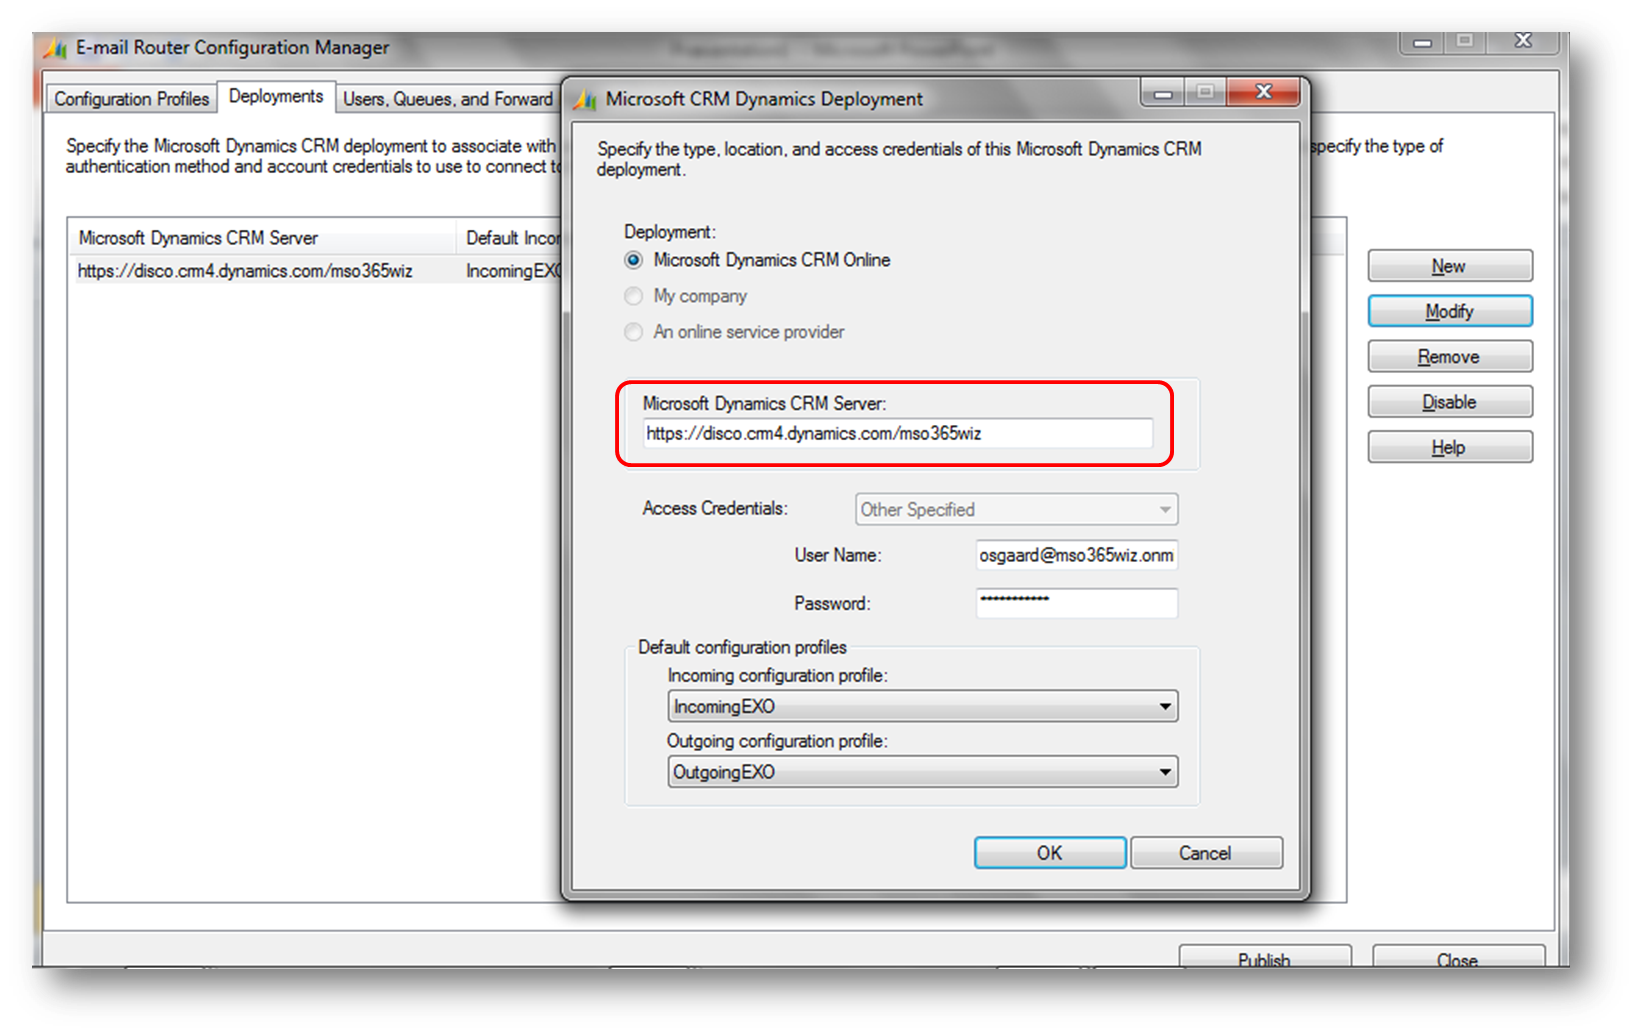
CRM Server URL
To configure your email router you'll need to know which CRM Server URL to put in. Depending on the which part of the world your Office 365/CRM Online tenant is hosted in you must put in the correct URL.
- If your datacenter is in North America, then use this URL: https://disco.crm.dynamics
- If your datacenter is in EMEA, then use this URL: https://disco.crm4.dynamics
- If your datacenter is in APAC, then use this URL: https://disco.crm5.dynamics
In other words; use CRM when in NA, CRM4 when in EMEA and CRM5 when in APAC
You'll also need the unique organization name of your CRM Online - find it under Settings -> Customizations -> Developer Resources
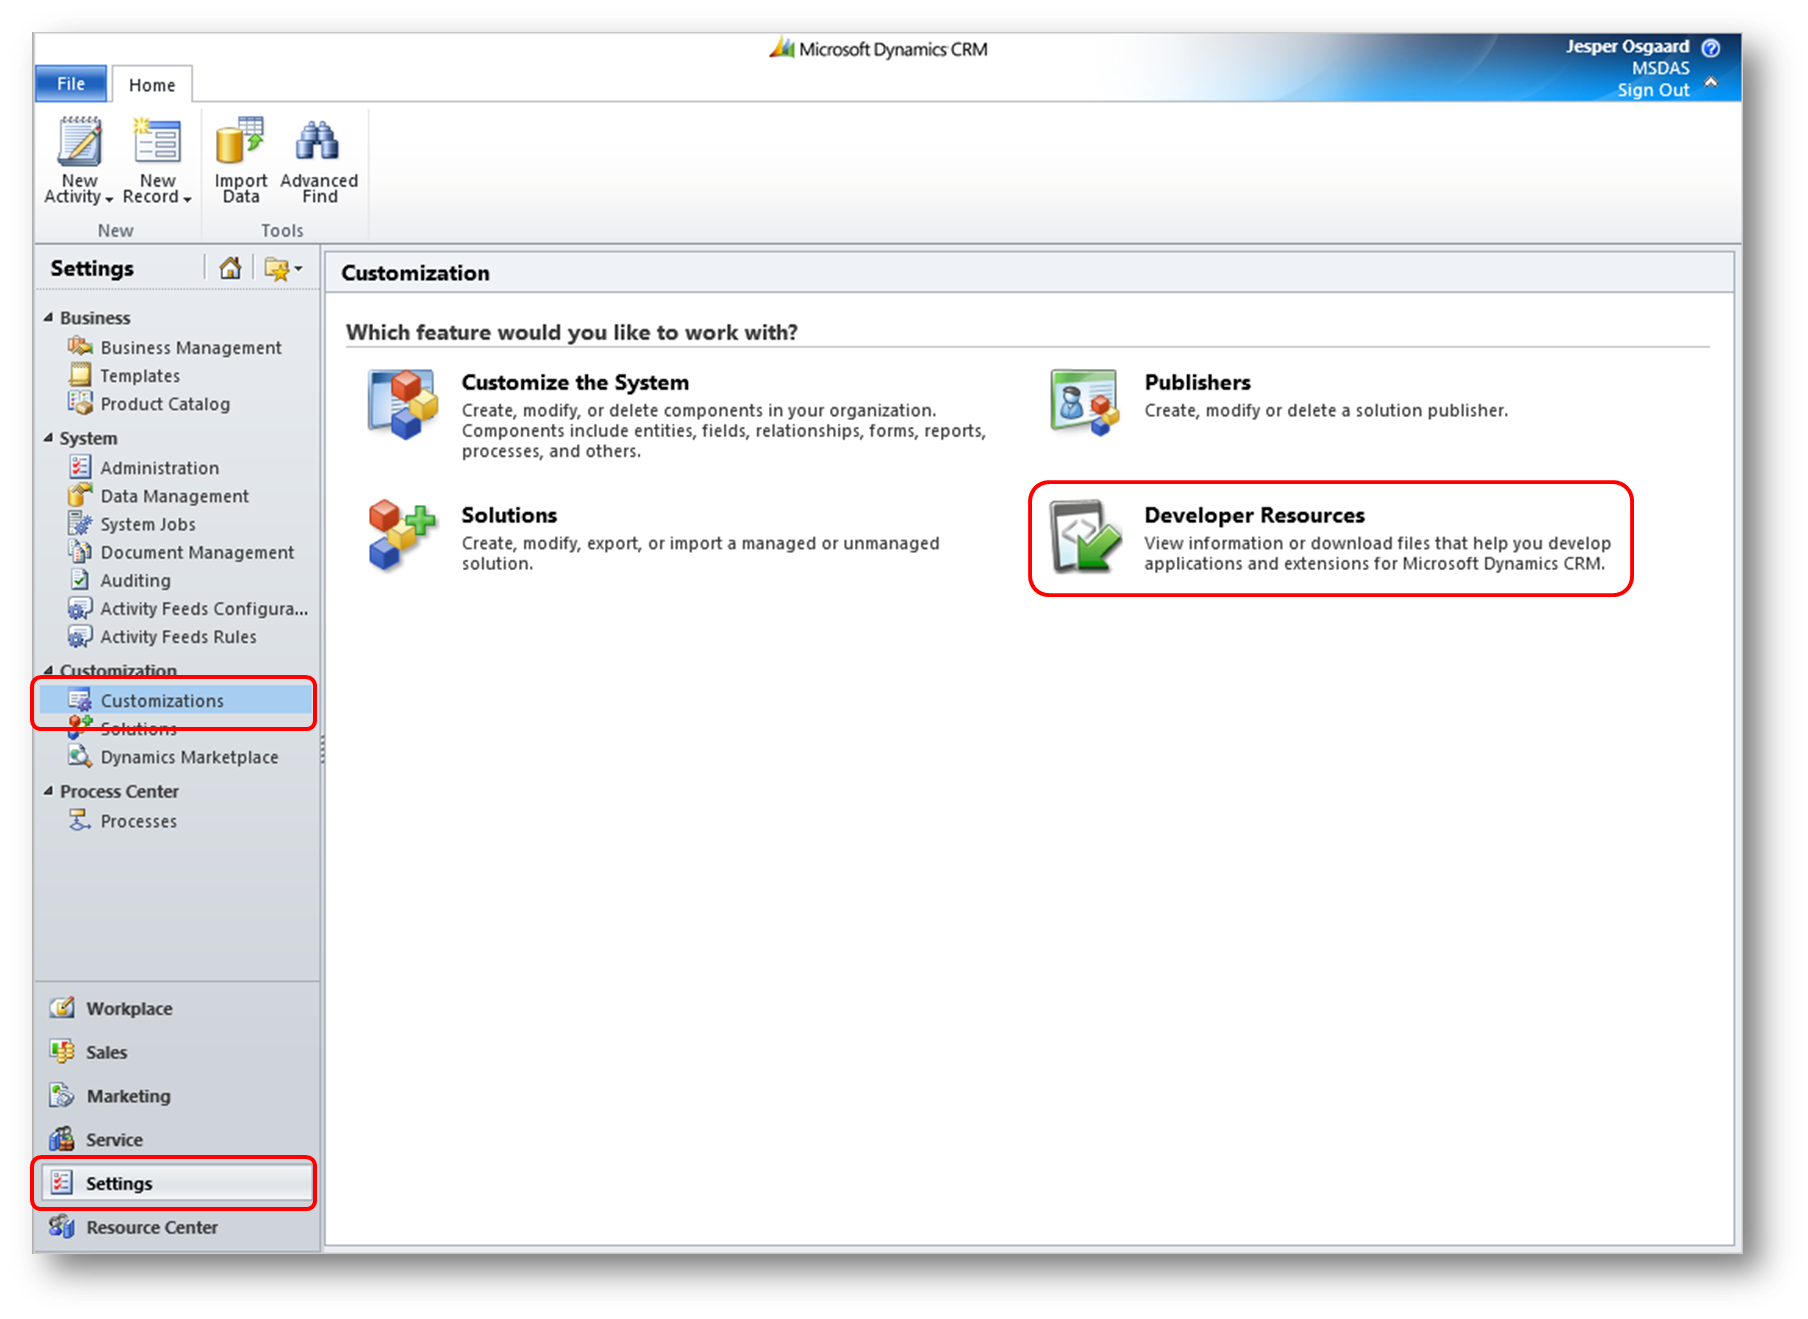
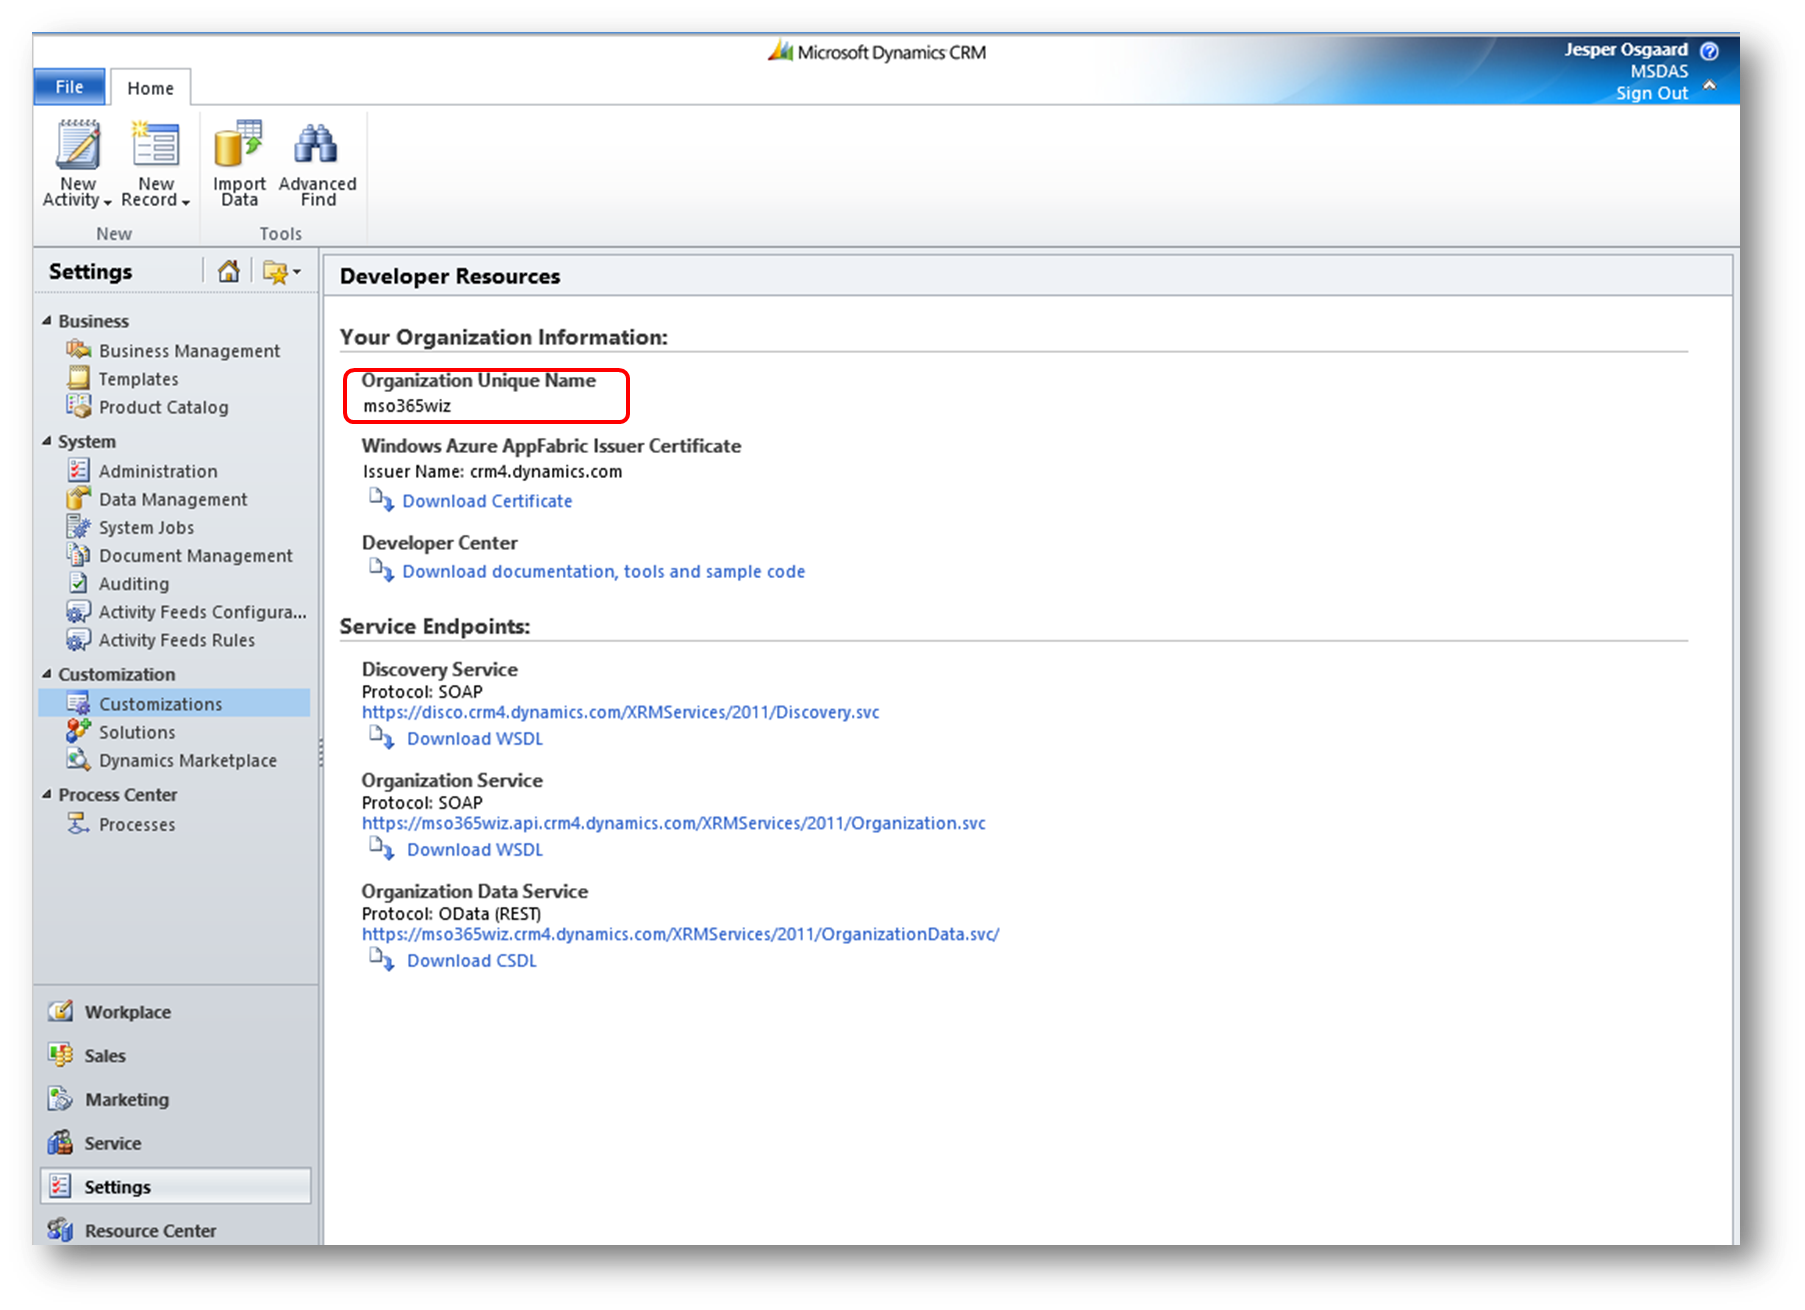
In my example the unique organization name is mso365wiz. Since my tenant is in EMEA the full CRM server URL I'll need to put in is: https://disco.crm4.dynamics.com/mso365wiz
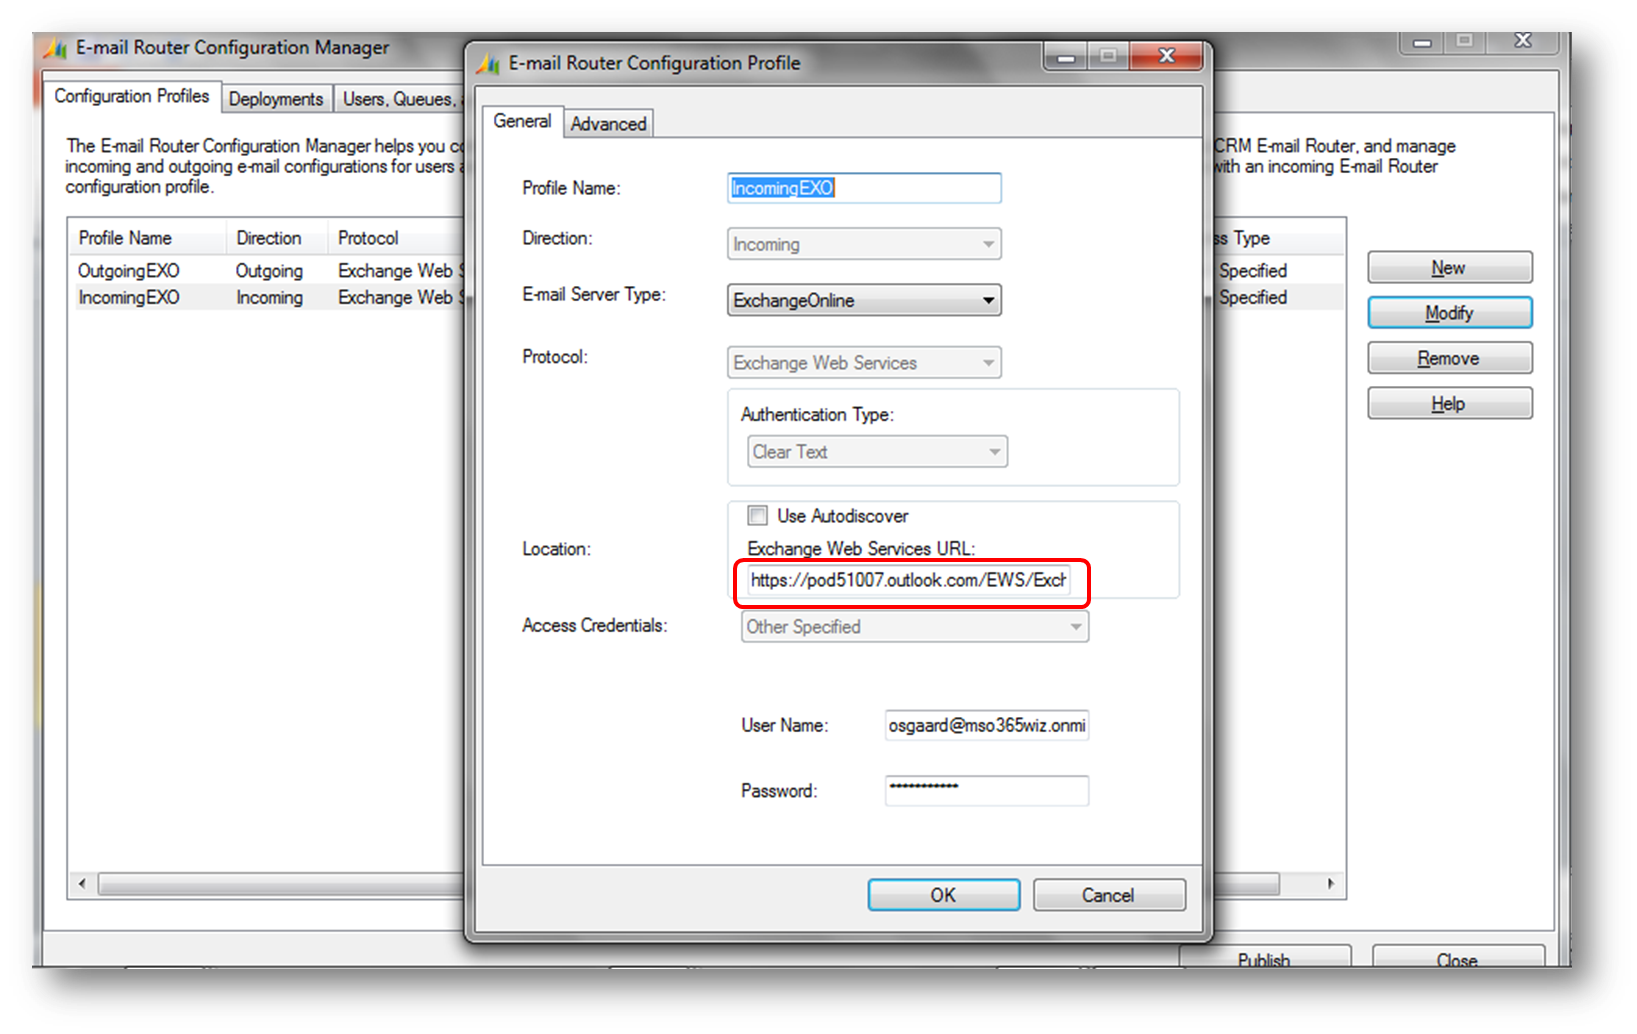
Inbound and outbound profiles
To configure the profiles for inbound and outbound mails in your email router to work with Exchange Online, you'll need to know the external SMTP settings of your Office 365 Exchange Online tenant. Open your Outlook Web App, click the question mark under your name and then click About
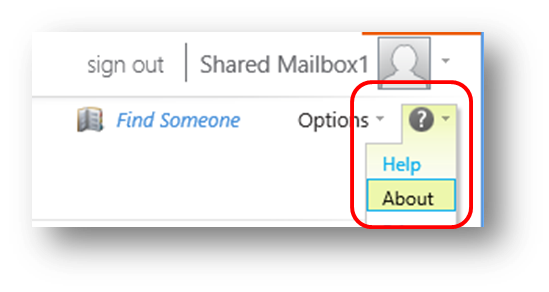
Scroll down and find the SMTP settings
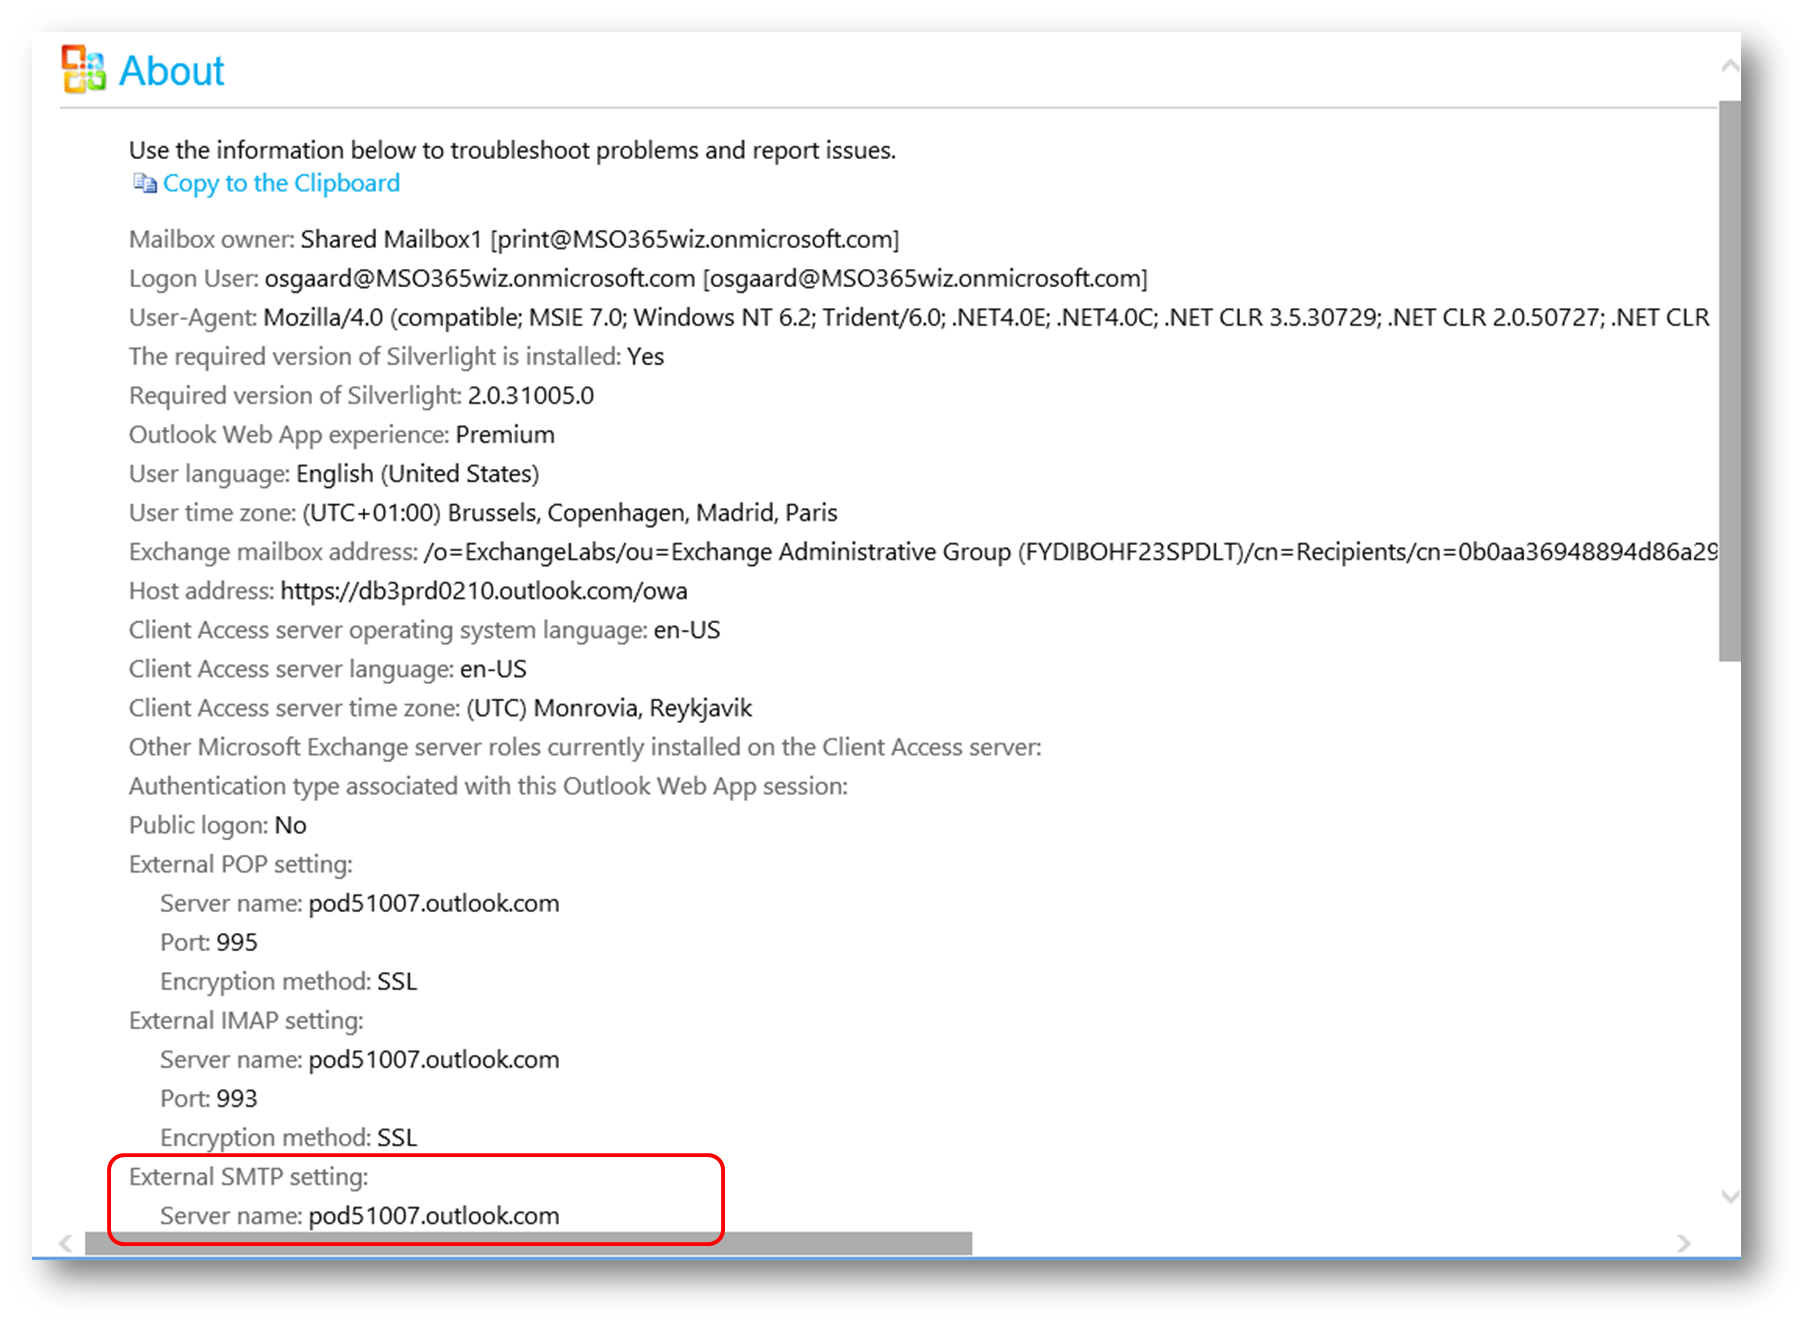
In my example its pod51007.outlook.com, hence the full URL to the Exchange Web Services is: https://pod51007.outlook.com/EWS/Exchange.asmx
I hope this article will be of use to you by pointing to one of the many ways Office 365 and CRM Online are better together
See also
- Email Router Demystified – Explanation
- “The account does not have permissions to impersonate the requested user” error occurs when you connect the Microsoft Dynamics E-mail Router to Microsoft Exchange 2010
- Unblock URLs required for Microsoft Dynamics CRM Online
- Frequently asked questions about the Microsoft Dynamics CRM E-mail Router