Istio CI/CD pipeline for VSTS
I wrote sample code for Istio. Also, I configure CI / CD pipeline for VSTS enabling Blue Green Deployment and Canary for Kuberenetes.
For the installation of the Istio on Azure, you can refer this post. It works fine for me. Then you can set up the istio on the top of your kubernetes cluster.
This is the pipeline which enable us to CI/CD on istio. You can get the sample code on the GitHub. However, I'll change some
for enabling automation.
Build Pipeline
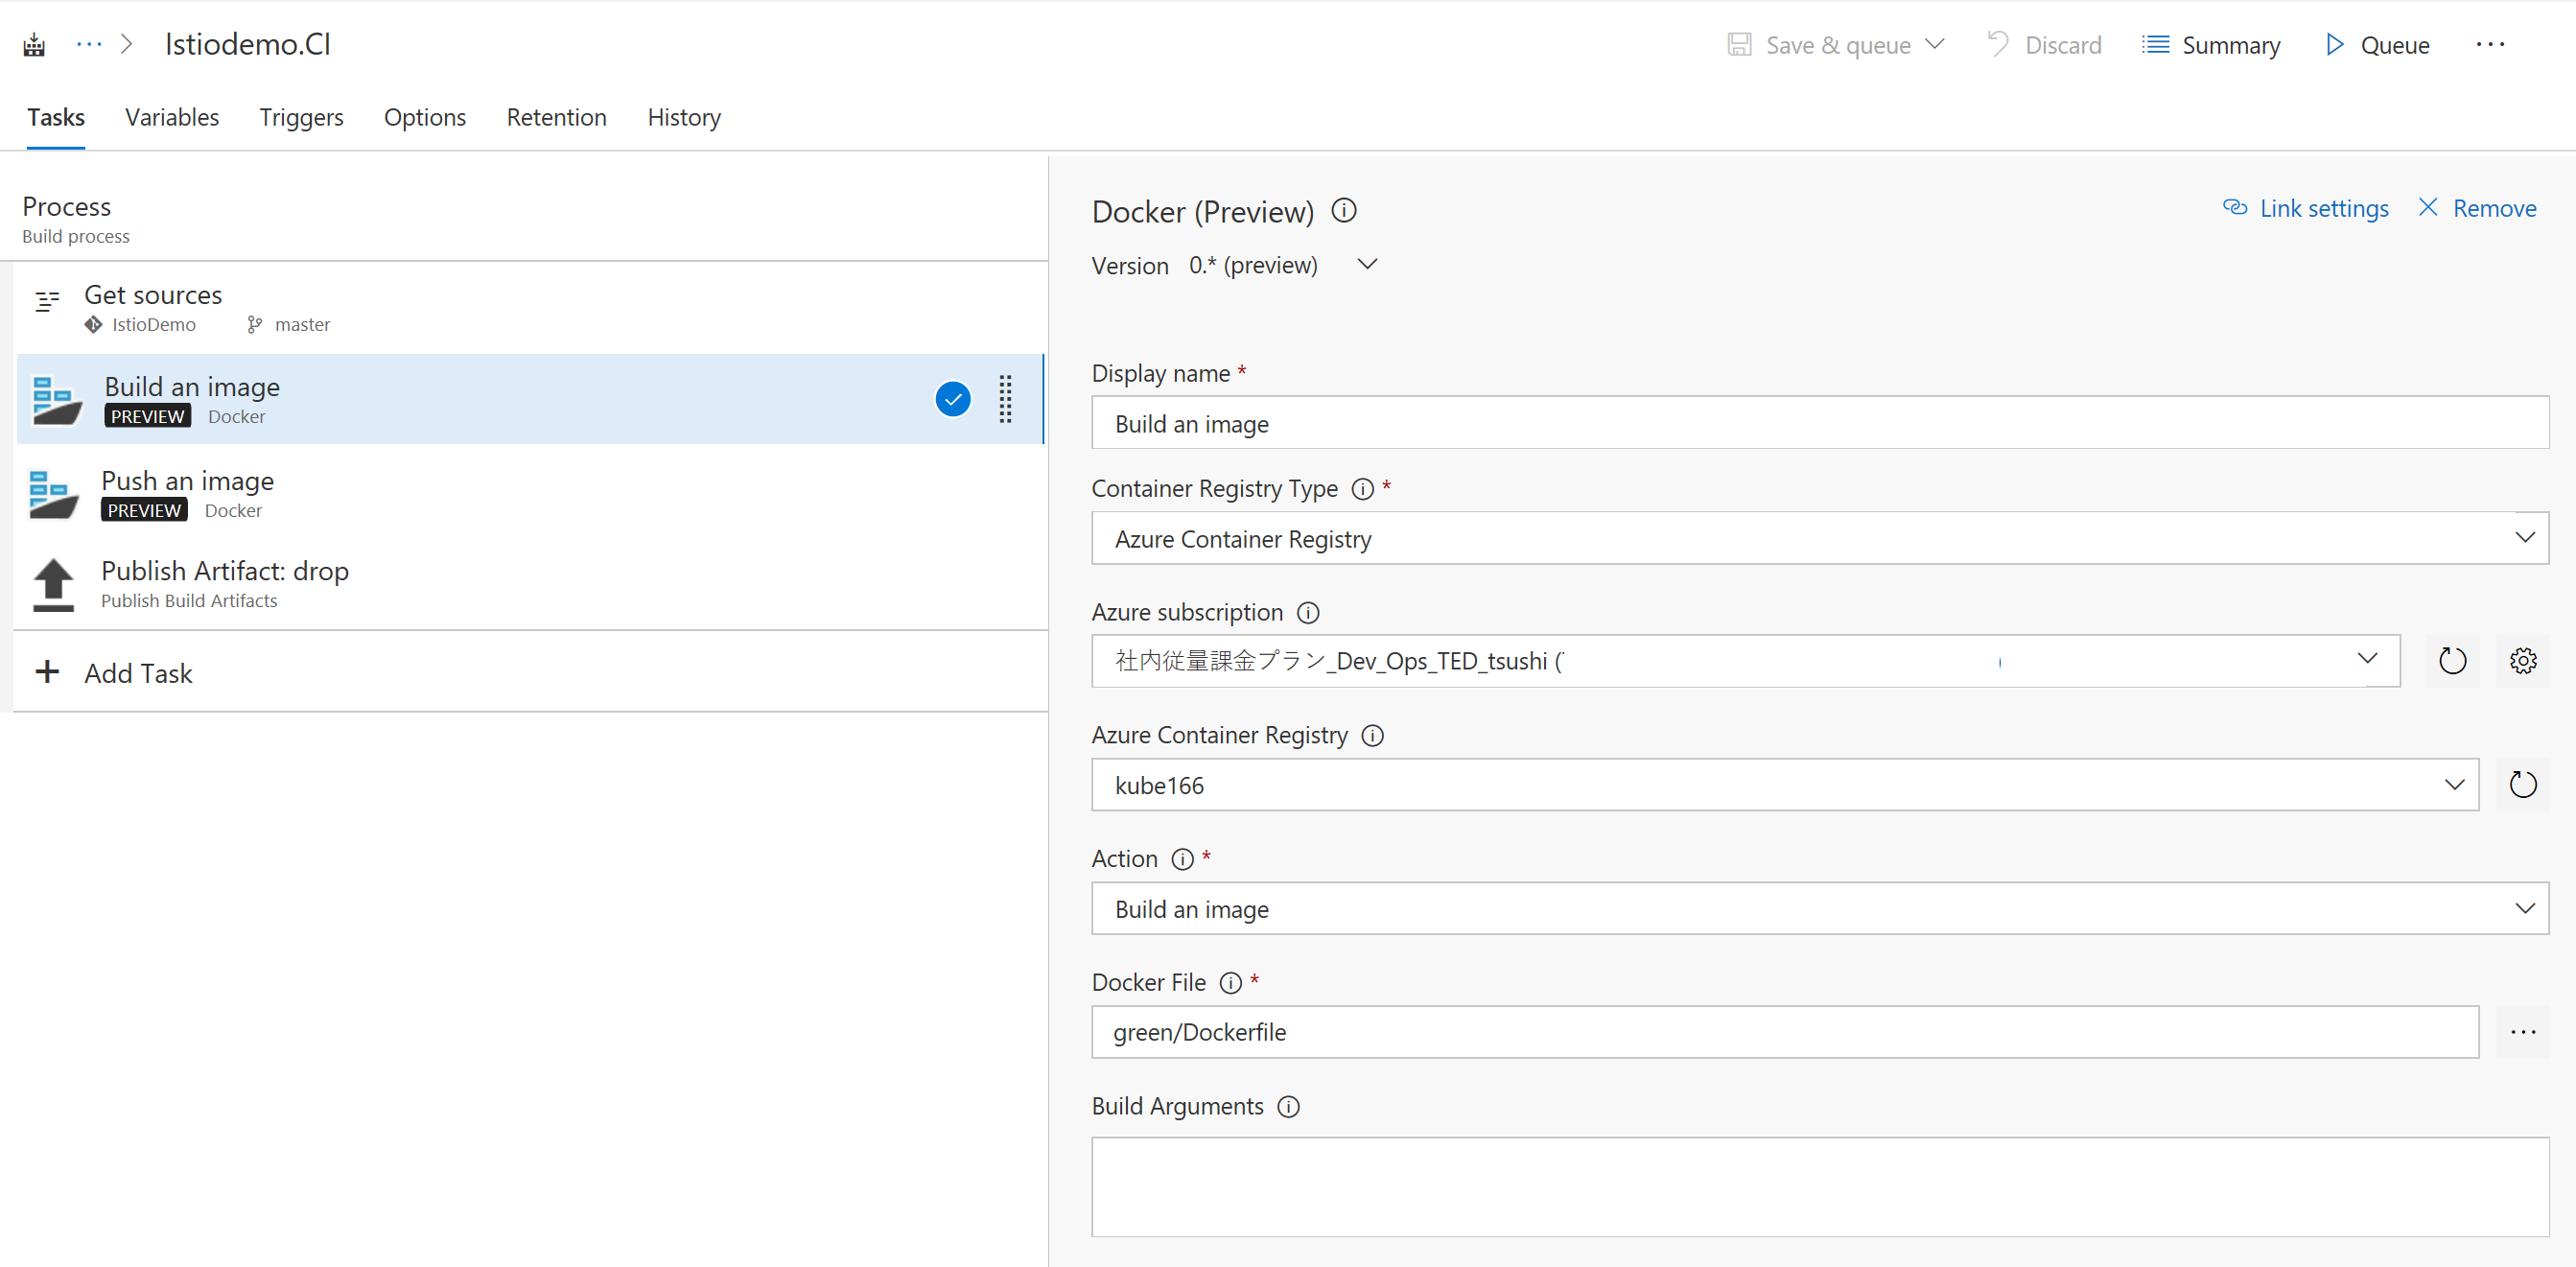
Build an image
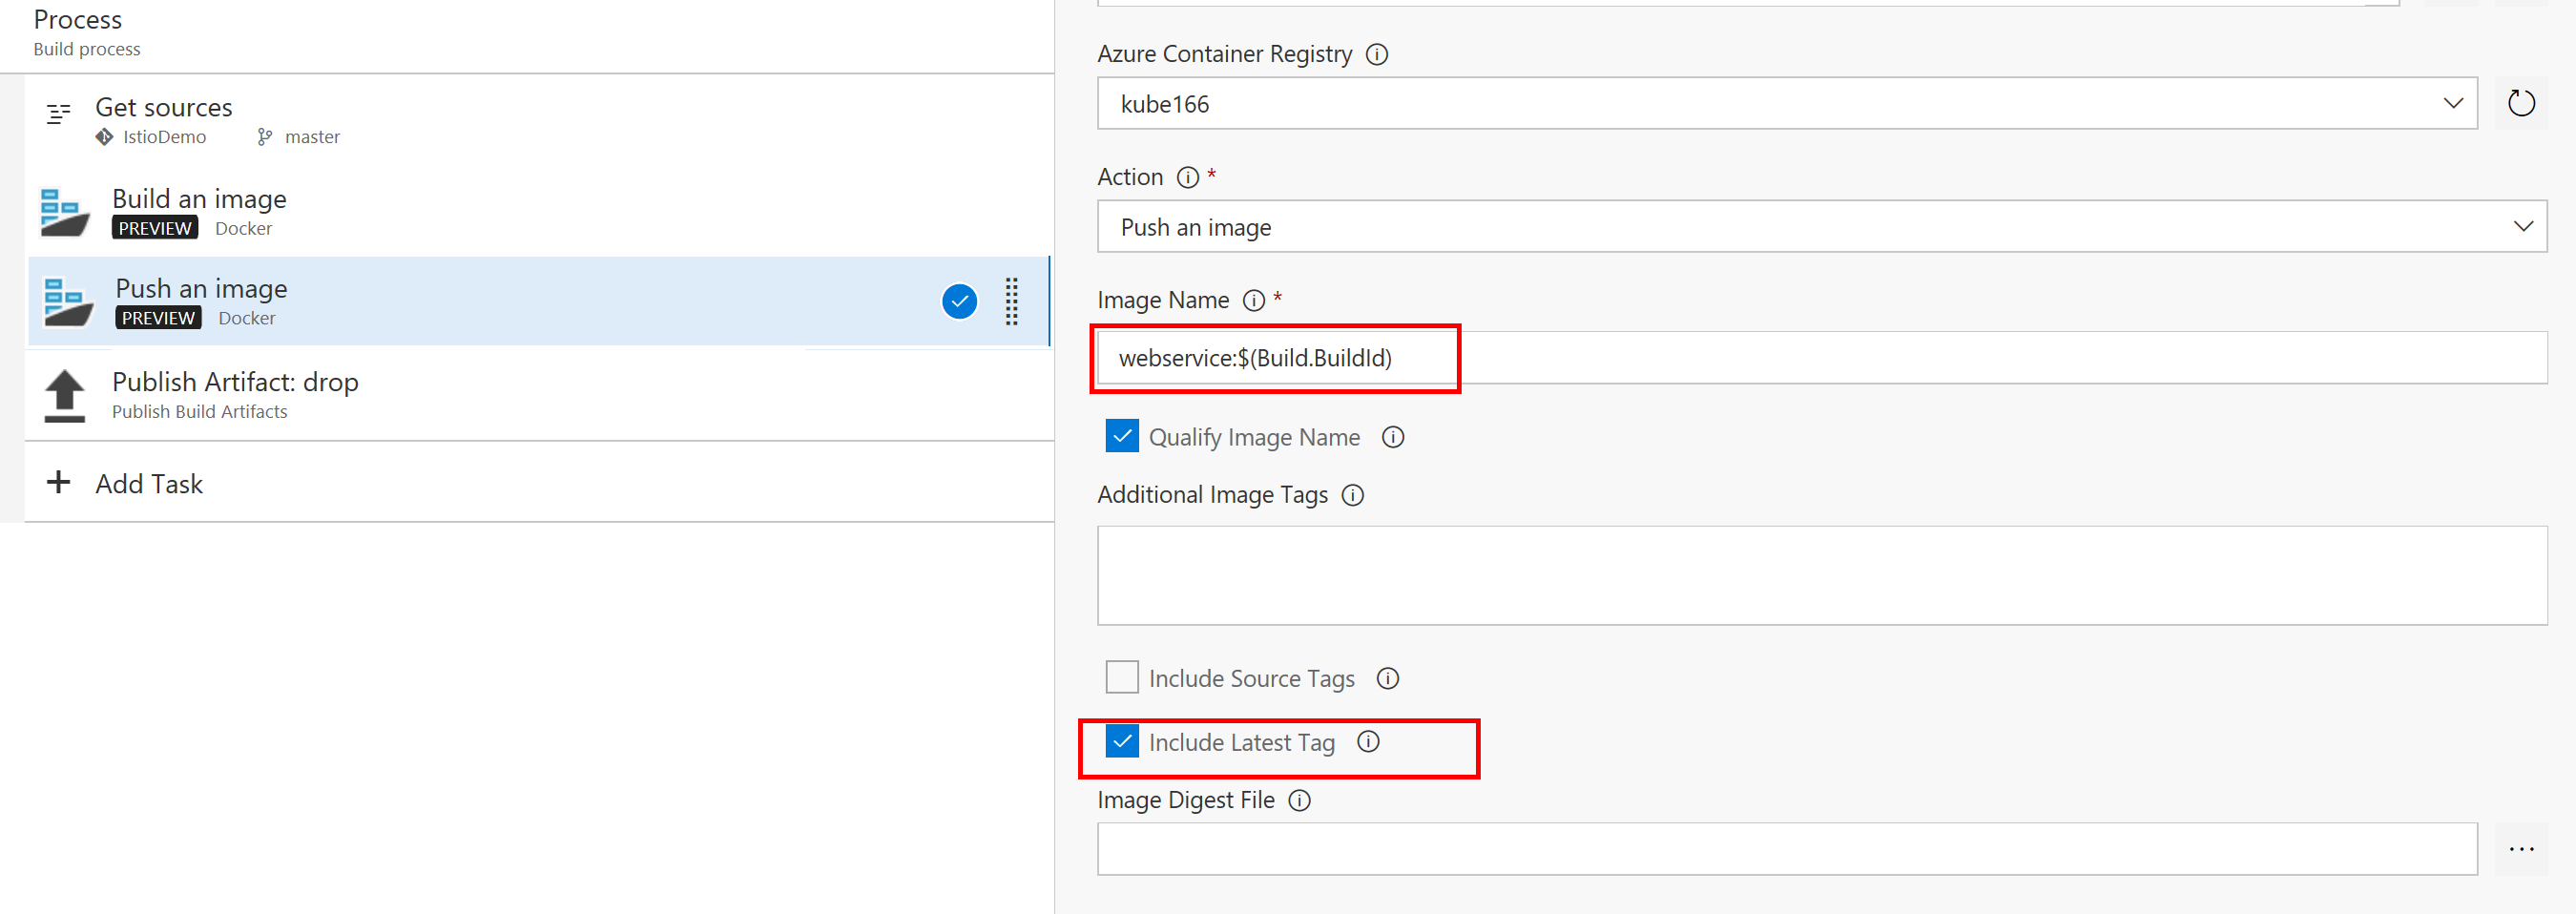
You build docker image for this config. I'm using Azure Container Registry. Using VSTS, you can just select your subscription, Azure Container Registry. Nothing to difficult for this part. One thing you need to care is, you need to use Hosted Linux agent. You can add "latest" tag option for make it latest image.
On this config, your docker image name will be kube166.azurecr.io/webservice:$(BUILD_BUILDID).
$(BUILD_BUILDID) will be replaced by the VSTS to a number like 196. It will be a version number of the docker image.

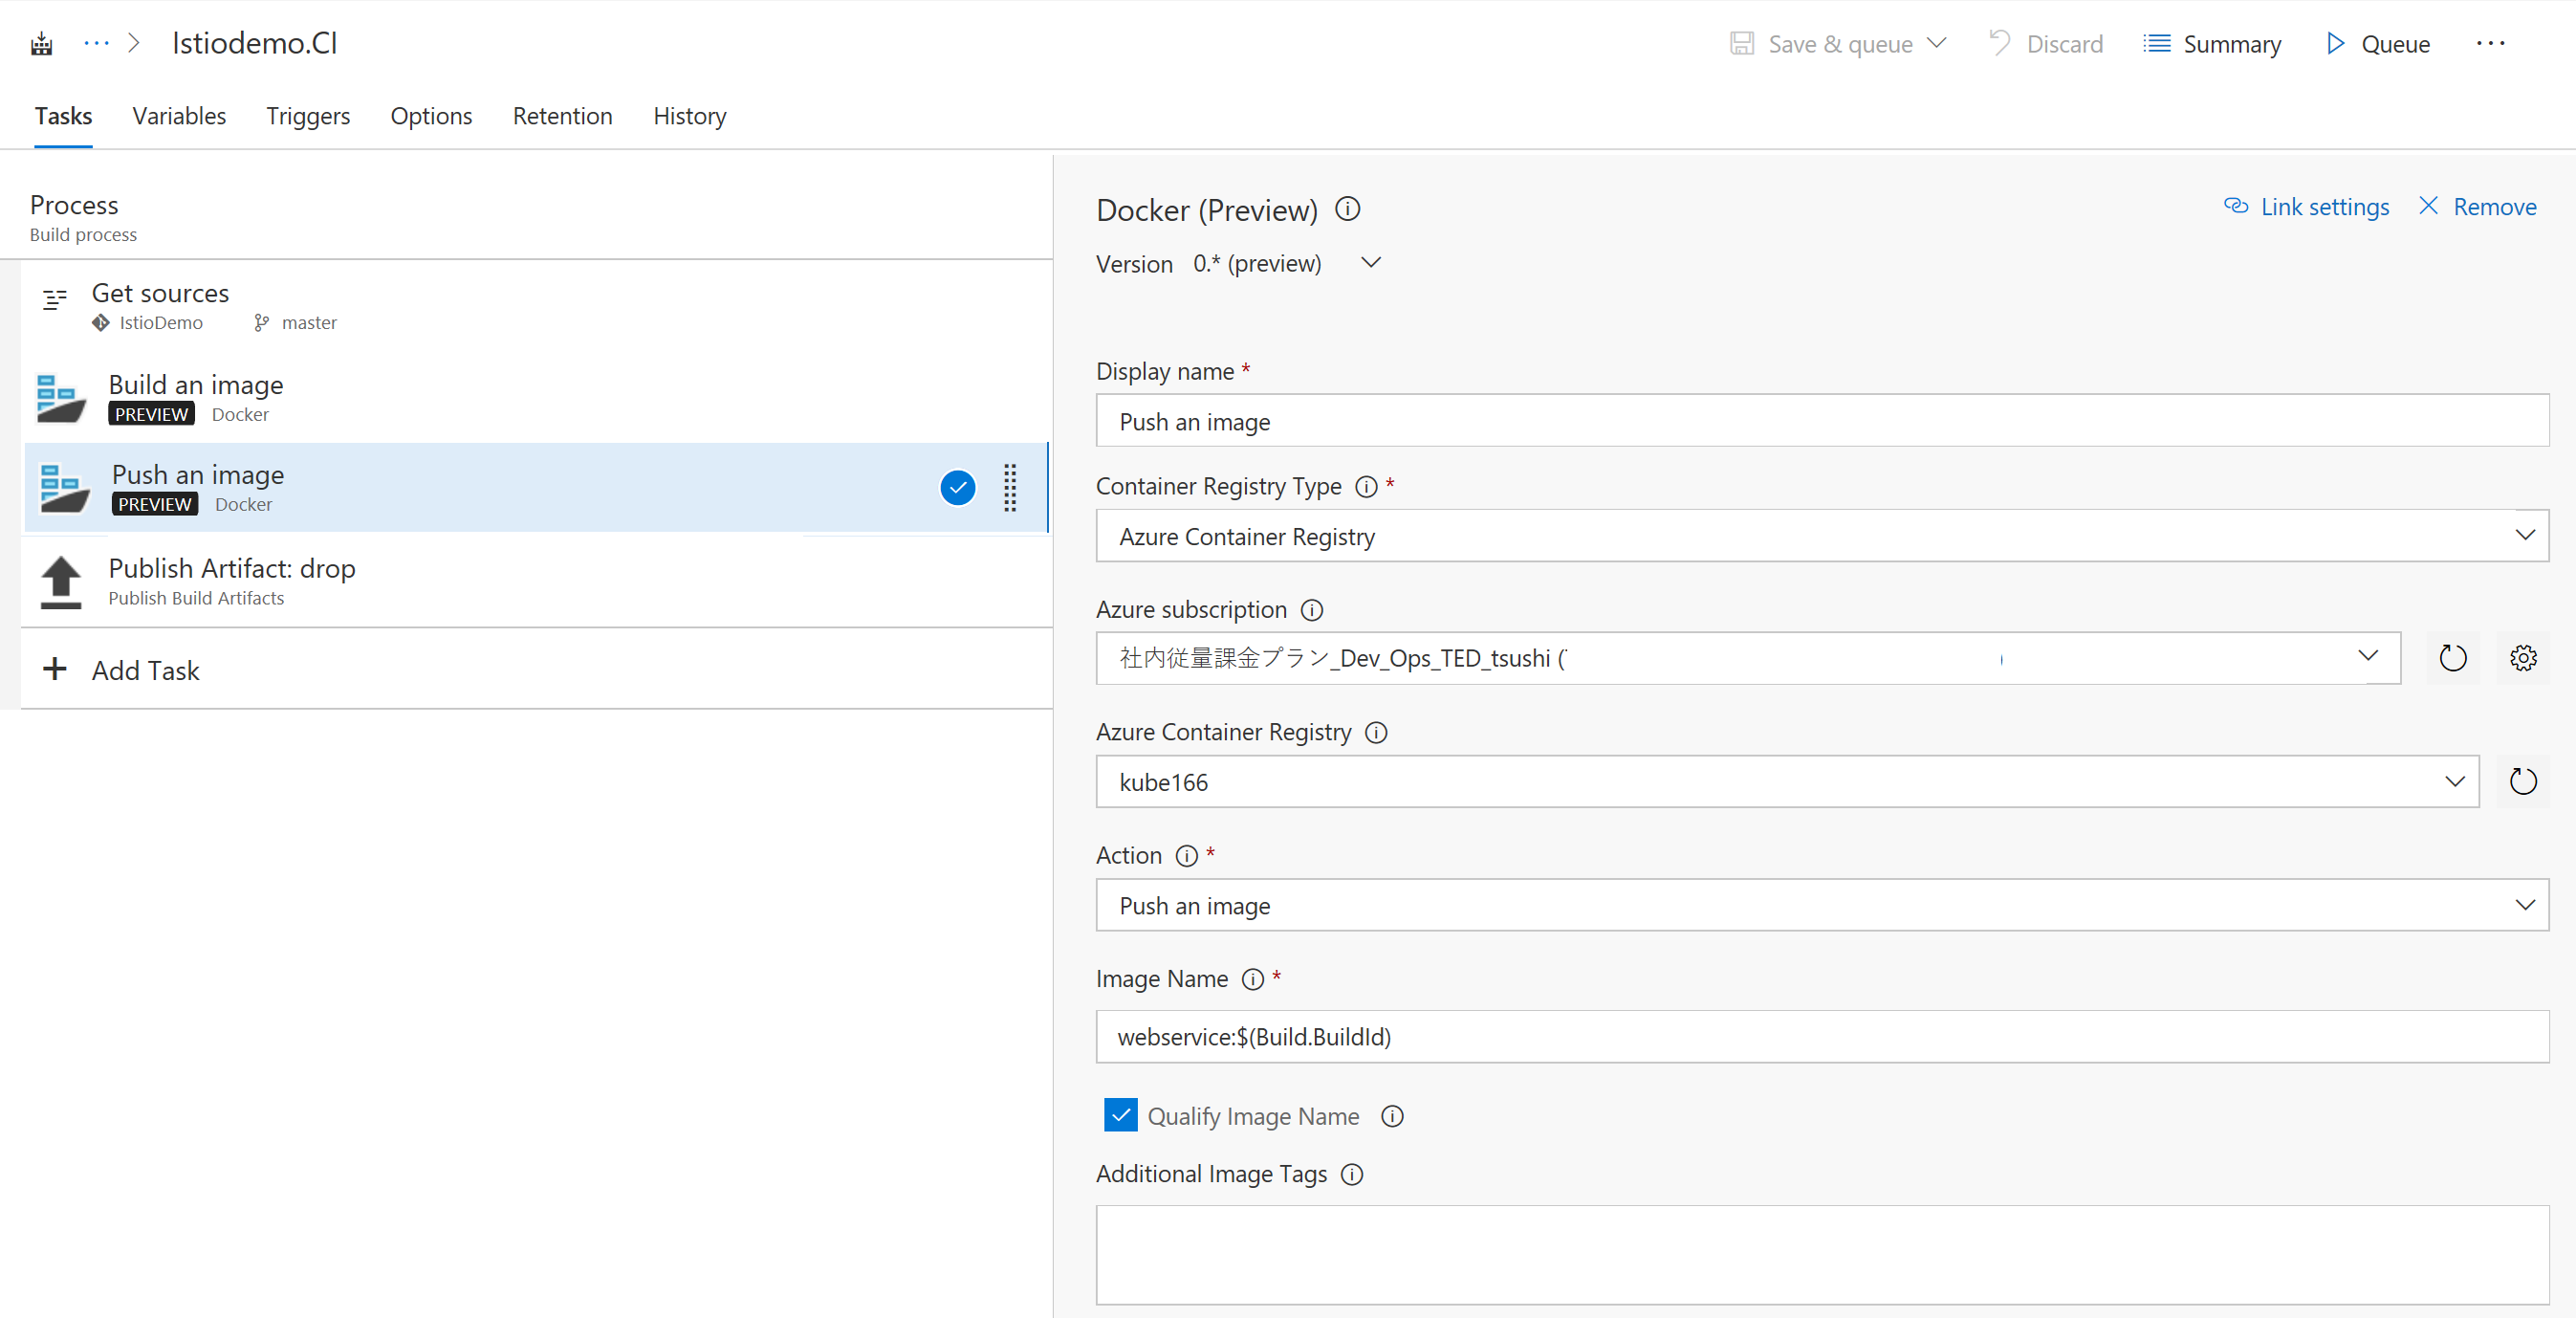
Push the image
After you create the image, you need to push it to Azure Container Registry. Not so different from the build the image step.
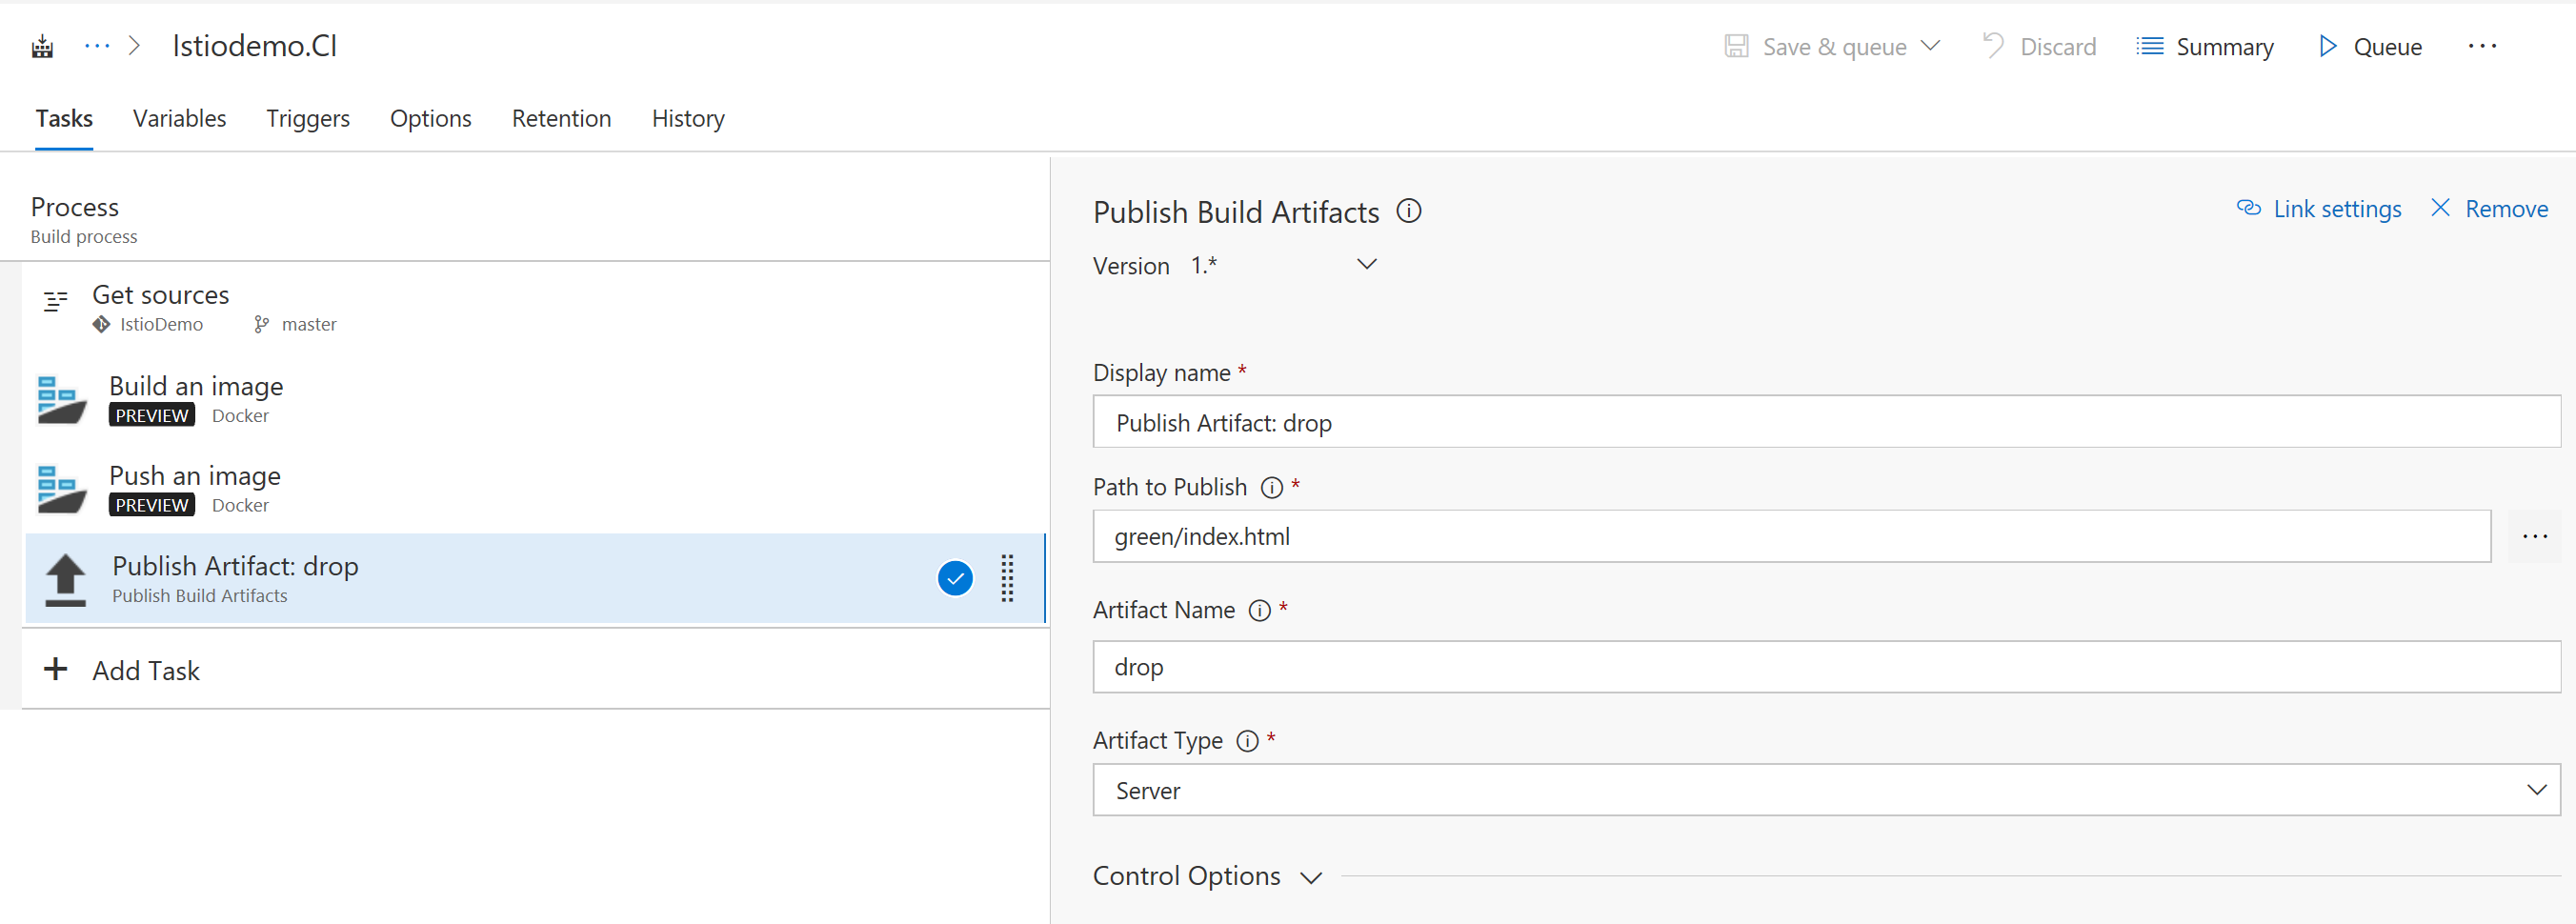
Push the Artifact
Then push the artifact. On the path to publish column, you can specify any file. The file means nothing. However, if you use this task, you can link the CI pipeline to the Release pipeline.
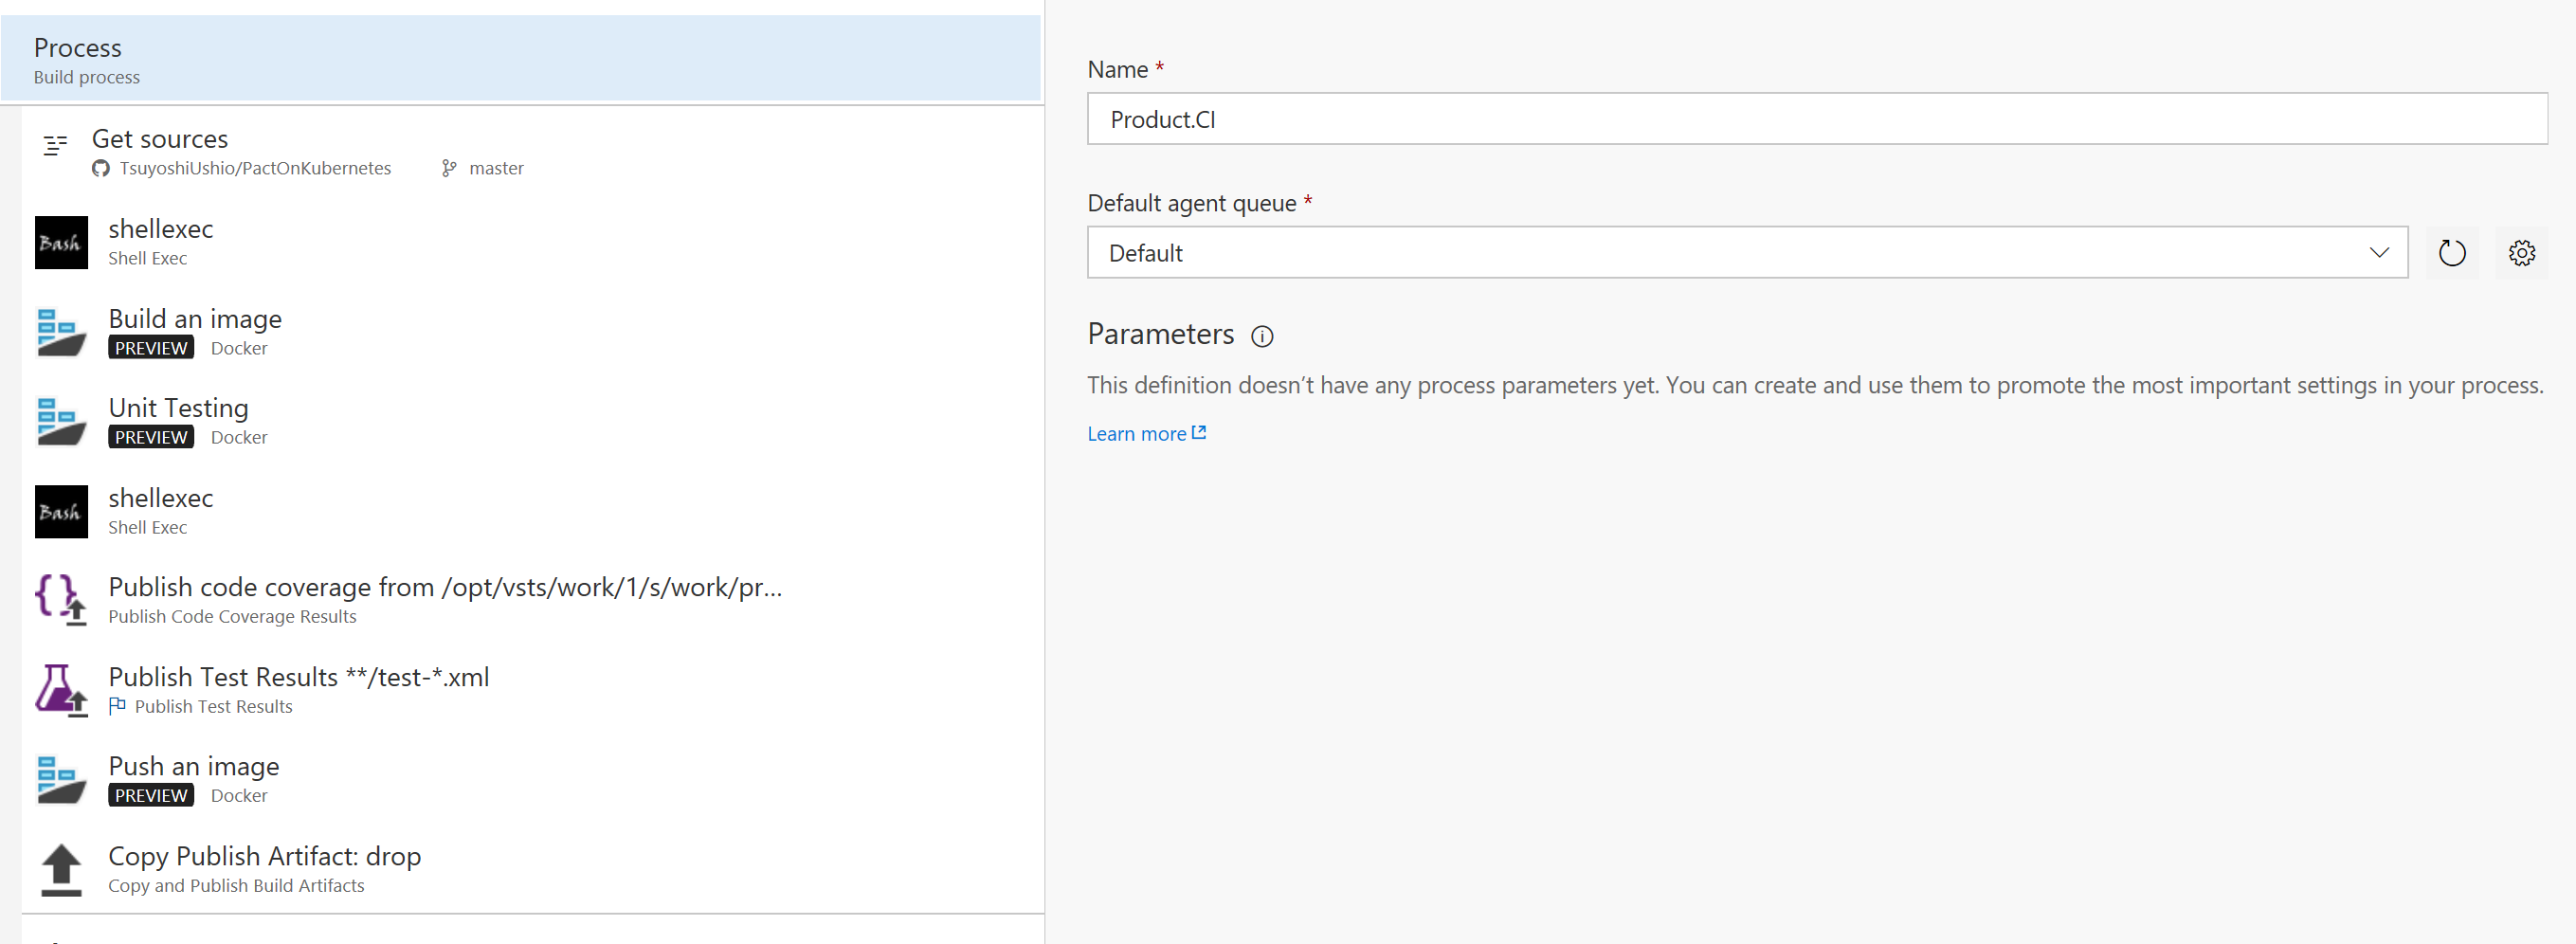
You can add testing / coverage feature on this pipeline. For example, I show you other pipeline with executing testing. If you run the docker, I recommend executing the test inside the container. Because we can use the exactly the same binary for this testing as the production deployment.
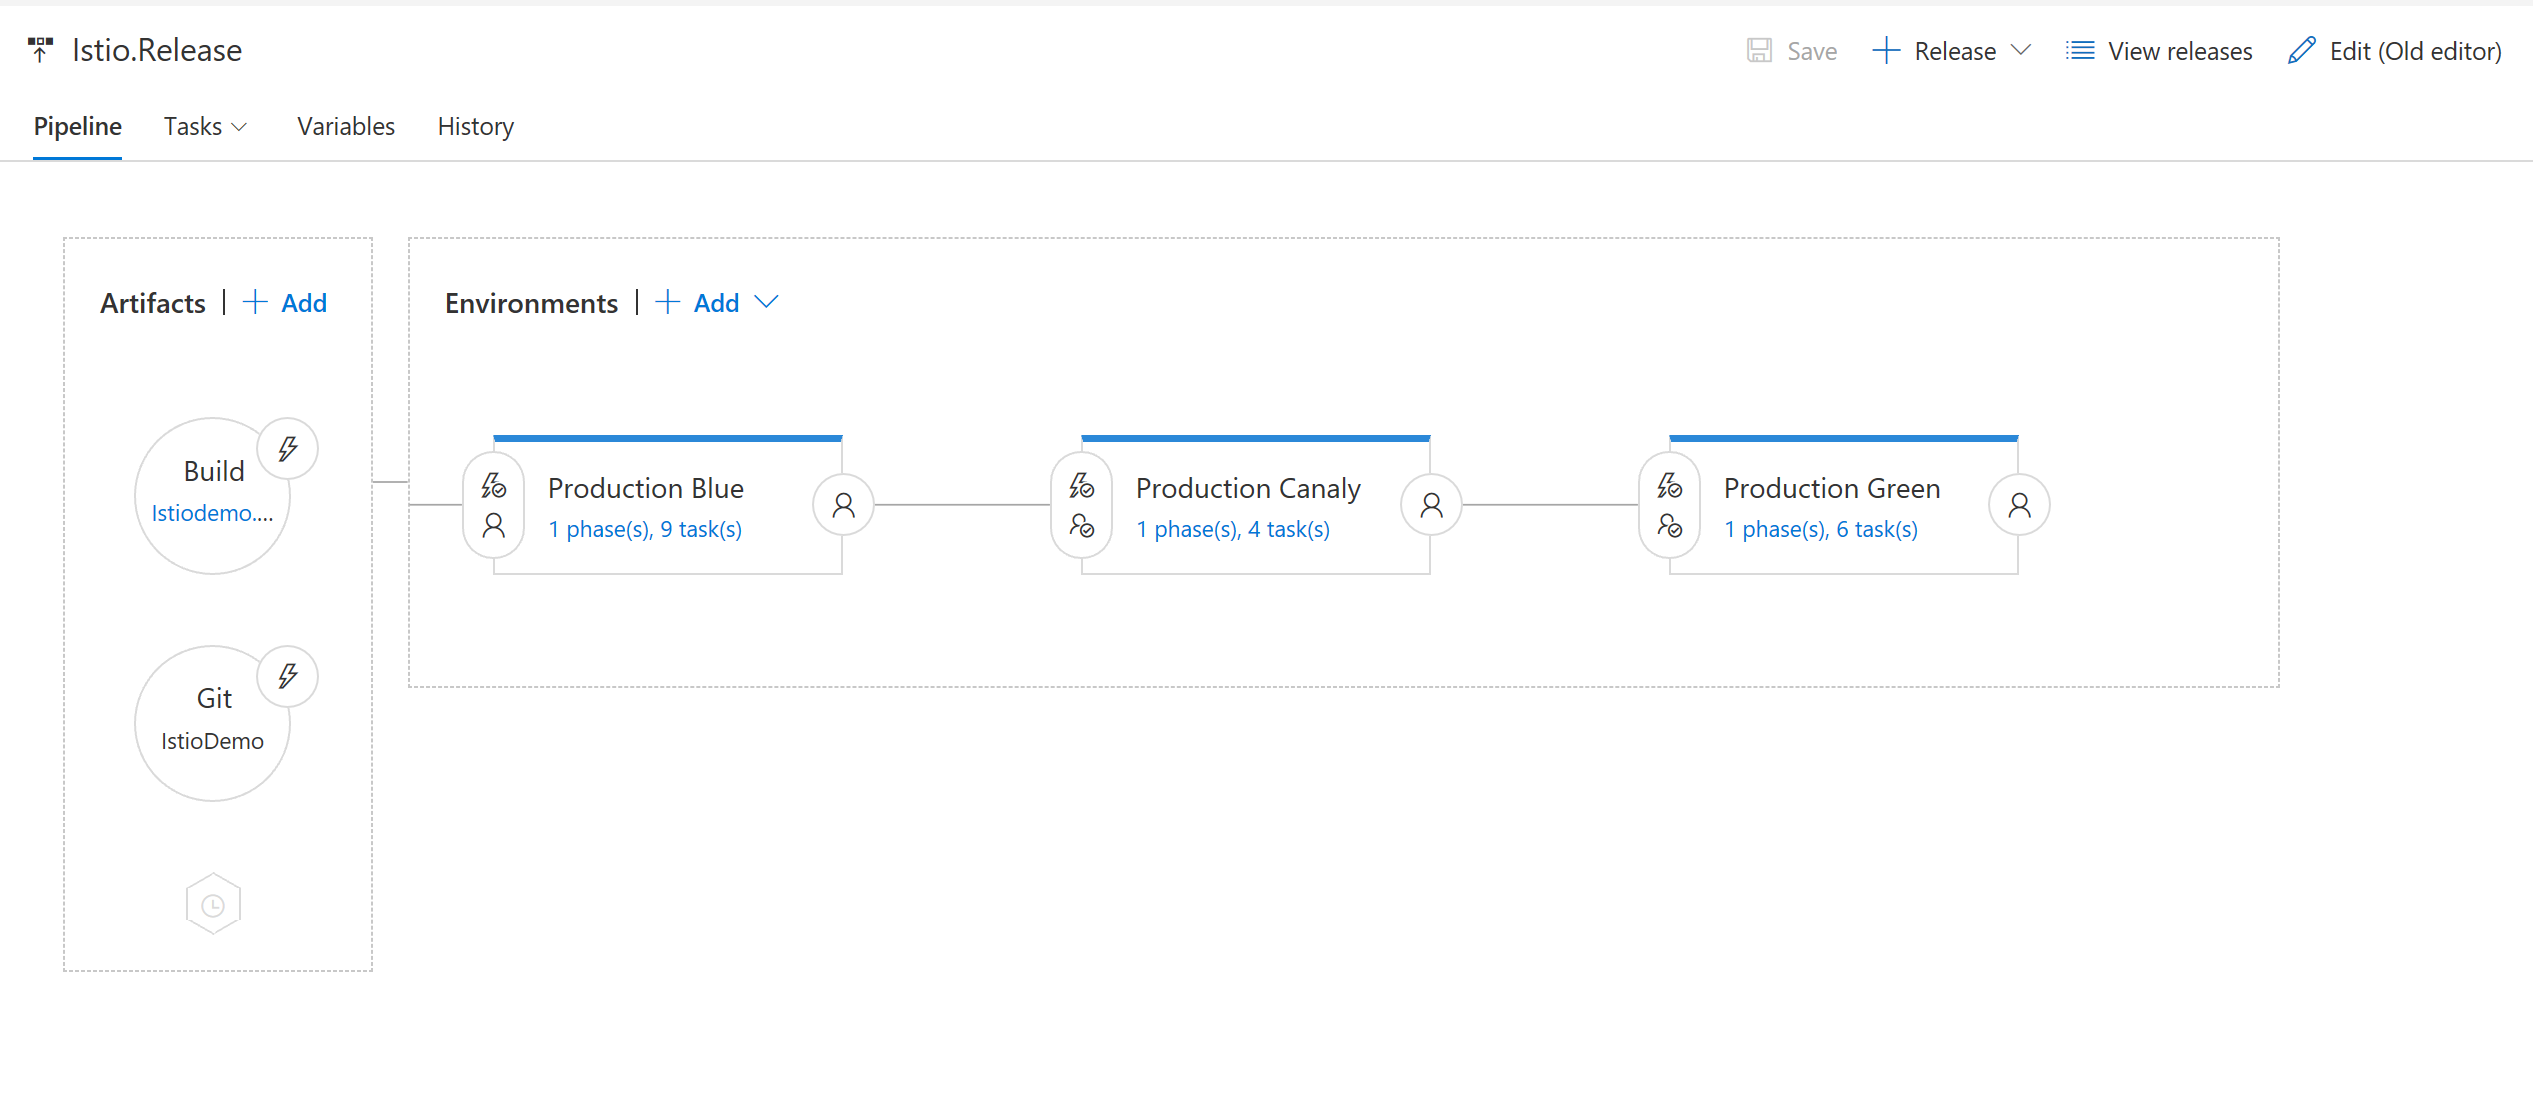
Release pipeline
The point is, let's use Hosted Linux Agent. It makes easy to build/deliver to kubernetes/istio environment. Also, This pipeline has two Artifact. The fist one is the CI Pipeline, which we already configured. The second is the Git or GitHub repository which has kubernetes/istio yaml file.
The Git/GitHub repository has the webservice.yaml file like this. The point is , you can see the #{LAST_BUILD_BUILDID}# and #{BUILD_BUILDID}# . These string are replaced by the replace token task. LAST_BUILD_BUILDID is the previous deployed docker image version. BUILD_BUILD is the current docker image version which you can get from the CI pipeline if you link the artifact.
Please compare the file with the original version.
I share some code for configuring istio and services. You need to create secret on your kubernetes before creating this pipeline.
webservice.yaml
 apiVersion: v1
kind: Service
metadata:
 name: web-service
 labels:
 app: web-service
spec:
 selector:
 app: web-service
 ports:
 - port: 80
 name: http
---
apiVersion: apps/v1beta1
kind: Deployment
metadata:
 name: web-deployment-#{LAST_BUILD_BUILDID}#
spec:
 replicas: 1
 template:
 metadata:
 labels:
 app: web-service
 version: #{LAST_BUILD_BUILDID}#
 spec:
 containers:
 - name: web-service
 image: kube166.azurecr.io/webservice:#{LAST_BUILD_BUILDID}#
 ports:
 - containerPort: 80
 imagePullSecrets:
 - name: kb166acrsecret
---
apiVersion: apps/v1beta1
kind: Deployment
metadata:
 name: web-deployment-#{LAST_BUILD_BUILDID}#
spec:
 replicas: 1
 template:
 metadata:
 labels:
 app: web-service
 version: #{BUILD_BUILDID}#
 spec:
 containers:
 - name: web-service
 image: kube166.azurecr.io/webservice:#{BUILD_BUILDID}#
 ports:
 - containerPort: 80
 imagePullSecrets:
 - name: kb166acrsecret
---
apiVersion: v1
kind: Service
metadata:
 name: web-front
 labels:
 app: web-front
spec:
 selector:
 app: web-front
 ports:
 - port: 80
 name: http
---
apiVersion: apps/v1beta1
kind: Deployment
metadata:
 name: web-front
spec:
 replicas: 1
 template:
 metadata:
 labels:
 app: web-front
 version: 1.0.0
 spec:
 containers:
 - name: web-front
 image: kube16.azurecr.io/webfront:1.0.3
 env:
 - name: SERVICE_URL
 value: "https://web-service"
 ports:
 - containerPort: 80
 imagePullSecrets:
 - name: kb16acrsecret
---
apiVersion: extensions/v1beta1
kind: Ingress
metadata:
 name: webservice-ingress
 annotations:
 kubernetes.io/ingress.class: istio
spec:
 rules:
 - http:
 paths:
 - backend:
 serviceName: web-front
 servicePort: 80
Also, you need to change other yaml file for the istio routing. Please compare with the original one.
all-v1.yaml
 type: route-rule
name: web-service-default
namespace: default
spec:
 destination: web-service.default.svc.cluster.local
 precedence: 1
 route:
 - tags:
 version: "#{LAST_BUILD_BUILDID}#"
all-v2.yaml
 type: route-rule
name: web-service-default
namespace: default
spec:
  destination: web-service.default.svc.cluster.local
  precedence: 1
  route:
  - tags:
      version: "#{BUILD_BUILDID}#"
    weight: 100
canaly.yaml
 type: route-rule
name: web-service-default
namespace: default
spec:
 destination: web-service.default.svc.cluster.local
 precedence: 1
 route:
 - tags:
 version: "#{LAST_BUILD_BUILDID}#"
 weight: 70
 - tags:
 version: "#{BUILD_BUILDID}#"
 weight: 30
test-v2.yaml
 type: route-rule
name: web-service-test-v2
spec:
 destination: web-service.default.svc.cluster.local
 precedence: 2
 match:
 httpHeaders:
 cookie:
 regex: "^(.*?;)?(NAME=v2tester)(;.*)?$"
 route:
 - tags:
 version: "#{BUILD_BUILDID}#"
Now you can ready for configuring the istio pipeline.
Blue production pipeline
Don't forget to use Hosted Linux Preview. :)
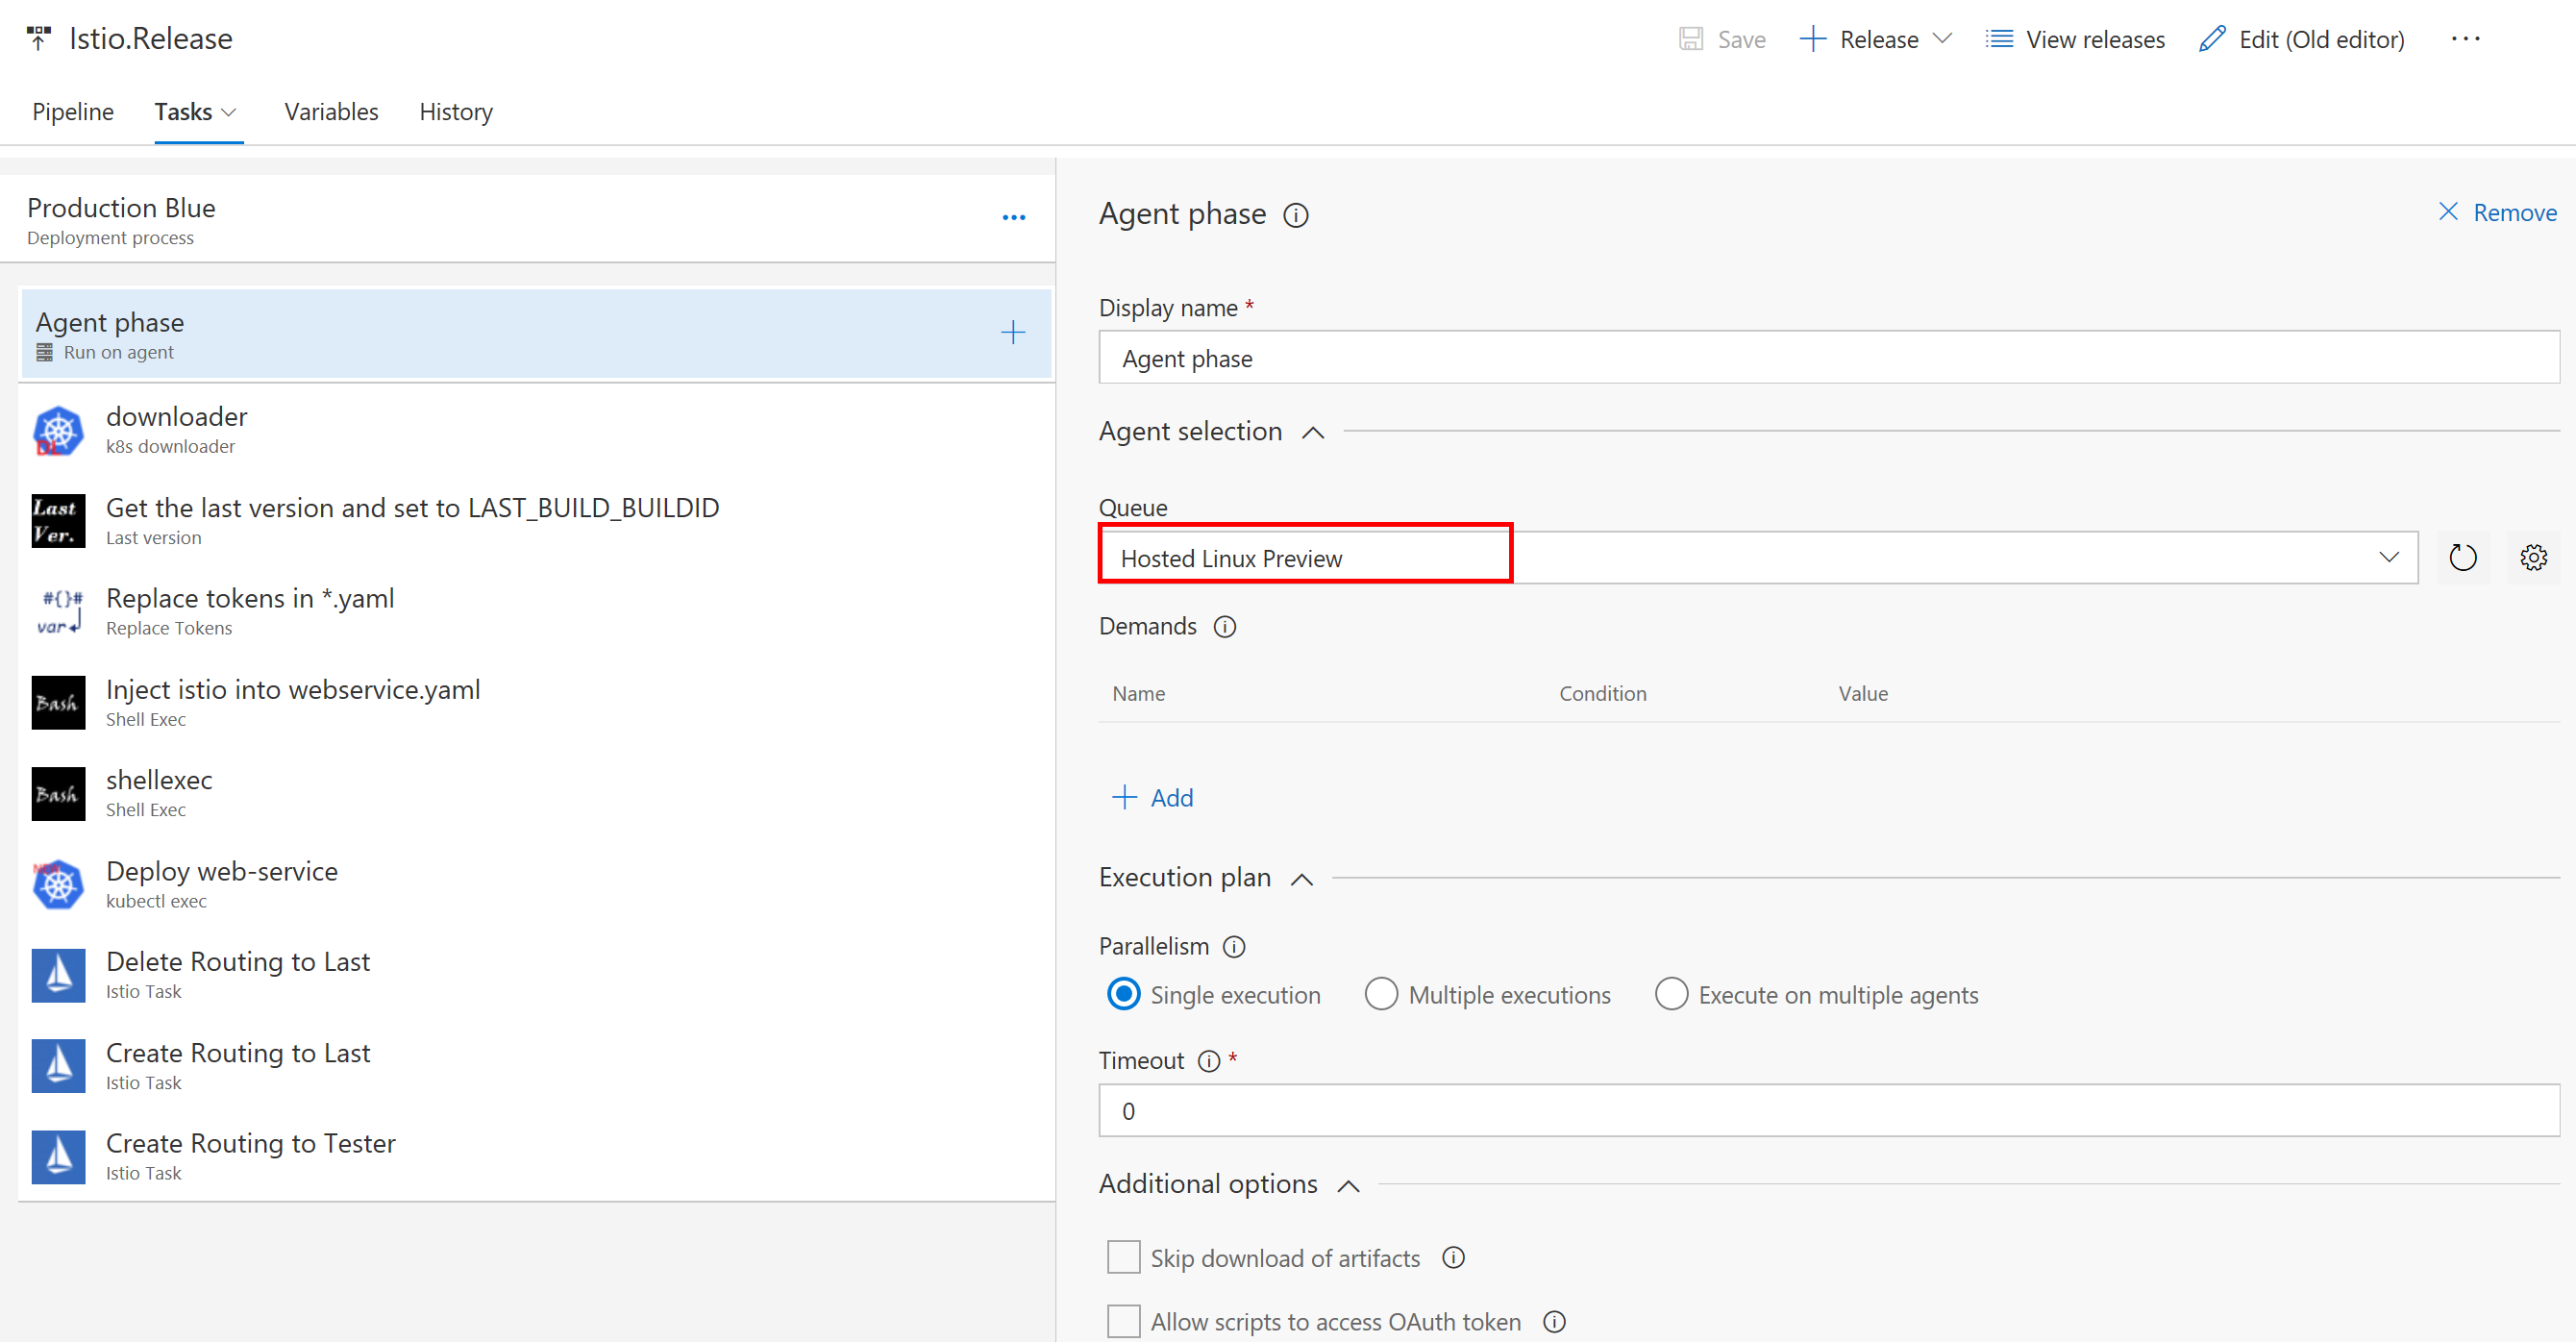
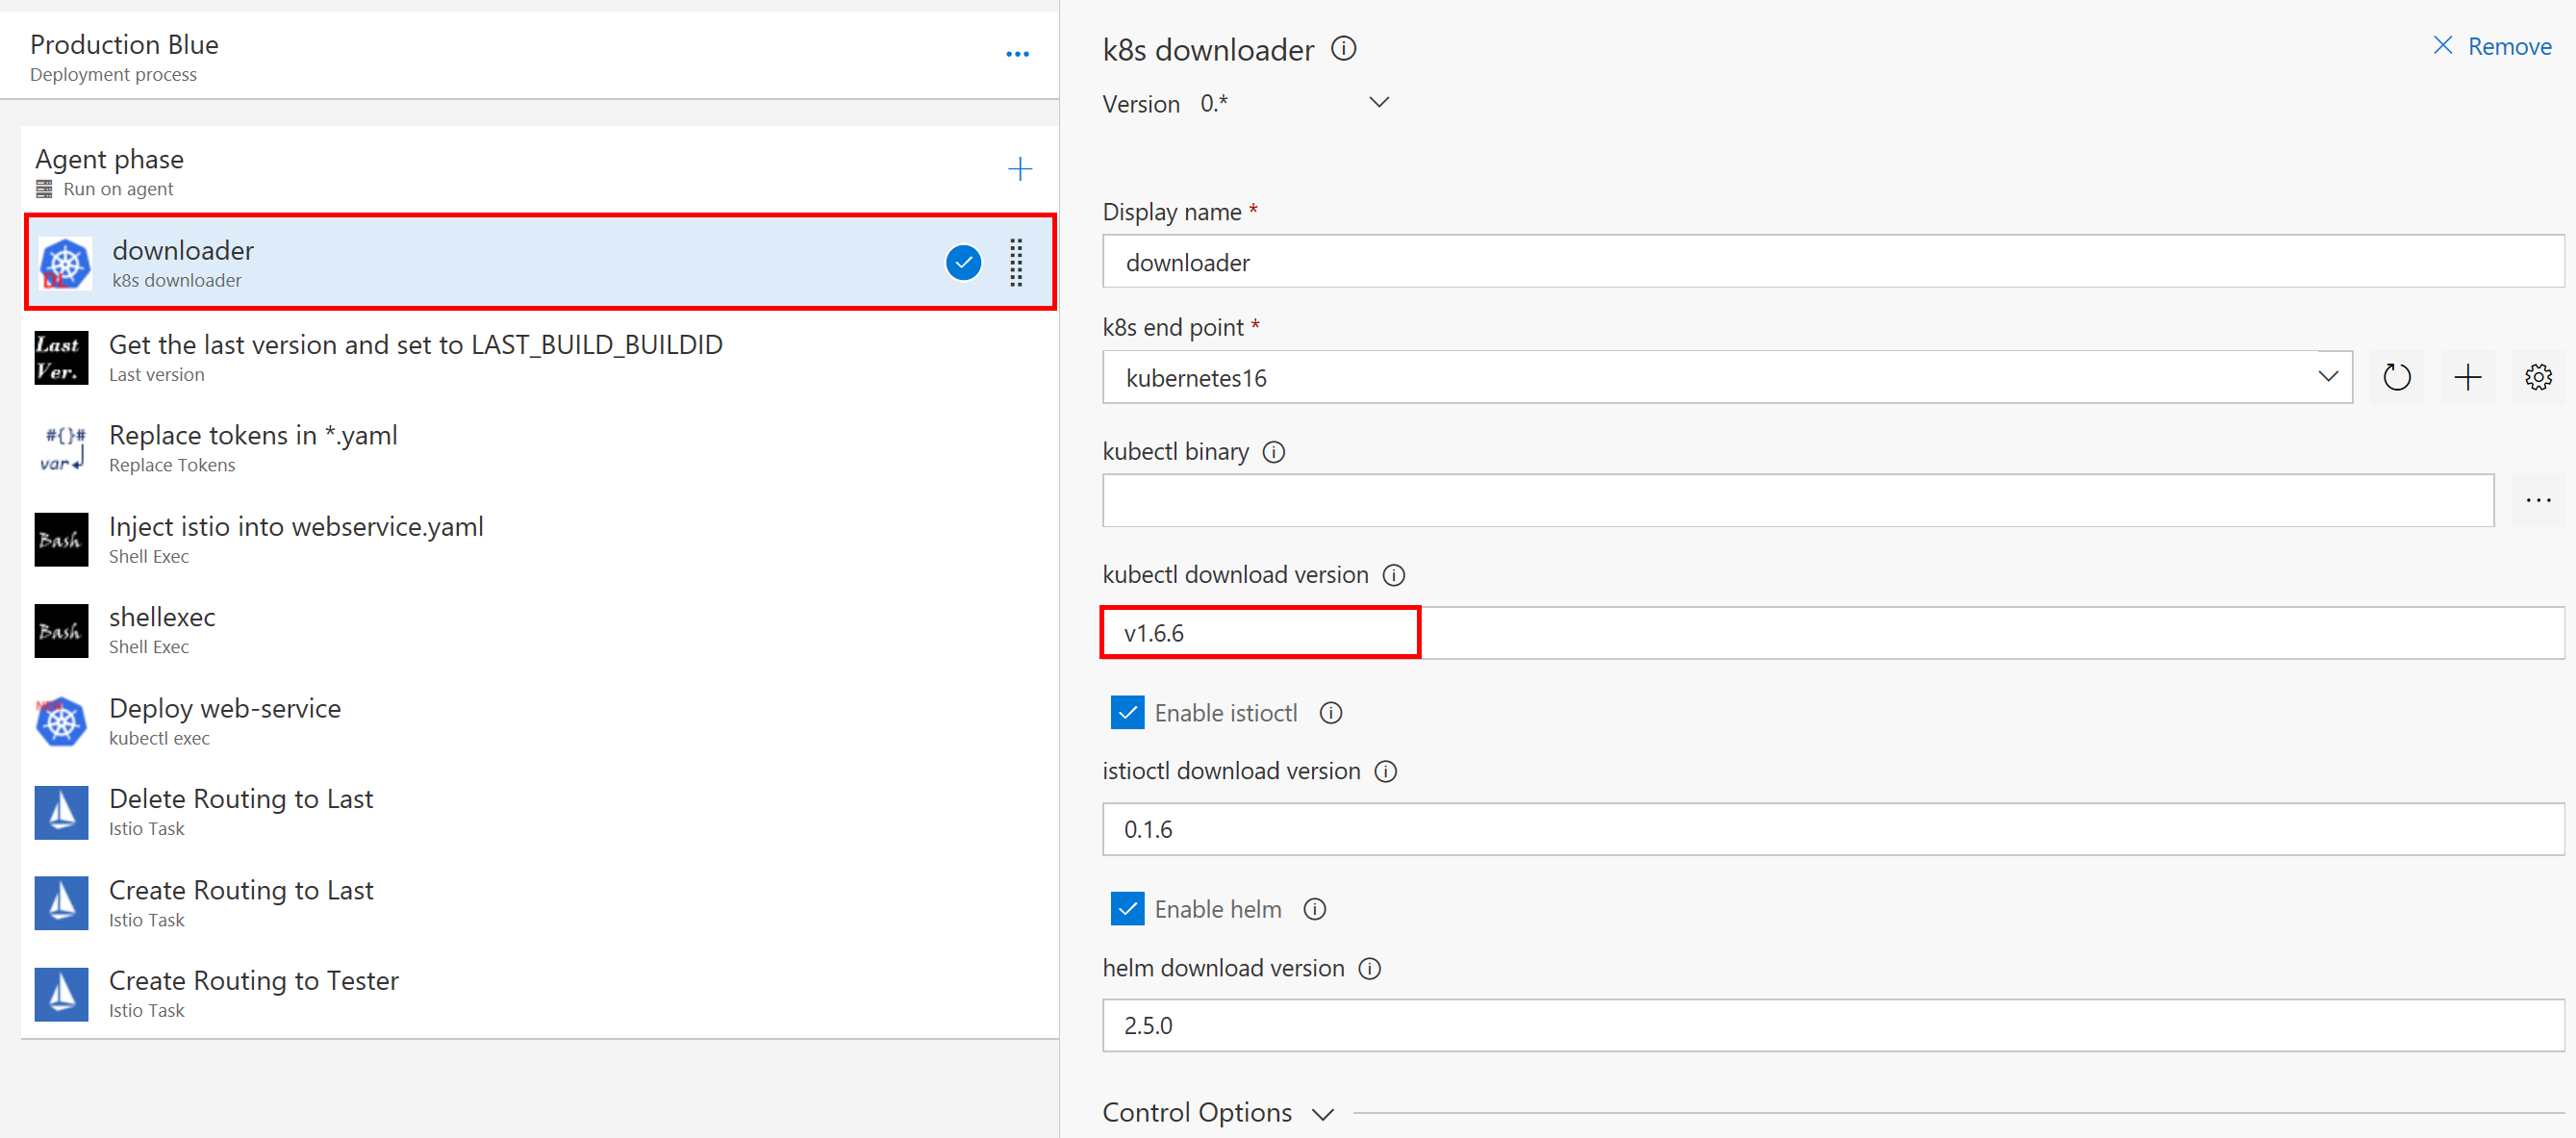
This is the brand-new unofficial kubernetes task. You can find it on the Market place. The github is here. You can download and configure the kubectl, istioctl, and helm. NOTE: please specify the kubernetes donwload version with v in front of the version number. Sorry for the confusion. You don't need it for istio and helm. This task download the binaries and set PATH and KUBECONFIG environment variables. You can add kubernets config file via k8s end point. You can refer the document.
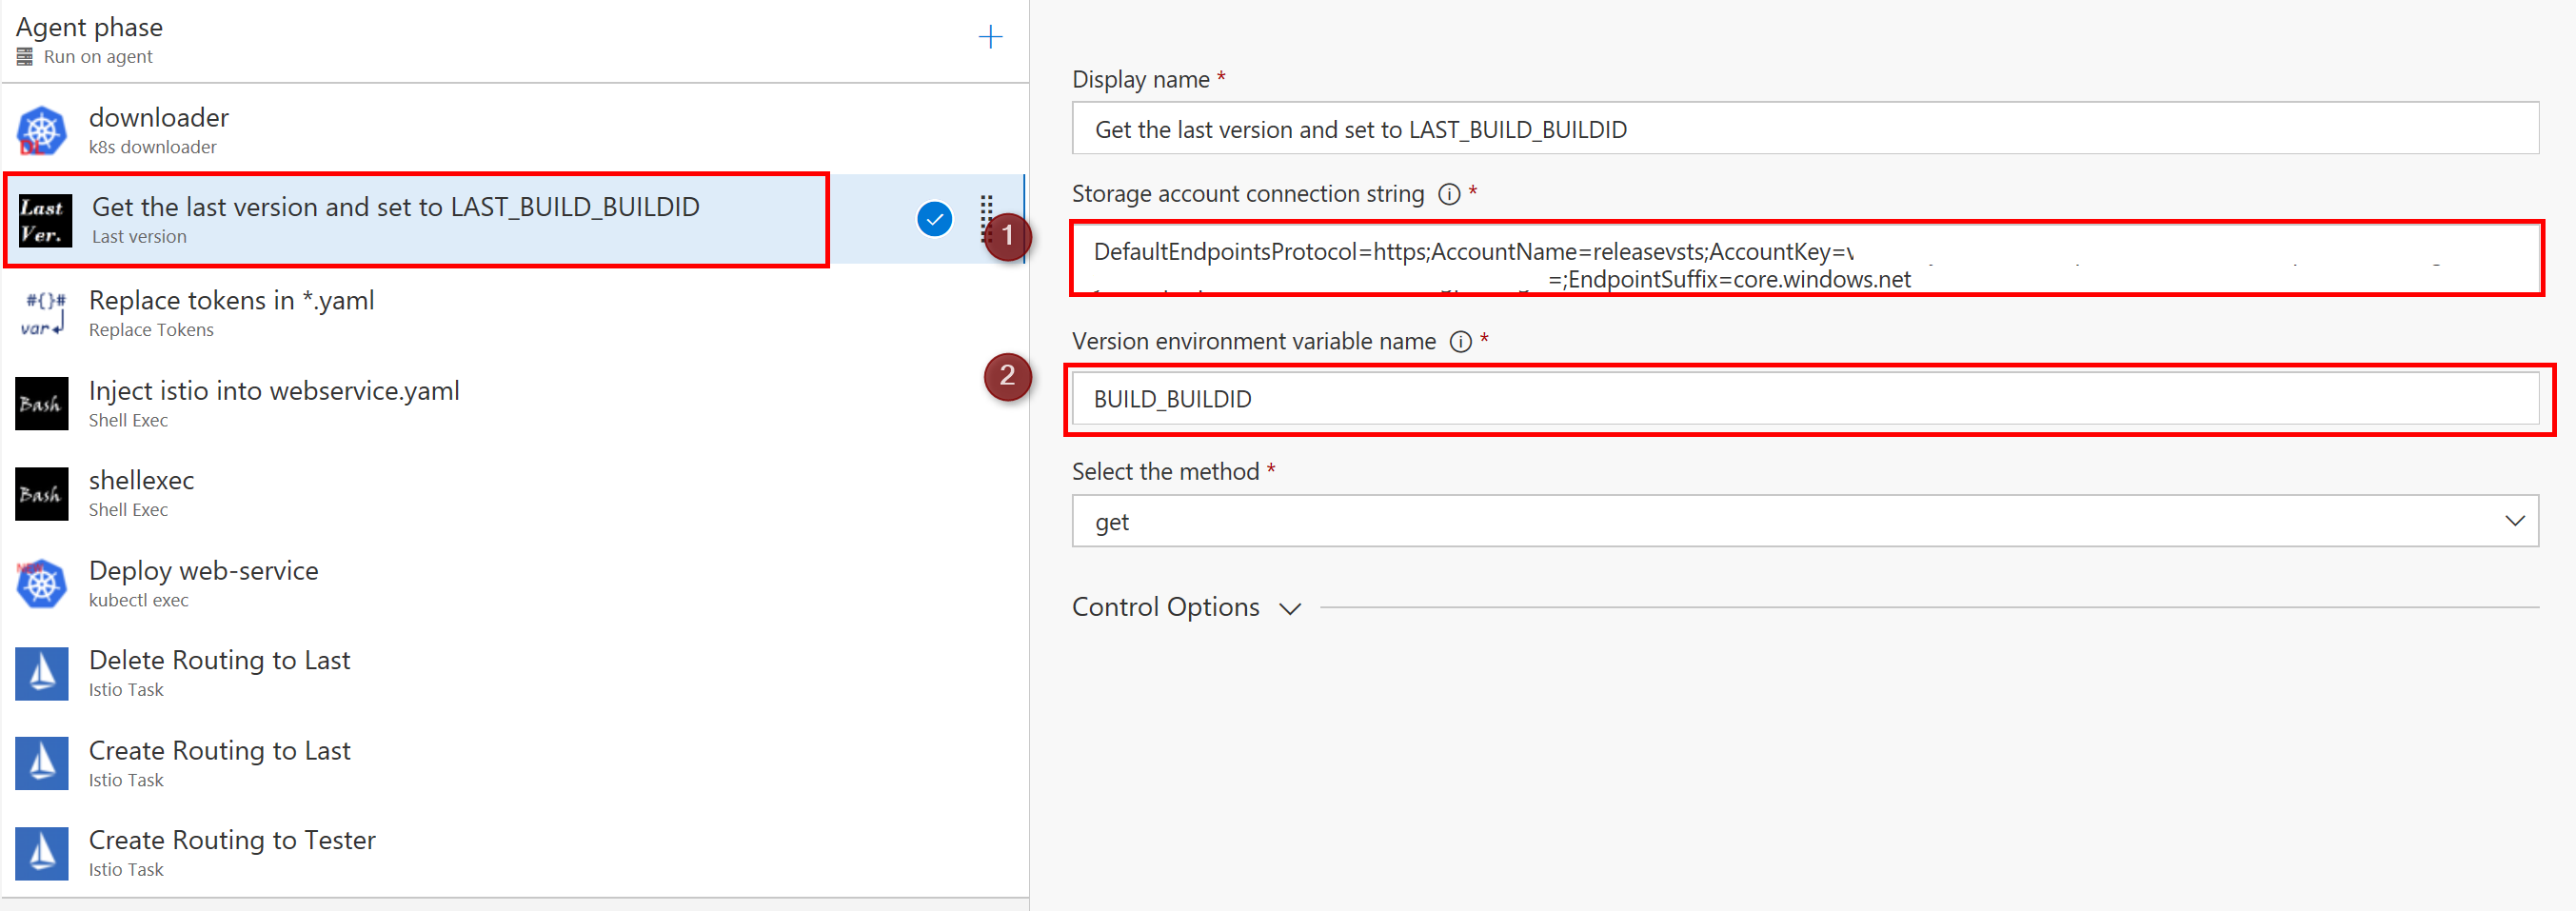
This task is the brand new task. Last Version. It enable us to manage the previous version number. BUILD_BUILDID will be your current version number. However, if you want to configure blue green deployment, you need the previous version number. This task is very simple and the first version. However, it can help you to manage the previous version.
If you use this task, you can do two things. One is getting the previous version from a storage account and set the version number to the Environment Variable which you will specify on 2. The other is record the current version as the latest to the storage account. You need to create a storage account in advance. Then get the connection string. You can paste it on 1. You need to specify some Environment Variables which you want to use it for version number of Docker image. this time is 2 BUILD_BUILDID.
I don't upload it to the market place until now. However, you can get it from my github and build upload to your repo with tfx-client.
for the detail of tfx-cli please refer this page.
tfx build tasks upload --task-path ./lastversion
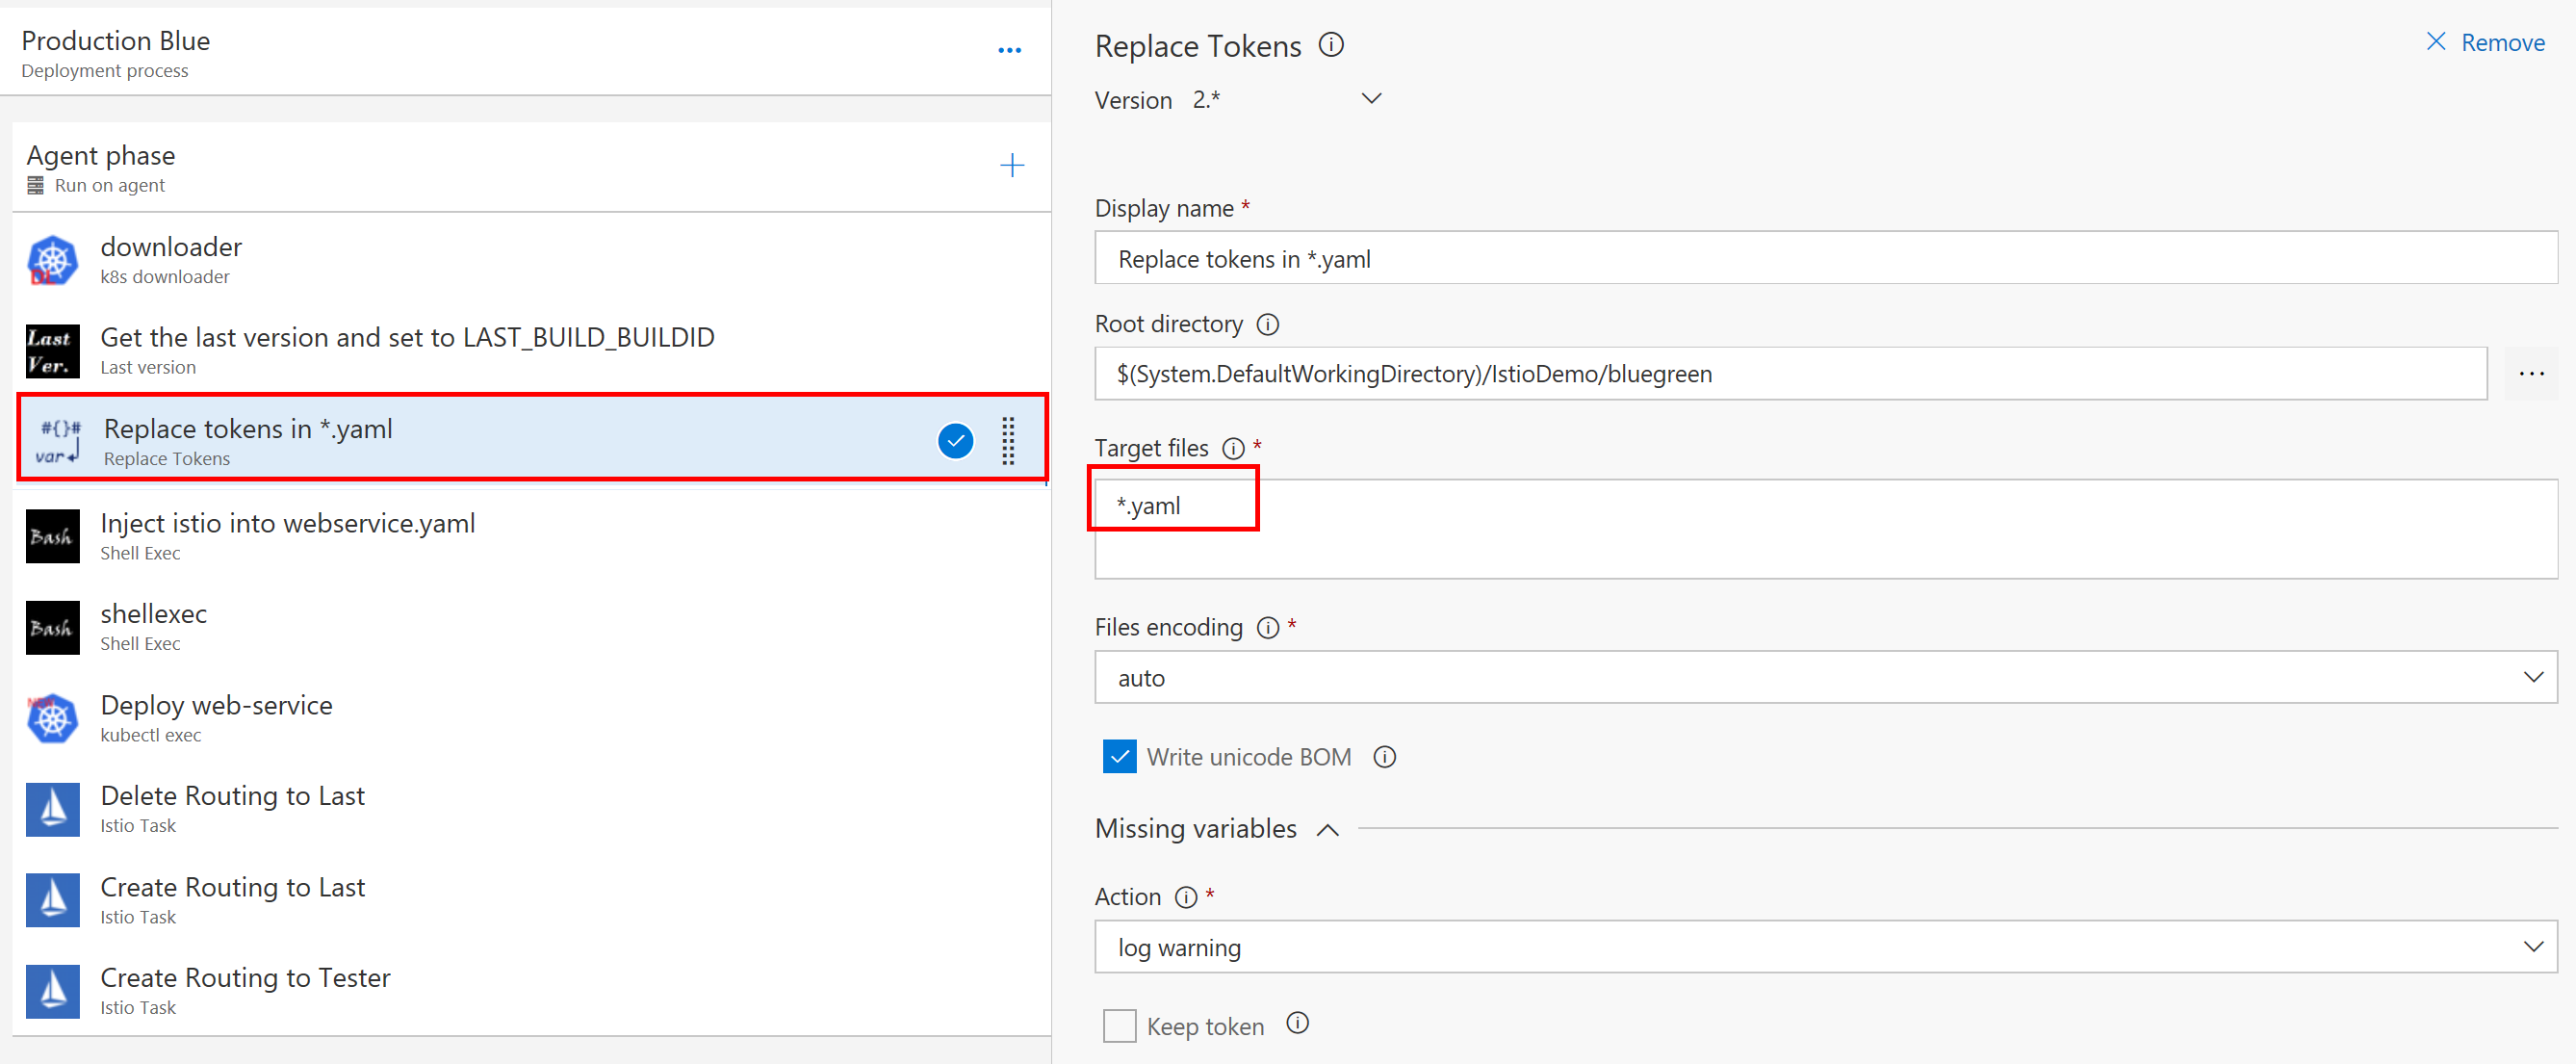
Then you need to replace the variables which you defined at the yaml files. This task enable you to replace #{ENV}# to the value.
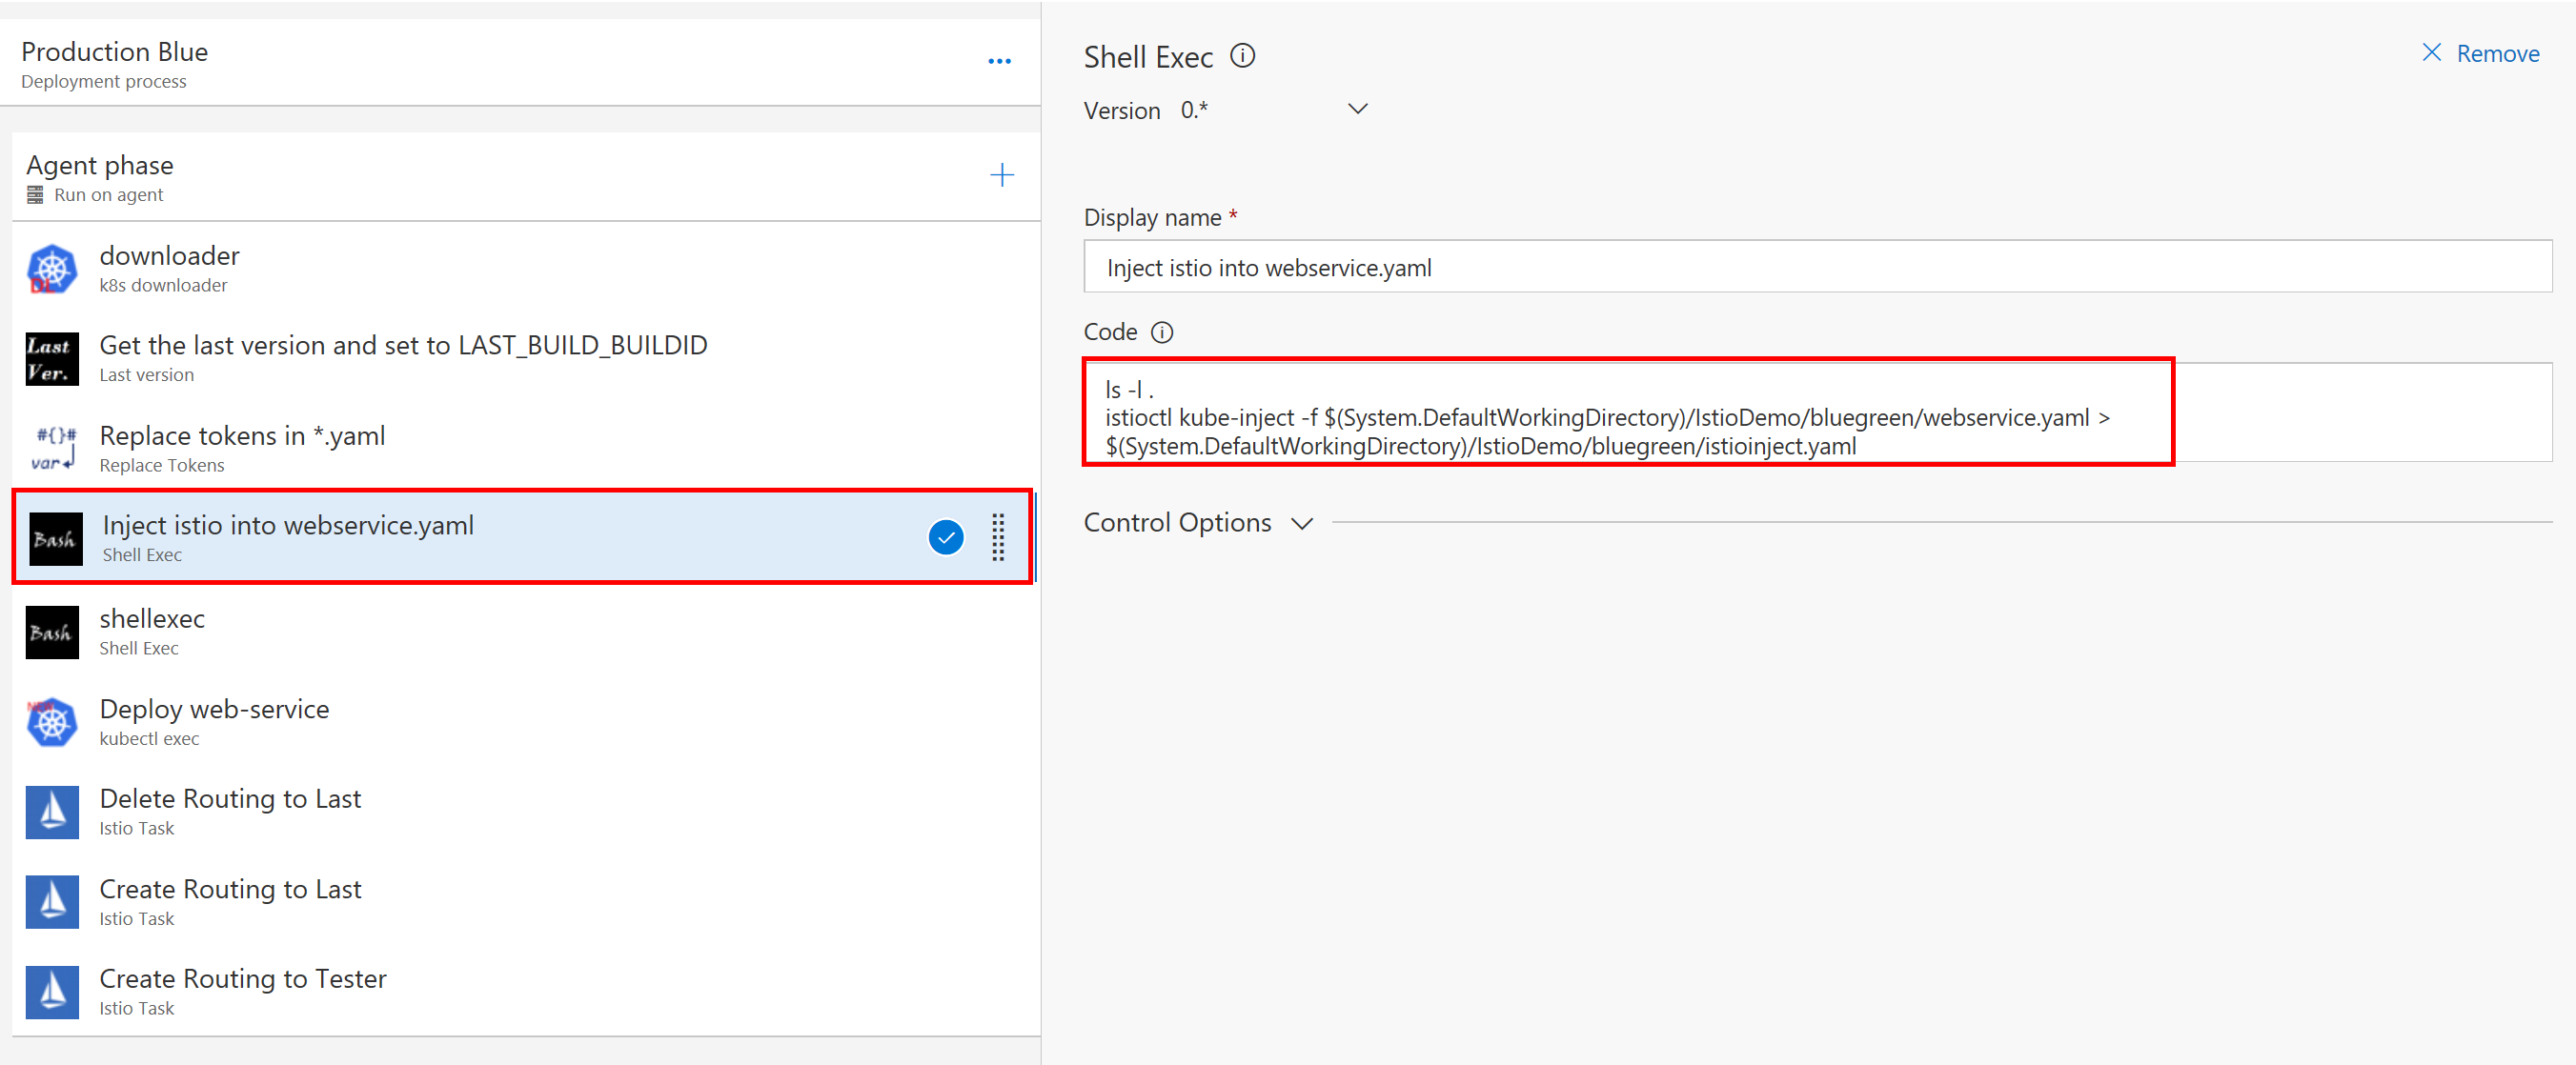
Using shell exec task, you can execute any shell command. In this case, I execute istioctl kube-inject command. Generally speaking, VSTS task can't handle pipe. I store the result in to the file.
Then you can Deploy to your k8s cluster. This task is kubectl exec command. It is included in my unofficial Kuberntes task.

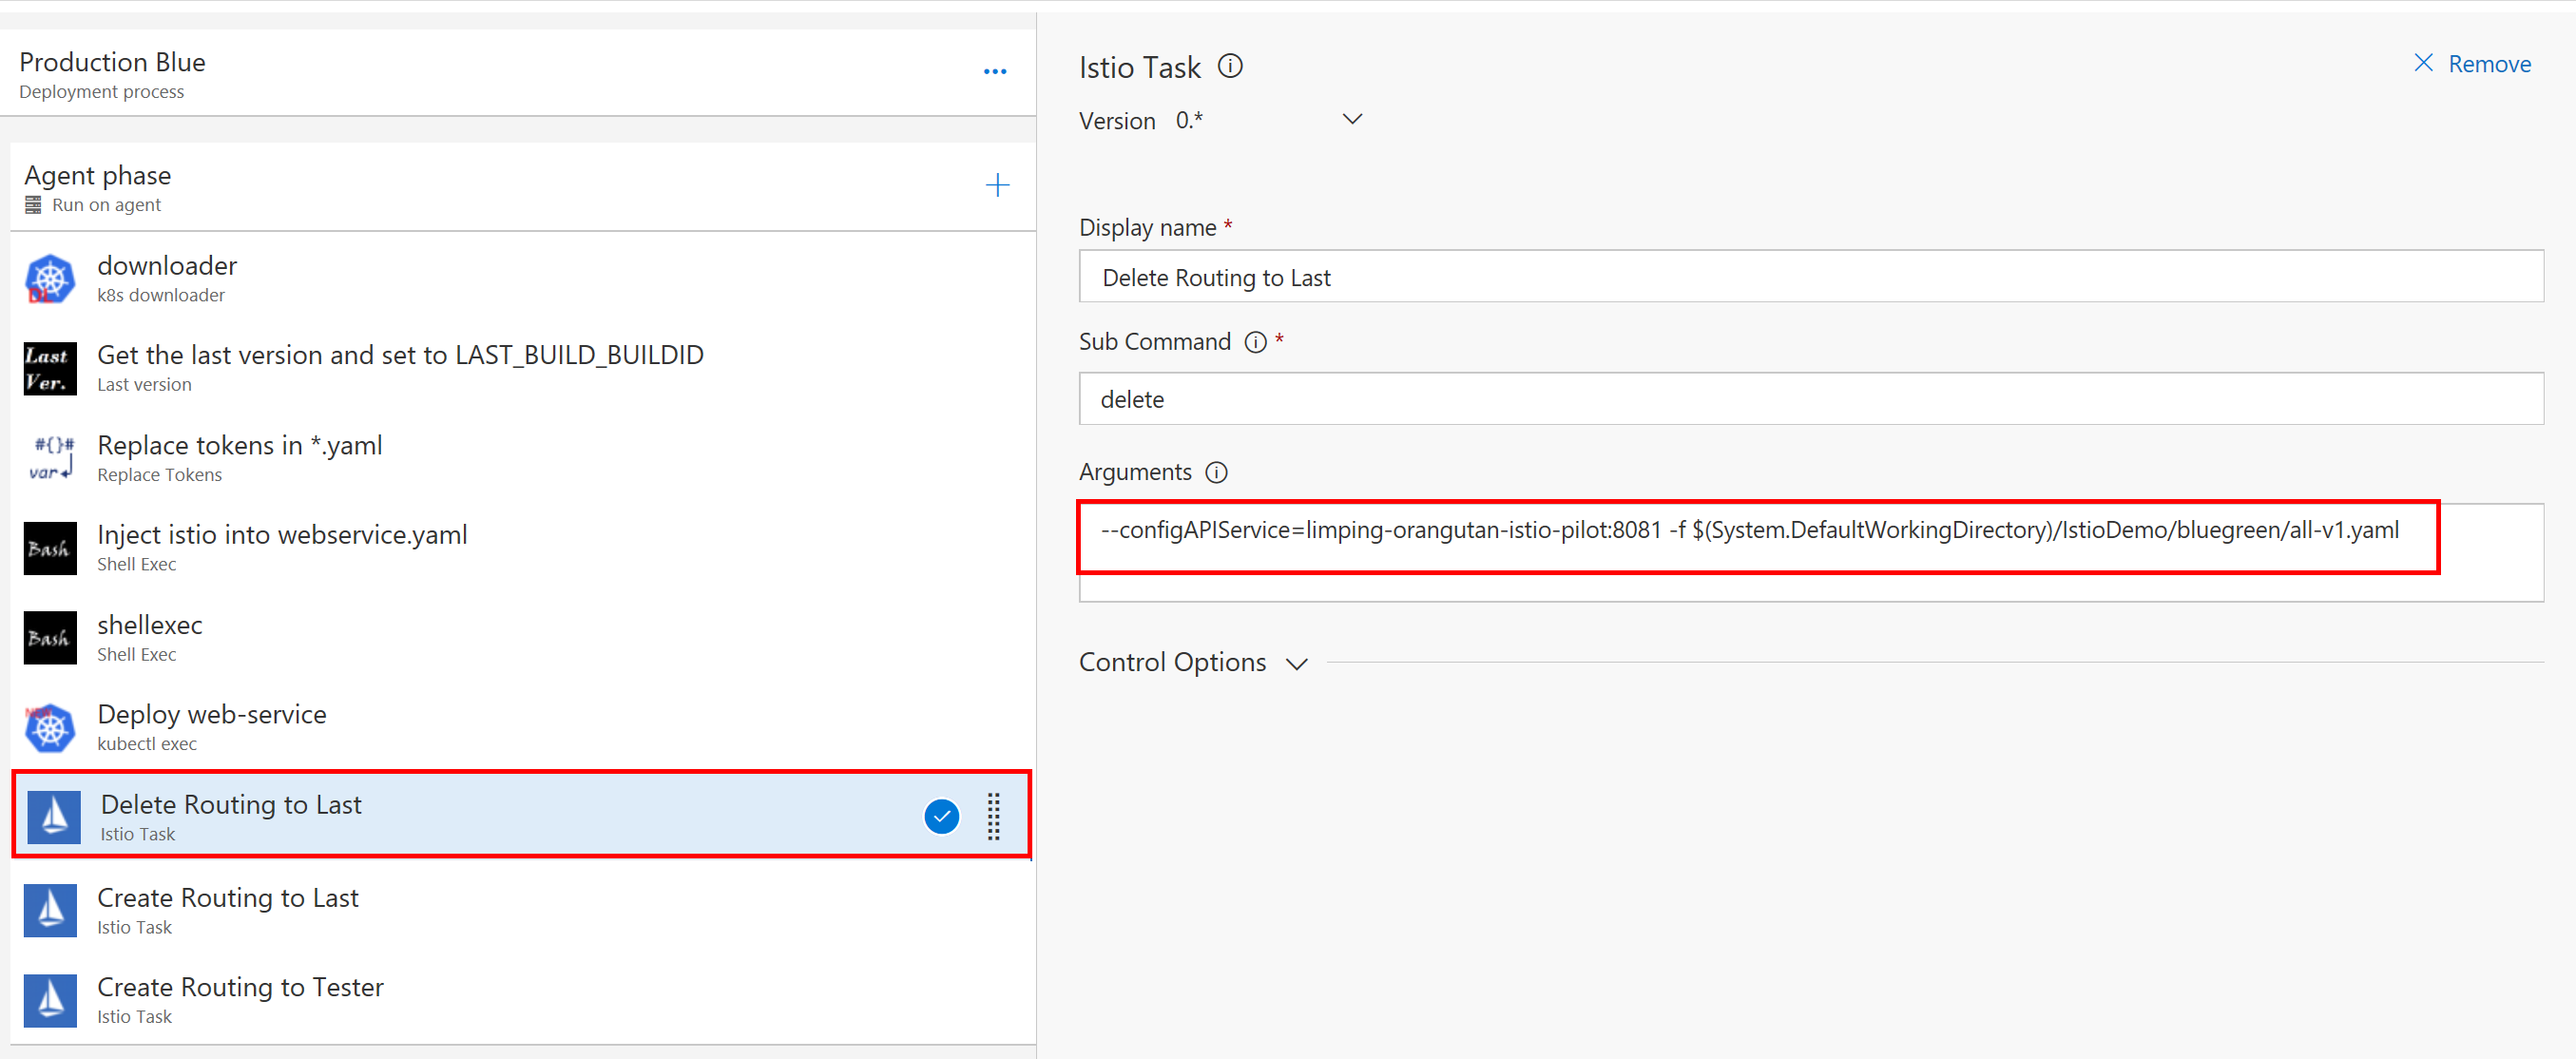
The kubernetes taks inlucde istio task. You can configure the routing. like this.
Delete the route
Then create a new routing. This route everyone to the previous version.

Add the routing for testers. test-v2.yaml file route new version only for tester who has cookie of NAME=v2tester. Please refer the test-v2.yaml file which I put on the previous section. Now only the tester can access the new version.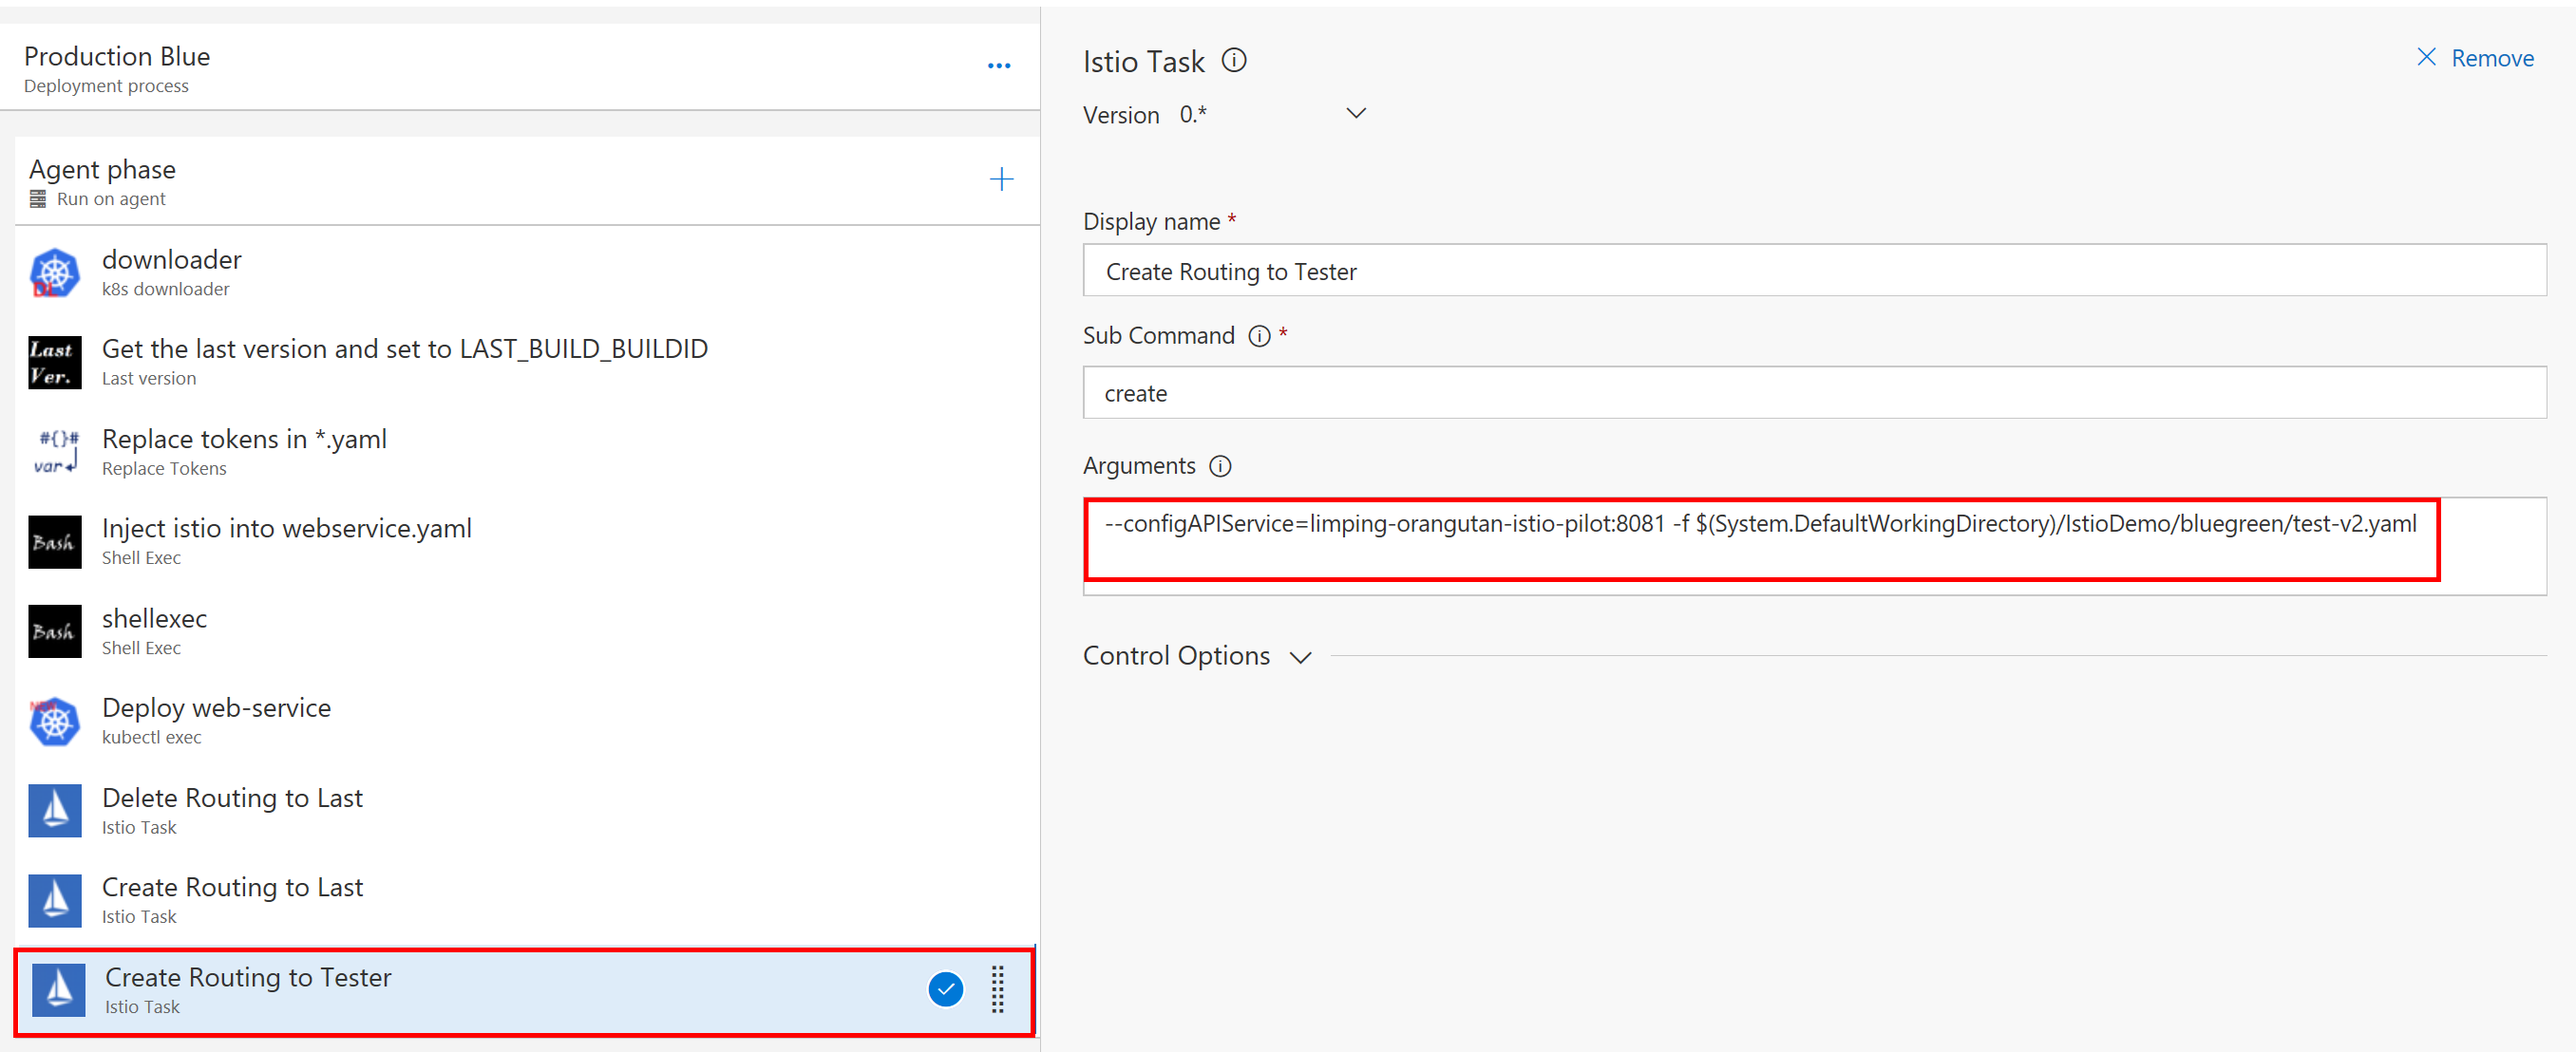
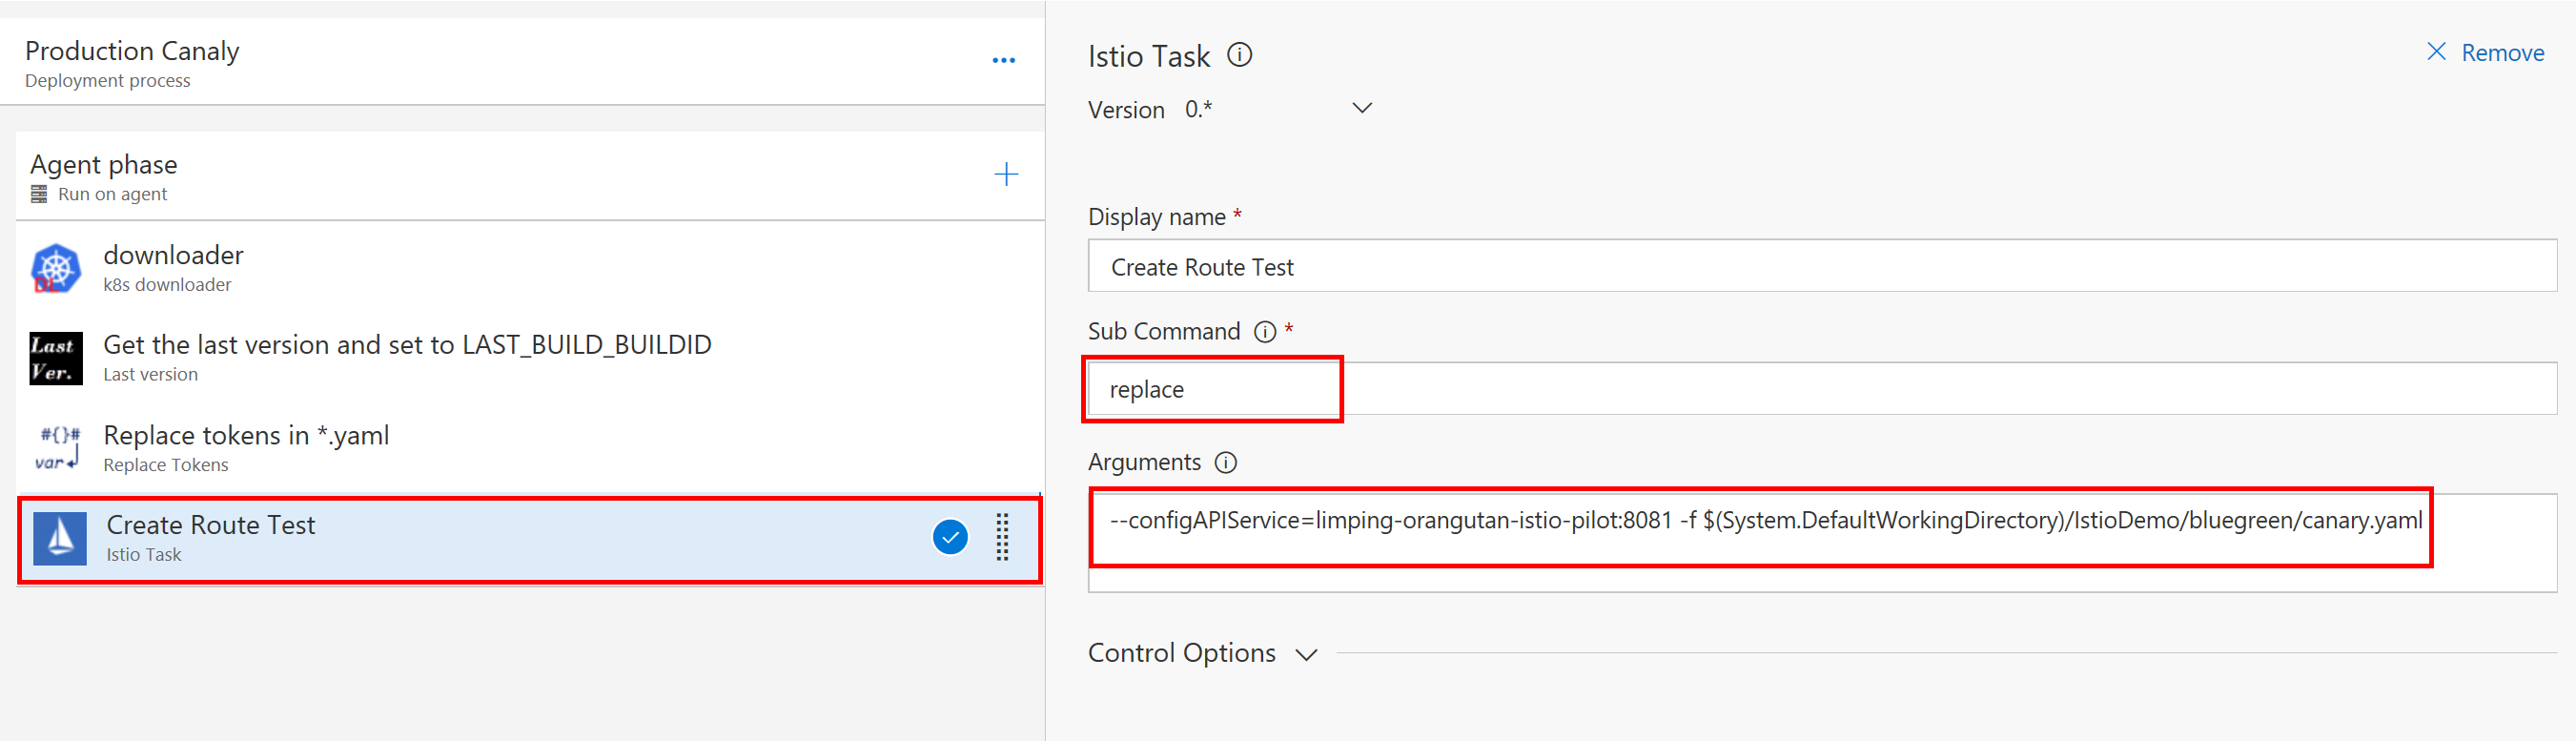
Canary Production
This is the canary release. The downloader and Last version, replace task is the same as the previous. Only difference is the route rule for canary testing. This rule route some people to previous version, some people to new version.
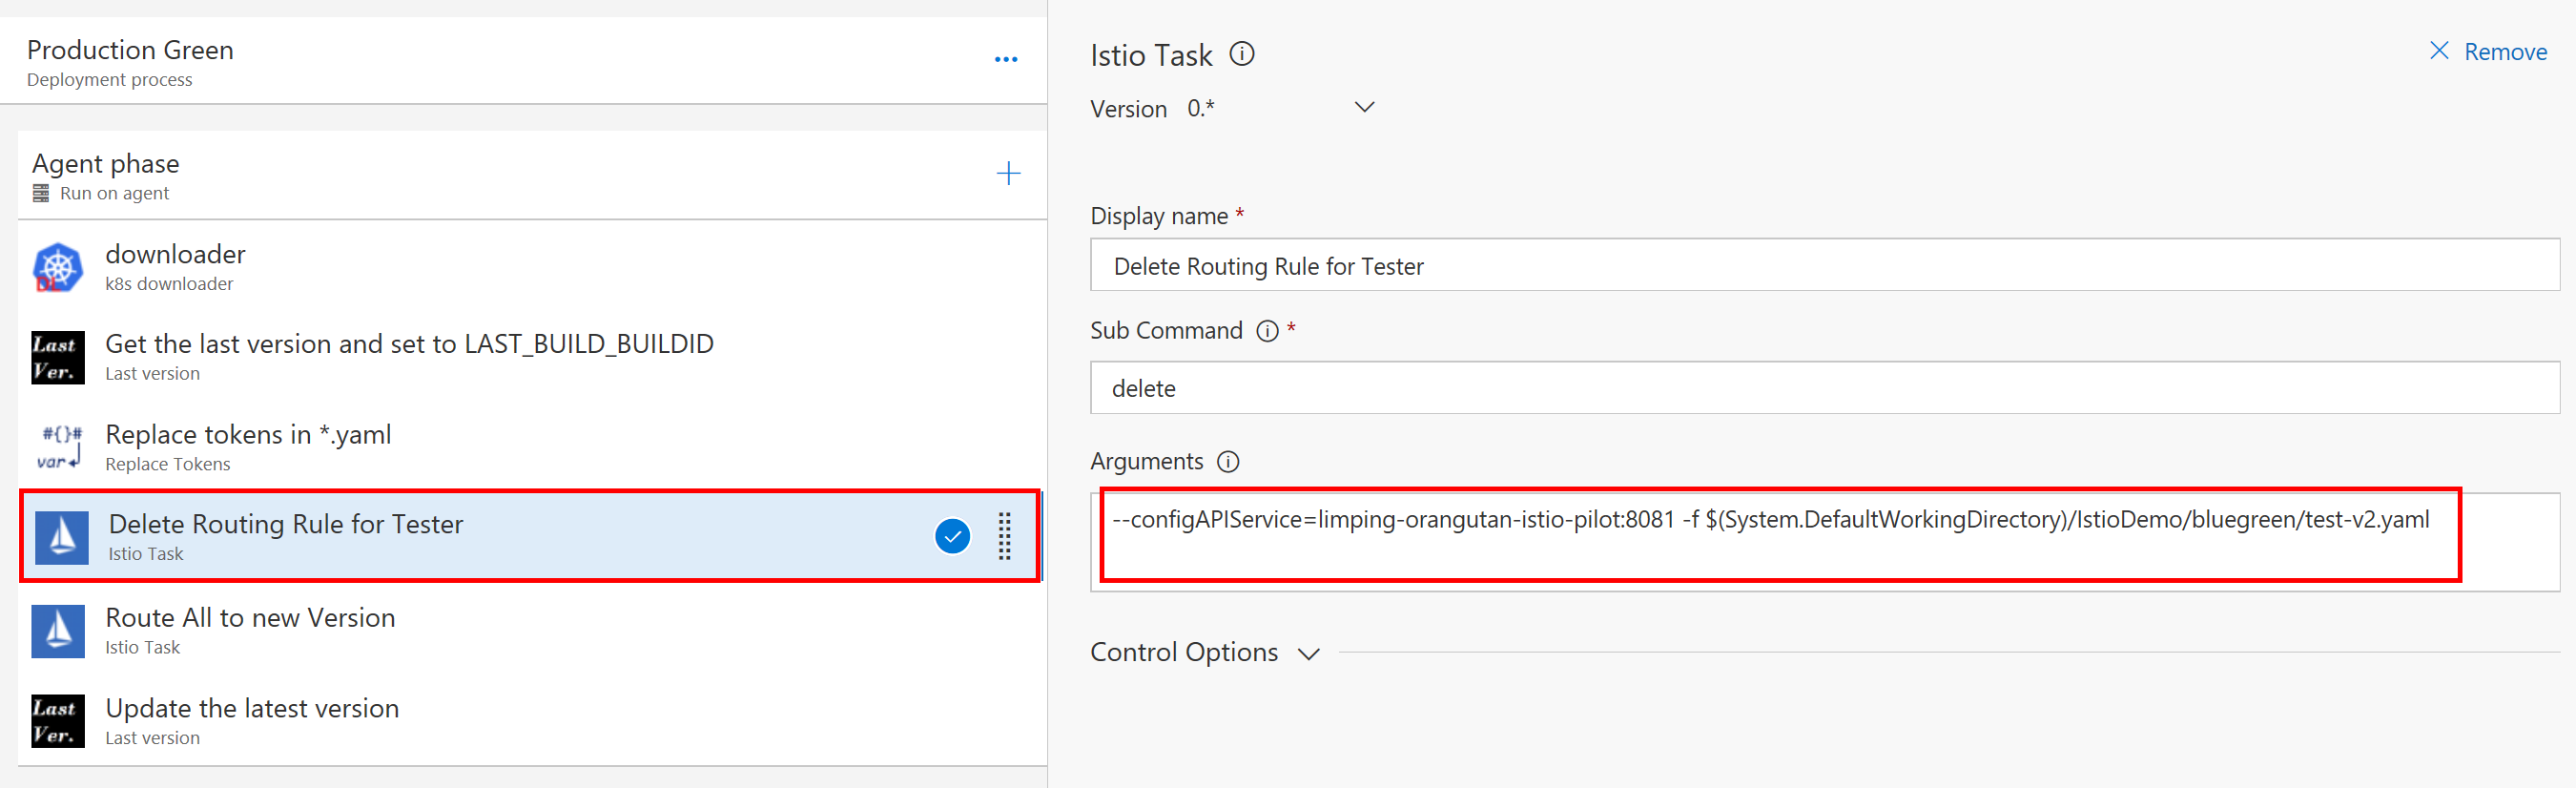
Green production
finally, you delete the tester's route then, route all user to the new version.
Finally, I store the current version as the latest version to the storage account.
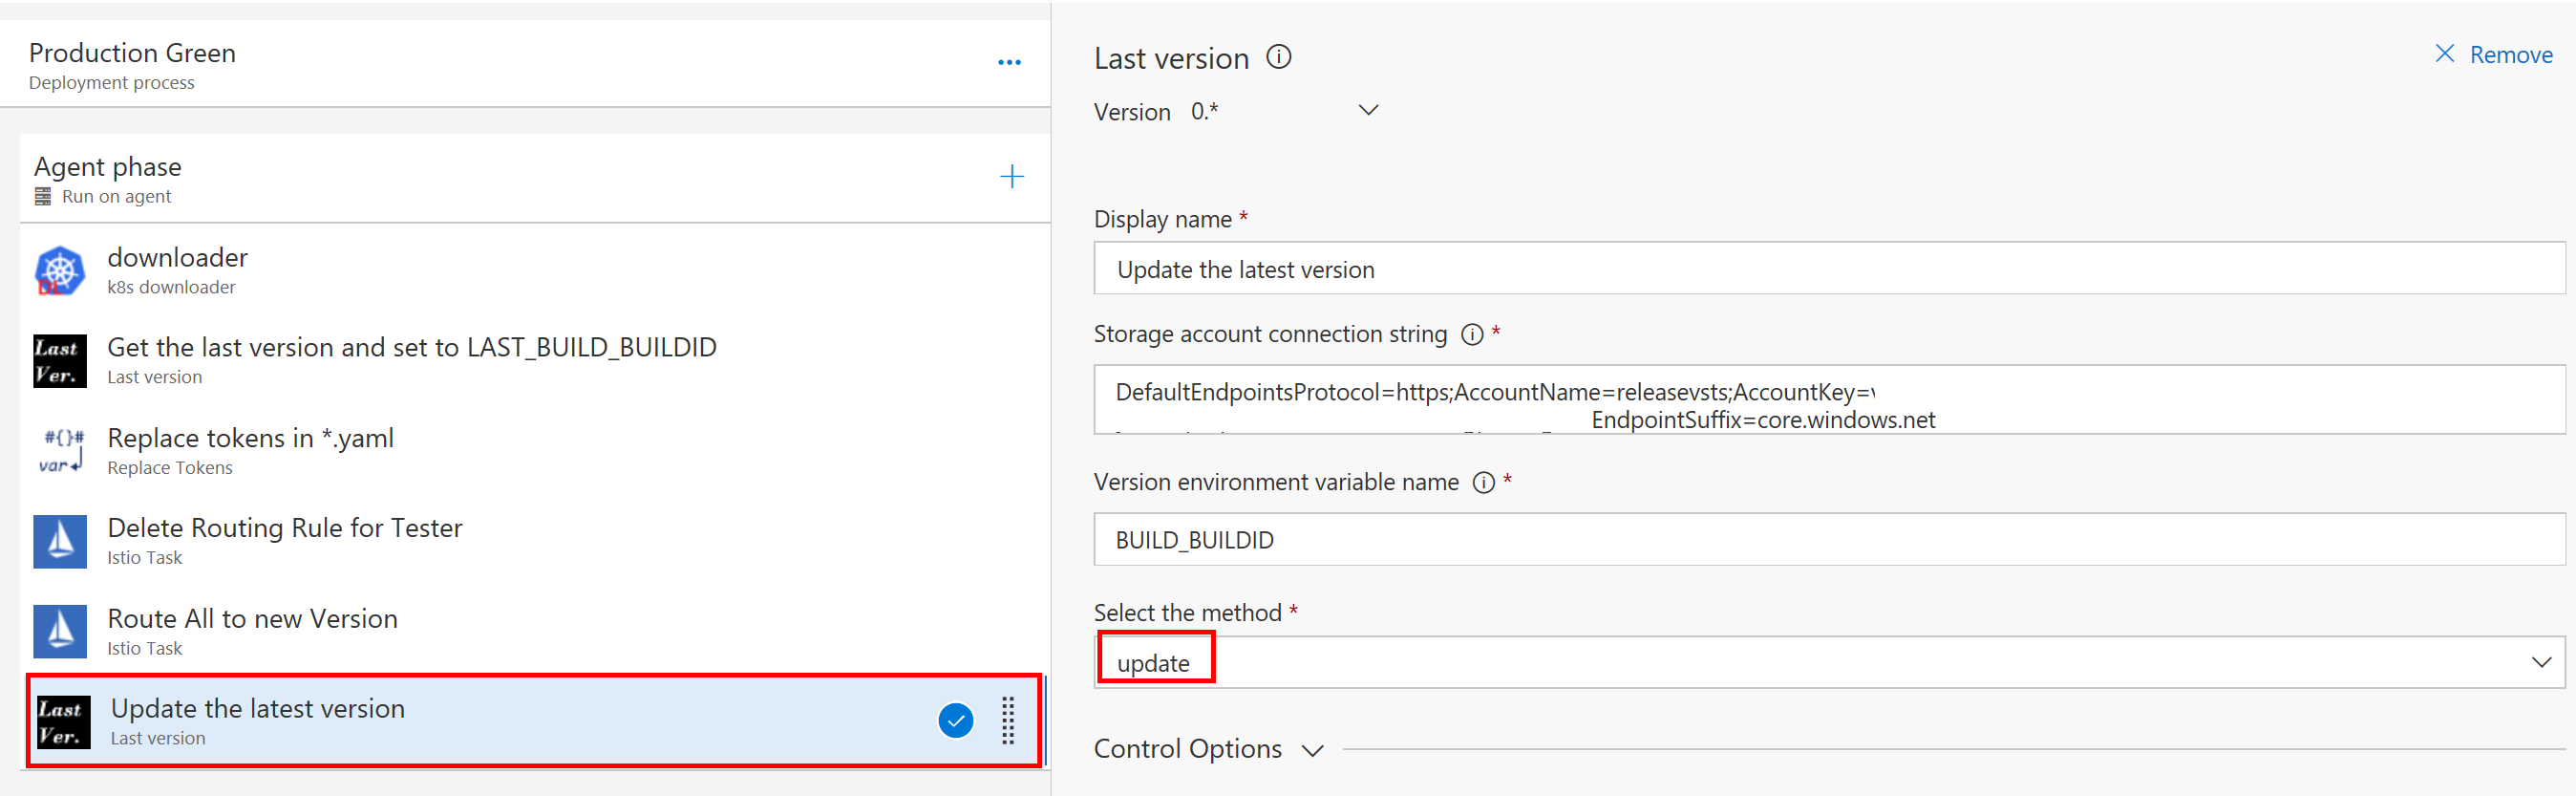
That's it. I hope you enjoy istio CI/CD with VSTS.