A simple guide to digitally signing software for Vista
Today I will be discussing how to digitally sign software for Vista. I had to put these directions together for a customer and I thought I would share them.
When digitally signing software for Vista you should meet the following requirements:
- A valid code signing certificate from a CA that is trusted within your environment - Please click here to read how to setup an Enterprise CA
- The certificate must be installed on the workstation/server that you are performing the following steps
- Windows SDK - The SDK can be downloaded HERE
Once you have met the above requirements you can proceed to the following steps.
1. Click on Start, All Programs, Microsoft Windows SDK and click CMD Shell
2. At the cmd prompt type "cd bin"
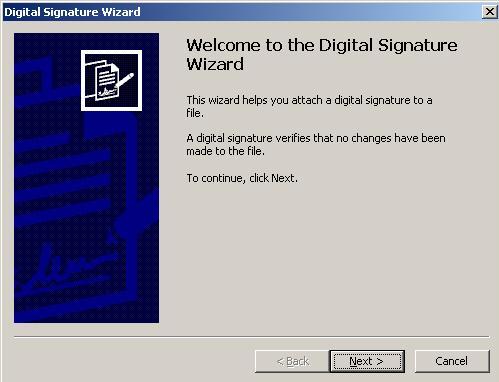
3. Type "signtool.exe signwizard" - Click next on the following Welcome screen
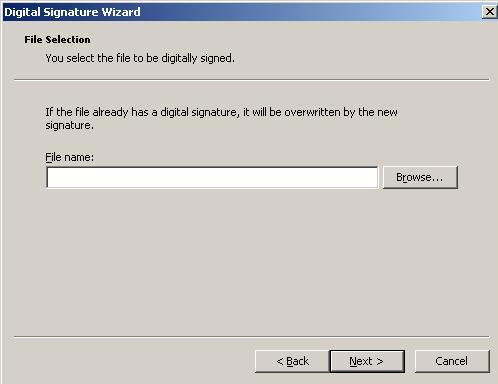
4. Select the file that you want to digitally sign and click Next
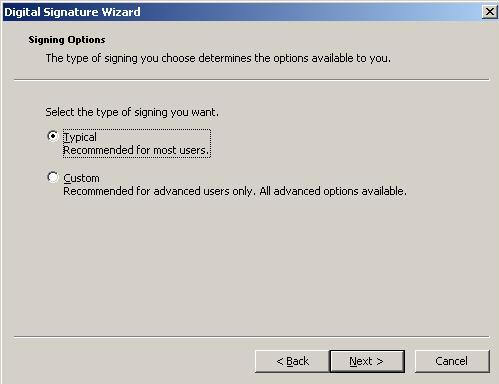
5. To keep this simple we will select Typical and click Next
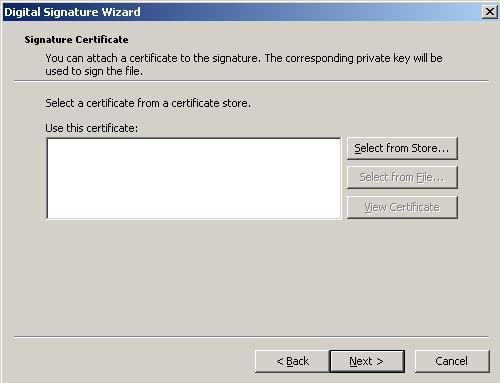
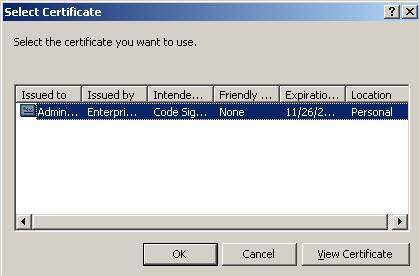
6. The following 2 screens are asking for the certificate you would like to use to sign the software. Click on Select from Store and highlight your certificate and click Ok.
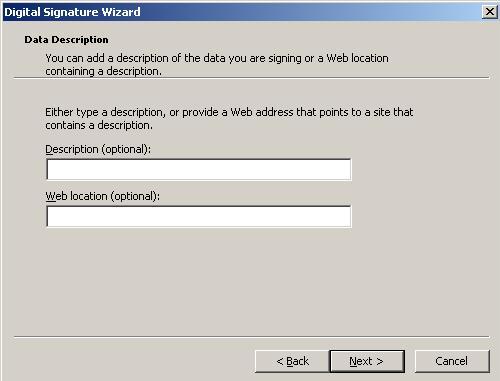
7. The following screen is requesting optional information on the data you are signing. You can opt to fill it in or not fill it in and click Next.
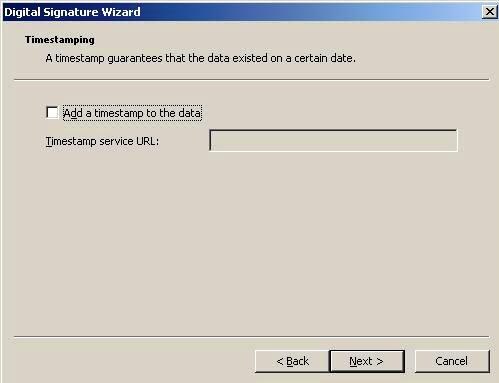
8. When signing a software/driver package, you should always use the option to timestamp the signature. This timestamp specifies when the signature was created. If a certificate expires or is revoked for security reasons, then only signatures created before the expiration or revocation are valid. If a timestamp is not included in the signature, then Windows cannot determine if the package was signed before or after the expiration or revocation, and will reject the signature. You can use the following timestamp service Url: https://timestamp.verisign.com/scripts/timestamp.dll
To add the timestamp url, check the box "Add a Timestamp to the data" and put in a valid url and click Next.
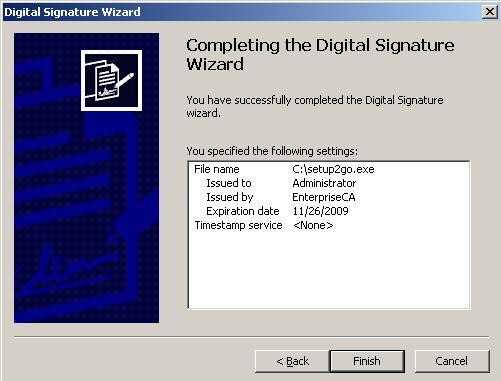
9. At this point you have almost finished digitally signing your software. Click Finish.
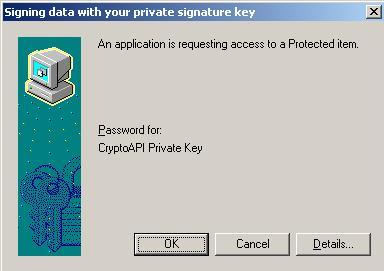
10. After clicking Finish a dialog box will appear requesting access to a protected item. Click Ok.
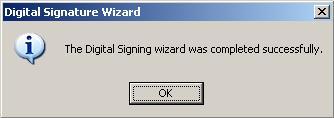
11. Now you have completed digitally signing software for Vista. Click Ok.
Note: If you would like to verify your signature you can right click on the file that was just signed and go to properties. Within the properties tab you will now have a Digital Signatures tab. You can click that tab and see your digital signature.
That concludes how to digitally sign software for Vista.