Configure WAP to support new SDN stack on Windows Server 2016
Start from UR9, WAP can support Windows Server 2016 and System Center 2016. Different from Windows Server 2012 R2, On Windows Server 2016 and System Center 2016, you could have two different SDN deployments. One is based on NVGRE and the other is based on VXLAN. WAP can work with either deployments but providing different functionalities.
Basically, if you use the traditional NVGRE HNV on your Windows Server 2016 and System Center 2016, you can leverage WAP to provide the same self-service capabilities as Windows Server 2012 R2 and System Center 2012 R2. This post will focus on leverage WAP to provide the self-service capabilities on top of the new SDN stack. For more information regarding how to deploy new SDN stack with VMM 2016, please refer my previous posts as below.
With the integration between WAP UR10, Windows Server 2016, System Center Virtual Machine Manager 2016, System Center Service Provider Foundation 2016, it can provide the following self-service capabilities:
- NC based VM network creation and management
- Outbound and inbound NAT rule configured through SLB
- S2S IPSec Gateway connectivity
Prerequisites
- Windows Server 2016
- VMM 2016
- SPF 2016 (You may find it from Orchestrator 2016's media.)
- WAP – UR10
You may follow my previous posts to build such environment.
Configure VMM
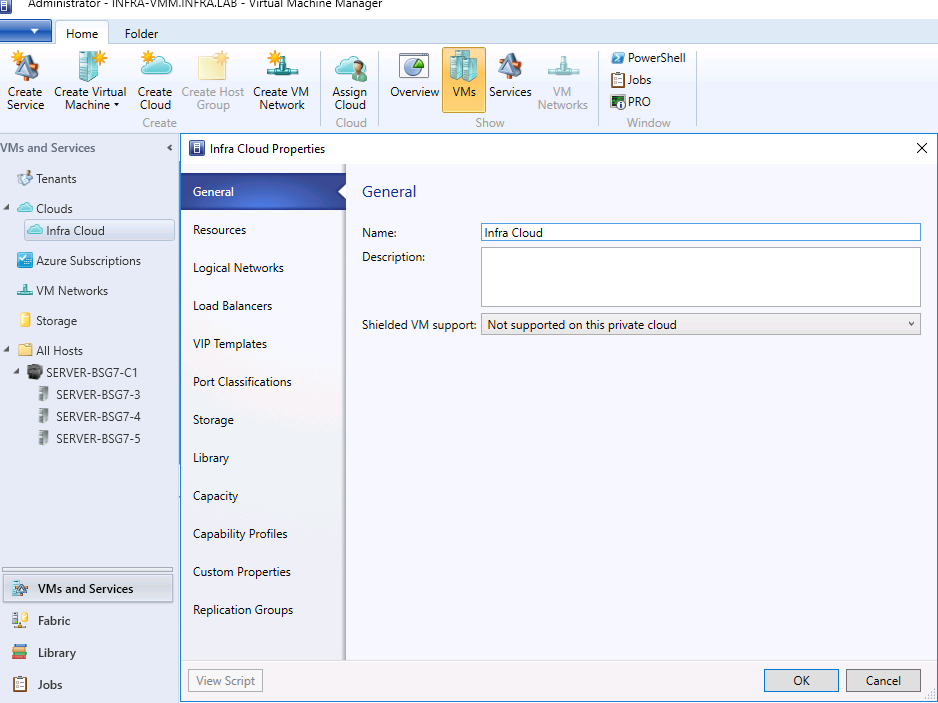
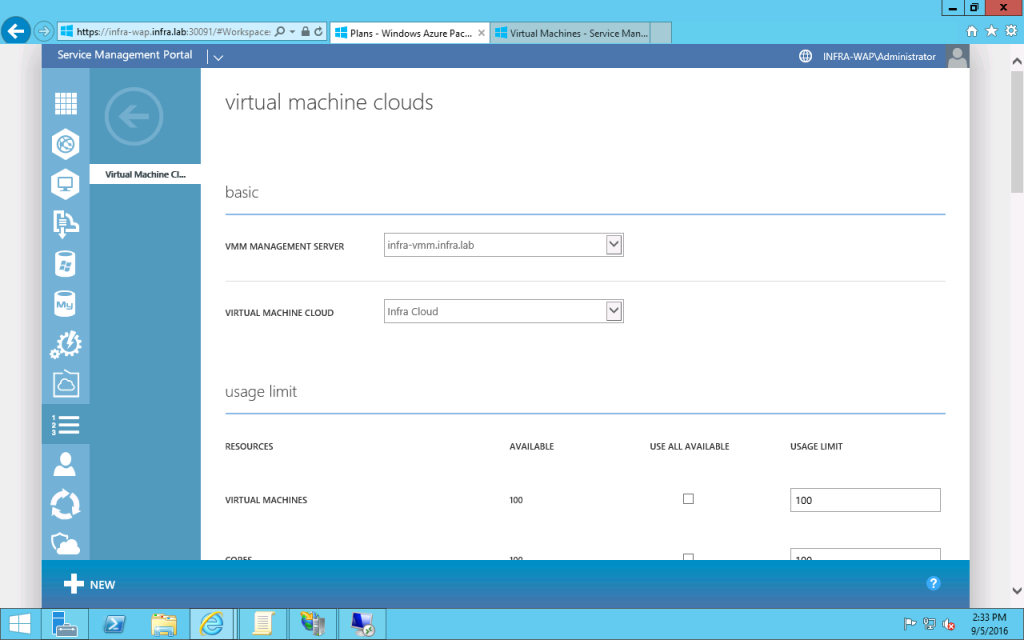
- As as the deployment of WAP+SPF2012 R2+WMM 2012 R2, you need to create a cloud in VMM. In my setup its name is "Infra Cloud".
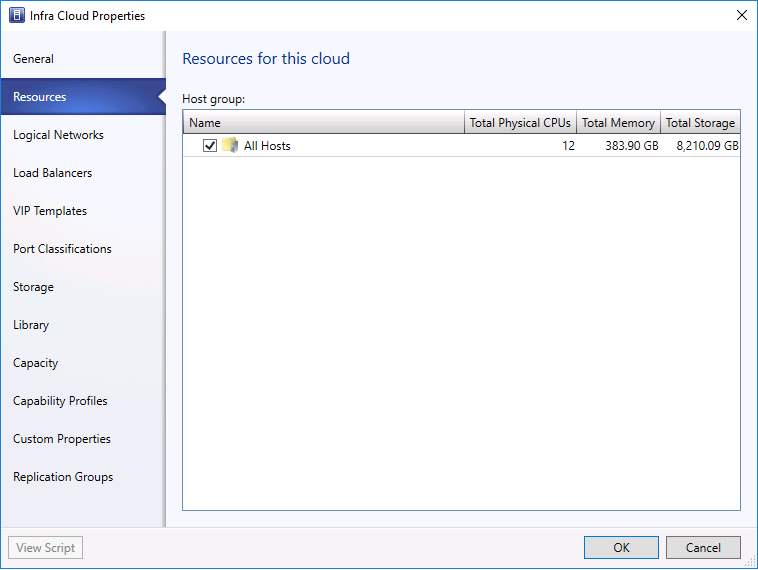
- On the resource tab, select the corresponding host group.
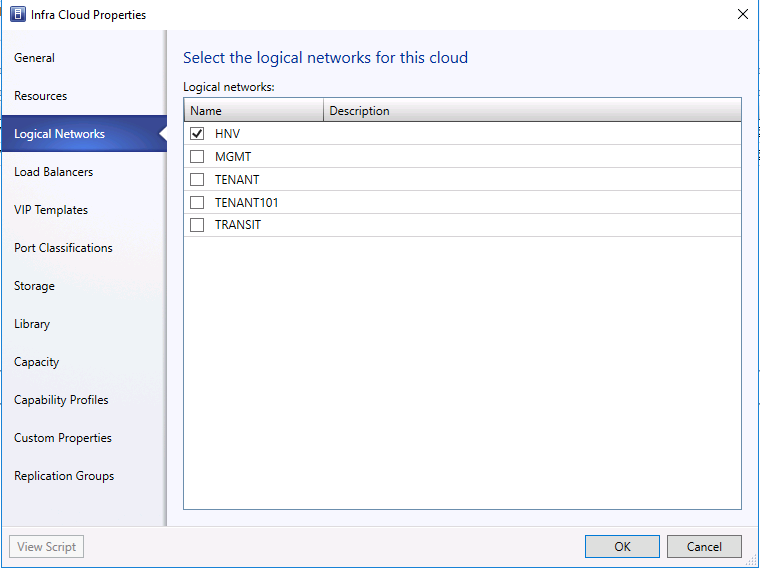
- In the logical Networks tab, please select HNV logical network
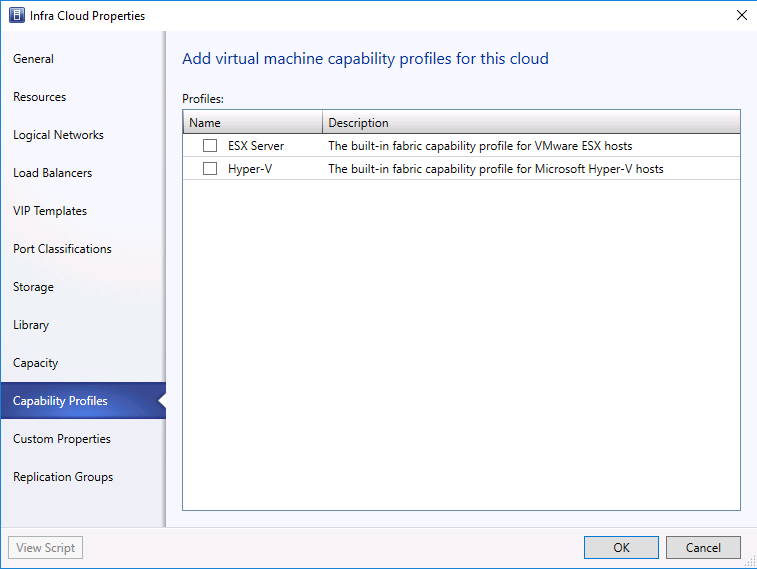
- On the capability Profiles tab, clear all the checkboxes.
- As for the steps didn't mentioned above, you may either use the default option/value or select based on your environment.
- After you create the cloud, you may want to create a VM in that cloud from VMM Console and make sure the provision could complete successfully.
Install SPF
In my setup, I installed SPF in the same box of VMM. Before install SPF, I run the PowerShell cmdlet to install the required components and services.
 Import-Module ServerManager
Add-WindowsFeature FileAndStorage-Services,Storage-Services,Web-Server,Web-WebServer,Web-Common-Http,Web-Default-Doc,Web-Dir-Browsing,Web-Http-Errors,Web-Static-Content,Web-Health,Web-Http-Logging,Web-Request-Monitor,Web-Http-Tracing,Web-Performance,Web-Stat-Compression,Web-Dyn-Compression,Web-Security,Web-Filtering,Web-Basic-Auth,Web-Url-Auth,Web-Windows-Auth,Web-App-Dev,Web-Net-Ext45,Web-Asp-Net45,Web-ISAPI-Ext,Web-ISAPI-Filter,Web-Ftp-Server,Web-Mgmt-Tools,Web-Mgmt-Console,Web-Mgmt-Compat,Web-Scripting-Tools,NET-Framework-Features,NET-Framework-Core,NET-Framework-45-Features,NET-Framework-45-Core,NET-Framework-45-ASPNET,NET-WCF-Services45,NET-WCF-HTTP-Activation45,NET-WCF-TCP-PortSharing45,ManagementOdata,FS-SMB1,PowerShellRoot,PowerShell,PowerShell-V2,PowerShell-ISE,WAS,WAS-Process-Model,WAS-Config-APIs,WoW64-Support
You also need to download and install WCF Data Services 5.0 (OData v3) (https://www.microsoft.com/en-us/download/details.aspx?id=29306) and ASP.NET MVC 4 (https://www.microsoft.com/en-us/download/details.aspx?id=30683)
The rest of the setup steps are same as the SPF 2012 R2.
Configure WAP Admin Portal
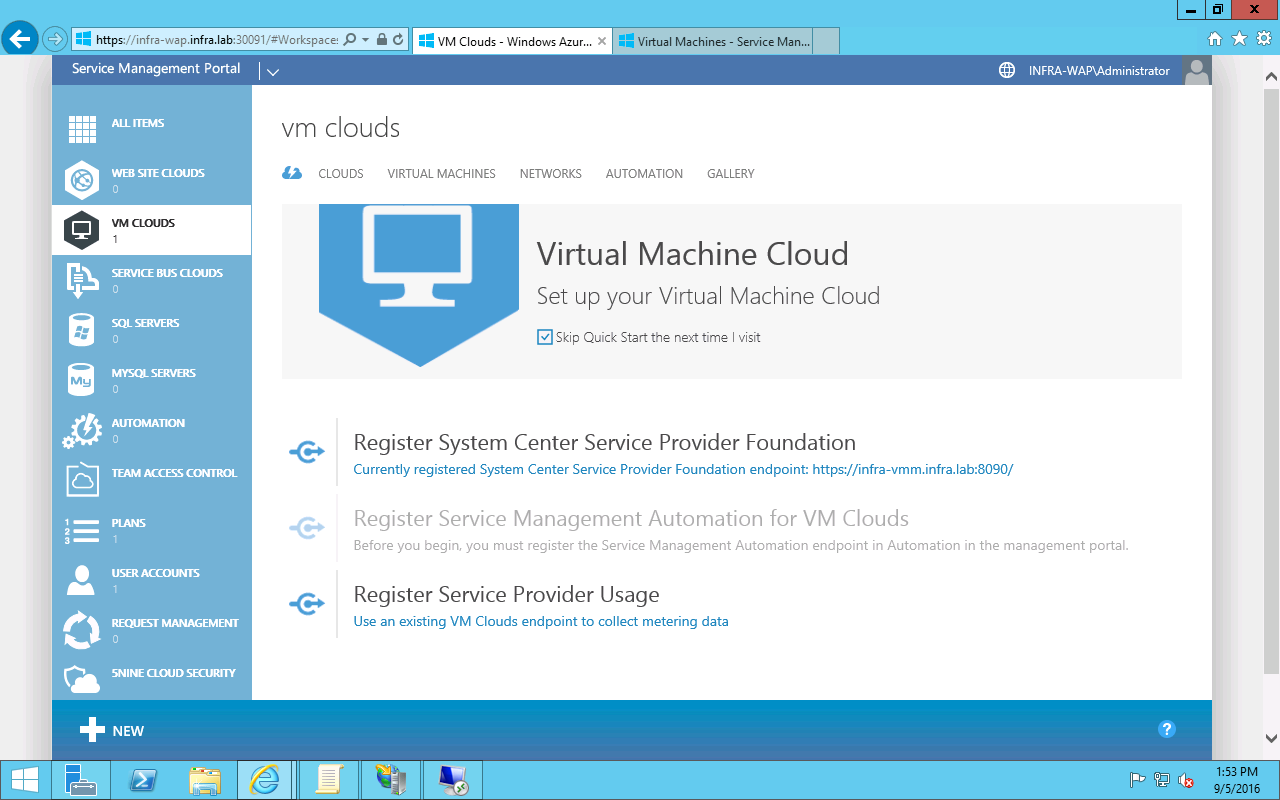
- On t he WAP Admin portal, clikc VM CLoud and click "Register System Center Service Provider Foundation" on the first page.

- Input the service URL of your SPF server. In my case, it's https://infra-vmm.infra.lab:8090. Also input the username and password which has the permission to access SPF.

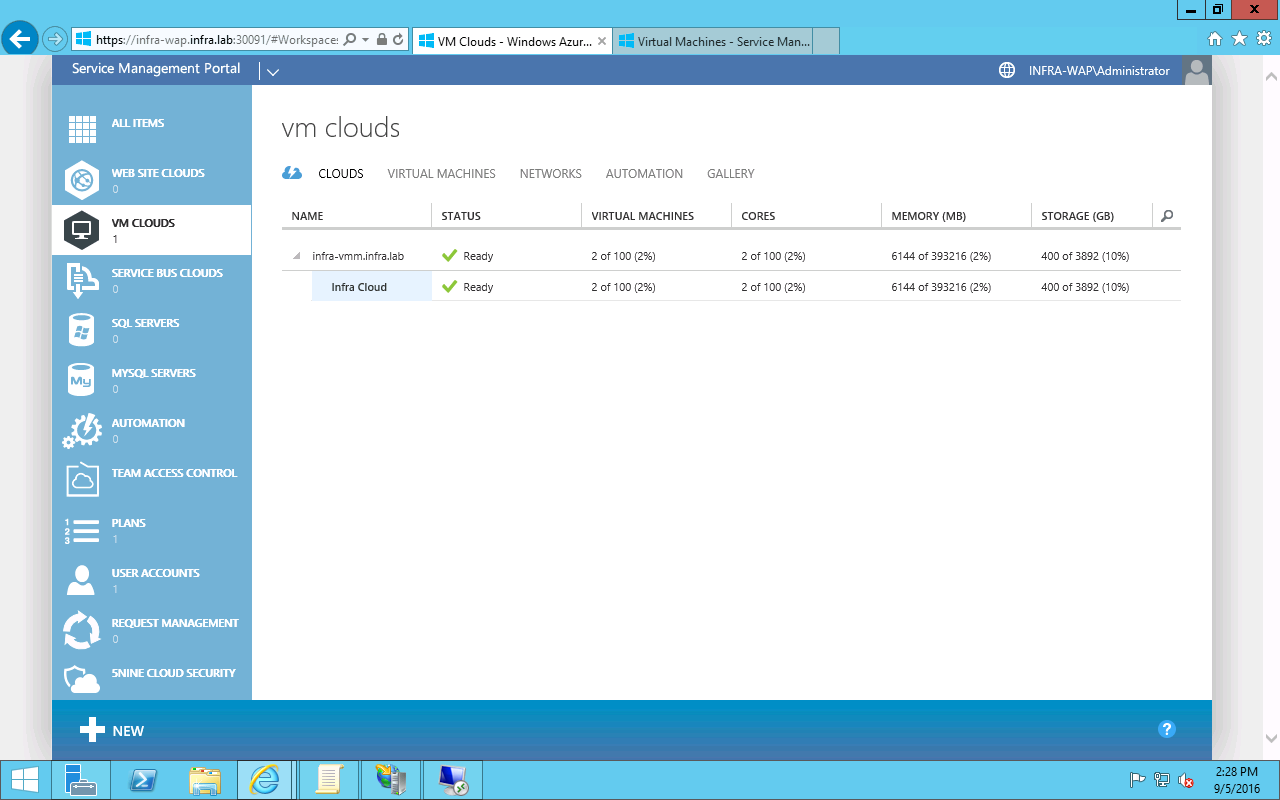
- Then add the existing VMM server. In my case, it's infra-vmm.infra.lab.

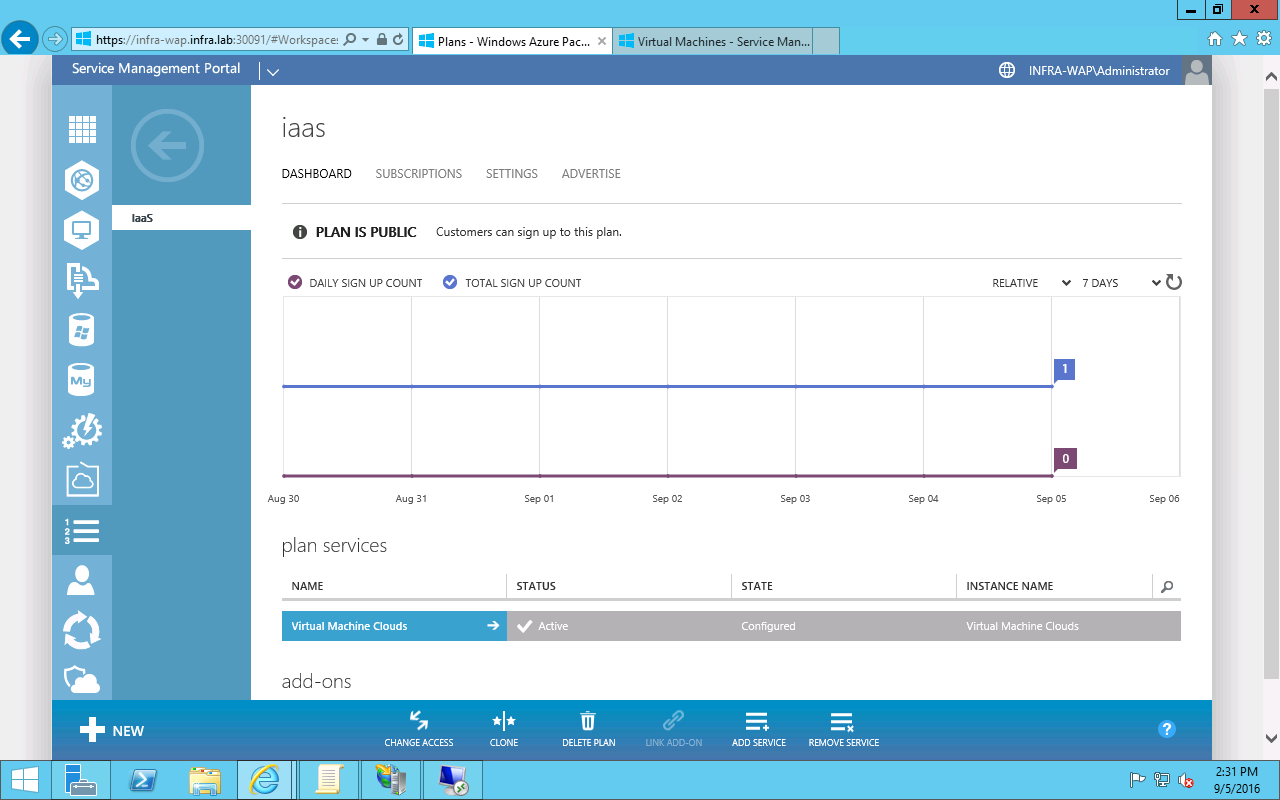
- Then you can add/configure a Plan to add plan service "Virtual Machine Clouds". (In my setup, the plan is "IaaS".)

- You may configure the plan service and use the existing VMM server and Virtual Machine Cloud configured in VMM console. The rest of the configuration is same as the previous WAP VM Cloud configuration.

Validate from Tenant Portal
NC based VM network creation and management
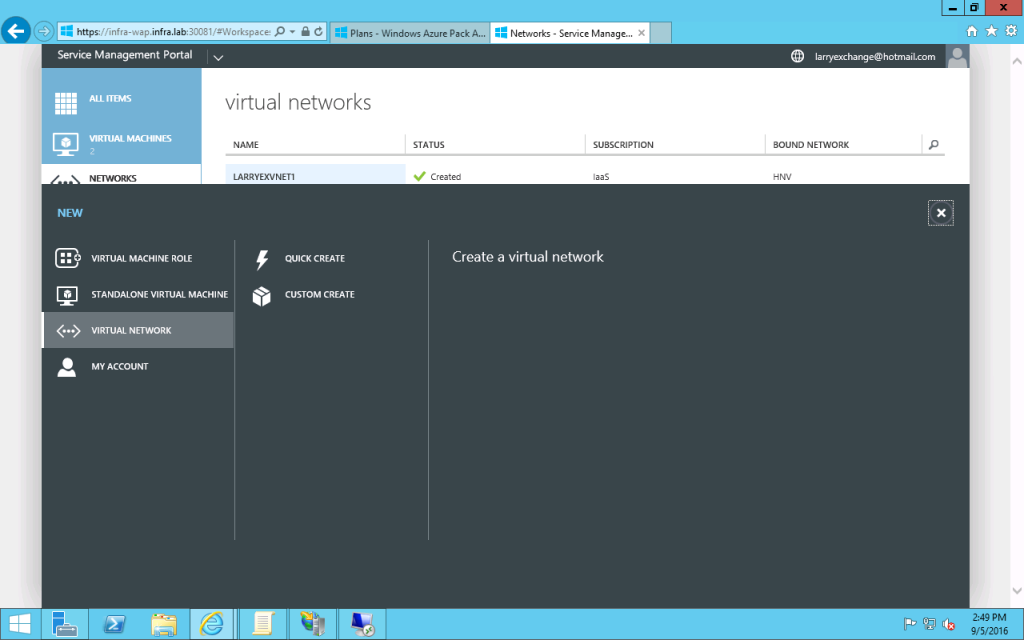
- Create a Virtual Network > Custom Create.
- Then give it a name and click Next.
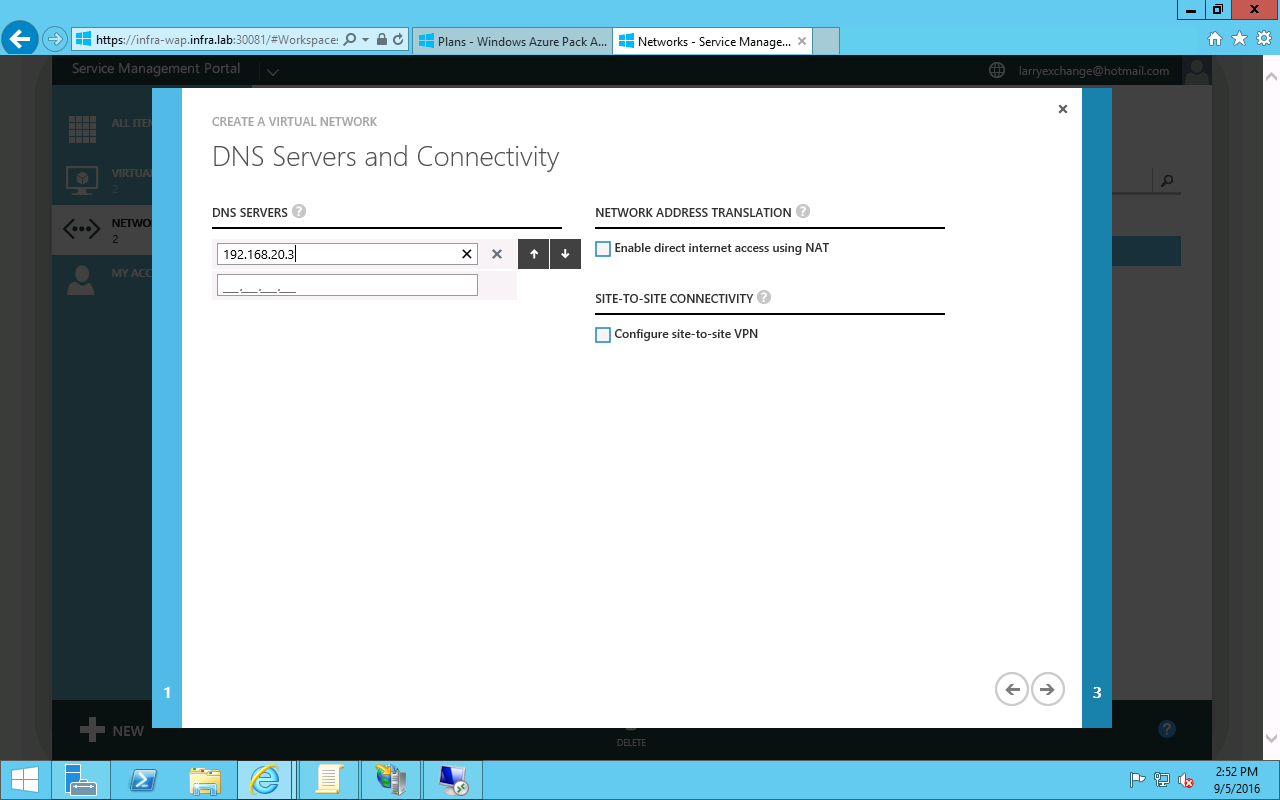
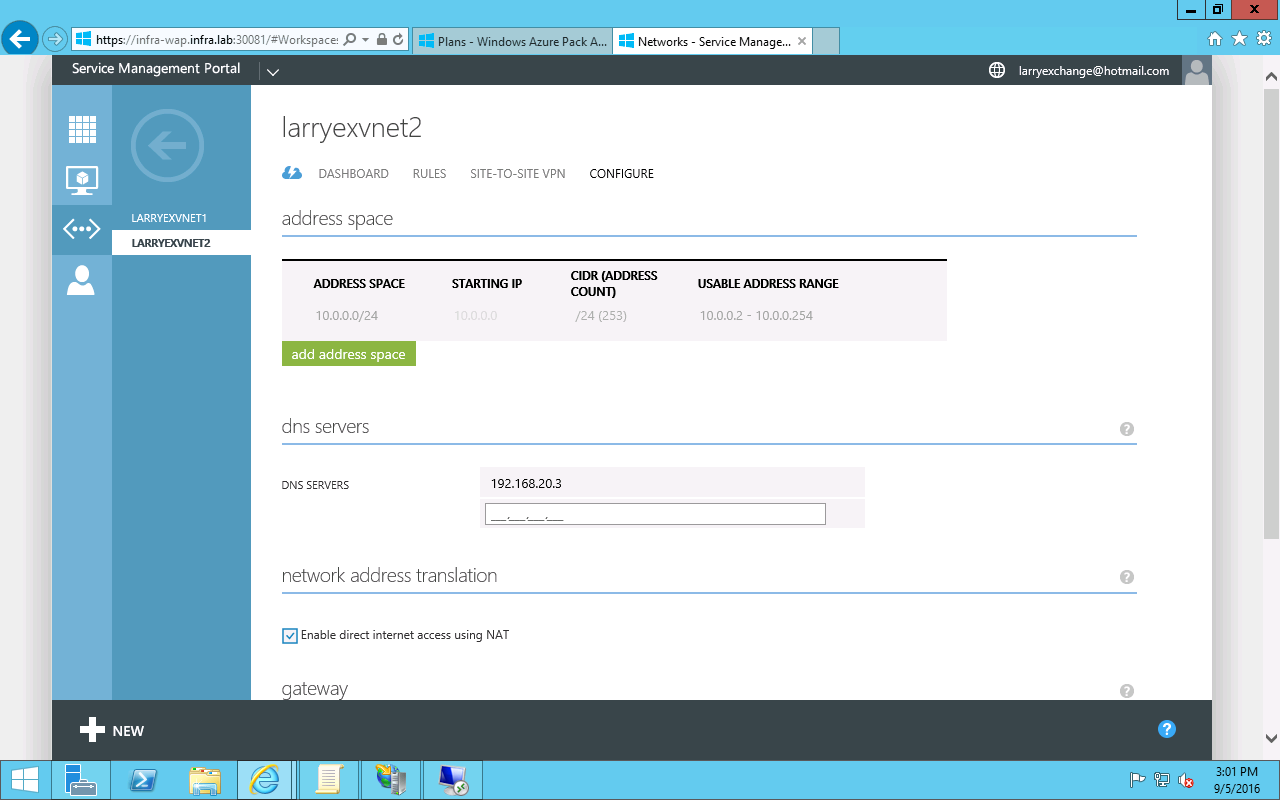
- Configure its DNS server (in my setup, the DNS server is 192.168.20.3). And click Next.

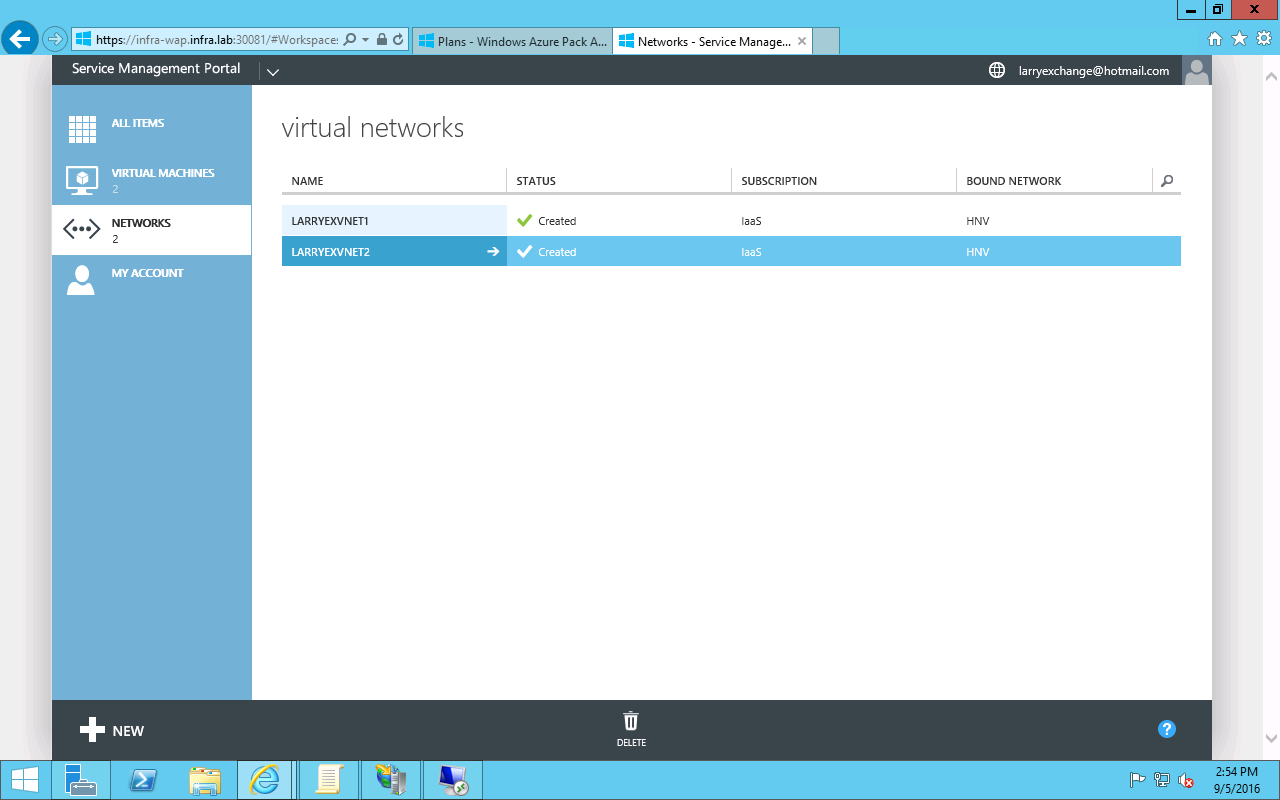
- Accept the default address space, which is 10.0.0.0/24. Click OK. Now you will see the Virtual Network Created successfully.

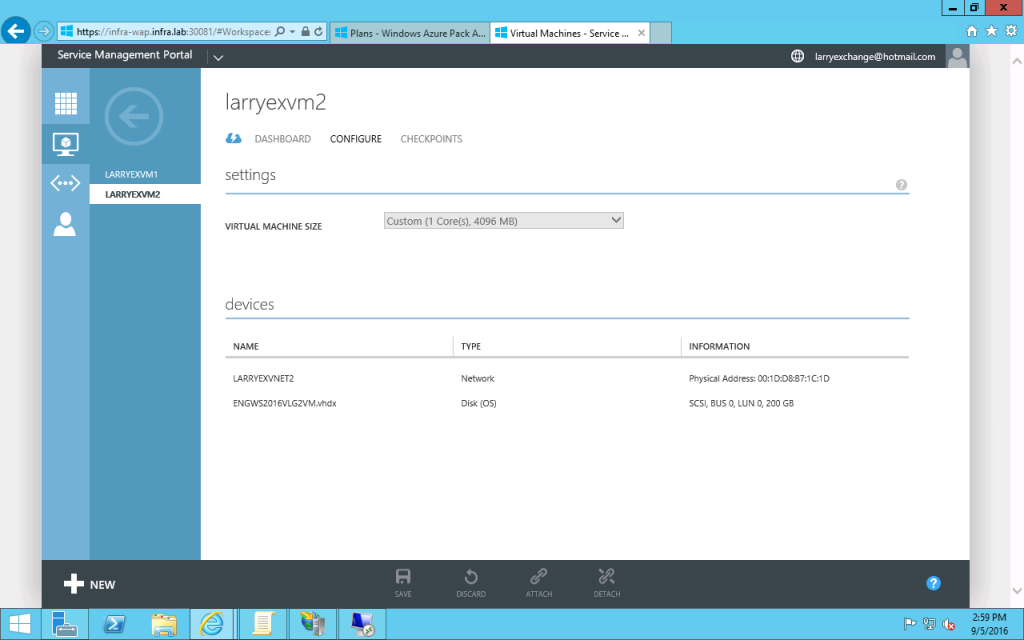
- Then you may create a new VM to use above new create virtual network.


Outbound NAT
- Click the new created Virtual Network and select the "CONFIGURE" page. Select the checkbox "Enable direct internet access using NAT".

- You may login your new created VM in the above virtual network and check if it could access external network

Inbound NAT
- Click the new created Virtual Network and select the "RULES" page. Add a new rule as below and click OK.
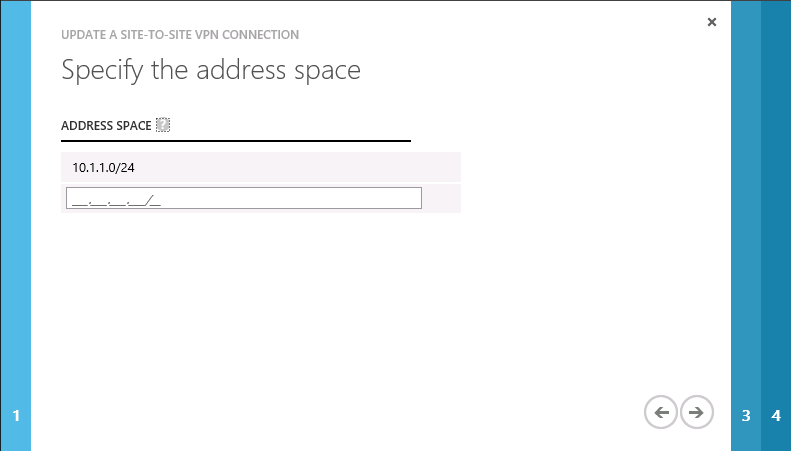
S2S IPSec Gateway connectivity
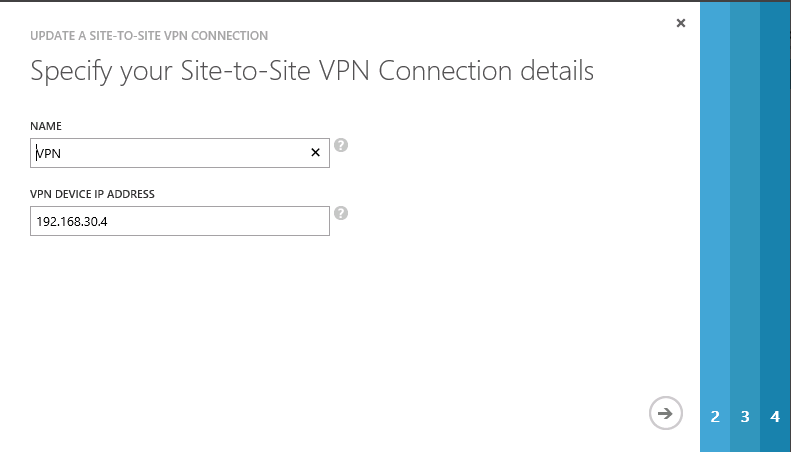
- Click the new created Virtual Network and select "SITE-TO-SITE VPN" page and click "CREATE VPN".
- Give it a name and input the remote VPN device's IP address.
- Specify the address space of remote site.
- Set the key same as the one you used to configure the remote VPN device.
- Accept the default value on other pages including using the default "Unlimited" VPN incoming and outgoing bandwidth setting.
- Click OK to finish the wizard.
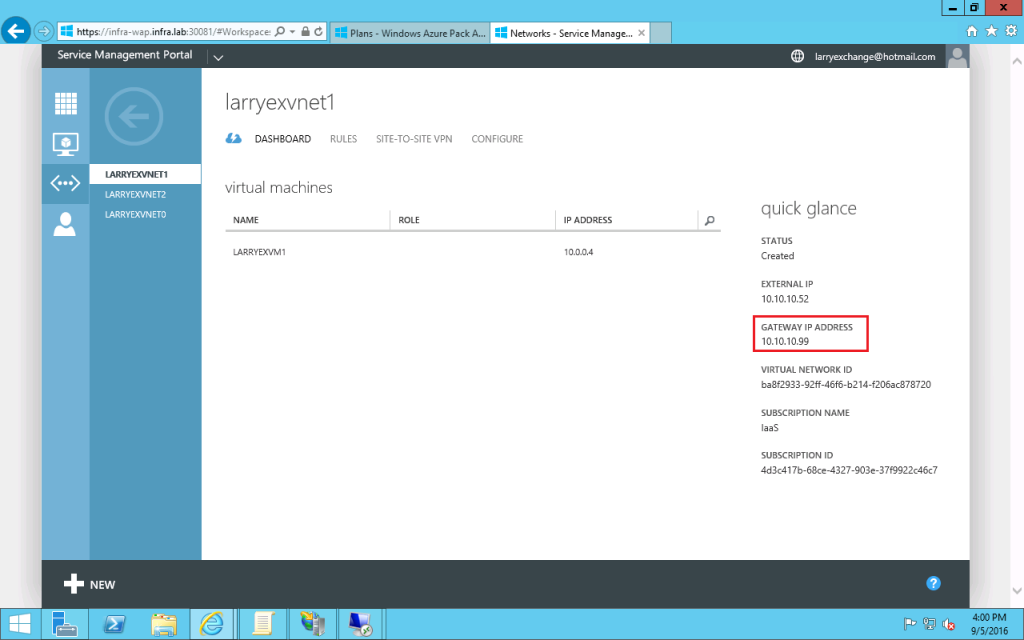
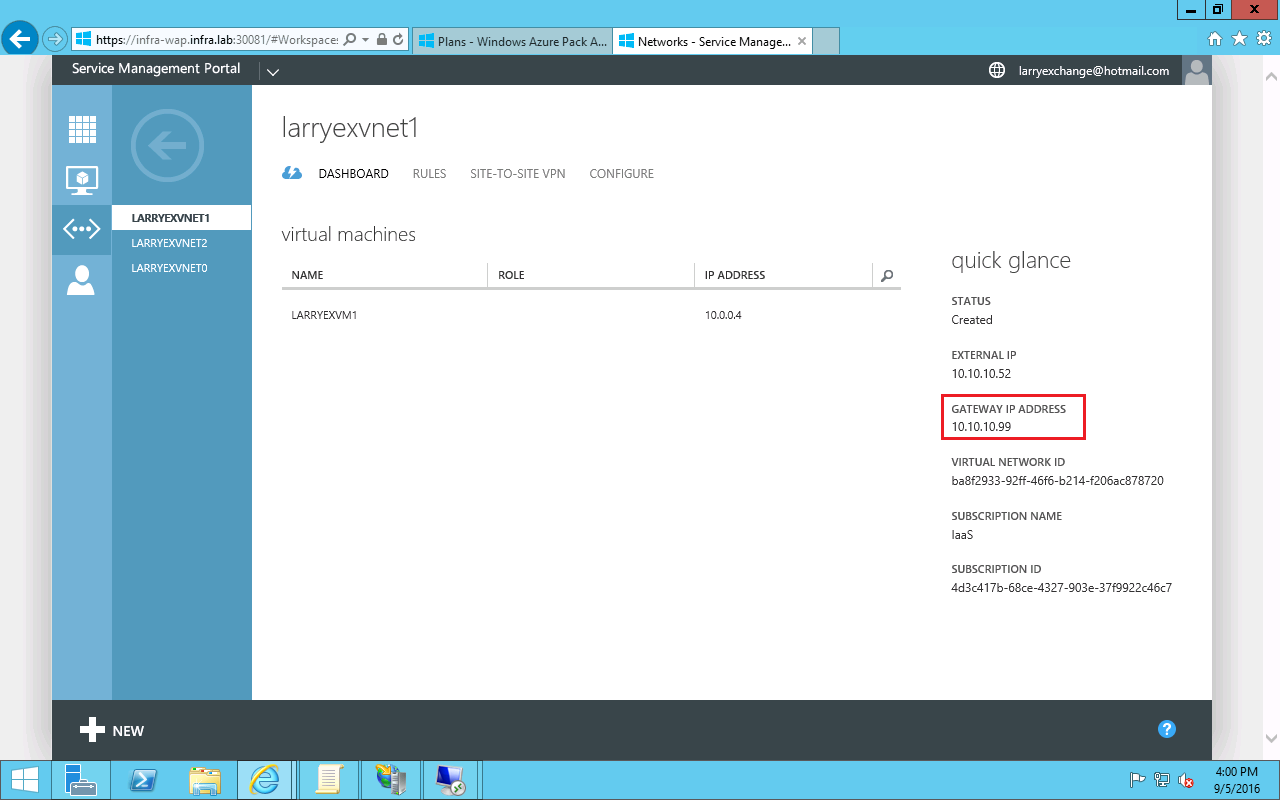
- On the dashboard of the virtual network, you may find the Gateway IP address.
- You may follow the steps in the following post to configure the remote VPN device.
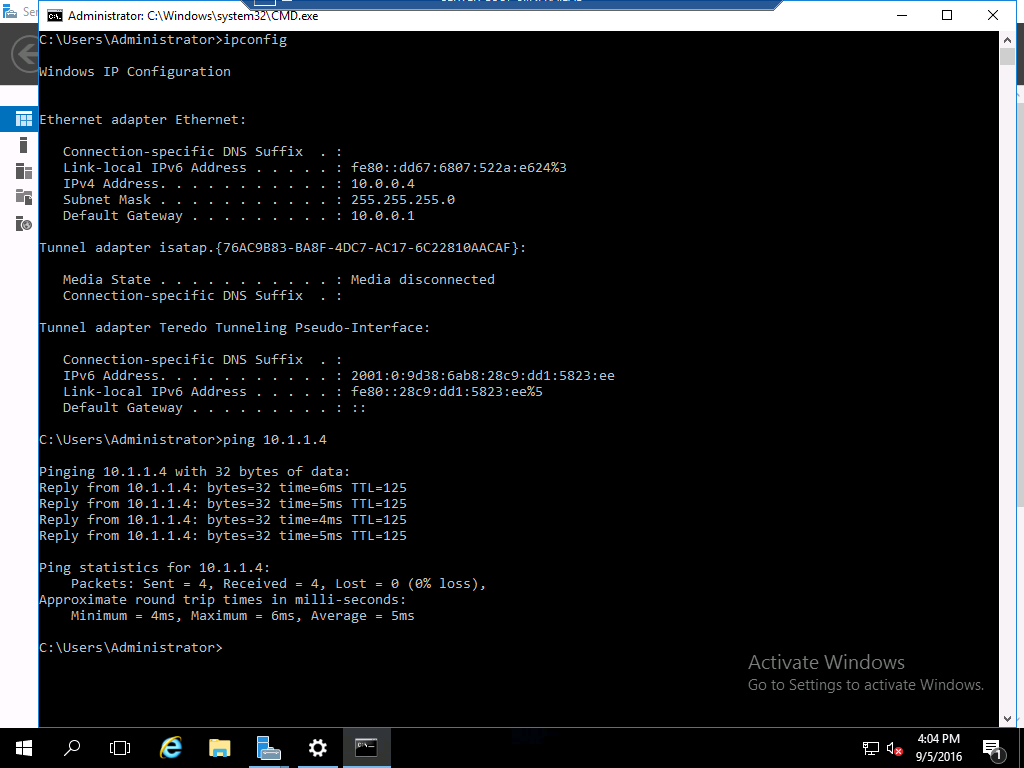
https://blogs.technet.microsoft.com/larryexchange/2016/06/01/step-by-step-for-deploying-a-sdnv2-using-vmm-part-4/ - You may connect to VM in the above virtual network and verify the S2S IPSec connection.

Other SDN functionalities
Network Security Group (NSG a.k.a., Distributed Firewall)
NSG is available as PortACLs in VMM. It is available through powershell not via console. If you want to configure it, please refer to the link below.
https://technet.microsoft.com/system-center-docs/vmm/Manage/Configure-Hyper-V-extended-port-ACLs-with-System-Center-VMM-2016-Technical-Preview
Software Load Balancer (SLB)
SNAT works fine with WAP but SLB inbound rule is not included in UR10.