Windows 10 Information Protection / Intune Quick Setup Guide
Well, first of all…what is WIP? You can read all about it here.
In short, WIP is a great security feature in the latest builds (Windows 10 Anniversary build and greater) of Windows 10 that allows companies to ‘containerize’ applications to ensure the integrity of corporate data.
Let’s get into the basic setup with Microsoft Intune.
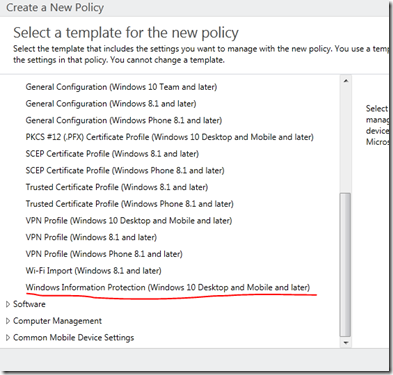
Log into the Intune admin console and proceed to POLICY –> ADD and expand the WINDOWS section to find the WIP policy.
Now, this is an important part and it’s required. So, not having the certificate will mean that your WIP policy will not work at all. I highly recommend that you do this first before setting any of the other policy options.
Here’s a bit of documentation on what you need to do to configure this properly:
In the required Upload a Data Recovery Agent (DRA) certificate to allow recovery of encrypted data box, click Browse to add a data recovery certificate for your policy.
After you create and deploy your WIP policy to your employees, Windows will begin to encrypt your corporate data on the employees’ local device drive. If somehow the employees’ local encryption keys get lost or revoked, the encrypted data can become unrecoverable. To help avoid this possibility, the DRA certificate lets Windows use an included public key to encrypt the local data, while you maintain the private key that can unencrypt the data.
For more info about how to find and export your data recovery certificate, see the Data Recovery and Encrypting File System (EFS) topic. For more info about creating and verifying your EFS DRA certificate, see the Create and verify an Encrypting File System (EFS) Data Recovery Agent (DRA) certificate .
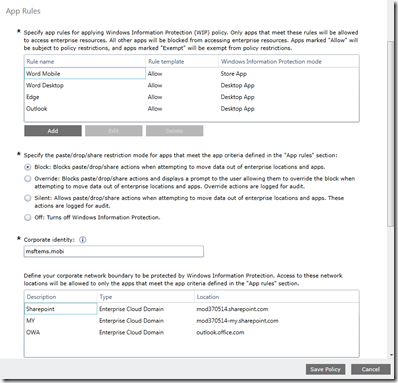
Next, you’ll want to start creating your app rules, I’ll give you some examples on how to deal with the formatting shortly, but when you are done your setup should look something like this. Keep in mind you can configure both desktop applications (think products in the Office 2016 suite, notepad.exe, etc…) and Microsoft Store applications.
Here’s how to create a policy. I’ll share the link here and it will point you to the platform you want to use (we’re just showing Intune in this blog post). The blog article there is very detailed and shows you the various ways to get the proper ID values for apps so you can tag them for protection.
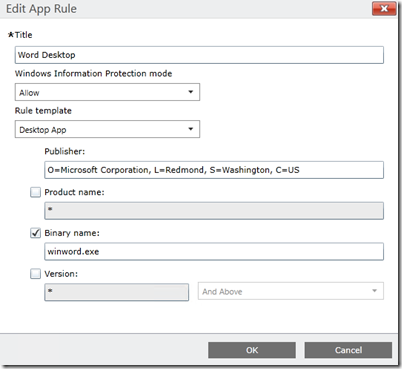
As an example, the app rule for the Microsoft Word desktop application looks like this:
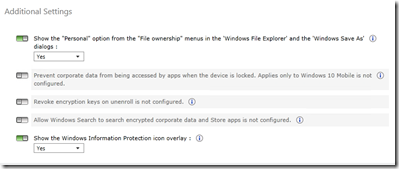
Finally, you have a few additional options that you can choose from.
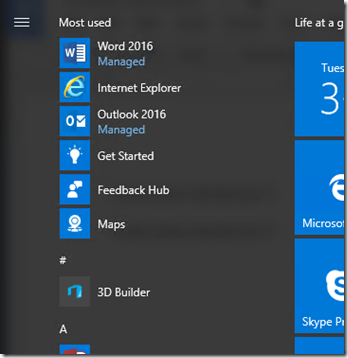
Now, how does this look once the policy makes it down to the device?
If you want a live demo of how this looks – you can head over to a YouTube video I recorded to check it out. This link will take you directly to the part of the video where the demo starts playing. https://youtu.be/nLcudXxBi_E?t=411
As you can see, the Word and Outlook applications are now ‘managed’.
IE is also managed – but only when I go to the websites definied in the policy. When I hit OWA as an example, this is what you’ll see in the browser.
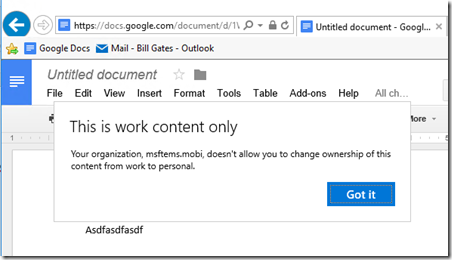
And finally, copy/paste actions per my policy are blocked. So when I try to copy from Word over to Google Docs as an example, I’m blocked with either a right-click paste or a CTRL-V.
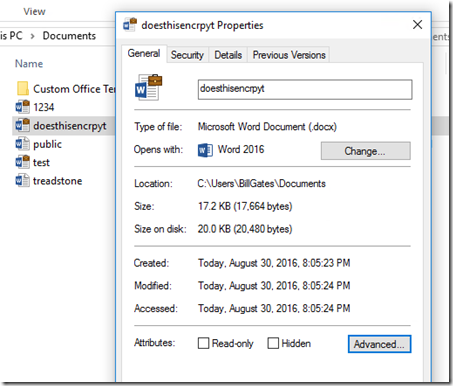
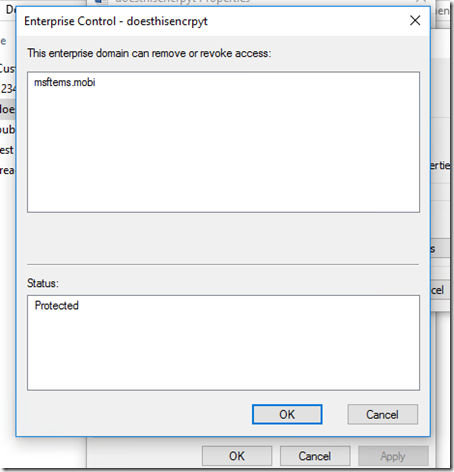
Now, when you save documents to your local disk you’ll see they’ve been encrypted.
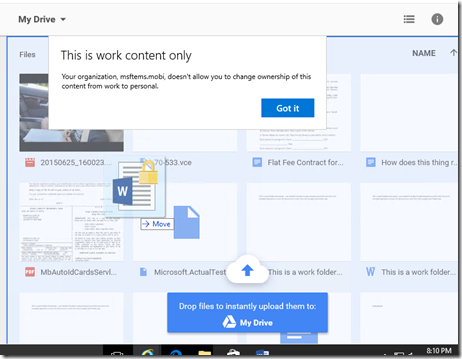
Finally, lets try to drag this encrypted doc over to Google Drive and see what happens?
Pretty cool stuff. Enjoy!
