Fun With SCOM 2012 Dashboards…SharePoint & Visio Included…
I’ve been busy building out various demo scenario’s in my lab and after getting SCOM 2012 humming along, I decided to get to work on some of the cool new dashboard features.
First things first…
PART 1: INSTALLATION AND PRE-REQ’S
What all do we need.
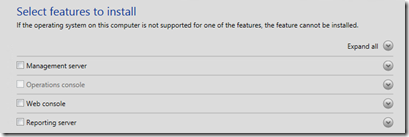
- SCOM 2012 (duh!) – make sure you have the web console piece installed. You can install it on the same server as the SCOM management server, especially if this is a lab configuration.
- SCOM 2012 ISO or DVD – you’ll need some files from here to get the OpsMgr SharePoint web parts up and running
- Visio 2010
- Visio & SharePoint 2010 Extensions for System Center 2012
- Windows 2008 & .NET Framework SDK (you’ll need this for a utility to install the Visio trusted add-in into SharePoint – you may already have the files you need…more later…)
So, obviously we need SCOM 2012 running somewhere, that’s a given.
The next thing is to get SharePoint installed. I opted for SharePoint 2010 Enterprise edition. We won’t go through the SharePoint install here, but once you get it running, you’ll need to do a few things to get the OpsMgr web parts installed. The full details can be found here, but I’ll copy in the important part. https://technet.microsoft.com/en-us/library/hh212924.aspx
You want to go ahead and install just the SCOM console on to your SharePoint server. This is only if you want to do the Visio integration. You’ll need the SCOM console installed so that the Visio web drawings that we store in SharePoint can connect to the SCOM RMS server for real-time updates. If you don’t want to do that part, then no need to install the console.
To deploy the Operations Manager web part
Copy the install-OperationsManager-DashboardViewer.ps1 file from the Operations Manager installation folder under Setup\amd64\SharePoint to a location that the SharePoint 2010 Management Shell can access.
Open the SharePoint 2010 Management Shell and navigate to the directory where you saved the install-OperationsManager-DashboardViewer.ps1 file.
In the SharePoint 2010 Management Shell, type the following command, and then press Enter.
.\install-OperationsManager-DashboardViewer.ps1 –solutionPath <directory for Microsoft.EnterpriseManagement.SharePointIntegration.wsp> -url <optional, for installing to a specific portal address or website>
Example that deploys the web part to a specific portal address:
.\install-OperationsManager-DashboardViewer.ps1 “C:\Program Files\System Center Operations Manager 2012\” https://localhost:4096
If an error occurs when you run the script, you must disable the RemoteSigned default code-signing execution policy for the SharePoint 2010 Management Shell. To allow the install-OperationsManager-DashboardViewer.ps1 script to run, type the following command, and then press enter:
Set-ExecutionPolicy Unrestricted
You will see some confirmation messages, select Y to confirm, and then run the script.
Verify that the web part is deployed and activated by performing the following steps:
- Open the site https://localhost.
- In the Site Actions dropdown menu, click Site Settings.
- In the Site Collection Administration section, click Site collection features.
- Locate Operations Manager Dashboard Web Part.
- If the button to the right says Activate, then the feature was not automatically activated during deployment. To activate the web part, click the Activate button.
- If the button to the right says Deactivate, no steps are required. The Operations Manager Dashboard web part can now be inserted into site pages.
If you disabled the RemoteSigned default code-signing execution policy to run the install-OperationsManager-DashboardViewer.ps1 script, you should re-enable it after the script runs. Type the following command and then press enter:
Set-ExecutionPolicy Restricted
You will see some confirmation messages, select Y to confirm.
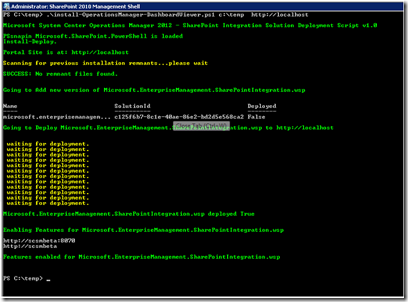
Your output will look something like this:
While we’re dinking around on the SharePoint server, we might as well go ahead and get the Visio integration going as well. Once these are done, you’re pretty much good as most of the creating dashboards and SCOM web consoles are already configured as a part of the SCOM management server installation.
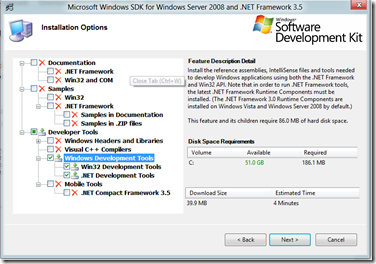
In the pre-req’s at the beginning of this document I recommended downloading the .NET Framework SDK components. I did that only because I didn’t happen to have Visual Studio installed anywhere in my demo environment and you’ll need a file called gacutil.exe to get the Visio SharePoint components installed.
The setup will want to install a massive amount of stuff – like gig’s worth. You don’t need the whole thing installed if you are just trying to get gacutil.exe like I was. Here’s the options I chose and I got the file installed I needed.
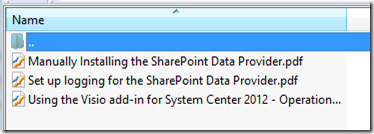
The next part (configuring the Visio integration) is also pretty straightforward. It’s tedious, but I didn’t have any issues walking through setup guides that come with the Visio/SharePoint Add-In that you have already downloaded. These are the 3 files you’ll find in the zip file you’ll download. There are two other folders in this download – the client add-in (install wherever you are running Visio) and the server piece which doesn’t really install anything – it extracts the files you’ll need to manipulate into a folder on your SharePoint server. Just follow the directions to get the add-in installed on the client (after Visio is installed of course) and then extract the server side files on the SharePoint server and do what the “Manually Installing the SharePoint Data Provider” file tells you to do.
Once all of that is done, you should be able to see the Operations Manager Add-in in Visio:
You should be able to see the Operations Manager Web Part in SharePoint:
And, when you save a Visio Web Diagram formatted file to a SharePoint document library, it should connect and render real-time data to the Visio diagram. But, more on that later…
PART 2: SETTING UP DASHBOARDS IN SCOM
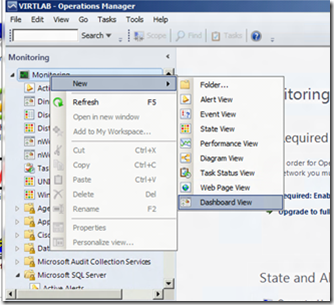
First of all, creating new dashboards couldn’t be any easier. Right-click in the SCOM console on “Monitoring”, select new –> dashboard view and off you go.
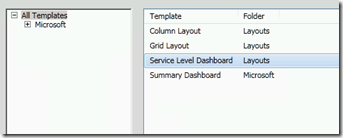
First, I decided to create one for the Veeam nWorks VMware management pack. I decided to use the SLA template.
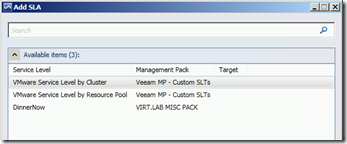
After you name your dashboard, you’ll be asked to pick from any existing SLA’s you’ve created.
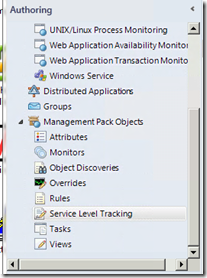
If you don’t have one – you can create one by going to Authoring –> Management Pack Objects. Creating a SLA is pretty straightforward – it can be trial and error picking the objects and such that you want to monitor, but the good news is – feedback is immediate and the SLA’s are easy to edit and make changes.
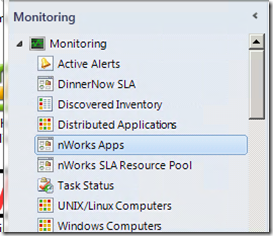
Once you have the SLA dashboard created you’ll see it show up in the SCOM console.
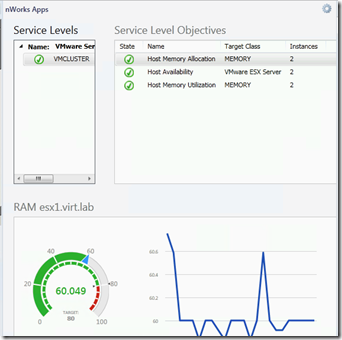
Detail view looks like this:
So, the next part was…how do I get this into SharePoint? Since we’ve already done all the heavy lifting in Part 1, we should be able to connect up to SharePoint, add a new web part to a page and then insert the web console URL for the dashboard view right into the web part. It’s easy.
First, go to your SCOM web console and get the URL of the dashboard you want to publish. You would use https://YourScomServer/operationsmanager to connect to the web console. Click on the dashboard you want to publish and copy the full URL you see in the browser bar:
It will look something like this:
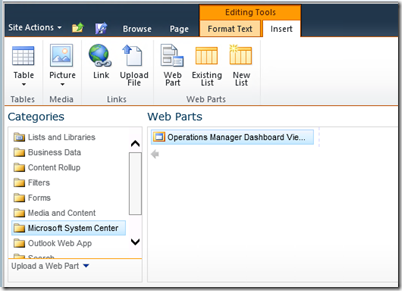
Now, add the Operations Manager Dashboard View Web Part to your page:
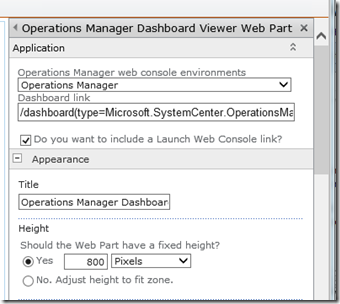
You will have to edit the web part after you add it. Basically, you need to paste that URL you just copied from the console into the appropriate field. Of course, you can change the title or any other parameters in here as well, if you see fit.
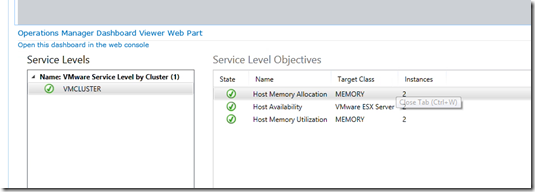
Once you OK the changes here, you should see your web part show up on the SharePoint page:
PART 3: FUN WITH VISIO
Finally, we’ll get to some fun Visio integration. We’ve already got Visio installed, the SCOM Add-in on the client, we’ve got the SCOM console (not the web console – just the console) installed on the SharePoint server and we’ve configured the SharePoint server so that it can communicate properly with the SCOM RMS server. We should be good to go.
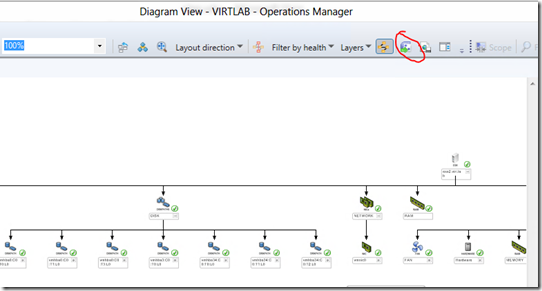
The easiest way to start messing with this is to open up a diagram view of something in SCOM. I picked a few components from my vSphere environment I have running in my lab. Once you get the diagram set the way you want it to appear in Visio, click the Visio icon on the toolbar to export that view into Visio.
Once you get this into Visio, you can totally customize this thing however you want to see it. You can add new stuff to monitor, change the formatting…whatever. Now, important here – when you save this file out of Visio…make sure you choose the VISIO WEB DRAWING option. If you’re going to host this in SharePoint and want to see live data, you’ll need to do this (and this is what we went through all that work on the SharePoint server for…).
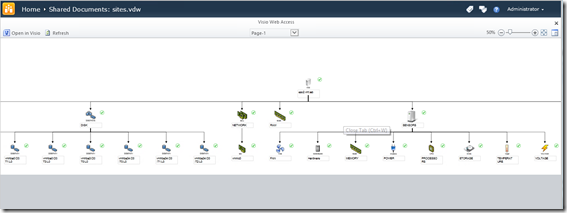
Now, you can simply stick that web drawing into a document library in SharePoint. When you connect to the SharePoint site and click on it – you’ll see it ‘connecting’ to the SCOM RMS server for the latest data. Pretty cool:
Click on that to get this:
Now, what’s really cool here is…you can click through each of the objects to get more details in the SCOM monitoring view. It will take you directly to the SCOM web console where you can dig into that particular component.
Pretty dang cool!
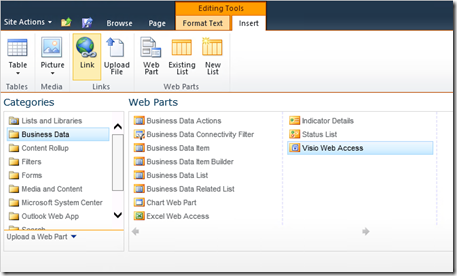
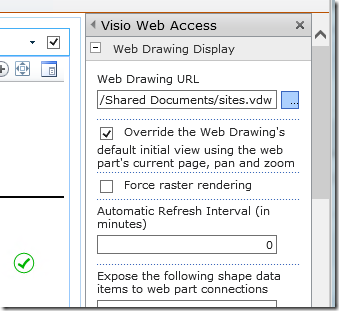
Of course, the last option here is to simply make this Visio web drawing a web part. That’s easy to do as well. Open the page where you want the web part to go, insert a web part, choose the Visio Web Access web part:
When you edit the web part, it just wants the location of the web drawing we uploaded to the SharePoint site:
Off you go!
This is one of the most improved upon and compelling features of SCOM 2012 – I hope you enjoy it!
-Ken
