Integrating VMM 2012 and OpsMgr 2012
If you want to monitor your System Center Virtual Machine Manager installation, you don't just import VMM management packs like you would for other applications. There is a process to connect VMM 2012 to OpsMgr 2012.
This is covered here: https://technet.microsoft.com/en-us/library/hh427287.aspx
The primary reasons to integrate are to use the process to import the VMM management packs so that SCOM can monitor the VMM server and guests from a virtualization health perspective. Additionally, you can enable PRO (resource optimization) where SCOM can provide advanced optimizations in VMM beyond the basic resource management provided out of the box in VMM. You can also enable the ability to integrate Maintenance mode in OpsMgr with actions in VMM.
Let’s get started.
This assumes you have installed and set up OpsMgr 2012 and VMM 2012. If not, here are some handy blogs to get those deployed quickly:
Following along at: https://technet.microsoft.com/en-us/library/hh882396.aspx we have some pre-reqs to cover:
PowerShell 2.0 should be on all servers as they should be Server 2008 R2 SP1 or later.
Install the OpsMgr Console on the SCVMM server. This is needed for the SDK binaries for SCOM connections
Ensure you have the IIS and SQL MP’s in place in SCOM, as SCVMM MP’s have dependencies.
Next, we need to open the VMM console – Settings > System Center Settings > Operations Manager Server. Right click and choose properties.
Enter in one of your management server names to provide the SDK connection to VMM. Next – we will need two accounts. One for SCVMM to connect to SCOM, and one for SCOM to connect to SCVMM.
When SCVMM connects to SCOM – it will need to have SCOM admin rights. It needs this to be able to manage the MP import process, manage maintenance mode, create product connectors, etc. The simplest path is to take the existing SCVMM service account, and make that a SCOM admin by placing it in the SCOM admins global group. Alternatively – you can create a special “run as” account for this purpose, assign it SCOM admin rights, and use a specific dedicated account that is locked down for this purpose, to limit the number of people with access to this credential. I will generally just use the SCVMM service account for simplicity.
When SCOM connects to SCVMM, likewise it will need to have the Administrator role in SCVMM. So we will need another account for this purpose, or we can use the SCVMM service account, or any other SCVMM administrative account. I will generally also use the existing SCVMM service account for this purpose, as it should already be granted SCVMM admin rights.
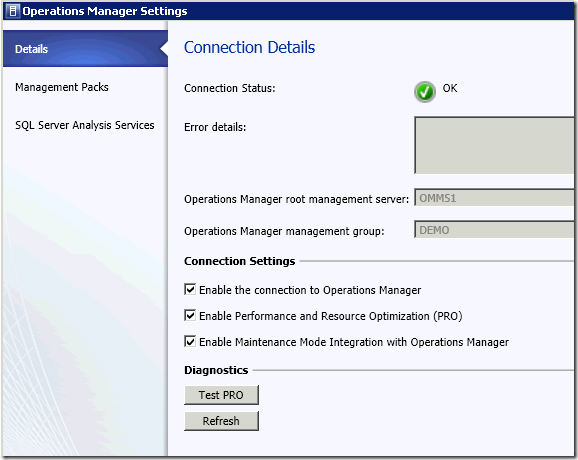
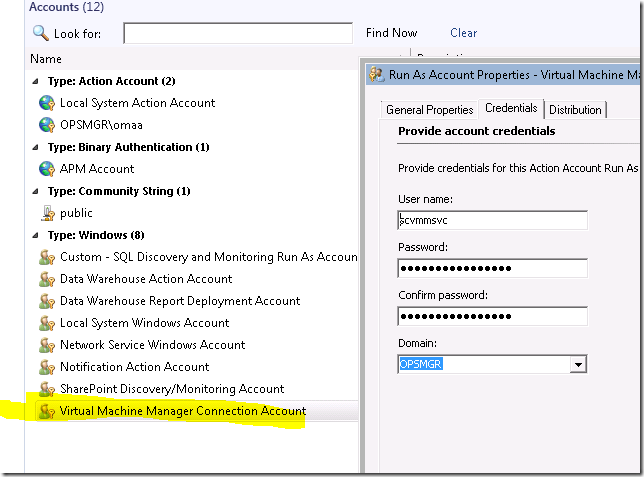
Going through the wizard – we will use the existing service account, and enable PRO, and Maintenance mode. Then we will input the account for SCOM>SCVMM. This will create a run-as account in SCOM behind the scenes. Click Finish, and away we go. What is happening in the background, is that we are creating product connectors, run-as accounts, and importing the management packs. If you get an access denied at this point, make sure the person running the configuration is a SCVMM admin, SCOM admin, and that the credentials we entered previous have the necessary rights. If you just recently added an account to a global group – it might take a reboot of the SCVMM or SCOM server to ensure the service accounts pick up that new token of group membership. This process will use considerable resources on your SCOM management server and database server while it is creating the resources in OpsMgr.
When you are complete – you can go back in and see your configuration by right clicking Operations Manager Server and choose Properties:
In OpsMgr – you will see a new Run As account:
And profile:
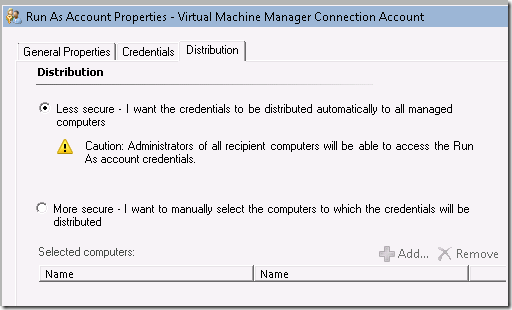
The one thing I don't like – is that this Run As account is set to “less secure”
***Note: It is my opinion that this account should not be set to “less secure” which will distribute the credential to all healthservices in the management group. I will research if we can limit the scope and distribution. Less Secure is not a good option for most customers and I am not sure why the product chose this for a default. This will cause a large number of alerts to be sent from all your SCOM agents, where this credential cannot “Log on locally”. Generally, your SCVMM service account does not need, nor will it have, “Log on Locally” rights to all managed agents. If you see a ton of those alerts after configuring SCVMM integration – this is why.
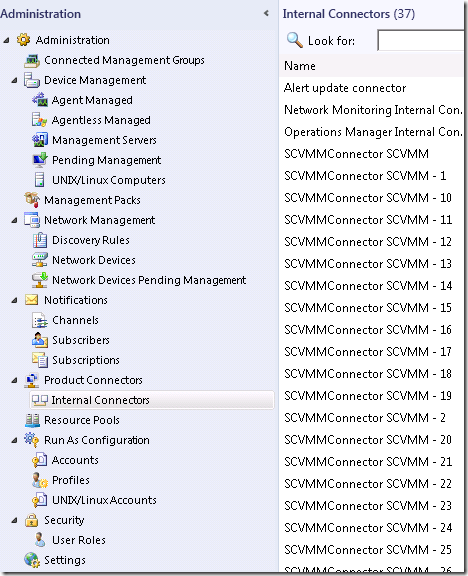
We will also see many product connectors configured in SCOM.
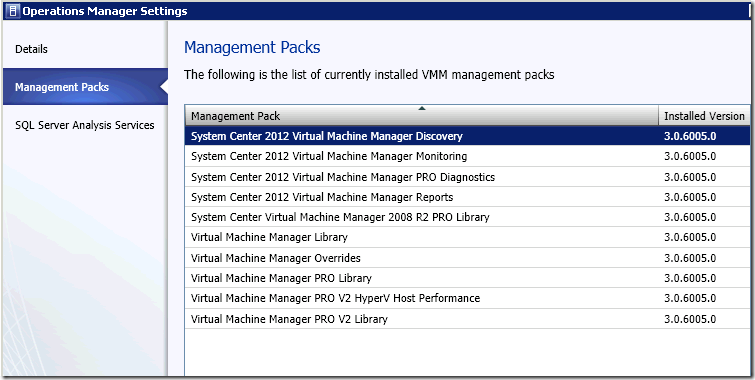
Next step – we need to update the SCVMM MP’s to the current version – quickly. The SCVMM MP’s version 3.0.6005.0 that shipped with RTM have many issues and need to be updated for a number of fixes. At the time of this writing – the current version is 3.0.6019.0 available at: https://www.microsoft.com/en-us/download/details.aspx?id=29679 This update is part of UR1 for System Center, which is detailed at: https://support.microsoft.com/kb/2686249
Following the MP guide – we do NOT just import these downloaded MP’s. We first must ensure VMM is integrated with OpsMgr (what we just accomplished above) and then we need to update some items on the VMM server. From https://technet.microsoft.com/en-us/library/hh882396.aspx we need to open the registry on the SCVMM server, and find the following key:
HKEY_LOCAL_MACHINE/SOFTWARE/Microsoft/Microsoft System Center Virtual Machine Manager Server/Setup
Edit the string value for “CompatibleMPVersion” from 3.0.6005.0 to 3.0.6019.0. Then bounce the SCVMM service.
On the VMM management server, open the management packs directory. By default, the location is C:\Program Files\Microsoft System Center 2012\Virtual Machine Manager\ManagementPacks. Make a backup copy of these files in a different location so you have them. Then copy over the extracted MP files from the MP update MSI you downloaded and installed.
At this step – we have two choices on how to continue. The TechNet documentation has us manage the MP import by removing the OpsMgr integration, and reconfiguring it to handle the MP import. However, the MP guide has different instructions – it tells us to simply import the new management packs manually using the SCOM console. So – your choice. For my example – I am going to remove and re-configure the integration, and let SCVMM handle the MP import.
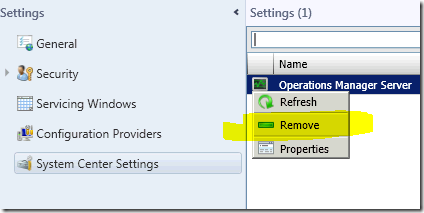
So – we must remove the integration we previously created. In the SCVMM console – right click Operations Manager Server and choose Remove.
Confirm the operation and wait a bit for it to complete. This leaves the MP’s behind and the run-as accounts, however it does delete the Product connectors for SCVMM.
Then – click Properties and the configuration wizard should start. Input the same info that we configured previously for the accounts. Click finish. Behind the scenes it is re-creating the SCVMM product connectors, and updating all the management packs.
At this point, your SCVMM integration is up to date. Technically, you could have updated the management packs FIRST – before handling the initial integration, however I wanted to walk through the MP update process for future updates.
At this point – you can go into SCOM, and close any alerts with the following names, if they don't auto-close on their own:
-
- Host has exceeded the supported maximum number of running VMs
- VGS not installed
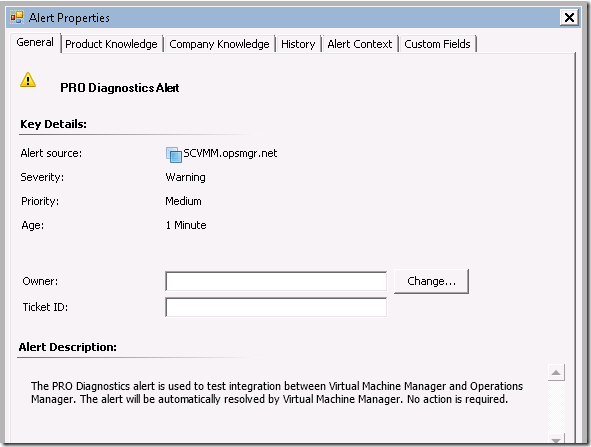
To test integration – open the SCVMM properties of the OpsMgr connection – and click Test PRO. You should see a test alert pop up in SCVMM, and a test alert in SCOM:
