Protecting Data That (Shouldn’t Be but) Is Leaving Your Network in the Clear
The Scenario:
You have just received a message from Microsoft that Azure Information Protection and Office 365 Message Encryption has been enabled in your tenant. So what, right? Well, I will tell you why this is an amazing thing! Every year millions of dollars are lost due to identity theft and companies are held liable for mistakes their employees make that result in the disclosure of customer data. One of the ways these disclosures often happen is through email.
The Solution:
Office 365 Message Encryption has been updated so that users can now send encrypted emails to anyone regardless of the service the recipient uses. This opens up new possibilities for securing data in transit that were previously very challenging without adversely affecting the user experience. The amazing thing is that this can now be triggered based on the content of an email or attached file. In this post, I will walk you through setting up one of these rules so you can start protecting your data in transit. I will also show you some examples of what the user experience looks like for a social email recipient.
The Mail Flow Rule
So, here we will set up a mail flow rule to trigger on credit card numbers that are sent in the body of an email or attachment. This is a simple use case for this that you can use to extrapolate additional items you can trigger on from sensitive PII data to Mergers and Acquisitions information that should not be going out in the clear.
- Log into https://outlook.office365.com/ecp/ as either a Office 365 Global Admin or Exchange Admin
- On the left side, click mail flow

- This will default to the rules pane
- In the rules pane, click the
 and click Apply Office 365 Message Encryption and rights protection to messages...
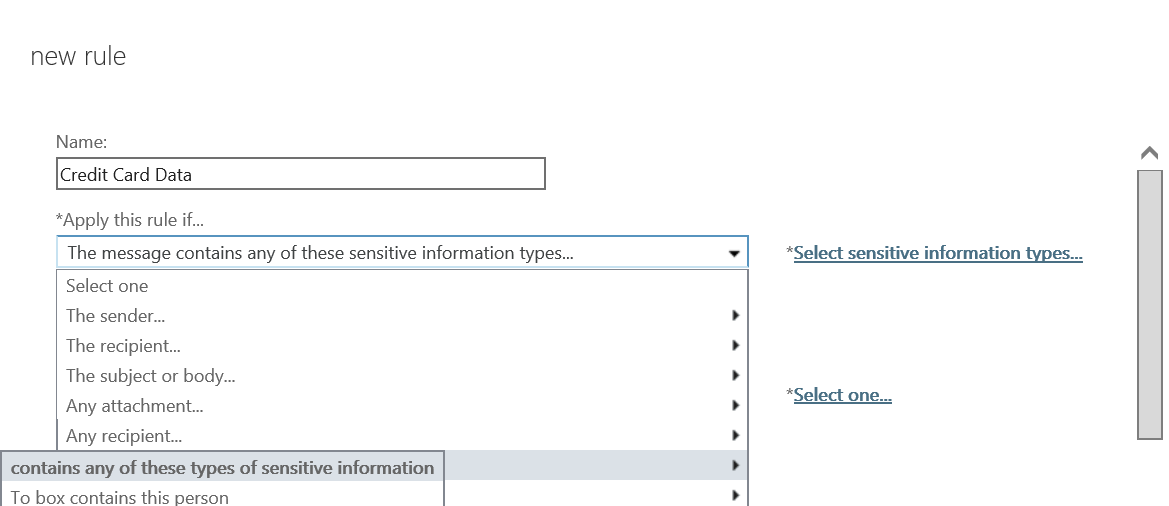
- In the new rule pane, name the rule Credit Card Data and select the drop-down under *Apply this rule if... and hover over This message... and click contains any of these types of sensitive information
- In the Contains any of these sensitive information types dialog, click on the , scroll down and select Credit Card Number. Click the Add -> button, and click OK.
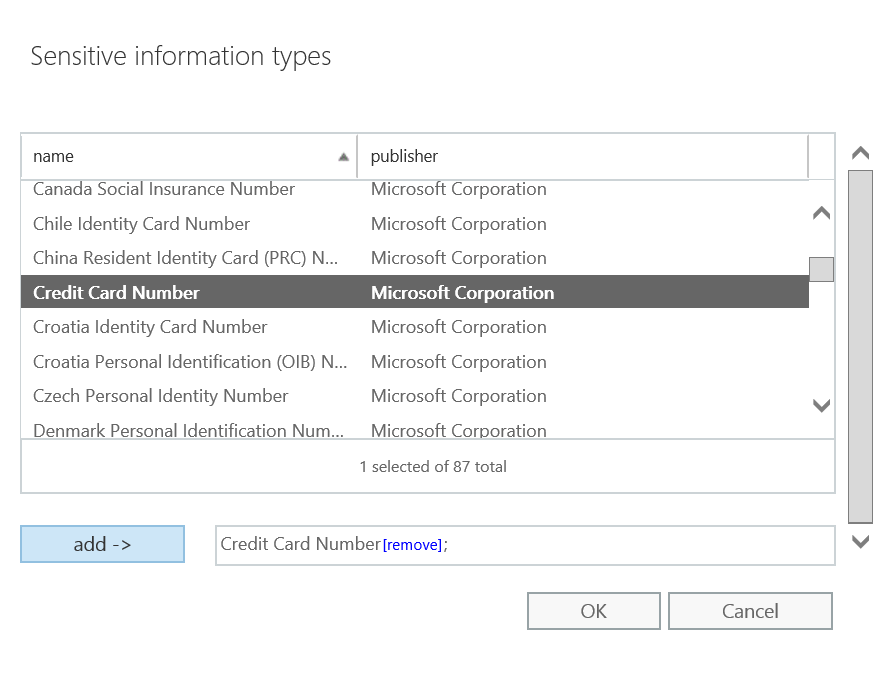
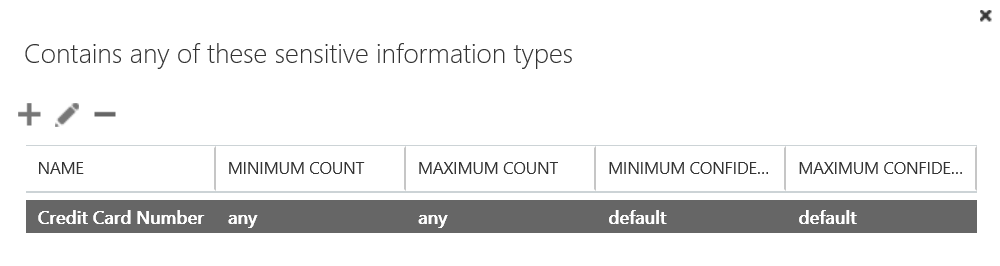
NOTE: You can add multiple types of sensitive information types to a single rule through this dialog. - In the Contains any of these sensitive information types dialog, you can now set additional settings related to each sensitive data type. We will leave it at the defaults and click OK.
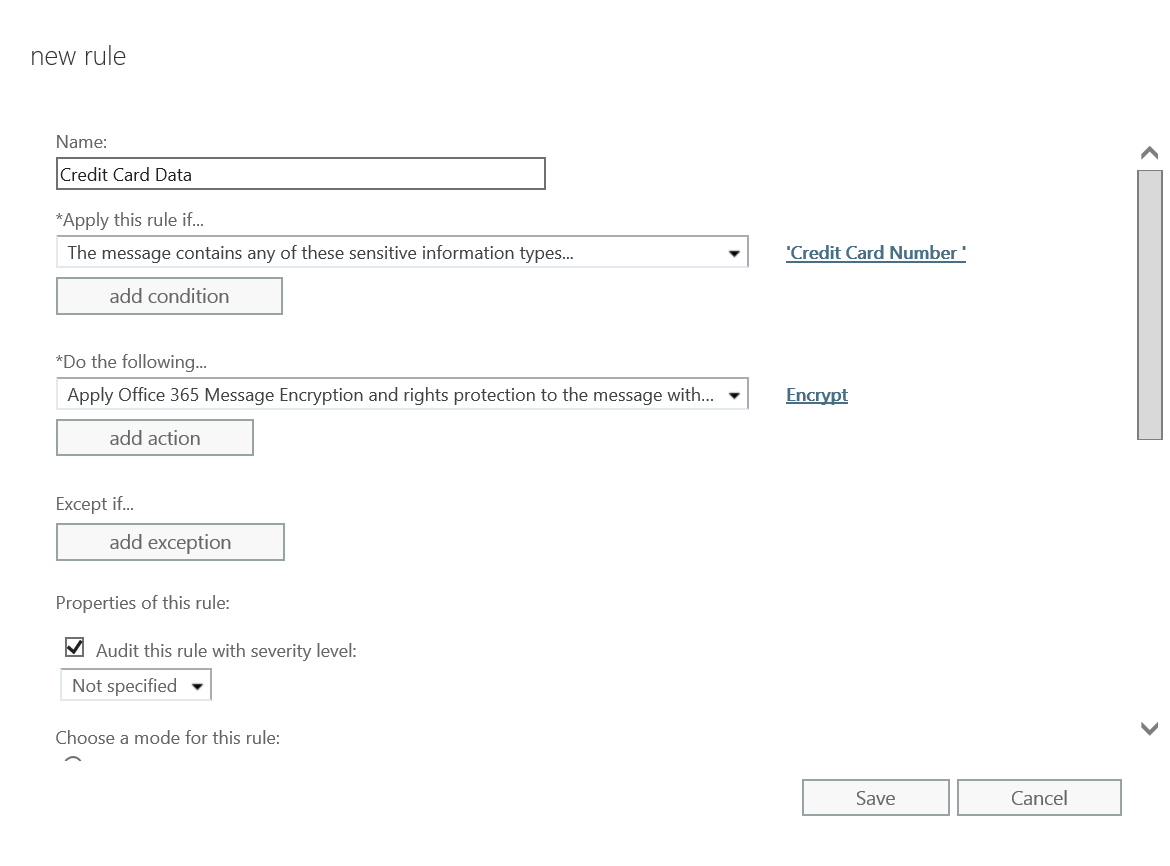
- Under *Do the following..., next to Apply Office 365 Message Encryption and rights protection to the message with..., click *Select one...

- In the select RMS template dialog, click the drop-down below RMS template: and select Encrypt and click OK

- The completed rule should look like the image below. Click Save to finish creating the first mail flow rule.
The User Experience
Now that we have the rule created, we can test the user experience. Please note that mail flow rules may take up to 15 minutes to be fully functional after creation, so now's a good time to go get some coffee or a soda. ;-) The steps below will show a user sending a clear text email with a Credit Card and a Gmail user recipient.
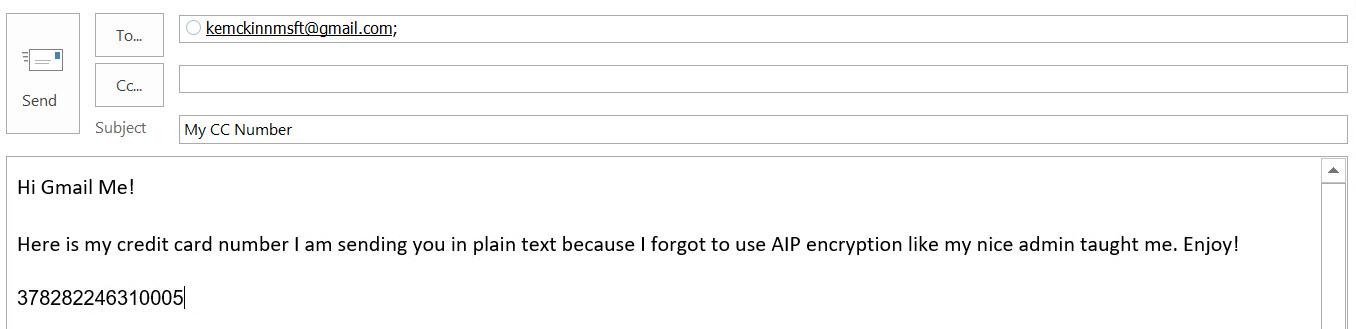
This needs to be a real Credit Card Number as EXO uses an algorithm to verify. I got mine from https://www.paypalobjects.com/en_GB/vhelp/paypalmanager_help/credit_card_numbers.htm
- This first image shows a credit card number being sent to a Gmail user with no protection.
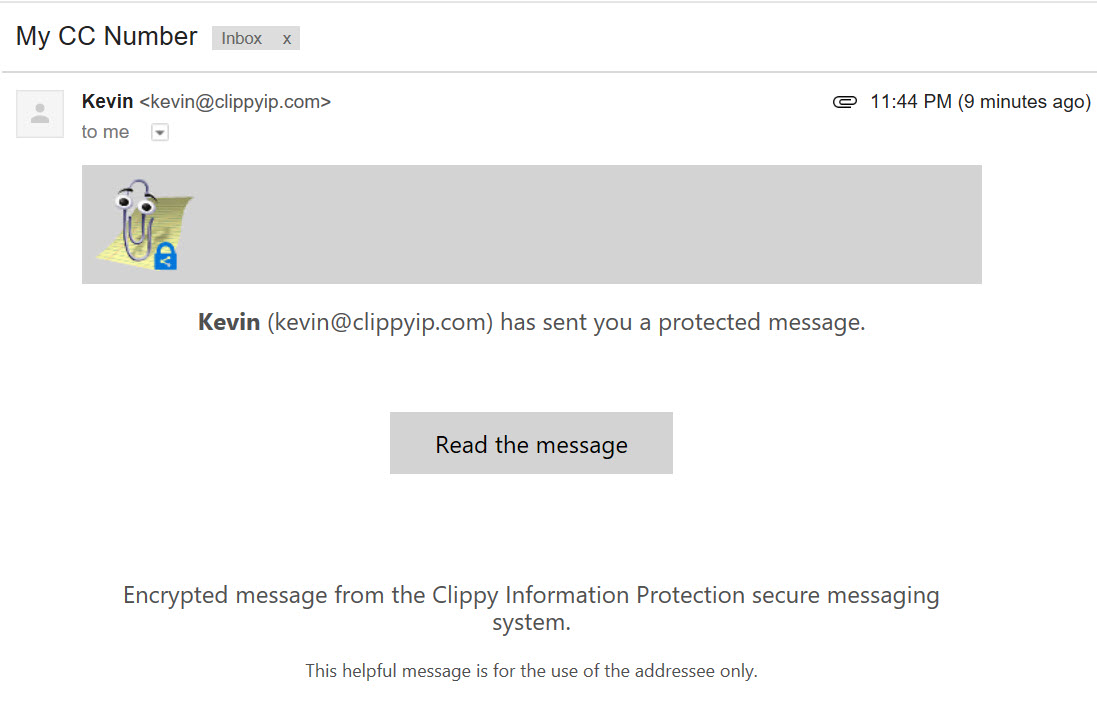
- In the Gmail mailbox you can see that the message came in and the wrapper data is all that can be seen of the content.

- The standard OME wrapper format is shown below. As you can see in this image, the text, branding icon and color can be customized. Details on that are available at https://aka.ms/OMEBranding.
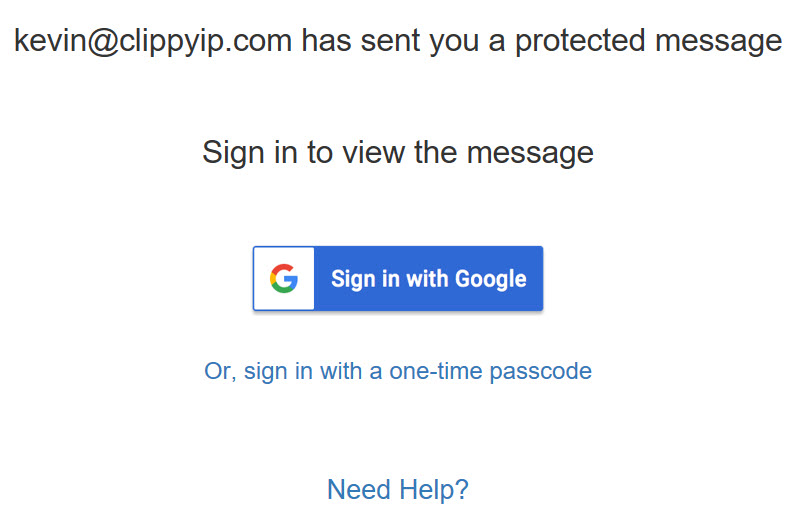
- After clicking Read the message, the user is sent to an authentication portal based on the social email service. In this case it is Google, but Outlook.com, Yahoo, and several others also have dedicated authentication. For other email providers that may not have their own authentication platform (who still has their Prodigy email?), they will be given the common option of a one-time passcode.
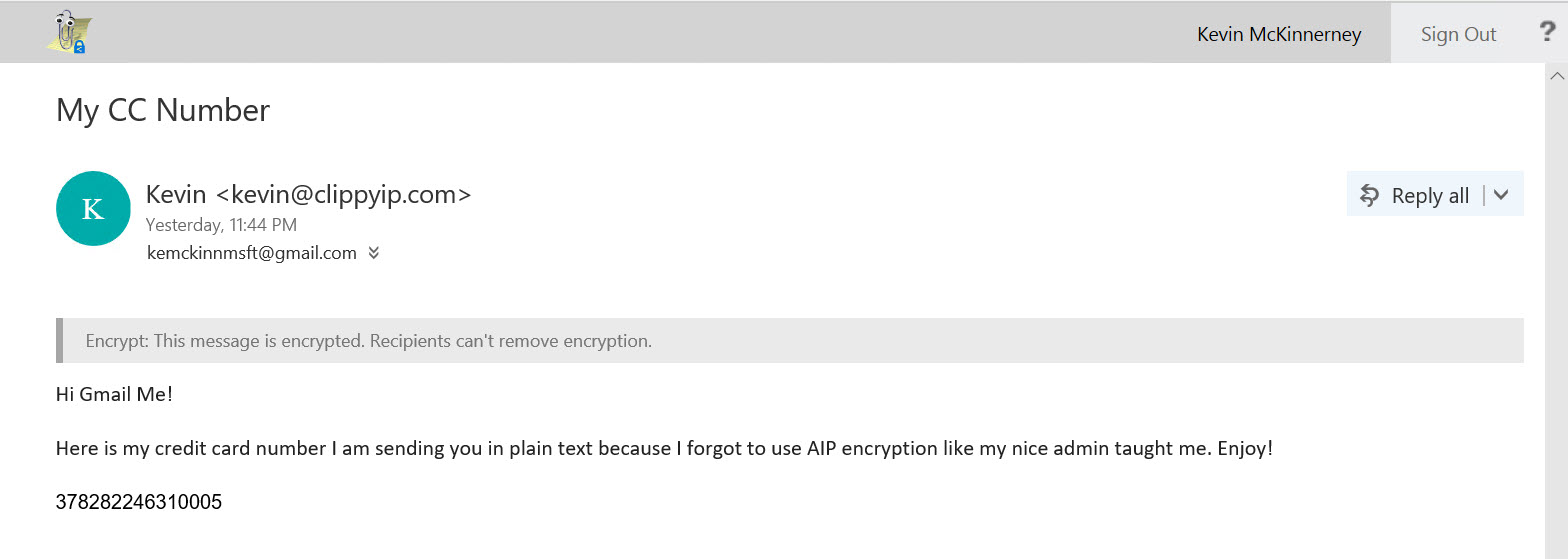
- In this case I authenticated with Google and it took me directly to the message in the OME Portal.
- If the user clicks sign in with a one-time passcode, they will be forwarded to the page below
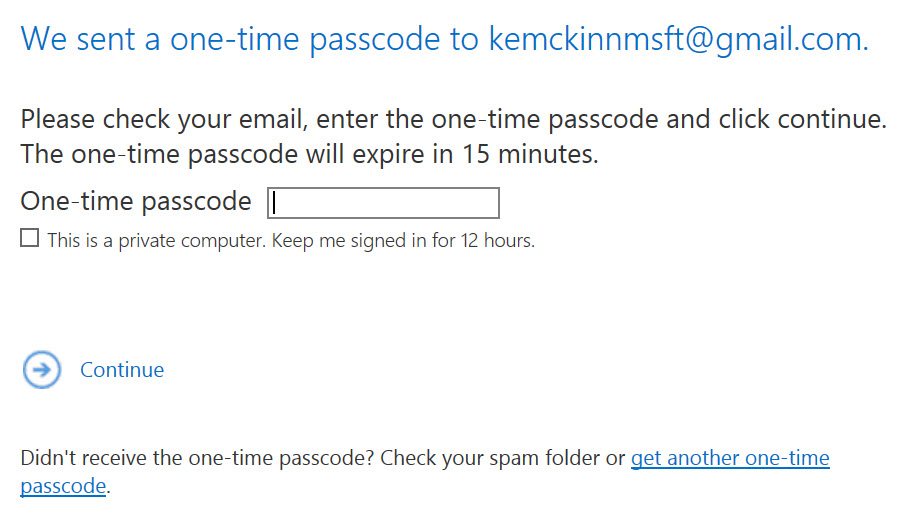
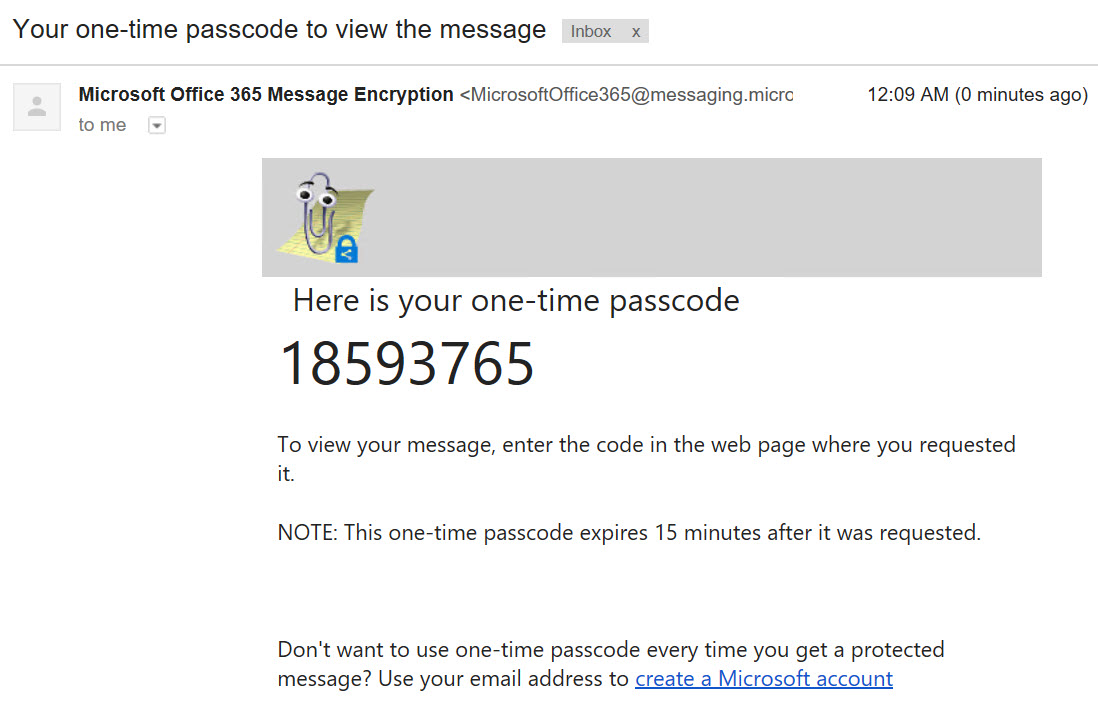
- The one-time passcode will be sent to the same email and they can use this to authenticate to the OME Portal.
And there you have it. You can use a EXO mail flow rule to catch sensitive data leaving your network and encrypt it in transit. As I have shown in the images above, the user experience is fluid and pleasant and is accessible to anyone.
NOTE: Official documentation for configuring these type of rules and additional use cases are available at /en-us/azure/information-protection/deploy-use/configure-exo-rules
Thanks,
Kevin
More fun content at https://aka.ms/Kevin