Full AIP Scanner Configuration (AIP Premium P1 Edition)
The Scenario:
You recently signed an Enterprise Agreement that includes AIP Premium P1 as one of the features (EMS E3/Microsoft 365 E3) and have been told that the AIP Scanner can be used to discover and protect your sensitive data. You want to know what this story looks like for you and how to fully install, configure, and best utilize the AIP Scanner based on just the capabilities that are included in the AIP Premium P1 license. Luckily, I have created multiple blog posts that show you what is possible in that regard.
https://blogs.technet.microsoft.com/kemckinn/2018/03/23/easy-configuration-of-the-azure-information-protection-scanner/
https://blogs.technet.microsoft.com/kemckinn/2018/05/11/more-fun-with-the-aip-scanner-ems-e3-aip-p1-capabilities/ https://blogs.technet.microsoft.com/kemckinn/2018/06/18/aip-scanner-discovering-all-the-sensitive-data/
Unfortunately, due to new capabilities of the AIP Scanner and trying to appeal to the largest audience, I have lost a bit of cohesion when trying to tell the specific story of what can be done at various license levels. But have no fear! I will shamelessly rip off bring together all of these blogs to give you a full story of what can be done at each of the license levels so you can focus on what you can do right now. I will focus this article on the Installation, Configuration, and Utilization of the AIP Scanner for functions available to the AIP Premium P1 license and will spare some of the exposition in the original articles for the sake of efficiency. So feel free to check those articles out if you want to hear more of my witty remarks read more detail about the product.
The Solution:
Installation:
Prerequisites:
To install the AIP Scanner in a production environment, the following items are needed:
- A Windows Server 2012 R2 or 2016 Server to run the service
- Minimum 4 CPU and 4GB RAM physical or virtual
- Internet connectivity necessary for Azure Information Protection
- A SQL Server 2012+ local or remote instance (Any version from Express or better is supported)
- Sysadmin role needed to install scanner service (user running Install-AIPScanner, not the service account)
- If using SQL Server Express, the SQL Instance name is ServerName\SQLExpress
- If you cannot be granted the Sysadmin role or your organization policies require databases to be created and configured manually, see Deploying the scanner with alternative configurations
- Service account created in On Premises AD and synchronized with Azure AD (I will call this account AIPScanner in this document)
- Service requires Log on locally right and Log on as a service right (the second will be given during scanner service install)
- Service account requires Read permissions to each repository for discovery and Read/Writepermissions for classification/protection
- AzInfoProtection.exe available on the Microsoft Download Center (The scanner bits are included with the AIP Client)
Binary/Service Installation:
Installation of the AIP Scanner service is incredibly simple and straightforward (once you have done it a few dozen times or if you follow this blog).
- Log onto the server where you will install the AIP Scanner service using an account that is a local administrator of the server and has permission to write to the SQL Server master database.
- Run AzInfoProtection.exeon the server and step through the client install (this also drops the AIP Scanner bits)
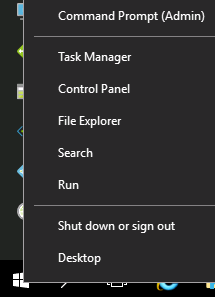
- Next, Right-click on the Windows
 button in the lower left-hand corner and click on Command Prompt (Admin)
- Type PowerShelland hit Enter

- At the PowerShell prompt, type the following command and press Enter:
Install-AIPScanner - When prompted, provide the credentials for the scanner service account (YourDomain\<AIPScanner Service Account>) and password
- When prompted for SqlServerInstance, enter the name of your SQL Server and press Enter
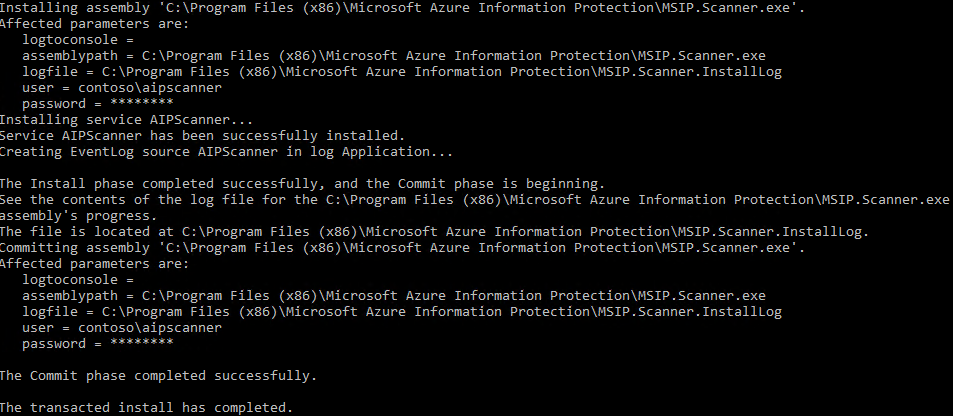
You should see a success message like the one below
NOTE: If you get any errors at this point, verify network connectivity and resolve any permissions issues with the SQL Database before proceeding! - Right-click on the Windows button in the lower left-hand corner and click on Run
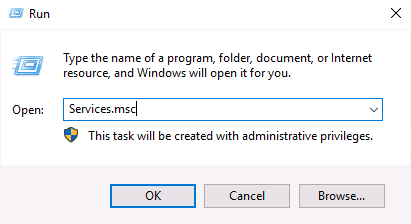
- In the Run dialog, type services.msc and click OK
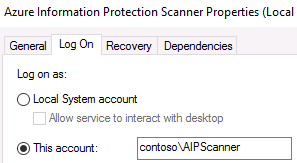
- In the Services console, double-click on the Azure Information Protection Scanner service
- On the Log On tab of the Azure Information Protection Scanner Service Properties, verify that Log on as: is set to the YourDomain\AIPScanner service account
See, told you it was easy to install. Luckily, configuring the service is only slightly more challenging. 🙂
Scanner Configuration:
OK, this next part is not super simple but it isn't terrible either as long as you don't miss anything. Luckily, you can follow my steps to make it as easy as possible.
Authentication Token:
- On the server where you installed the scanner, create a new text document on the desktop and name it something like Set-AIPAuthentication.txt
- In this document, paste the line of PowerShell code below and save
Set-AIPAuthentication -webAppId <ID of the "Web app / API" application> -webAppKey <key value generated in the "Web app / API" application> -nativeAppId <ID of the "Native" application>
- In this document, paste the line of PowerShell code below and save
- Open Internet Explorer and browse to https://portal.azure.com
- At the Sign in to Microsoft Azure page, enter the your tenant global admin credentials
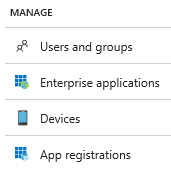
- In the Microsoft Azure portal, click on Azure Active Directory in the left-hand pane

- Under Manage, click on App registrations
- In the App registrationsblade, click the + New application registration button

- In the Create blade, use the values in the table below to create the registration
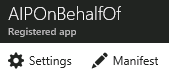
Name AIPOnBehalfOf Application type Web app / API Sign-on URL https://localhost - Click the Create button to complete the app registration
- In the AIPOnBehalfOf blade, hover the mouse over the Application ID and click on the Click to copyicon when it appears

- Minimize (DO NOT CLOSE) Internet Explorer and other windows to show the desktop
- On the desktop, return to Set-AIPAuthentication.txt and replace <ID of the "Web app / API" application> with the copied Application ID value
and Save

WARNING: Ensure there is only a single space after the Application ID before -webAppKey - Return to the browser and click on the Settingsbutton
- In the Settings blade, under API ACCESS, click on Keys

- In the Keys blade, add a new key by typing AIPClientin the Key description field and your choice of duration (1 year, 2 years, or never expires)

- Select Saveand copy the Value that is displayed
WARNING: Do not dismiss this screen until you have saved the value as you cannot retrieve it later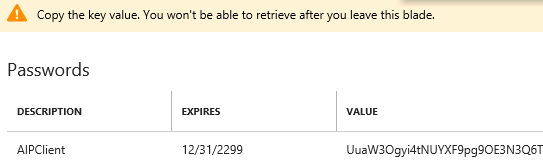
- Go back to the txt document and replace <key value generated in the "Web app / API" application> with the copied key valueand Save

WARNING: Ensure there is only a single space after the Application Key before -nativeAppId - In the Microsoft Azure portal, click on Azure Active Directory in the left-hand pane
- Under Manage, click on App registrations
- In the App registrationsblade, click the + New application registration button
- In the Create blade, use the values in the table below to create the registration
Name AIPClient Application type Native Application Sign-on URL https://localhost - Click the Create button to complete the app registration
- In the AIPClient blade, hover the mouse over the Application ID and click on the Click to copyicon when it appears
- Replace <ID of the "Native" application > in the Set-AIPAuthentication.txt document with the copied Application ID value
and Save

- Return to the browser and in the AIPClient blade, click on Settings
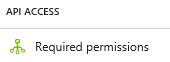
- In the Settings blade, under API ACCESS, select Required permissions
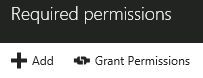
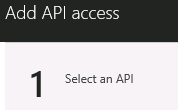
- On the Required permissions blade, click Add, and then click Select an API
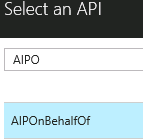
NOTE: It may take a few moments for each of these blades to load - In the search box, type AIPO and click on AIPOnBehalfOf, and then click the Selectbutton
- On the Enable Access blade, check the box next to AIPOnBehalfOf, click the Select button
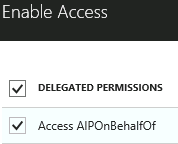

- Click Done

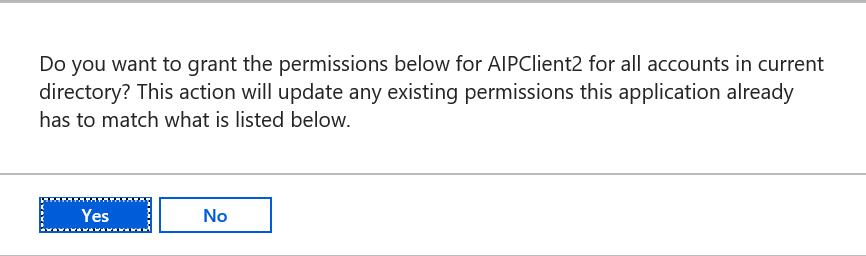
- In the Required permissions blade, click Grant permissions
- In the popup window, click Yes
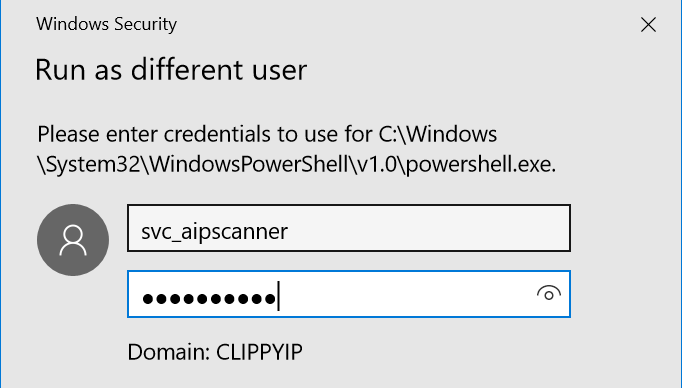
- Click on the Start menu and type PowerShell, right-click on the PowerShell program, and click Run as a different user.

- In the Run as different user dialog, insert the Scanner Service credentials
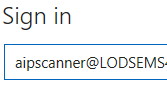
- In the Scanner Service context PowerShell window, paste the completed command from Set-AIPAuthentication.txt and press Enter
- When prompted, enter the user AIPScanner@yourdomain.com and the password
NOTE: Replace yourdomain with the your tenant
- You will see the message below in the PowerShell window once complete

Configuring Repositories:
Finally, it is time to put the AIP Scanner to work scanning repositories. These can be on-premises SharePoint 2013 or 2016 document libraries or lists and any accessible CIFS based share. Keep in mind that in order to do discovery, classification, and protection, the scanner service pulls the documents to the server, so having the scanner server located in the same LAN as your repositories is recommended. You can deploy as many servers as you like in your domain, so putting one at each major site is probably a good idea (Microsoft currently uses around 40 Scanner instances worldwide for internal repositories).
- To add a file share repository, open a PowerShell window and run the command below
Add-AIPScannerRepository -Path \\fileserver\documents - To add a SharePoint 2013/2016 document library run the command below
Add-AIPScannerRepository -Path https://sharepoint/documents - To verify that the repositories that are configured, run the command below
Get-AIPScannerRepository

Sensitive Data Discovery:
One of the most useful features of the AIP Scanner for the AIP Premium P1 license level is the discovery of sensitive data across all of your configured repositories. You can do this by adding a parameter to Set-AIPScannerConfiguration called -DiscoverInformationTypes. When this property is set to All, the scanner uses any custom conditions that you have specified for labels in the Azure Information Protection policy, and the list of information types that are availableto specify for conditions on labels in the Azure Information Protection policy. When you use this option, labels do not need to be configured for any conditions.
The command below will allow you to scan your repositories against all information types
PS C:\> Set-AIPScannerConfiguration -Enforce Off -Schedule OneTime -Type Full -DiscoverInformationTypes All
After running the scan, you can review the logs by opening the Azure Information Protection event log or you can view the detailed logs at C:\users\<Scanner Service Account Profile>\appdata\local\Microsoft\MSIP\Scanner\Reports. There you will find the summary txt and detailed csv files.
Bulk Protection:
Now that you have a list of all of your sensitive files, you can use AIP PowerShell to Classify and Protect the files. You can either script this using the information you have obtained from the scanner, or you can relocate the files to a central location where you can bulk protect the entire location. If you choose to do the latter, you can use the PowerShell commands below to accomplish this.
PS C:\> Install-Module Aadrm
PS C:\> Import-Module Aadrm
PS C:\> Set-AIPFileLabel -Path \\Finance\Projects\ -LabelId d9f23ae3-4321-4321-4321-f515f824c57b -JustificationMessage '
The previous label no longer applies' -Owner "admin@contoso.com" -PreserveFileDetails
And that is it! Now you can start using the AIP Scanner and PowerShell to classify and protect entire file shares and on prem SharePoint libraries with only an AIP Premium P1 license!
Please leave comments below and rate to let me know if you enjoy my posts.
The rest of my content can be found at https://aka.ms/Kevin
Thanks!
Kevin