AD RMS to Azure Information Protection: Enterprise Client Migration using SCCM Compliance Settings
The Scenario:
Your management has just renewed their Microsoft Enterprise Agreement and bought a shiny new Office 365 E3 (or E5/EM+S/etc) and have been told wonderful things about how Azure Information Protection can enable them to securely collaborate with partners in the cloud. They want this implemented yesterday (of course) so they can start sending protected messages to all their fellow CxOs that have recently made the move to Azure as well. OK, no problem. So you follow the documented migration steps and find that migrating the server portion is going to be a piece of cake. Then you notice what is needed for the client migration. The documentation for the client migration requires a few scripts on each client, and one of the scripts must be run with administrative rights to allow modification of HKLM registry entries. This presents a problem. In keeping with Microsoft's posture on Securing Privileged Access, you have removed users from the local administrators group on their assets. Additionally, you do not want to expose privileged credentials to every endpoint. So how can you manage the client side of this migration?
The Solution:
I recently ran into this scenario at a customer site when assisting with a migration from AD RMS to Azure Information Protection. Trying to figure out the best way to do this without compromising security and with the least possible impact on end users proved to be very challenging indeed. Luckily, I stumbled across something that works.
System Center Configuration Manager to the rescue! I found the answer in SCCM Compliance Settings. When researching this issue, I came across an article by one of my teammates, Russ Rimmerman, about using SCCM Compliance Settings to work with PKI certificates. I wanted to make sure that it would be possible to do both the elevated portions and user level portions of the script provided in the migration article so I ended up reaching out to another senior SCCM resource on my team, Ray Rosen. With his help, I designed the SCCM compliance settings using four PowerShell scripts to handle the detection and remediation for both the system and user portions of the migration. I am going to walk through this process below for your benefit.
Prerequisites:
System Center Configuration Manager 2012 or above
All clients must have properly communicating SCCM client agents
For Office 2010, the RMS Sharing Application and Azure Information Protection Client should be installed (the Beta Azure IP Client can be used inplace of both)
For Office 2013+, the Azure IP Client should be installed
Client Migration using SCCM Compliance Settings:
As I mentioned earlier, this will be done using PowerShell scripts executed using SCCM Compliance settings. For SCCM, you have two options for running PowerShell scripts on clients. The first option is to sign the script with a trusted certificate. While this is the best option, it is not always possible. Thus, the second option is to set the PowerShell execution policy to “Bypass”. In this example, I won’t be signing the PowerShell scripts, so I will go into Administration->Client Settings and select the Client Settings that are being applied to the collection I want to migrate. This may be the default client settings or custom client settings depending on where you want to deploy the scripts. Go into the “Computer Agent” section of the client settings, and set the PowerShell execution policy to “Bypass”. This allows unsigned PowerShell scripts to execute when run by the Computer Agent.

***UPDATE***
I have added scripts to the package below that include the premigration settings added to the batch scripts at docs.microsoft.com. These premigration scripts can be used to roll out Azure IP in a phased manner. These scripts are used in the same fashion as described below but in a separate Compliance Settings package targeting users that are not yet migrated to AIP.
***
For the next section, you will need the PowerShell scripts I created for discovery and remediation. I have posted these at https://aka.ms/AzureIPSCCMScripts. Download the zip file and extract the for PowerShell scripts.
***IMPORTANT***
Open each of the PowerShell scripts and modify them to add your AD RMS Server Name/FQDN and Azure IP GUID. Read through each of the scripts so you understand what each of them does. I have tried to document them as much as possible so they will be easy to follow. Once you have added the appropriate data in each file, save them and we will use them below.
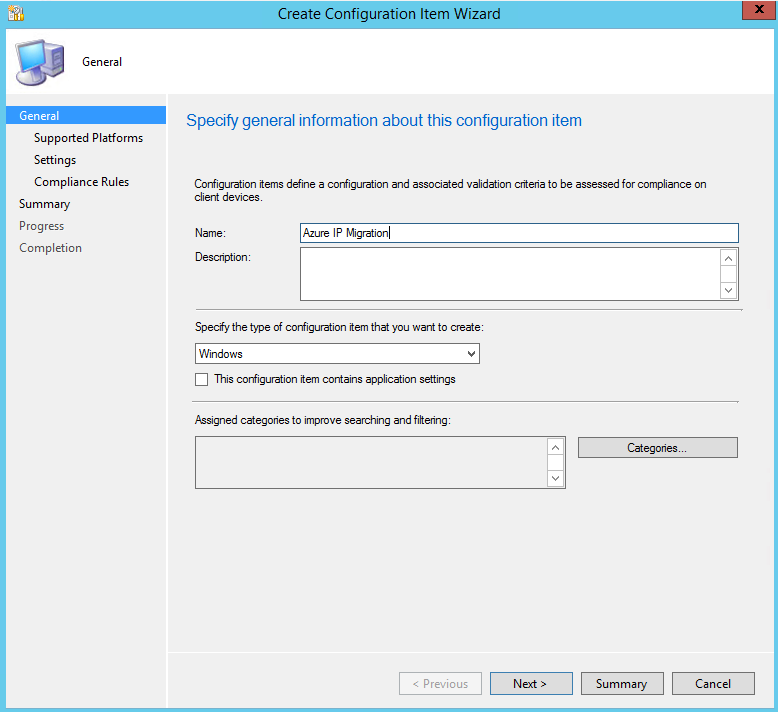
Now, go to Assets and Compliance->Compliance Settings->Configuration Items and click “Create Configuration Item”. The Create CI Wizard will appear. Give it a meaningful name, select any categories if desired, and click “Next”.
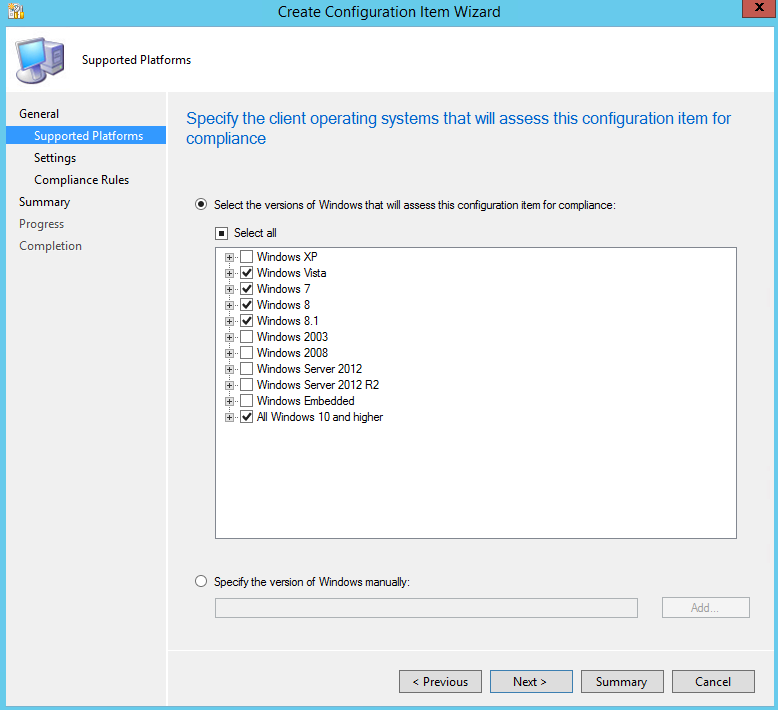
On the Supported Platforms page, select any supported client operating systems you require and click "Next".
On the Settings Page, click New...
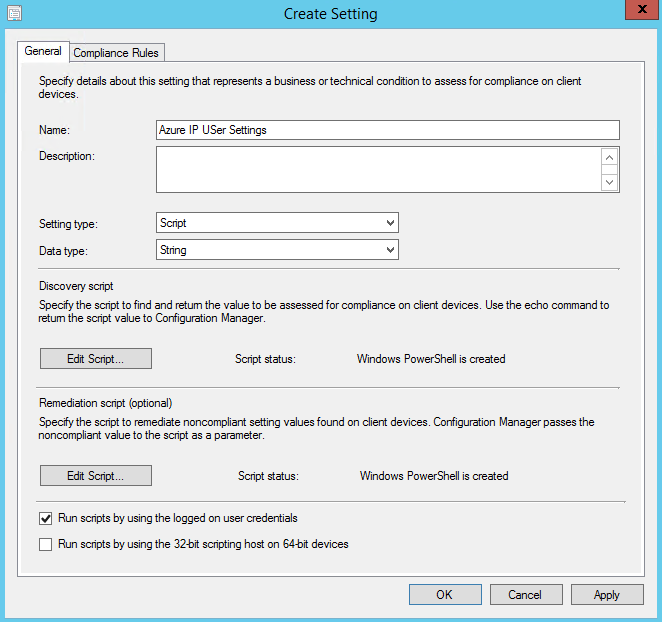
This will launch the Create Settings dialog box. Name the setting something meaningful like "Azure IP User Settings". Add a description if you like and set the Setting type to Script. Set the Data type to String. Under Discovery Script, click the Add Script... button. In the Edit Discovery Script dialog, click Open... and select the UserDiscovery.ps1 script you modified earlier. The script will populate in the Script pane and you should be able to scroll down and verify that your AD RMS Server and Azure IP GUID are populated. Ensure that the Script language says Windows PowerShell and click OK to close the dialog. Repeat this process for the Remediation script only this time browsing to UserRemeditation.ps1. After both scripts have been loaded, check the box to "Run scripts by using the logged on user credentials". Your General tab should look similar to the image below.
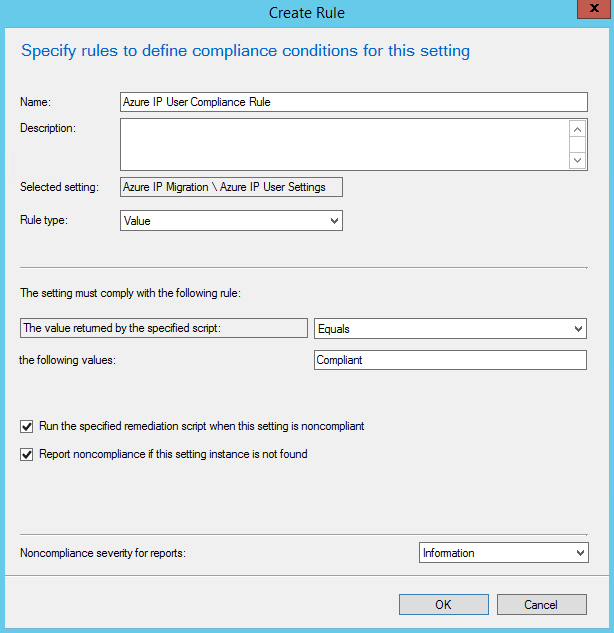
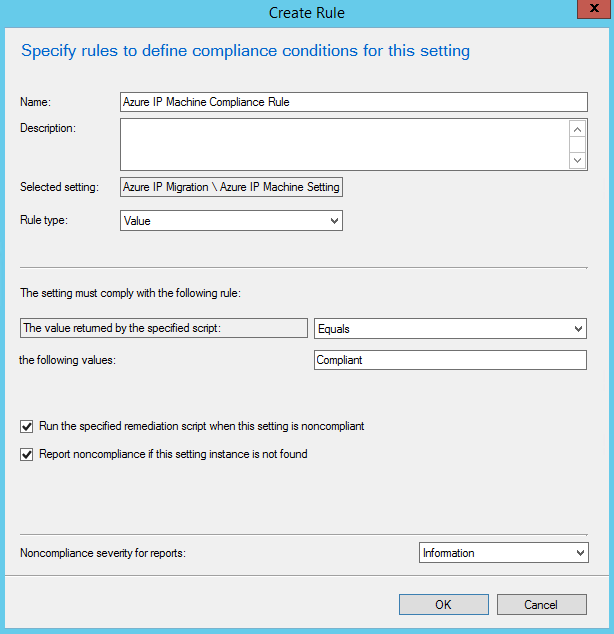
Next, click on the Compliance Rules tab and click on the New... button. In the Create Rule dialog, name the rule something descriptive like "Azure IP User Compliance Rule". In "the following values:" textbox, enter "Compliant" (without quotes). Check the box next to "Run the specified remediation script when this setting is noncompliant" and optionally "Report noncompliance if this setting instance is not found". You can also set the severity for reporting if you chose to enable that. Your rule should look similar to the image below. Click OK to create the rule.
Click OK to finish the User Settings. Click the New... button again and go through a similar process to create the Azure IP Machine Settings. The only difference other than the scripts you will choose is that you will not check the checkbox next to "Run scripts by using the logged on user credentials". Your settings and compliance rule should look similar to the images below. Click OK to create the rule. 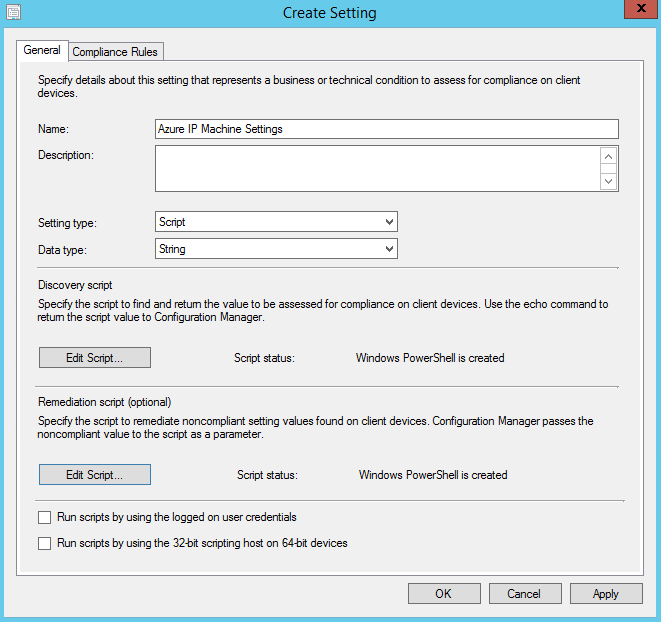
Finally, click OK to complete the Machine Settings. Click Next and you should see the Compliance Rules you have created. Click next to see the Summary, then Next and Close to complete creation of the Configuration Item.
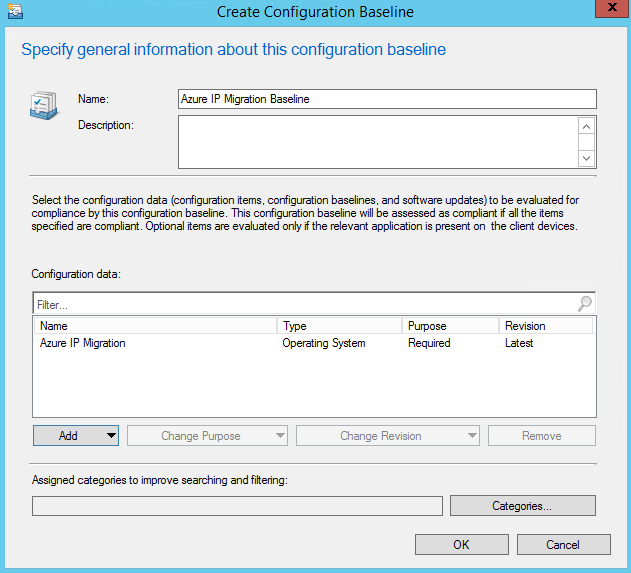
Now, go to Assets and Compliance->Compliance Settings->Configuration Baselines and click "Create Configuration Baseline". Give the baseline a descriptive name like "Azure IP Migration Baseline", and under Configuration data click Add->Configuration Items. Select the configuration item you just created and click Add then OK. Your dialog should look like the one below.
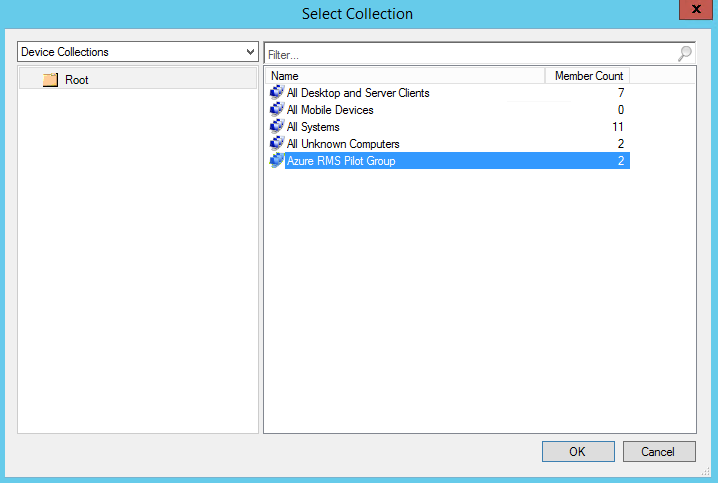
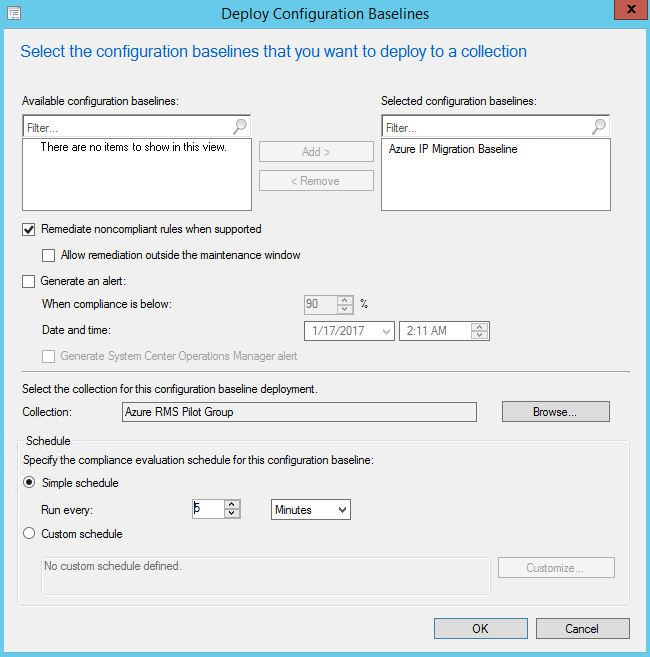
Click OK to complete the creation of your baseline. The last thing to do now is to deploy the baseline to your clients. I recommend doing this with a test or pilot group and then rolling out to a larger audience after you have confidence that it is working in your environment. You can do this by clicking the Deploy button. This launches the Deploy Configuration Baselines dialog box. If you had your baseline selected, then it will already show up under Selected configuration baselines in the dialog. Check the box next to "Remediate noncompliant rules when supported" then click the Browse... button to select your collection. The selection dialog defaults to User Collections, but I created a Device Collection for my pilot group and you can select that from the drop-down. Choose your collection then set a schedule for compliance evaluation. During testing it is good to keep this low, but make sure to raise it back up to a reasonable value when deploying to your full environment. Below are some images from my deployment.
Click OK and your SCCM Compliance Settings should migrate your collection to Azure Information Protection.
Additional Information:
If you are running Office 2010, the RMS Sharing Application or Beta Azure Information Protection Client will be necessary for the clients to connect to Azure Information Protection. I mentioned it earlier, but I wanted to make sure that it is fresh in your mind as it is a requirement for your migration. Office 2013+ will work without the Azure IP client, but I highly advise installing the Azure Information Protection Client on all systems as classification is a great user experience and should be the end goal for any migration to Azure Information Protection. Please let me know if you find any errors in my documentation or scripts but I have tested them so hopefully you will not run into any issues.
Kevin McKinnerney
PREMIER FIELD ENGINEER – PLATFORMS/SECURITY