From Windows Server 2008 R2 to Windows Server 2012 R2: A Tale of a Successful Failover Cluster Hyper-V Migration
I seemed to be running into more and more Hyper-V Failover Cluster migrations with my customers as of late. Some of these are migrating from VMWare to Hyper-V, but some of these are simply migrating from Windows Server 2008 R2 Hyper-V Cluster to Windows Server 2012 R2 Hyper-V Cluster.
It’s actually a fairly simple process.
My customer’s Failover Cluster migration actually started as a datacenter consolidation project. They had multiple datacenters across two different states and wanted to get down to just two. They started down that road without me and understandably they wanted to keep everything exactly the same when moving from one datacenter to the next to lessen the risks involved with such a move. In fact, the application and business owners insisted on this point. After all, they were already moving to a completely new network, new hardware, etc. Why introduce any other changes? Well, it took waaay longer than they anticipated. It turns out exporting VMs from Windows Server 2008 R2 Hyper-V takes quite a bit of time, not the mention the time it takes to copy over the wire to the new datacenter, importing into the new Cluster, along with all the other steps required with this migration strategy. Who would have thunk? J But the time for the export was the main pain point. It wasn’t predictable. Sometimes they would run over their 6+ hour maintenance window. It was painful. The business owners and the application owners were not happy.
So they finally involve me and what do I do? I convince them to change their plans.
We’re not modifying the virtual machines themselves or the operating system within the virtual machines. We’re just changing the underlying host. There’s almost no chance of it impacting the virtual machine (and therefore the critical application running that virtual machine) in anyway. We could migrate them to their new datacenter and to the latest and greatest host operating system in a fraction of the time and man hours required for their previous migration. Better yet, we could reduce their outage from 6+ hours down to less than 1 hour. If they were still unsure, we could take a copy of their virtual machine, add it to a test environment running Windows Server 2012 R2 Hyper-V Cluster, and they could test until their heart’s content. Very few actually took us upon this by the way. I guess I provide a pretty convincing argument. J
Even better, not only would they get the additional stability, performance, scalability, and reliability of Windows Server 2012 R2, by migrating to the new operating system during this datacenter consolidation, it would save them an outage. They wouldn’t have to repeat the migration in the future just to upgrade the operating system!
But here’s the catch, we had to migrate all the virtual machines on a given cluster at one time. They couldn’t do the two or three at a time that they were doing. It was all or nothing per cluster (and they had multiple clusters).
This was a bit hard for them to swallow at first. Some of these clusters had 100s of virtual machines on them running their most critical applications. What if we ran into problems during the migration? How on earth could all the application owners on a given cluster agree upon a specific time window for the migration? I didn’t bother to address that last question.
I used the following Visio diagram to help illustrate the process. (Hey! Don’t laugh at my poor Visio skills! I’m an engineer, not a technical writer!)
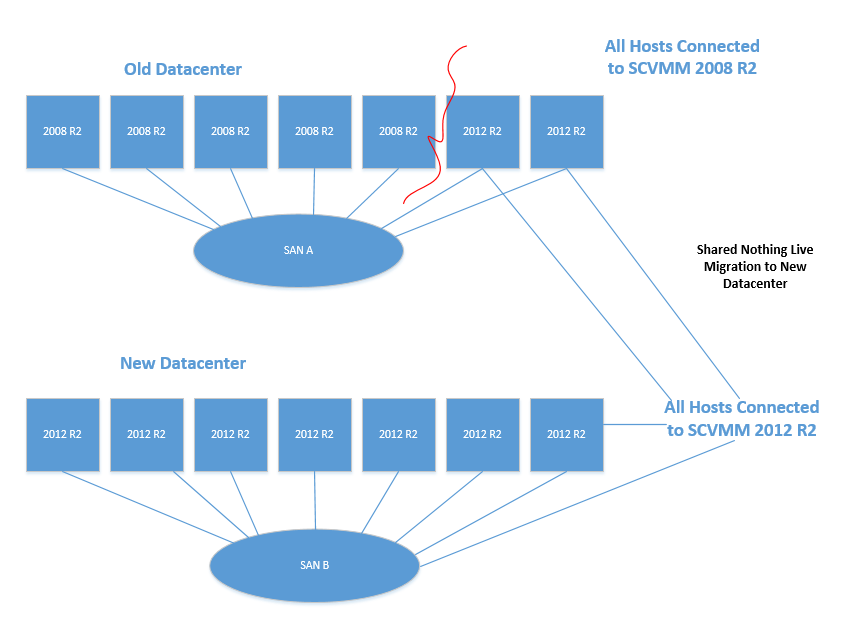
What does the above diagram mean? In short, we would evict a couple nodes from their existing Windows Server 2008 R2 Hyper-V Cluster, rebuild them as Windows Server 2012 R2, and create a new Cluster. We would then use the Copy Cluster Roles wizard to migrate the cluster configuration and settings from the old Cluster to the new Cluster. During our downtime, we would shut down all the VMs on the 2008 R2 Hyper-V Cluster, and then shutdown the 2008 R2 nodes themselves. We would then online the LUNs on the 2012 R2 Hyper-V Cluster and online the VM.
Presto! The migration of the operating system is complete!
End of outage.
End of maintenance window.
From there, to get to the new datacenter, we would use System Center Virtual Machine Manager 2012 R2 to perform a shared nothing live migration from the old datacenter to new hardware and clusters waiting in the new datacenter while the virtual machine is up, running, and online with no outage.
So what does this look like in more detail?
Here’s our exact Hyper-V Failover Cluster migration plan along with our rollback plan.
Migrating from Windows Server 2008 R2 Hyper-V Cluster to Windows Server 2012 R2 Hyper-V Cluster using same hardware and same SAN
Evict two nodes from the existing 2008 R2 Hyper-V Cluster.
Rebuild these two nodes as Windows Server 2012 R2 Hyper-v Cluster.
Note: The SAN team will need to present a new 1GB LUN to use as the new disk witness for this cluster.
Online and format the new 1GB LUN, but make sure to keep remaining SAN disks that are still attached OFFLINE.Add new cluster to SCVMM 2012 R2.
Remove the existing nodes of the 2008 R2 Cluster from SCVMM 2008 R2.
On the new 2012 R2 Hyper-V Cluster, click on the blue hyperlink to start the Copy Cluster Roles Wizard.
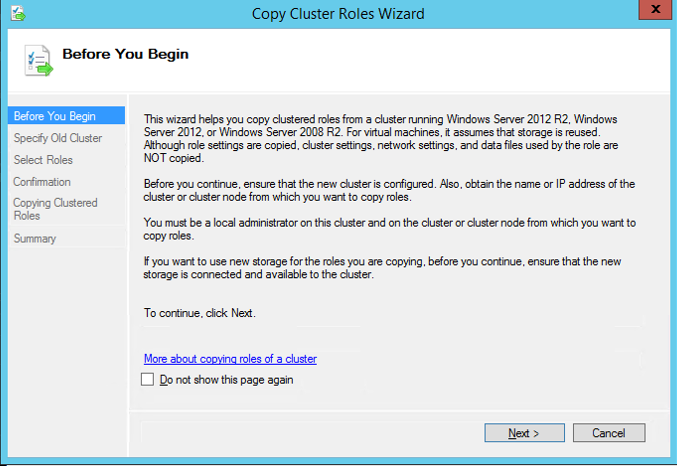
Click Next.
Specify the name of the old cluster.

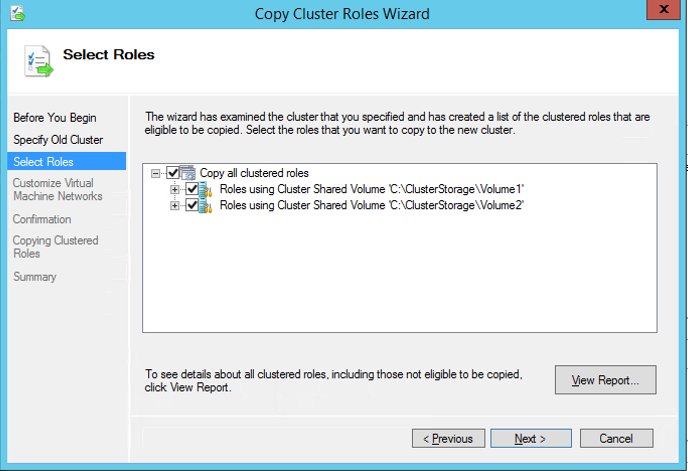
Select Copy all clustered roles.
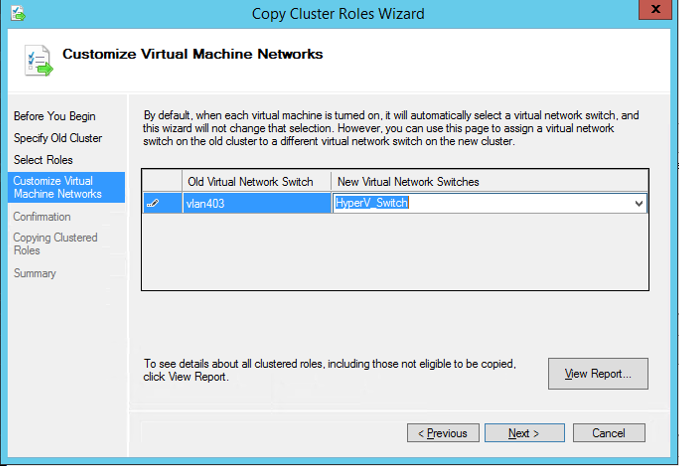
The Customize Virtual Machine Networks wizard pane will show the old Virtual Network Switch(s) from the old Windows Server 2008 R2 Cluster. It should default to the new switch called “HyperV_Switch” in this example. Verify and click Next to continue.
Complete the wizard.
After the roles have been copied, scroll down verify success of each virtual machine and click Finish.

Add new cluster to SCVMM 2012 R2.
Remove old 2008 R2 cluster nodes from SCVMM 2008 R2. Make sure you remove just the hosts and not the VMs!
BEGIN DOWNTIME
Shutdown the VMs on the 2008 R2 cluster.
Verify there are no check points.
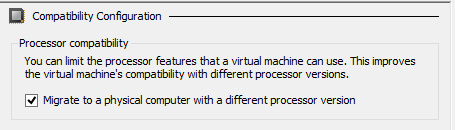
Verify Processor Compatibility is enabled. This can be found in the settings of the VM as one of the Processor sub-items.
Shutdown remaining nodes in old 2008 R2 Cluster.
FROM HERE ON FORWARD, REMAINING ACTIONS TAKE PLACE ON THE NEW 2012 R2 HYPER-V CLUSTER.
On one node, open Disk Management.
Right-click on each of the LUNs and Online the disks.
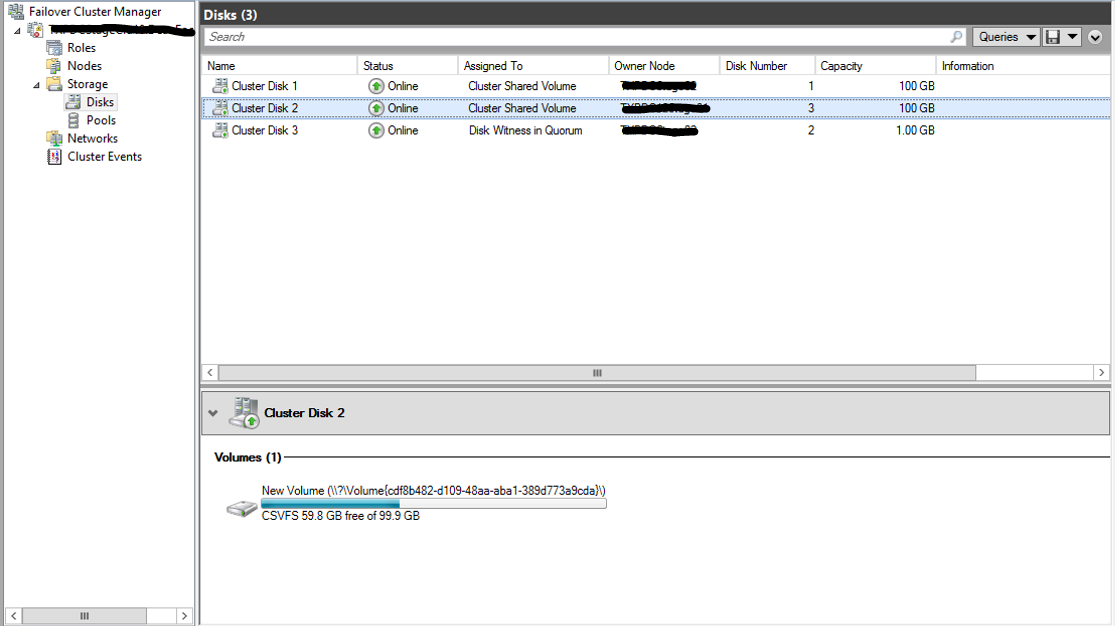
Open Failover Cluster Manager, navigate to Storage, and bring the Cluster Shared Volumes online.
Online VMs in whatever order you deem appropriate.
Note: If you have a large number of VMs, during the planning stage, I recommend determining a start order ahead of time so that high priority VMs are started first over less critical VMs such as test boxes.END DOWNTIME
Navigate to SCVMM 2012 R2 and refresh the host cluster.
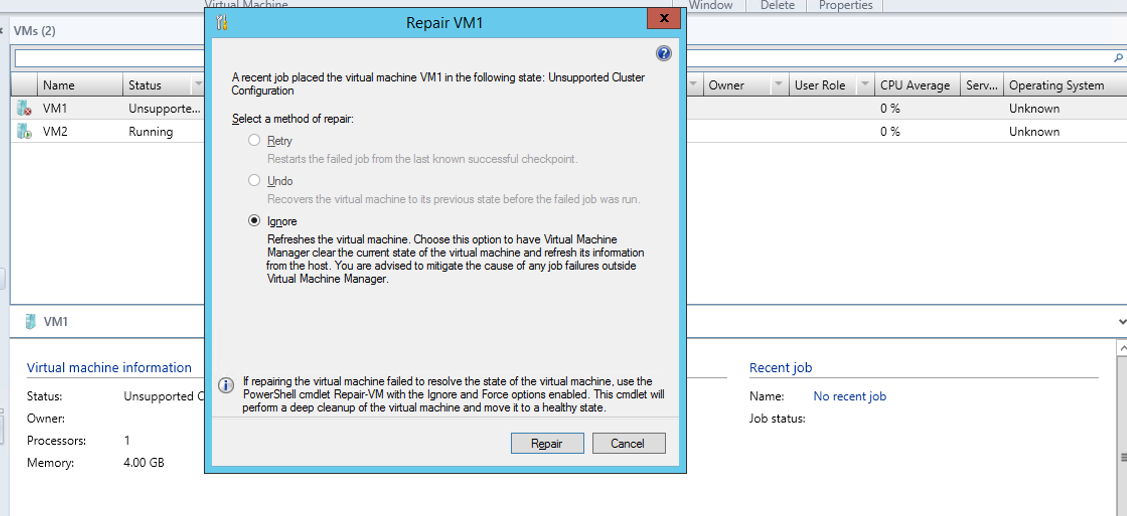
Check out the VMs. If the VM shows as unsupported, repair the VM.
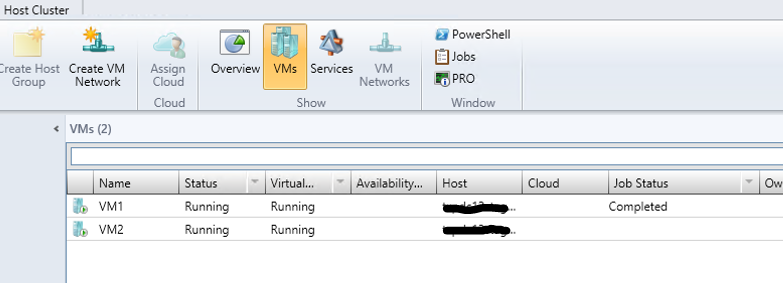
The VM should then show as running:
At this point, perform any additional checks. Verify the VMs have network connectivity by pinging a few of them and hand off to the application owners for further verification.
Once verification is complete, have the SAN team remove presentation of the LUNs to the old 2008 R2 Hyper-V Cluster. You can then rebuild these nodes as 2012 R2 and join them to the new 2012 R2 Hyper-V Cluster.
At this point, we are now on a Windows Server 2012 R2 Hyper-V Cluster. The VMs and hosts are connected to SCVMM 2012 R2, but we’re still in the old datacenter.
Note: Now that the operating system migration is complete, this is a great time to perform any cleanup before migrating to the new datacenter.
What about our rollback plan?
That, too is easy.
Shutdown the VMs in Failover Cluster Manager.
Offline the Cluster Shared Volumes.
Offline the LUNs in Disk Management.
Shutdown the 2012 R2 Hyper-V Cluster nodes.
Startup the 2008 R2 Hyper-V Cluster nodes.
In Failover Cluster Manager, confirm cluster disks are online.
Start the virtual machines.
Open the settings for the virtual machines and correct the network, if needed.
Shared Nothing Live Migration from Old Datacenter to New Datacenter
At this point, there’s only one step remaining:
- Use SCVMM 2012 R2 and shared nothing live migration to migrate VMs and storage from the cluster and SAN in the old datacenter to the waiting cluster and SAN in the new datacenter.
Bam. Presto. OS and datacenter migration complete. Mike drop.
Q & A
I’m attempting to anticipate questions here. I’m not going to be able to read everyone’s mind, but I’ll give it a shot.
Question 1: But you didn’t go into the SCVMM 2012 R2 Shared Nothing Live Migration piece!
Answer: You’re right. I didn’t. That would be a great topic for another blog post. *cough* Matt *cough*
Question 2: Can I do this with less hosts/nodes?
Answer: Yes. With a two node cluster with a disk witness, you can evict a single node and go through this same process. That is, of course, assuming all your VMs can run on one node. It would also increase the risk factor as the cluster would not be able to sustain a failure of a node until you migrate the VMs to the new cluster, rebuild the remaining old node, and join it to the new cluster.
Question 3: Can Shared Nothing Live Migration be done without SCVMM?
Answer: Yes.
Wrapping Up
So it’s not as scary as you thought, right? I hope you’ve found this beneficial and of value.
Enjoy!
Charity “cluster migrations are a piece of cake” Shelbourne