Migrate from Windows XP to the future with the Microsoft Assessment and Planning Toolkit
Hello, Jeff Stokes here, the dude as it were...so, if you hadn't noticed, XP end of life is quite soon. If you are still trying to find the random XP machine in your environment, Ashley McGlone, Mr. PowerShell, GoateePFE, wrote this awesome post on how to find it quick and dirty like:
We looked at it and were like that’s pretty slick! If you have few machines that fell through the cracks during your upgrade this will catch them. But what if you’ve been putting this whole upgrade thing off and you got a whole bunch it found and you don't know what to do? We’d like to talk to you about the unsung hero of the Solutions Accelerator Teams efforts, the Microsoft Assessment and Planning toolkit or MAP. I’m going to turn it over to Kyle Blagg to take you on a nice getting you started post on MAP.
Hi, Kyle Blagg here. I’m a Premier Field Engineer that has been focused on the Windows Client OS for the past few years. Prior to joining Microsoft, I worked with a Microsoft Partner focusing on Client OS deployments.
Some companies that I have worked with in the past have had the delusion that the hardware/software in their environment is only the approved hardware/software. Unfortunately this isn’t always the case. Johnny has found a way to install every toolbar possible for Internet Explorer and it may affect his upgrade to Internet Explorer 11 or Susie is still running Office 2003 on her computer with only 512 MB of ram.
So how do we as IT professionals determine what hardware/software is in our environment if we don’t have access to the System Center suite of products that can provide us with this information? On the flipside of that, what if we do have System Center, but the data that it provides isn’t really in the format that we need to easily make a decision of whether our machines are ready for the latest version of Windows, Internet Explorer, or Office.
As part of an Operating System refresh in your enterprise, there are a lot of issues to consider prior to deploying the latest and greatest version of Windows or Office or Internet Explorer. Prior to deploying a new OS, it may be helpful to know more about your environment. Wouldn’t it be helpful prior to deployment to know what hardware makes/models you have in your environment and whether or not they meet the minimum specs needed to run the software or Windows 7/8?
Well that’s where Microsoft Assessment & Planning toolkit comes into the picture. As Jeff mentioned above, MAP is another of the awesome tools created by the Solution Accelerators team. Those are the same guys who have brought you Microsoft Deployment Toolkit and the Security Compliance Manager. The Microsoft Assessment and Planning (MAP) Toolkit is an agentless inventory, assessment, and reporting tool that can securely assess IT environments for various platform migrations—including Windows 8.1, Office 2013 and Office 365, Windows Server 2012, SQL Server 2012, Hyper-V, Microsoft Private Cloud Fast Track, and Windows Azure.
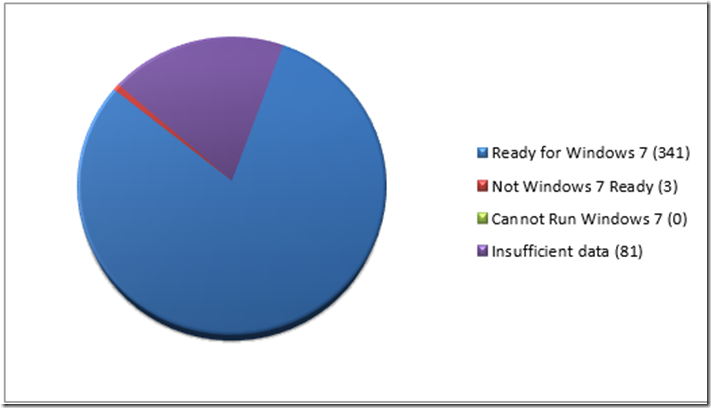
Not only does MAP assist you in getting the necessary information from your clients and/or servers, it also provides it to you in a very easy to use and digest format. The reports generated by MAP are able to be exported into Excel and Word files. The Excel reports are detailed reports that contain detailed information on each system scanned. The Word reports provide a summary of the information gathered and some helpful suggestions. Below is a sample chart from the report for Windows 7 Readiness.
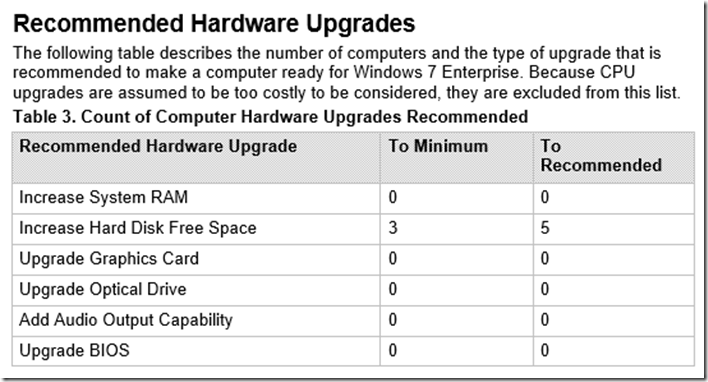
The reports that MAP generates for you take out most of the guess work of whether your hardware is compatible with the Windows 7. In this case, we only had a few machines that did not meet the recommended specifications for Windows 7. Fortunately, they were minor as all the user needed to do was free up some disk space.
One of the other pain points in an OS upgrade process is driver management. There are different philosophies on how to handle drivers for your OS deployment, so we’ll leave that discussion for another day. With that said, MAP takes out some of the guesswork of which hardware devices do you need to located drivers for. For this particular client, 82% of their required drivers were available natively in the Windows 7 image.
So that is comforting (at least to some extent right? So how do you know which drivers you need to source from other sources, well there is a report for that too.
So now that we have all the dry details out of the way, let’s dive into the installation and use of MAP. The requirements to get MAP up and running are minimal. First, you’ll need a host machine/server to use for the data collection.
You can download the MAP toolkit from the link below:
https://technet.microsoft.com/en-us/solutionaccelerators/dd537566.aspx
System requirements are MAP are:
- 1.5 GHz dual core processor
- 2.0 GB of memory
- 1 GB free hard drive space (for database)
After you download the installer and execute it, you’ll get the normal options for installation.
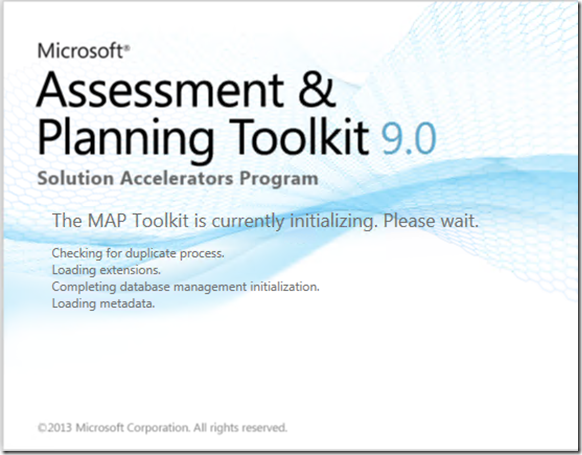
After you complete the installation, open the application from the start menu or desktop. Once you open it, you will see the following screen.
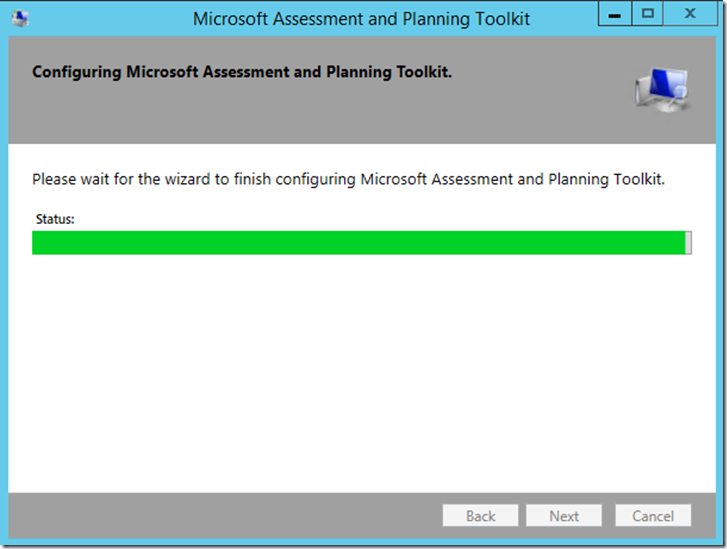
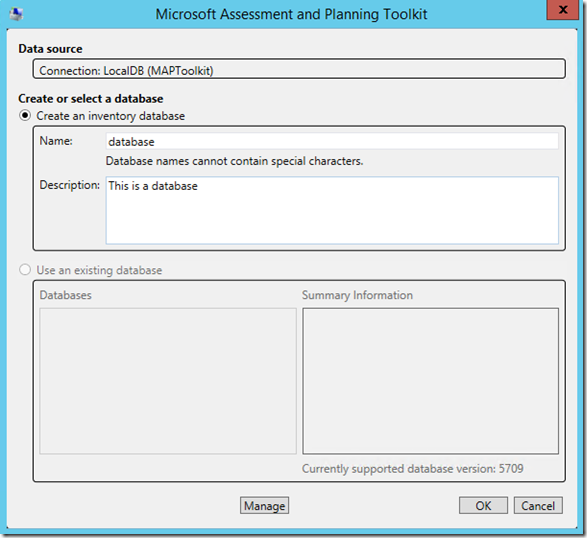
Upon first launch of the application, it will prompt you for some configuration information so it can continue the configuration process. You can select the default option of using the LocalDB and create a new inventory database. The inventory database is where MAP will store all of the collected data that is acquired during the system scan process that we’ll look at in a couple of minutes. The database will require approximately 1 MB of data per machine scanned and .5 MB for virtual machines. Keep this in mind when determining which machine you want to use as a host for MAP. From a performance standpoint, the impact on the client machines and network is minimal. During the inventory scan, MAP transfers an estimated 512KB to 1MB of data per machine across the network
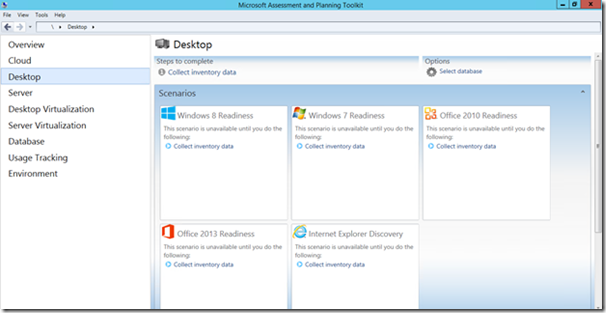
Once you have MAP pointing to the database, the application will open and you’ll be at the main dashboard. The dashboard will present you with a variety of options to pick from. Select the option that is applicable to your needs. For the purpose of this blog, we will assume that you’re intended goal is to collect data for a Windows client migration so we’ll click on the Desktop Tab on the left side of the screen.
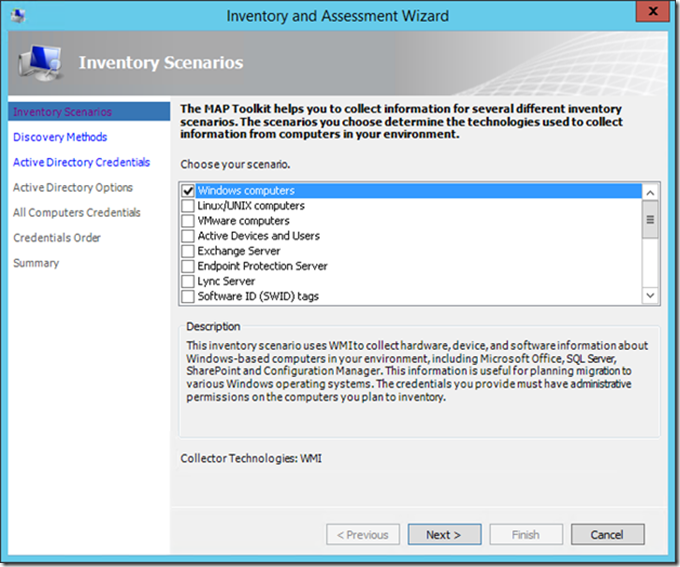
At the top, you will see an option to Collect Inventory data. Once you click that hyperlink, the Inventory and Assessment Wizard will be displayed. The options that you select on this screen will vary based on your needs. For our example, we will go with the Windows Computers option since we are looking to migrate to Windows 7.
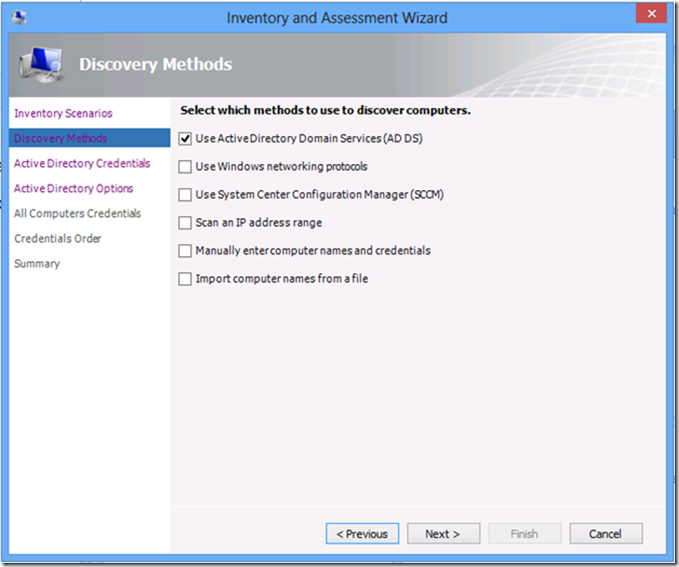
Once you click, Next you will navigate to the Discovery Methods pane where you can select from a variety of different ways to discover computers. In this example, we’ve specified Active Directory. You could select any of the options based on your needs (or a combination thereof).
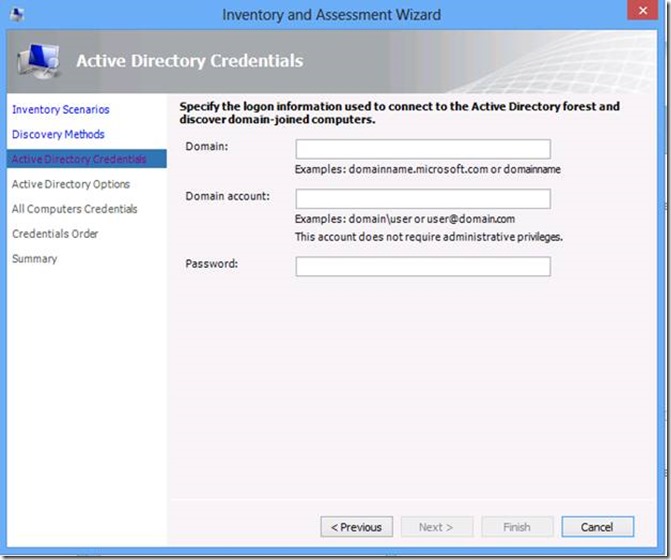
After clicking next, we will be prompted to enter the domain name and credentials for the domain that we want to scan. The credentials provided here are only to access Active Directory.
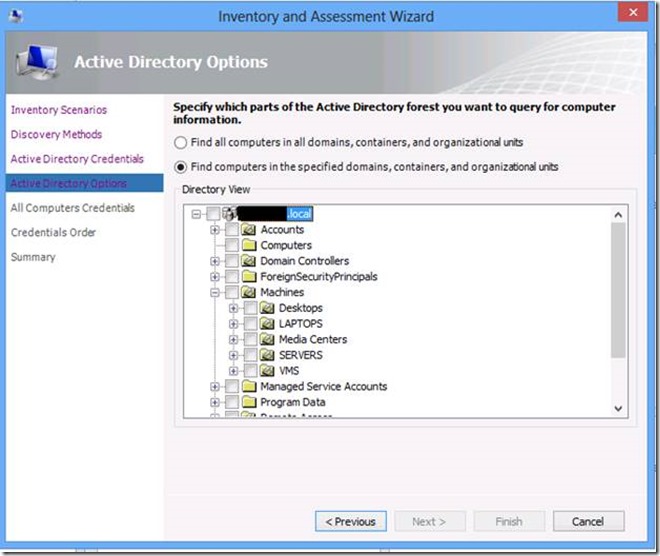
Once you enter your domain credentials and click Next, you will be taken to the pane shown below where you can target specific Organizational Units. In this example, I selected the Machines OU which targets all of the PCs, servers, laptops, etc. in this domain. Feel free to filter accordingly based on your needs.
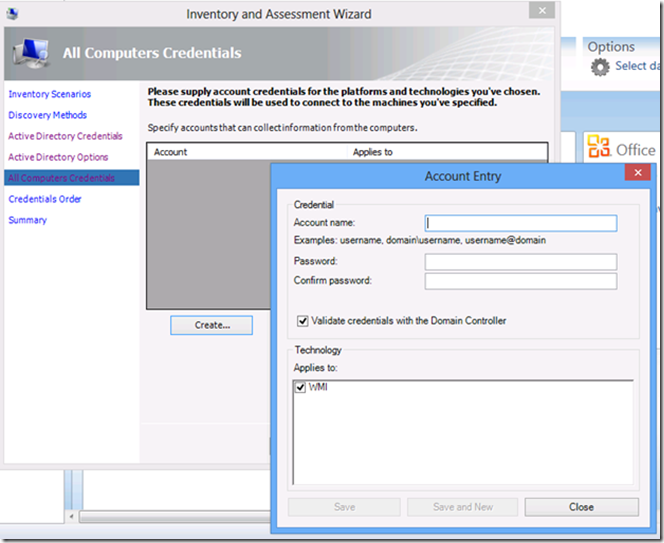
One of the most critical steps and overlooked steps in running the MAP inventory wizard is that you must provide credentials that have administrative rights on all of the targeted machines. I’ve seen instances where the technician running the tool will enter his credentials into MAP at the windows below and wonder why all of the machines report a failure afterwards. At the screen below, enter the credentials for a user/service account that has administrative access on all of the targeted machines.
Once the necessary credentials are entered, click the close button followed by Next. The next pane will provide you with a summary of your selections based on the different options that you previously selected. Once you click Finish, the inventory scan will commence.
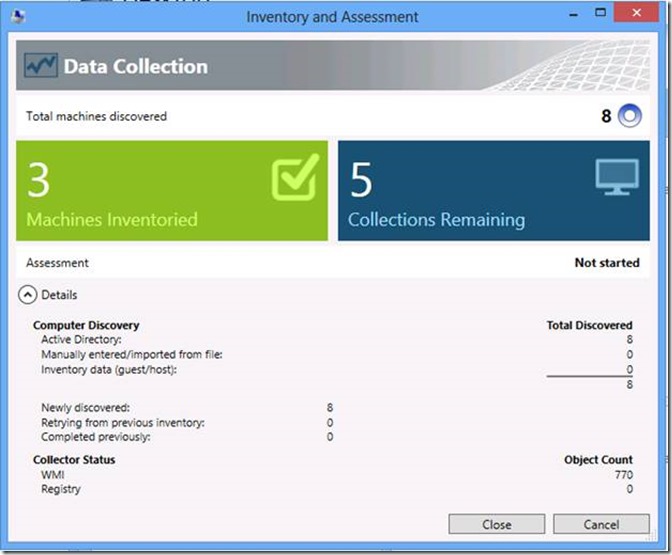
In this particular (lab) domain, there were only 8 machine accounts. Below you can see the progress pane as it scans through the different machines.
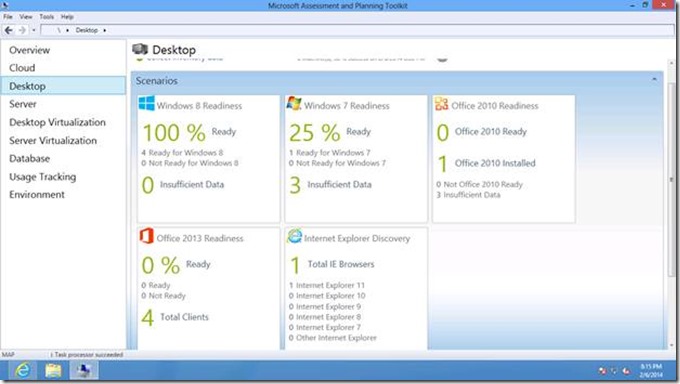
Once the scan completes, you’ll be taken back to the dashboard where it will provide Readiness information.
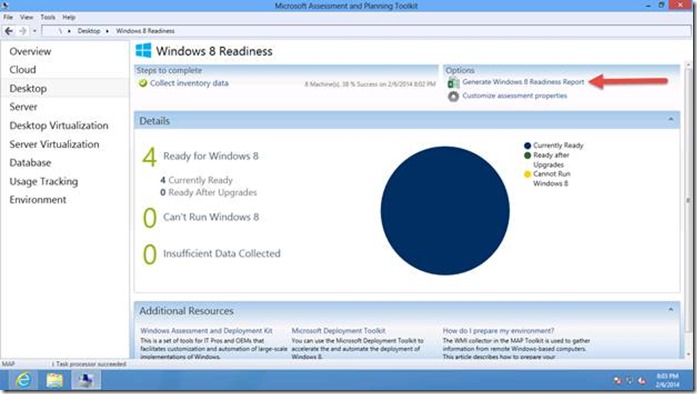
From here we can dive into the area that is important, so let’s dive into the Windows 8 Readiness section. Of the 4 machines that were online at the time of the scan, 4 of them are Ready for Windows 8. That’s probably a good thing considering those 4 machines are currently running Windows 8.1. If you want to view the detailed report with all of the information, you can click on the hyperlink at the top right for Generate Windows 8 Readiness Report.
You may need to repeat the inventory scan several times to account for machines that have been turned off or are in sleep mode or for those working remote or for those users who have already left for the day. You likely will not achieve a 100% success rate on the scan, so you will need to decide what an acceptable success rate is for your environment.
The reports generated from MAP can provide you with the needed information about the hardware and software in your environment to help you make a more informed decision about whether you should plan to implement a hardware refresh (or at least a hardware upgrade) as part of your OS deployment plan. Unfortunately, I can’t cover all of the details collected by MAP and all of the different scenarios so I would invite you to download the toolkit and run it in your environment (or lab) to see for yourself the usefulness it can provide.
-Kyle
