Getting Started with Log Parser Studio - Part 1
Hopefully, if you are reading this you already know what Log Parser 2.2 is and that Log Parser Studio is a graphical interface for Log Parser. Additionally, Log Parser Studio (which I will refer to from here forward simply as LPS) contains a library of pre-built queries and features that increases the usefulness and speed of using Log Parser exponentially. If you need to rip through gigabytes of all types of log files and tell a story with the results, Log Parser Studio is the tool for you!
None of this is of much use if you don’t have LPS and know how to get it up and running but luckily this is exactly what this blog post is about. So let’s get to it; the first thing you want to do of course is to download LPS and any prerequisites. The prerequisites are:
- Log Parser Studio (get it here).
- .NET 4.x which can be found here.
- Log Parser 2.2 which is located here.
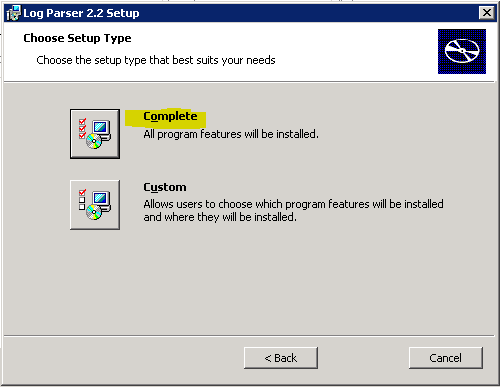
Once everything is downloaded we’ll install the prerequisites first. Run the installer for Log Parser 2.2 and make sure that you choose the “Complete” install option. The complete install option installs logparser.dll which is the only component from the install LPS actually requires:
Next we want to install .NET 4 and you can run the webinstaller as needed. Once it is installed all that is left is to install Log Parser Studio. Oh snap, LPS doesn’t require an install, all you need to do is unzip all the files into a folder in the location of your choice and run LPS.exe. Once you have completed these steps the install is complete and the only thing left is a few basic setup steps in LPS.
Setting up the default output directory
LPS (based on the query you are running) may export the results to a CSV, TSV or other file format as part of the query itself. The default location is C:\Users\username\AppData\Roaming\ExLPT\Log Parser Studio. However, it’s probably better to change that path to something you are more familiar with. To set a new default output directory run LPS and go to Options > Preferences and it is the first option at the top:
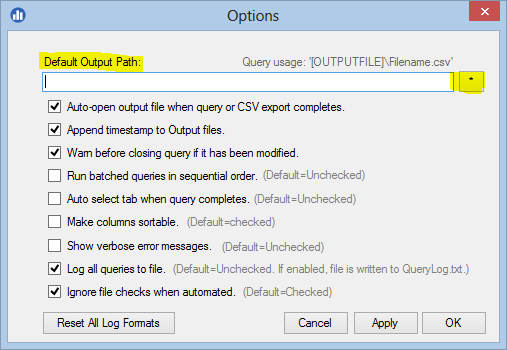
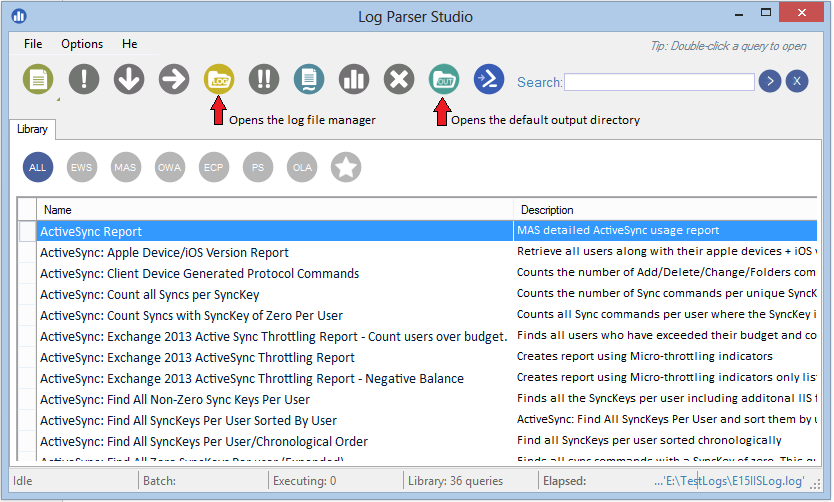
Click the browse button and choose the directory you wish to use as your default output directory. You can always quickly access this folder directly from LPS by clicking the show output directory button in the main LPS window. If you just exported a query to CSV and want to browse to it, just click that button, no need to manually browse:
Choose the log files you wish to query
Next you’ll want to choose the log file(s) you want to query. If you are familiar with Log Parser 2.2 the following physical log file types are supported: .txt, .csv, .cap, .log, .tsv and .xml. To choose the logs you need open the log file manager by clicking the orange “log” button shown in the screenshot above. Technically, you can query almost any text based file, more on that in upcoming articles.
In the log file manager you can choose single files, multiple files or entire folders based on log type. Just browse to the logs you care about. You can house multiple file types in the log file manager and only the ones that are checked will be queried. This is very handy if you have multiple log types and you need to quickly switch between without having to browse for them each time:
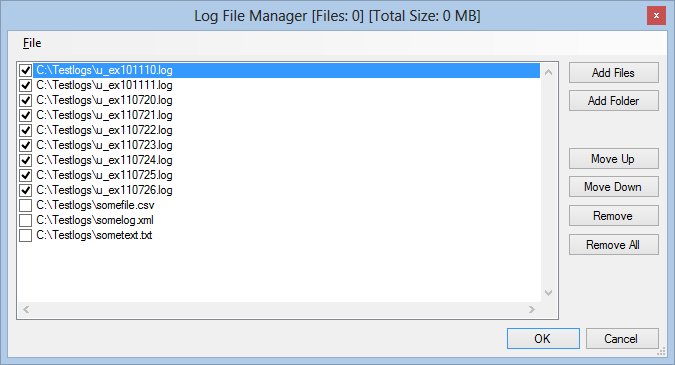
Note: When adding a folder you need to double-click or select at least one log file. LPS will know that you want all the files and will use wildcards accordingly instead of the single file you selected. If you use the Add Files button then only files you select will be added.
Running your first query
By this point you are ready to start running queries. All queries are stored in the LPS library which is the first window you see when opening LPS. To load any query to run, just double-click it and it will open in its own tab:
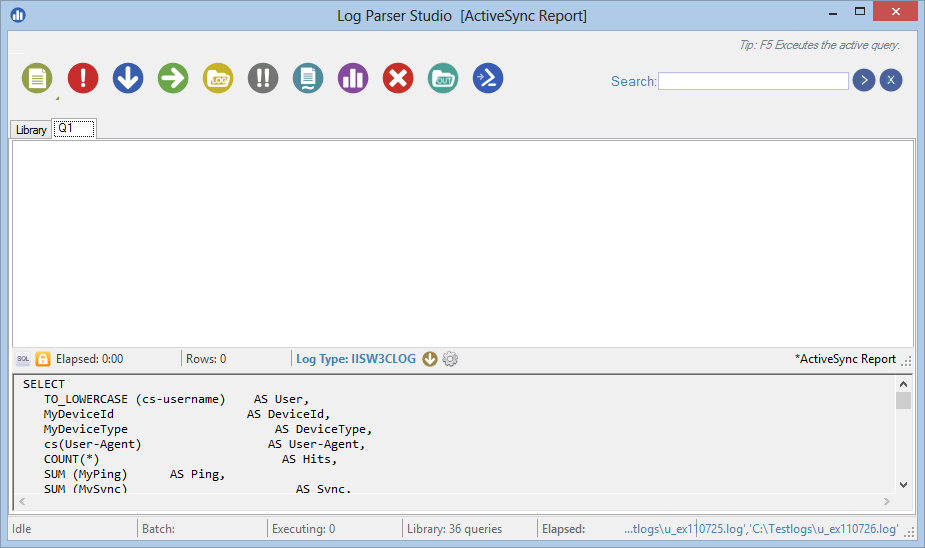
The only thing left is to execute the query and to do so just click the execute query button.  If you are wondering why I chose such an icon as this it’s because Log Parser uses SQL syntax and traditionally this icon has always been used to identify the “run query” button in applications that edit queries such as SQL Server Management Studio. If you are wondering why there is another button below that is similar but contains two exclamation points you might be able to guess that it executes multiple queries at once. I'll elaborate in an upcoming post that covers grouping multiple queries together so they can all be executed as a batch.
Here are the results from my test logs after the query has completed:
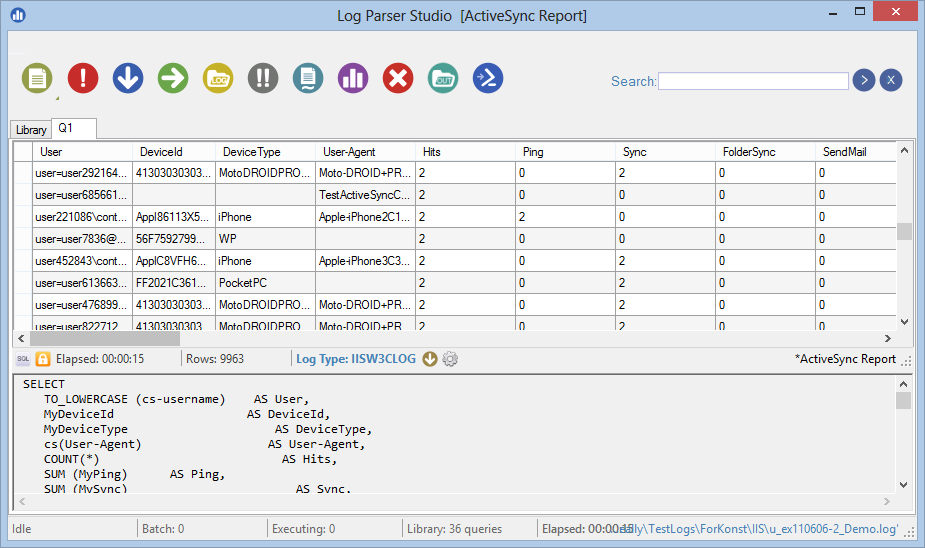
We can see that it took about 15 seconds to execute and 9963 records were returned, there are 36 queries in my test library, zero batches executing and zero queries executing.
Conclusion
And that’s it, you are now up and running with LPS. Just choose your logs, find a query that you want to use and click run query. The only thing you need to be aware of is that different log formats require different log types so you’ll want to make sure those match or you’ll get an error. In other words the format for IISW3C format is different than the format for an XML file and LPS needs to know this so it can pass the correct information to Log Parser in the background. Thankfully, these are already setup inside the existing queries, all you need to do is choose an IIS query for IIS logs and so on.
Most every button and interface element in LPS has a tool-tip explanation of what that button does so be sure to hover your mouse cursor over them to find out more. There is also a tips message that randomly displays how-to tips and tricks in the top-right of the main interface. You can also press F10 to display a new random tip.
You can also write your own queries, save them to the library, edit existing queries and change log types and all format parameters. There is a huge list of features in LPS both obvious and not so obvious, thusly upcoming posts will build on this and introduce you the sheer power and under-the-hood tips and tricks that LPS offers. It’s amazing how much can be accomplished once you learn how it all works and that’s what we are going to do next. :)
Continue to the next post in the series: Getting Started with Log Parser Studio - Part 2