Deploy Server 2016 – Part 2
Welcome everyone to Part 2 of my experiences deploying Server 2016. In Part 1, I gave a breakout of the stages of my deployment, and some of the details about our initial Group Policies. This post will follow the next steps of Stage One, where we build out the first 2016 server in the environment, apply the policies, and submit the server to our security team for scanning.
Picking up where we left off, I have taken the two policies that were created, Server 2016 Security Policy and Server 2016 Standard Policy, to the Server 2016 Organizational Unit (OU).

Before we start building our 2016 server, we will create a new Computer Object in the Build Staging OU in the Server 2016 OU structure. Do this by opening Active Directory Users and Computers and browse to the Server 2016-> Build Staging OU. Right click on Build Staging and choose New -> Computer. The reason we are creating our computer object in Active Directory before we do the actual creation is that we want to be certain that all our policies are applying to the servers from the moment they join the domain. This will help ensure the security of the servers and of our environment. 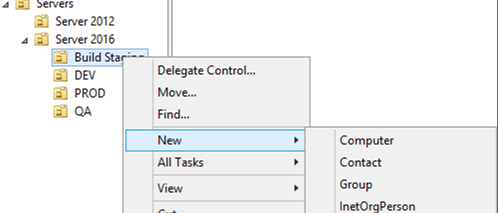
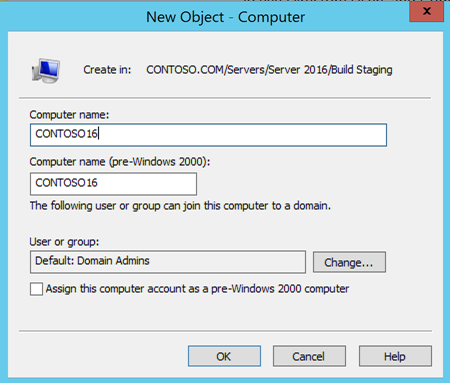
In the New Object – Computer wizard, enter the Computer Name of the new 2016 Server.

Since we've already applied the policies at a higher OU, they will flow down and apply to any objects in the sub OUs, so our newly created computer object will receive them with no additional work.
And now we move on to the creation of the server itself!
Following our plans for Stage One, we will install the server with the Desktop Experience. There are plenty of sites out there that detail the installation process for Server 2016 (like this one, and this one) so I won't duplicate the process here. I will call out the one part of the install that is important to us: the 'Select the operating system you want to install' screen, where it defaults to the Windows Server 2016 Datacenter edition. Don't be misled by the name, that is the CORE install, and not what we're looking for right now. We'll come back to that another day, but for right now, be sure to click on Windows Server 2016 Datacenter (Desktop Experience) before clicking next.

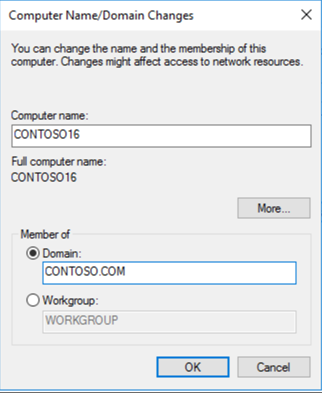
Now that our server is built and powered on, we'll log in as the local administrator and configure the server with a new IP address, name, and then we'll join the domain. Again, there are many resources detailing how to go through the initial configuration of a 2016 server (like here, here, and here), so I won't beat that to death here. I will show that I am going to join the CONTOSO.COM domain and my machine will be named CONTOSO16.
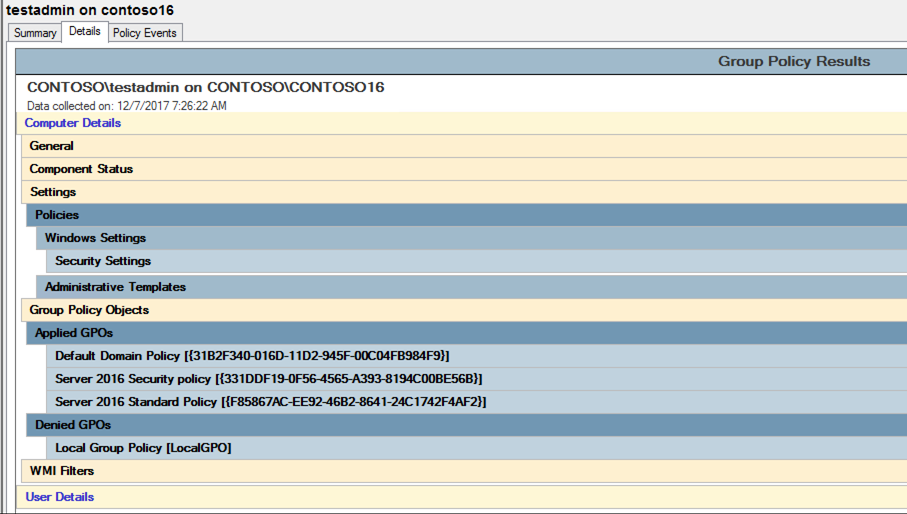
With the machine joined to the domain, we can verify that it is accepting the group policies by running the Group Policy Results Wizard from the Group Policy Management Console and check the Applied GPOs section.
Now that we have verified our new CONTOSO16 server has received the appropriate group policies, we can ask our security team to scan the server and verify that it meets all the requirements. For our test environment, they are testing to ensure all our policies are correct, and that they have been applied.
In our case, we have had several failures, listed here.
- Issue 1: Ensure 'Audit PNP Activity' is set to 'Success'
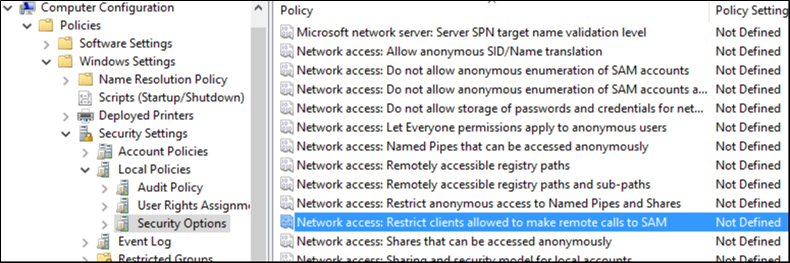
- Issue 2: Ensure 'Network access: Restrict clients allowed to make remote calls to SAM' is set to 'Administrators: Remote Access: Allow'
- Issue 3: Disable IPv6 (Ensure TCPIP6 Parameter 'DisabledComponents' is set to '0xff (255)')
Issues 1 and 2 are new options for Server 2016, and Issue 3 has been a corporate preference. Microsoft recommends keeping IPv6 enabled, even if it is not being configured for use in the environment, but this is not a hard rule and in this customer's environment they have chosen to disable it.
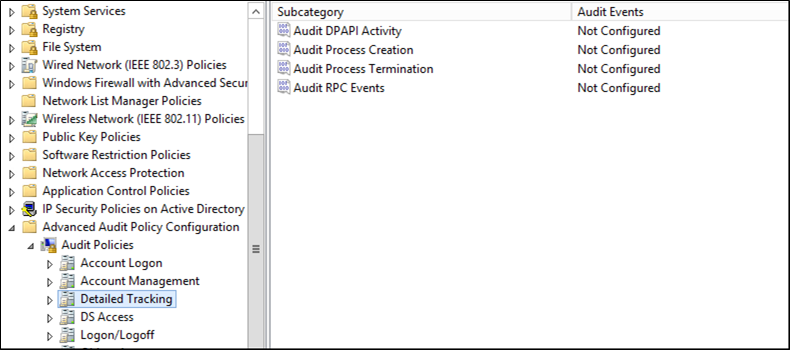
Because Issues 1 and 2 are new, even when loading the newest templates into our PolicyDefinitions folder on our central store in %systemroot%\ SYSVOL\sysvol\CONTOSO.COM\Policies, if we open the Group Policy Management Console from any server below 2016 or a workstation with the Remote Server Administration Tools (RSAT) that is below Windows 10, we won't be able to see those new features. Also, any other new settings will only be visible from either a Windows 10 workstation or a 2016 server.
Here's the view from our 2012 R2 Domain Controller:

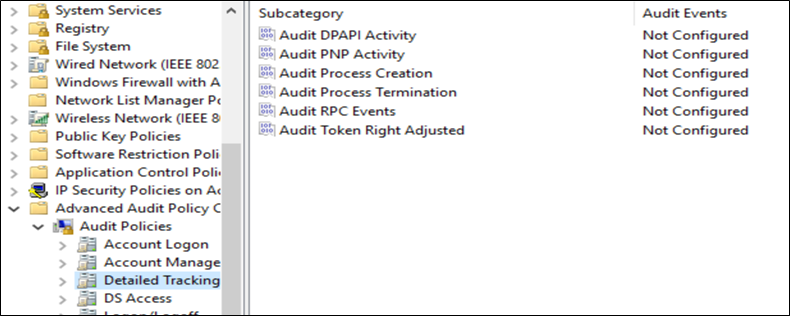
And here it is from a 2016 server:
Resolving the issue of turning off IPv6 is a little more complicated. As I've stated, Microsoft's official stance is to not turn it off, so there is no built-in policy to do so. Fortunately, there are a lot of great people out there and there are some template files which can be downloaded to help us resolve this issue. This link has an article on how to do so, and I'll summarize it here.
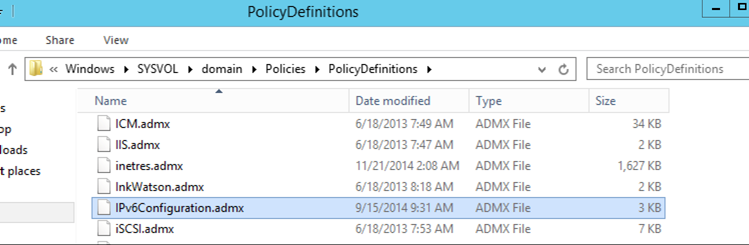
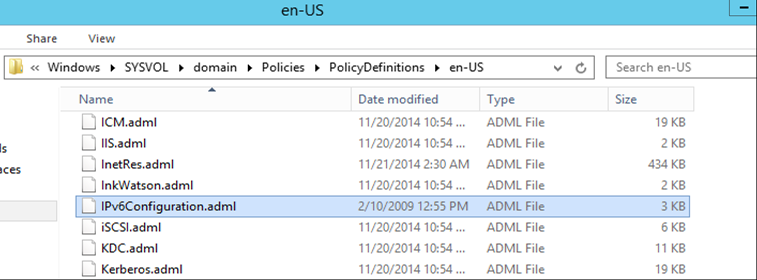
Once you have downloaded the IPv6Configuration.zip file, extract both the ADMX and ADML files. If your domain has a central store for the policies, the IPv6Configuration.admx files should be placed in the %SystemRoot%\SYSVOL\domain\Policies\PolicyDefinitions folder as shown below. If your domain is not using a central store (fix that, they should be), then place the file in the %SystemRoot%\PolicyDefinitions folder on each of your Domain Controllers or the machine where you are editing your group policies (i.e. a machine with the RSAT installed). Depending on how many Domain Controllers you have, you'll quickly realize that a central store is much more efficient.
Now place the IPv6Configuration.adml file in the %SystemRoot%\SYSVOL\domain\Policies\PolicyDefinitions\en-US folder (replacing en-US as needed with your country code). Again, if you are not using a central store (which you should be), the file should be placed in the %SystemRoot%\PolicyDefinitions\en-US folder (replacing en-US as needed with your country code).
Now that we've loaded in the IPv6 templates, we can see them in our Group Policy Editor. The new template will be visible in Computer Configuration -> Policies -> Administrative Templates -> Network -> IPv6 Configuration. 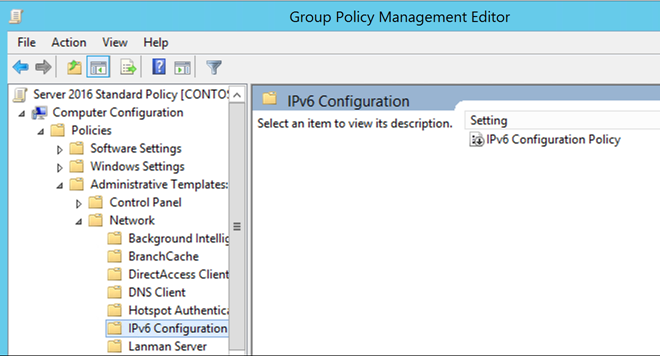
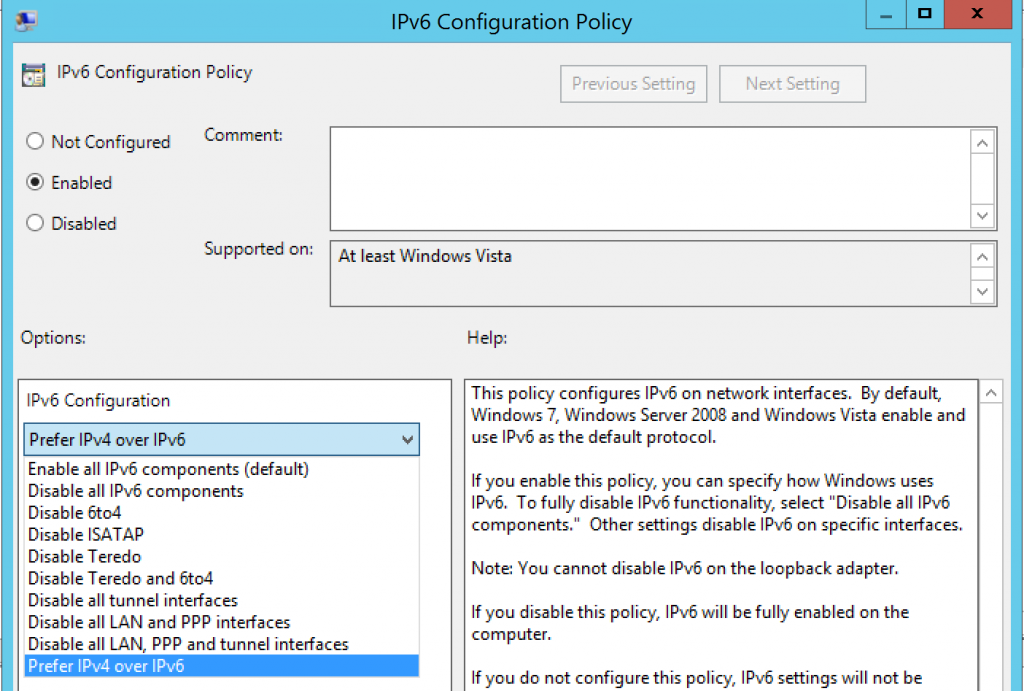
Once we open and set the policy to Enabled, we'll see there are a lot of options in the drop-down menu. Since our customer does not want IPv6 but Microsoft recommends not disabling it, we'll choose Prefer IPv4 over IPv6 components to do this. While this policy specifies Windows 7 and Windows Server 2008, it still applies to newer versions of Windows Server and Windows clients.
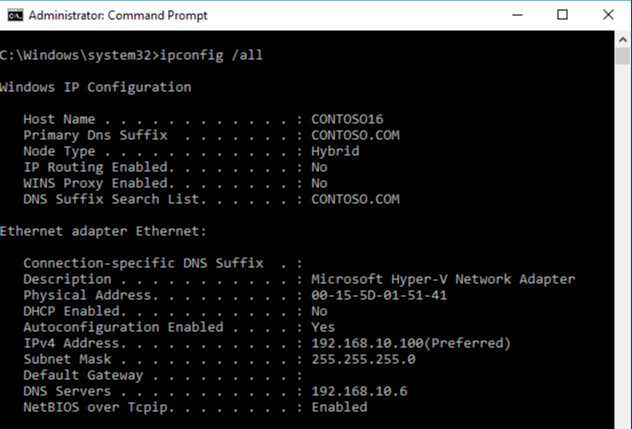
After enabling and configuring the IPv6 policy, we will verify it has taken effect on our new server. From the command prompt on our CONTOSO16 server, we run the IPCONIFG /ALL command and verify that there is no setting for IPv6.
Now that we have verified that all our issues have been resolved, we can submit it back to the security team and have them run their scans for the official record. Our result this time: SUCCESS! Our server has passed all the necessary checks for the Development environment.
After completing our server build and passing the security checks, we can pass off our server to the VMWare administrators so that they can turn it into a template and deploy it to other environments for agent installation and further testing.
As our deployment project moves along, I'll post more details of the actions taken. Please post your comments, and if there's anything you'd like more details on, let me know!