How to Install System Center 2012 R2 Configuration Manager SP1
Hi All :
Today, I will use this blog post to instruct you how to apply SP1 for System Center 2012 R2 Configuration Manager.
My testing environment have six VMs:
- DC
- DB
- Primary Site Server (SC2012 R2 CM CU4)
- Remote Console
- ClientA
- ClientB
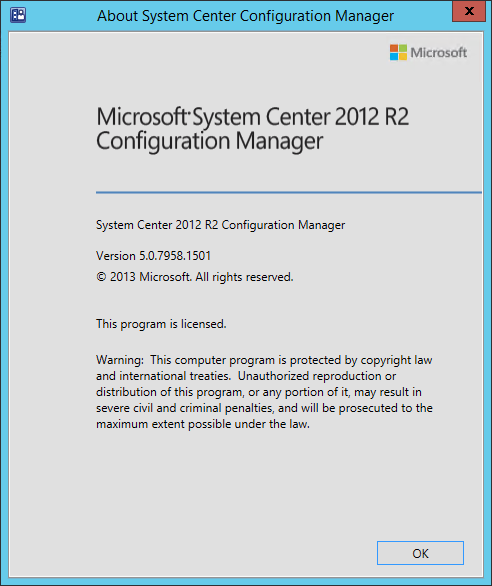
1-3 OS based on Windows Server 2012 R2 DataCenter RTM ; 4-6 OS based on Windows 8.1 Enterprise RTM ; Database is SQL Server 2012 with SP1. The System Center 2012 R2 Configuration Manager CU4 version is 5.0.7958.1501 :
This update totally have three main step:
- Updating Site Server
- Updating Client Agent
- Updating Remote Console
1) Let's starting step one now. Download SC2012 CM SP2 & SC2012 R2 CM SP1, you can follow the last blog post to order these packages : https://blogs.technet.com/b/justin_gao/archive/2015/05/14/announcement-system-center-2012-r2-configuration-manager-sp1-amp-2012-configuration-manager-sp2-released.aspx
2) Based on preinstall information, for upgrade your installation: If you have a System Center 2012 R2 Configuration Manager installation, you can use the System Center 2012 Configuration Manager SP2 media to install the latest patches and automatically upgrade to System Center 2012 R2 Configuration Manager SP1. For new installation: Install System Center 2012 Configuration Manager SP2 first, and then install System Center 2012 R2 Configuration Manager SP1 at the top-tier site of your hierarchy. Both of these installation files are included as part of this evaluation.
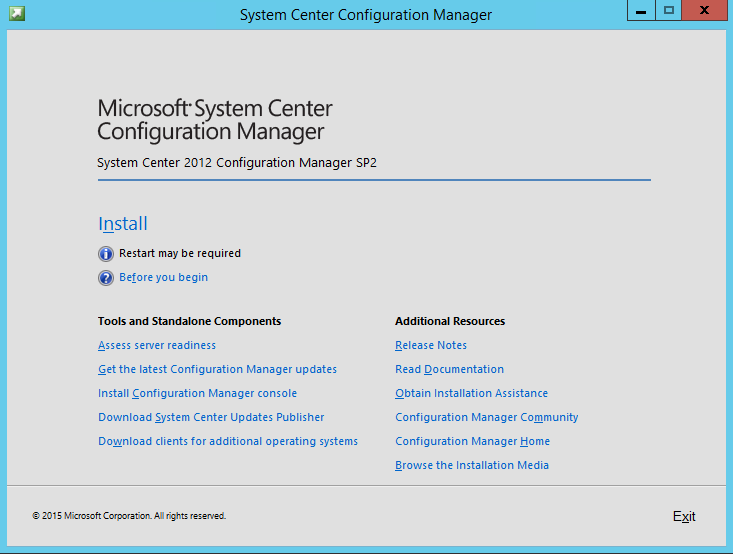
3) Logon to Primary Site Server, double-click SC2012 CM SP2 install file, the installation wizard dialog box appears:
4) Click Install, on the Before You Begin page, click Next
5) On the Available Setup Options page, make sure you selected Upgrade this Configuration Manager site, then click Next
6) On the Microsoft Software License Terms page, select I accept these license terms, then click Next
7) On the Prerequisite Licenses page, select all I accept these License Terms, and click Next
8) On the Prerequisite Downloads page, select you needed option to download updates and click Next
9) On the Server & Client Language Selection page, select you needed language and click Next
10) Then into the Prerequisite Check phase, make sure we passed check, and click Begin Install into the installation phase
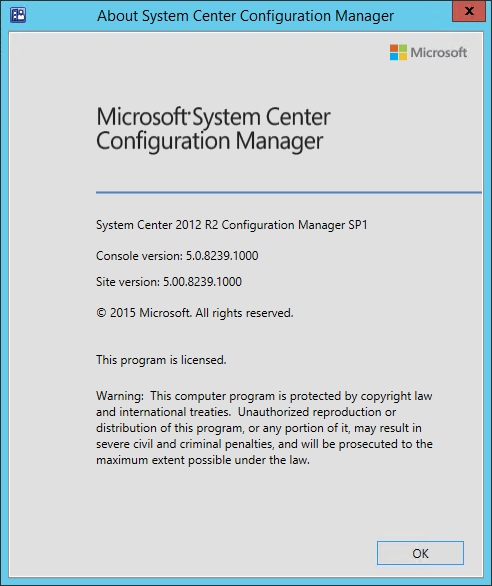
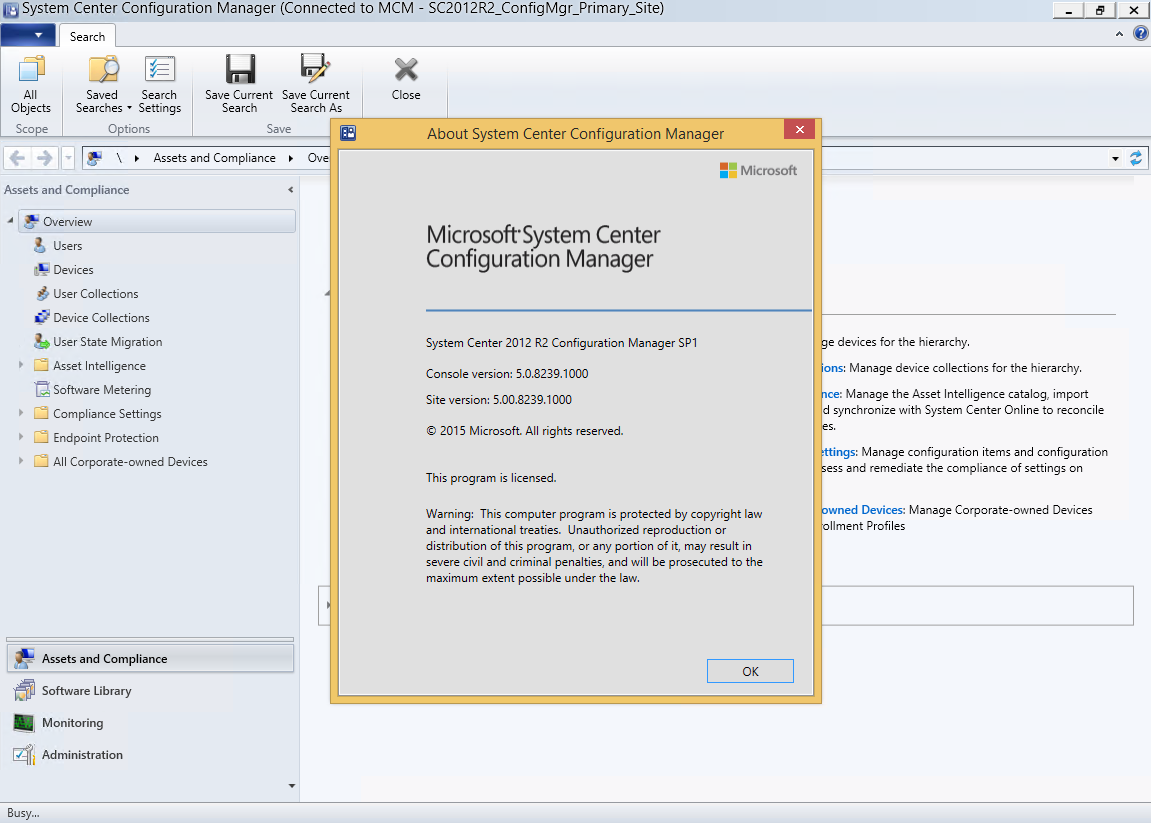
11) Installation phase about 30 minutes, when install finished, the SP1 version is 5.0.8239.1000 :
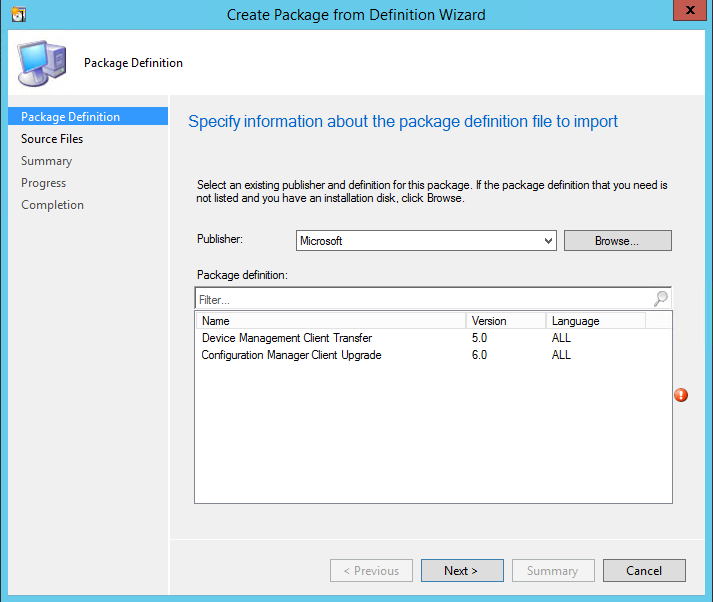
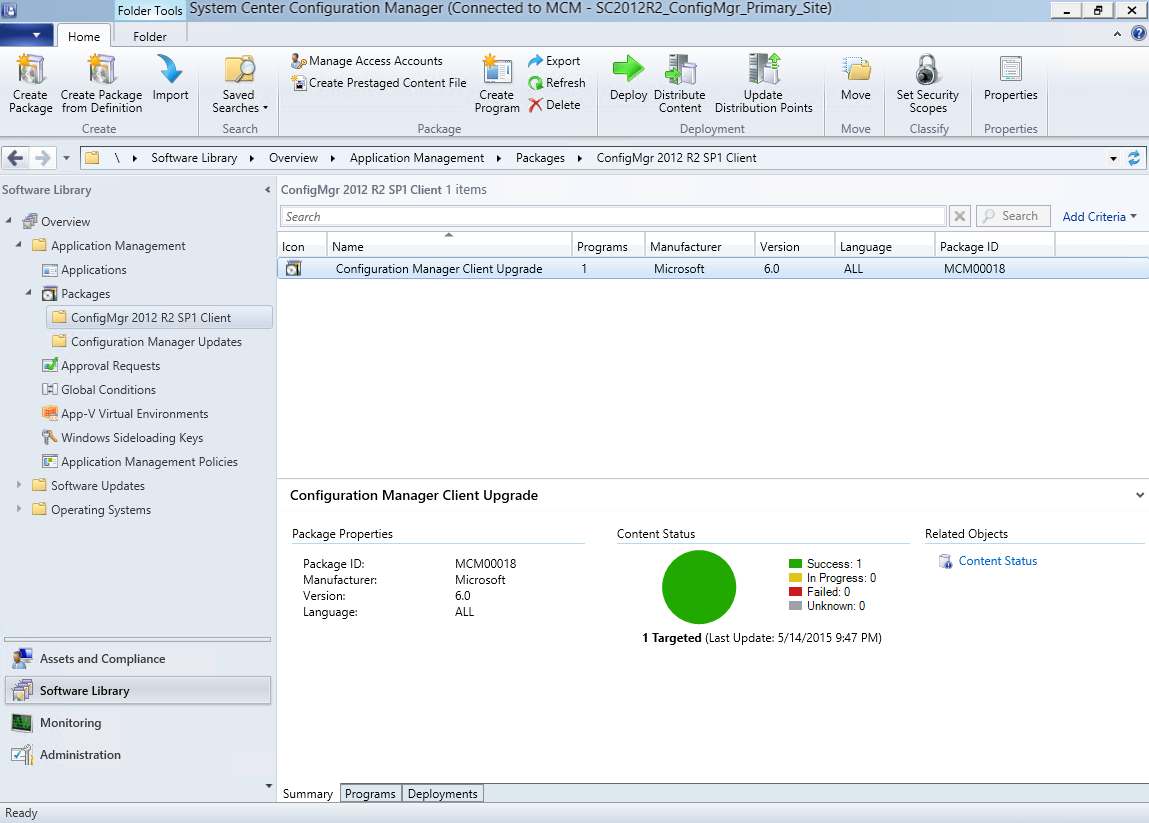
12) Then I will to upgrade client agent. Create a Client Upgrade package, on the Package Definition page, select Configuration Manager Client Upgrade:
13) When you finish packaging, you need to Deploy it to the clients.
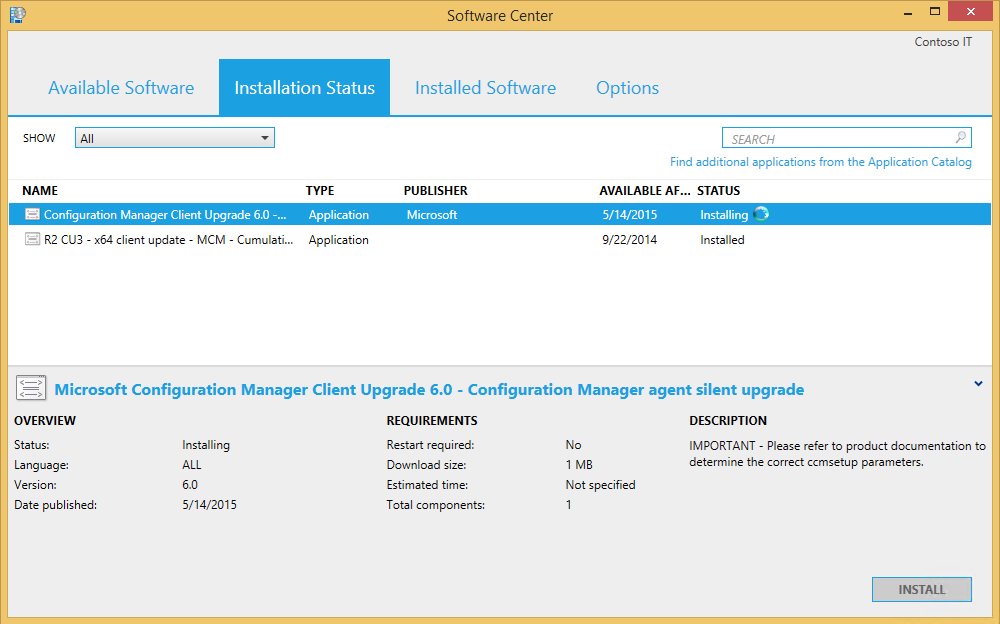
14) Then the client will upgrade client agent automatically :
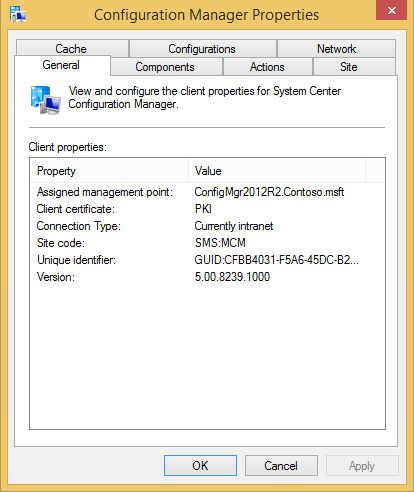
15) The Client Agent version is 5.00.8239.1000:
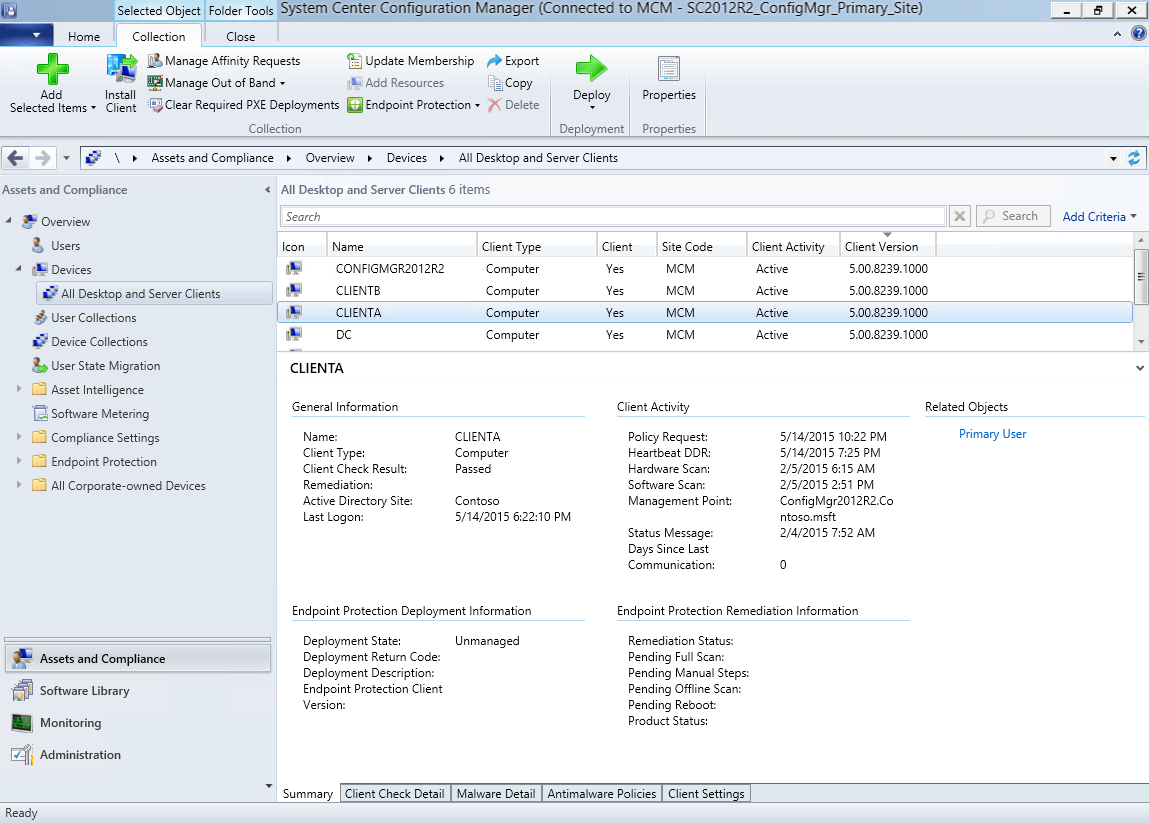
16) From the management console, you can see all client upgrade results:
17) Last, logon to Console computer, install .Net framework 3.5 SP1. Then double-click installation file, the installation wizard appears, click Install
18) On the System Center Configuration Manager page, click Next
19) On the Site Server page, enter the site server FQDN name, click Next
20) On the Installation Folder page, choose the install path, click Next
21) On the Customer Experience Improvement Program page, select your needed and click Next
22) On the Ready to Install page, click Install
23) When install finished, click Finish, the management console will opening
Now, I finished System Center 2012 R2 Configuration Manager SP1 upgrade. You can start to testing new features.
Enjoy!
Justin Gao
Microsoft (China)