Azure Backups and Site Recovery – Encrypted SQL Backups
Introduction
This document is intended to assist the user in configuring Azure Recovery Services for on premise backups of encrypted SQL Server Backups.
The goal of this document is to demonstrate the capability of backing up encrypted Database backups, where the encryption key stays in possession with the customer (onsite) and is not managed by any external service.
Configure Azure Recovery Services
Navigate to https://ms.portal.azure.com, sign in with your subscription details. This will be the account that will contain your Recovery Service.
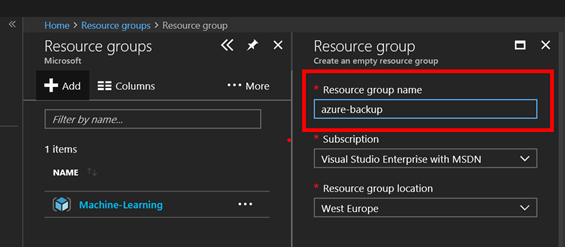
Create a Resource Groups to manage your Azure Recovery Services Vault
This step will create a resource group, which we will contain the Azure Recovery Services vault at the end of this demo.
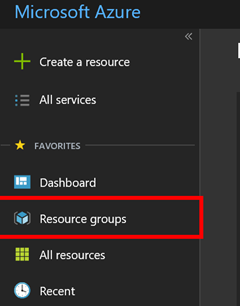
Click on Resource Groups
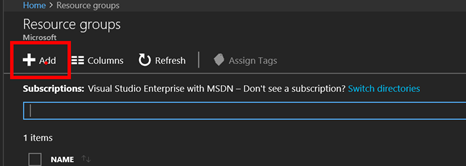
Add a resource group
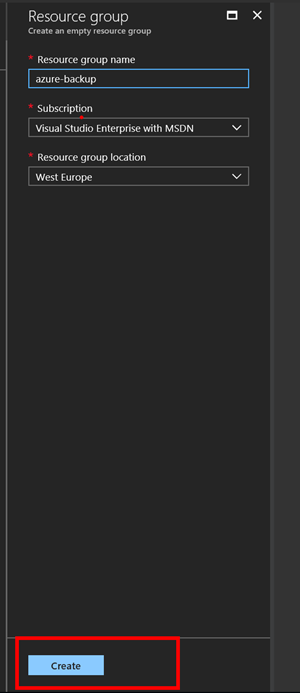
Give your resource group a name and select the region you would like the resource group to belong
To, in this example, we called the resource group "azure-backup"
Click Create once configured
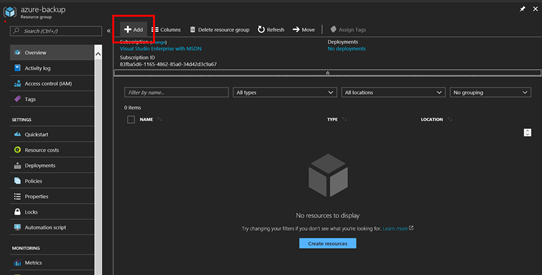
Once the resource group is created, select the resource group

Select Add in your resource group, to begin adding the Azure Recovery Service
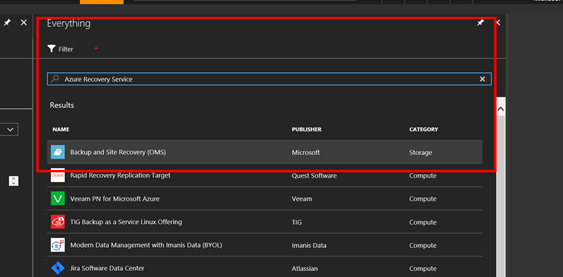
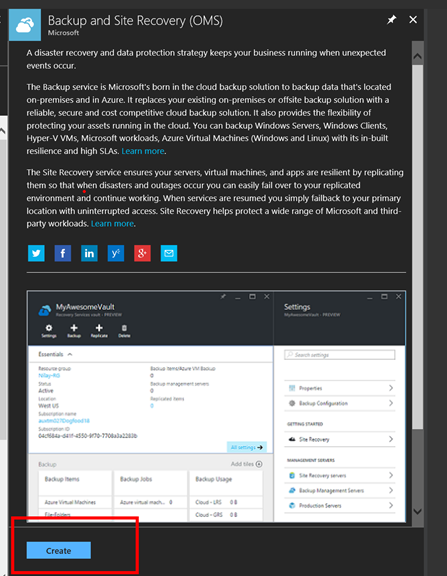
Search for "Azure Recovery Service" and select the "Backup and Site Recovery (OMS)" option.
Click Create to create the Vault
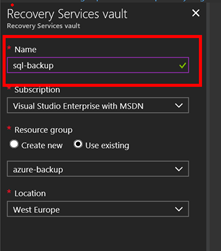
Give your recovery services vault a name and select the resource group previously created. Once filled in, click create.
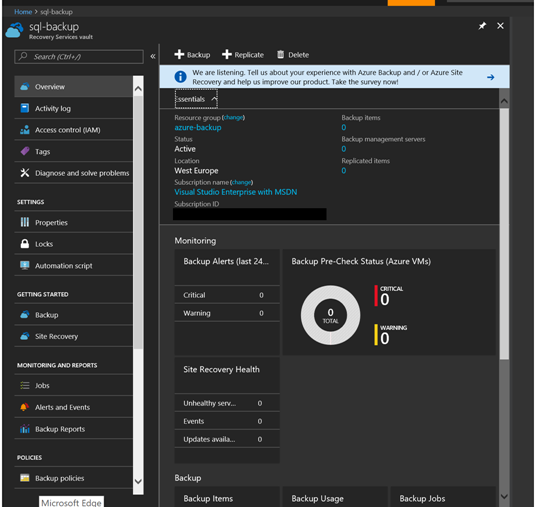
Once your Vault has been created, you will be presented with the overview blade of the Recovery Services Vault.
Configuring Azure Recovery Services Backups
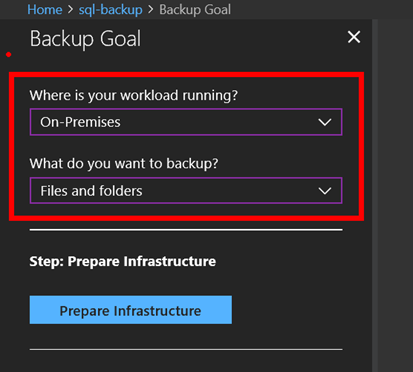
This step will allow you to configure what you want to backup to the vault.
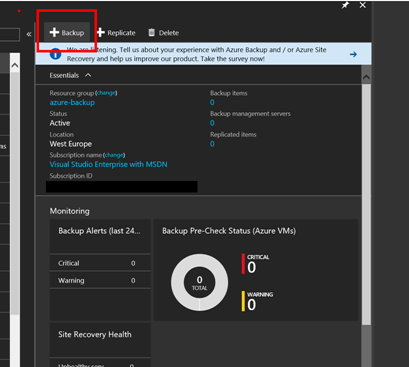
You will be presented with a blade to select the types of backups you want to do. For purposes of this documents, configure your backups as follows, and select "Prepare Infrastructure":
This will prompt you to download the recovery services agent, as well as the credentials to authenticate your on-premises infrastructure, with your vault
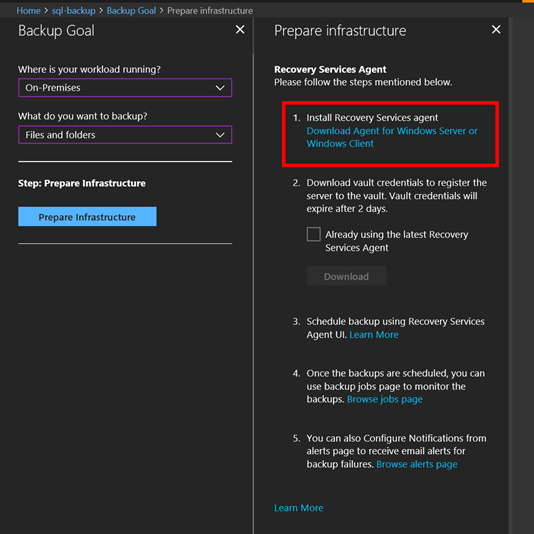
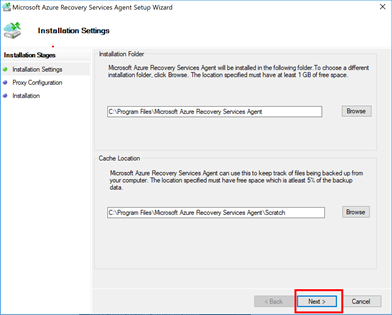
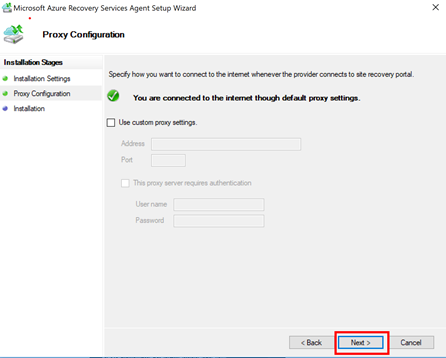
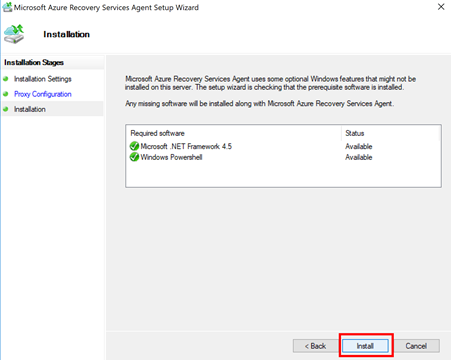
Follow Steps 1, but installing the Recovery Services Agent, and configure the agent to suit your environment. i.e. proxy setting if applicable.

Return to the azure portal, to download your credentials
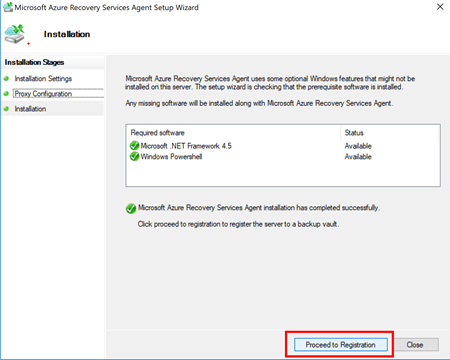
Once the agent is installed, proceed to step 2
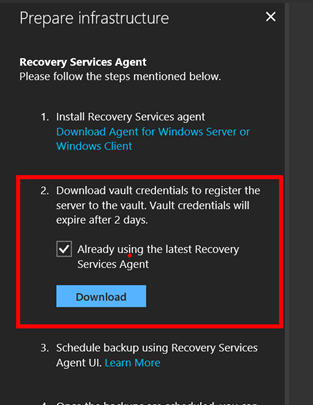
Save your credential file

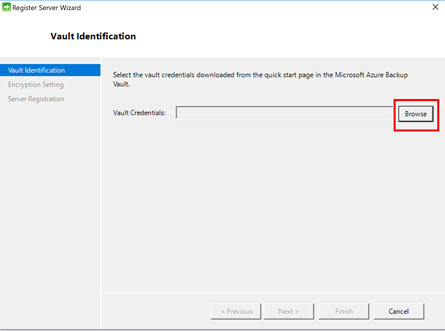
Import this file via the Recovery Services Agent
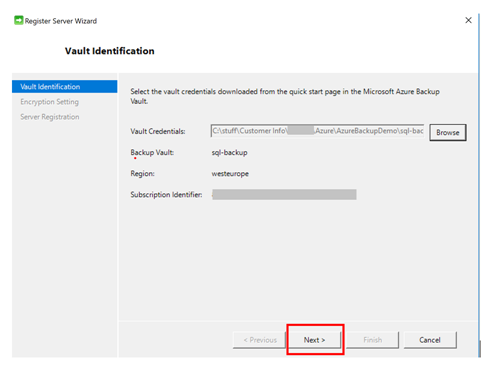
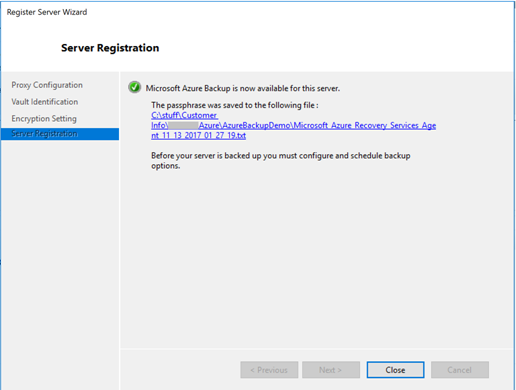
Configure your Passphrase, this is your password to the vault, and needs to be kept safe and click Finish when done.

Registration successful
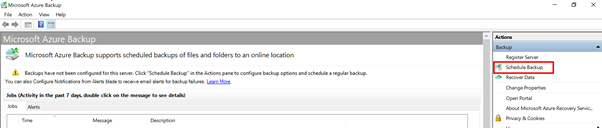
Configuring Backup Schedule
Once the Azure Recovery Services Agent has been installed and configured, the next step would be to configure and schedule your backups.

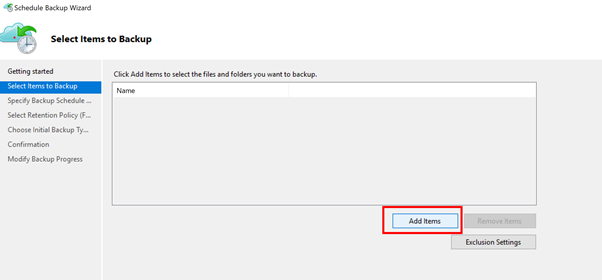
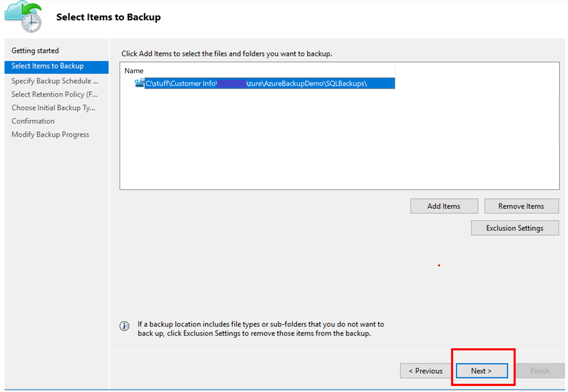
Add items you wish to backup.
In this example, we are going to add a folder location for the Encrypted SQL Server Backups we wish to back up.
Navigate to the folder location you wish to back up

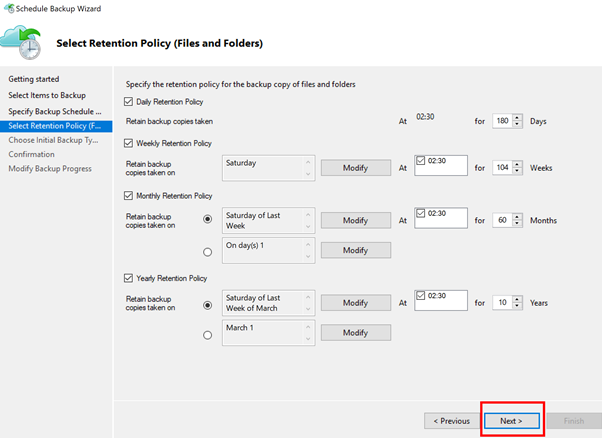
Configure your schedule as necessary

Configure retention period
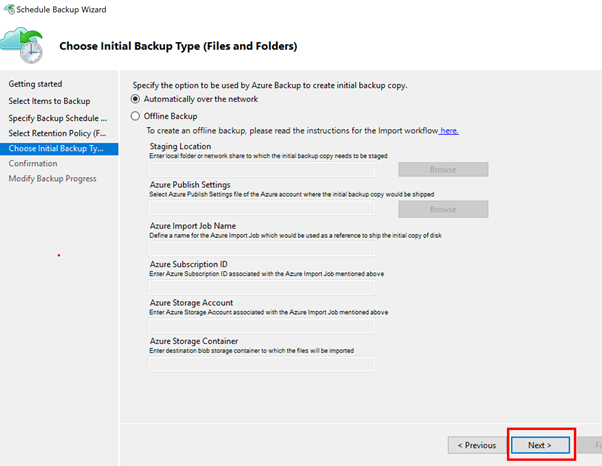
Configure initial backup options
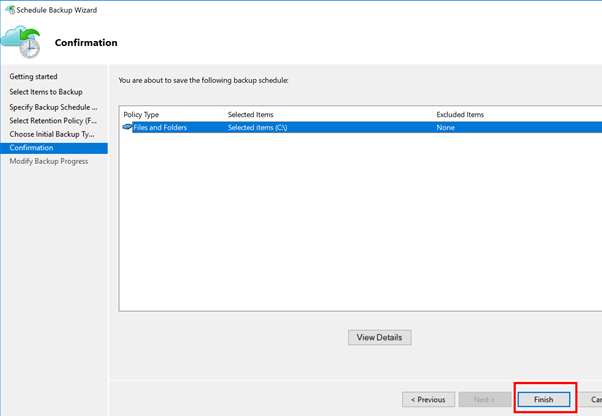
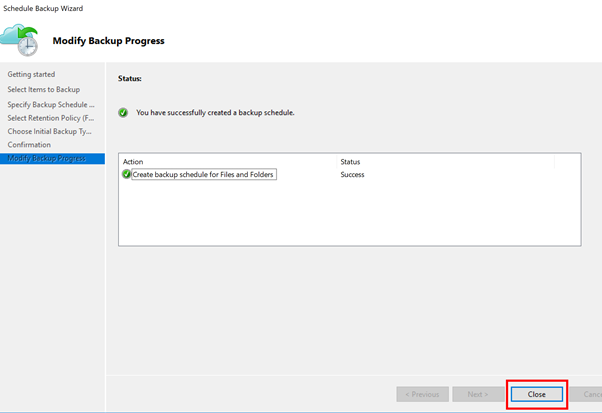
Confirm and Finish
Confirm Success and Close
Backing up a SQL Server Database
This demo will illustrate the steps in backing up a database and having the Azure Recovery Service back the SQL Server backup file to Azure
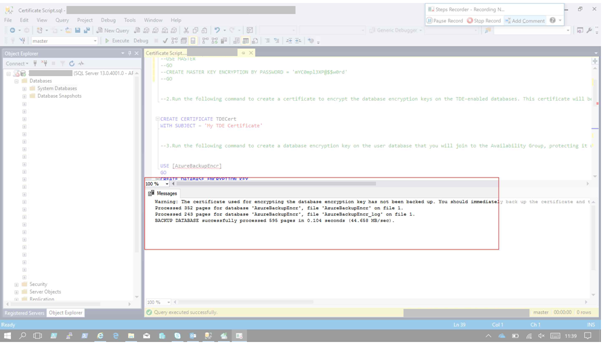
Perform an encrypted backup to a disk location

Take note of the warning, to back up your certificate.
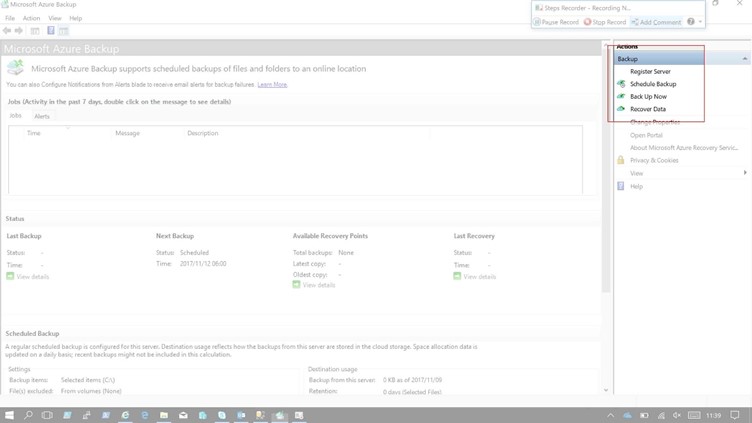
You can manually execute a backup from the Microsoft Azure Recovery Services agent, by selecting to "back up now". This will have the recovery services agent send the backup file to your azure vault for safe keeping.
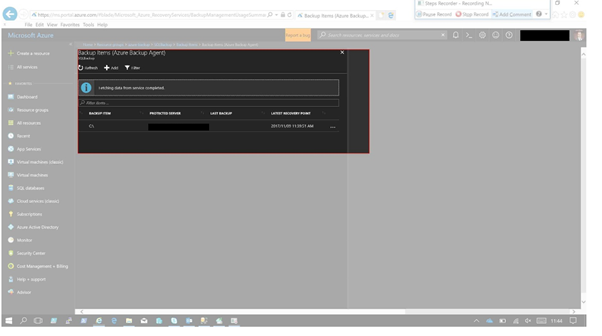
Verify your machine is now listed in the vault as a backup item:
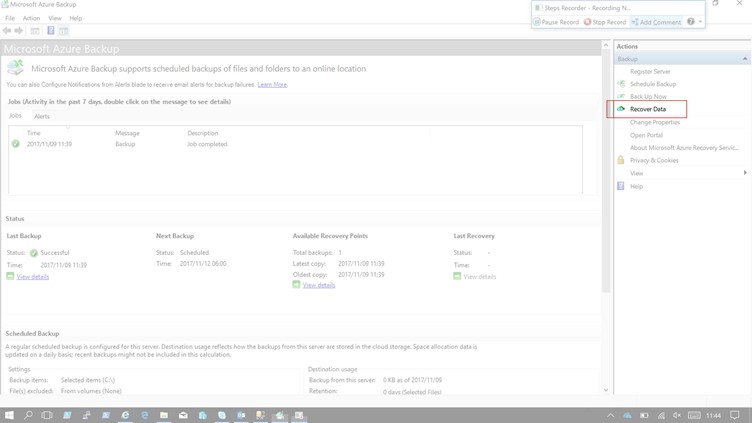
Performing a recovery
To restore your database backup, you will need to perform a recovery of the vault, which will allow you to select at which point in time, or schedule, you would like to recovery from. This will recover the entire directory structure of your recovery site, and you will be able to restore the database. This will be demonstrated in the next following steps.
Select Recover from the Microsoft Azure recovery Services agent
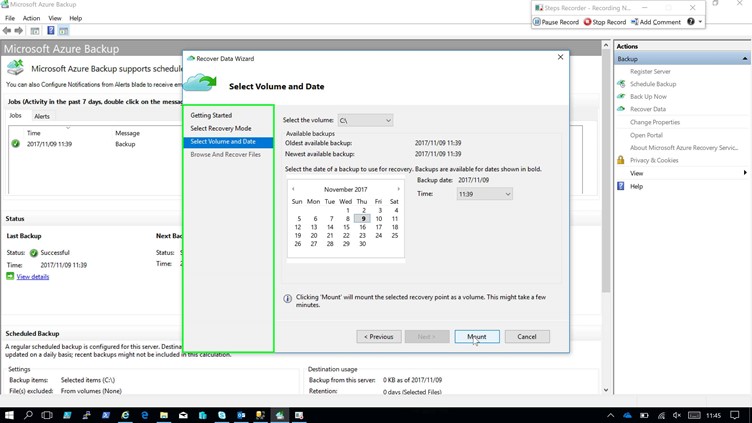
Select the point in time which you would like to recover.
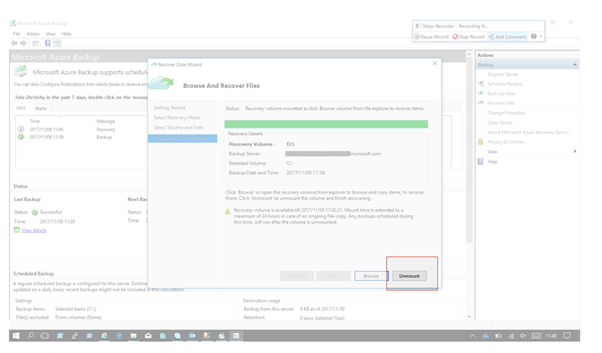
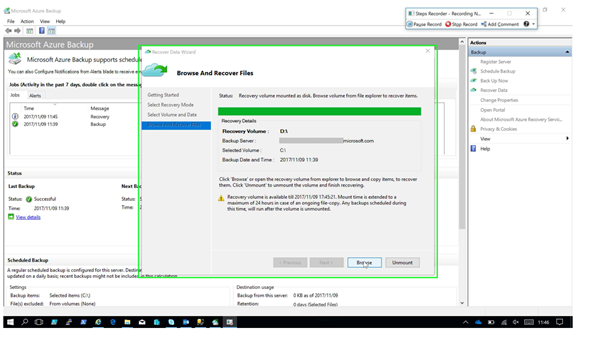
You will notice that a volume is mounted as a disk you can browse though. This will allow you to click through the directory structure, to retrieve any files you wish to retrieve. These may be copied off the mounted volume and placed on a separate disk for future use.
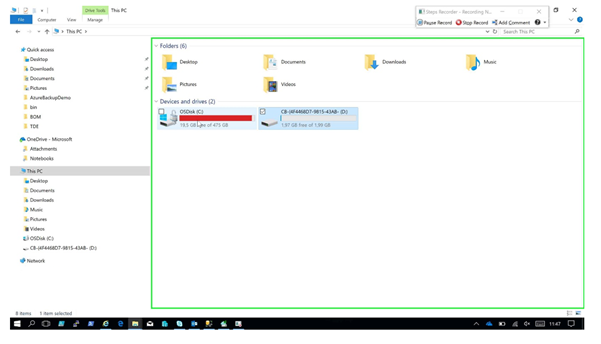
An example of the mounted volume for recovery.
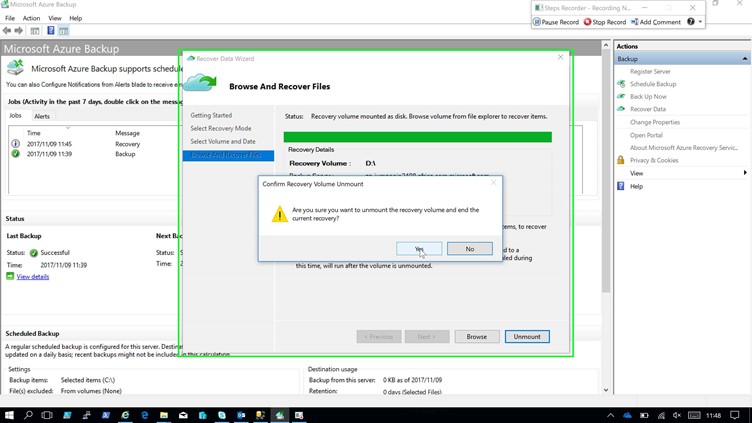
Once file retrieval is complete, unmount the disk