How to Remove the (none) IP Address Entries in BGInfo Background
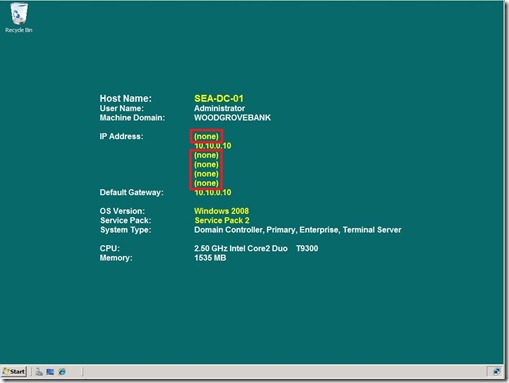
I did a post last week that talked about using BGInfo on my demo machines so I can have machine information displayed in the Desktop Background. It was pointed out to me that my screenshot showed my background had a slew of (open) entries in my IP Address list. (See RED boxes below)
BGInfo Desktop Background with Multiple (none) IP Address Entries
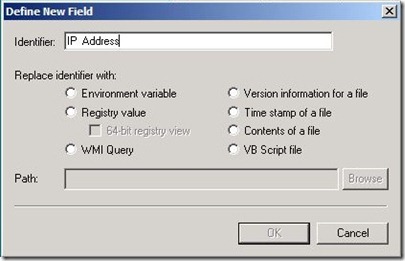
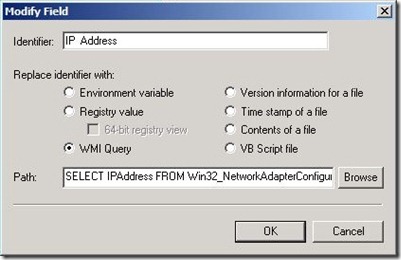
Step 1: Define New Field
In order to remove these (none) entries from the Desktop Background I needed to create a new custom field that does a WMI call to get the IP Address. I called the new field “ IP Address” with two spaces between the “P” and the “A”. It had to have two spaces because the field IP Address field already exists, and its one you can’t delete. Next, select the WMI Query radio button then click Browse.
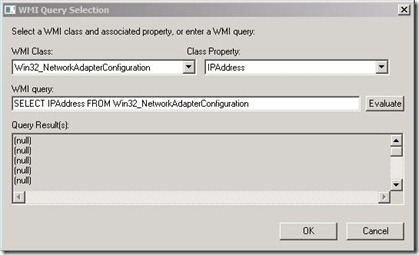
Step 2. Create WMI Query
In the WMI Query Selection dialog box, from the WMI Class drop-down menu select Win32_NetworkAdapterConfiguration. In the Class Property drop-down menu, select IPAddress. The following WMI query is built in the WMI query box: SELECT IPAddress FROM Win32_NetworkAdapterConfiguration. If you click the evaluate button at this point you will probably see a bunch of NULL entries.
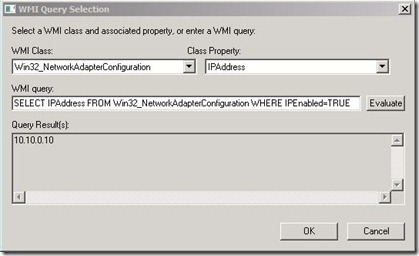
Step 3. Modify WMI Query
In the WMI query box add WHERE IPEnabled=True. Click the Evaluate button again and it should only show the IP addresses on enabled interfaces. Click OK.
Note: If you have IPv6 enabled on the machine you will see both the IPv4 and IPv6 address on the same line. My demo systems only use IPv4.
Step 4. New IP Address Field
The new field IP Address now has the necessary WMI Query. Click OK and the new custom field is now available for use.
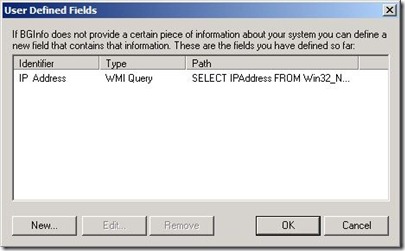
Step 5. New User Defined Field
Here you can see my new User Defined Field is available to use.
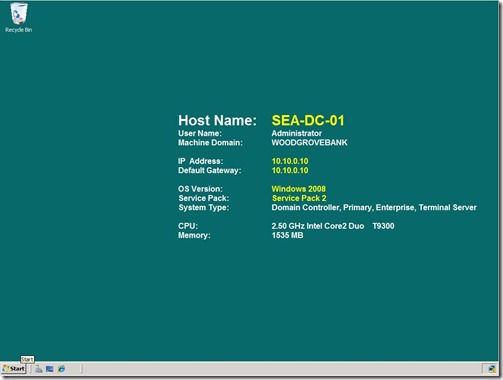
Step 6. The End Result
Once selected as a field to display, here is what the Desktop Background will look like. Notice that all of the (none) entries are now gone.
