Maintenance Mode Scheduling Tool
The Operations Manager Product Team recently released an Administration Resource Kit for System Center Operations Manager 2007 R2. One of the tools in the kit is a Maintenance Mode Scheduler….I finally got around to trying this out today…below are my notes.
Setup
Download the Resource Kit and run the installation (System Center Operations Manager 2007 R2 Admin Reskit.msi)
Navigate to the directory where the MM tool is installed (in my case, C:\Program Files (x86)\System Center\SystemCenter Operations Manager 2007 R2 Admin Reskit\ScheduleMaintenanceMode)…we should see four folders:
In the “Guide” folder is a doc that explains how to setup, configure and use the tool…BE SURE TO READ THIS FIRST.
Here’s a quick summary of the setup instructions:
- Copy the EnableMmodeWriteActionModule.dll and MOMSCRIPTAPILib.dll to the installation directory on the RMS (usually C:\Program Files\System Center Operations Manager 2007). These are in the x64 and x86 subfolders of the folder mentioned above….use whichever architecture applies to your installation.
- Import the ScheduleMaintenanceMode.Library.MP Management Pack using the OpsMgr console. This is in the MP subfolder mentioned above, but we have an updated version of this MP available here.
- Restart the Health Service on the RMS
- Copy the ScheduleMaintenanceMode.exe file to the computer where you will be running the tool…again, this is in the x64 and x86 directories…use whichever one matches the architecture of your computer. Also note that you must have the OpsMgr 2007 R2 Console and .NET Framework 3.5 installed on the computer where you will be running the tool
Configuration
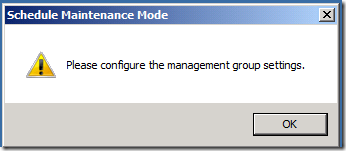
On the computer that you will do the scheduling from, run "ScheduleMaintenanceMode.exe”. The first time, you will get a pop-up:
Just click on OK to get to the “Connect” UI
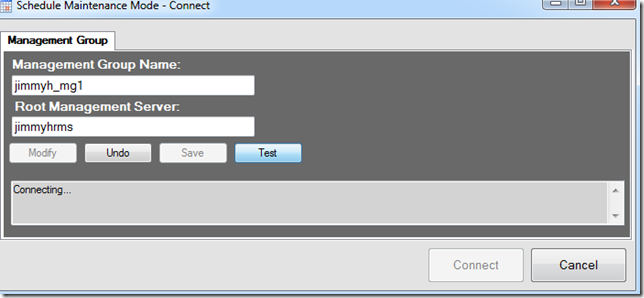
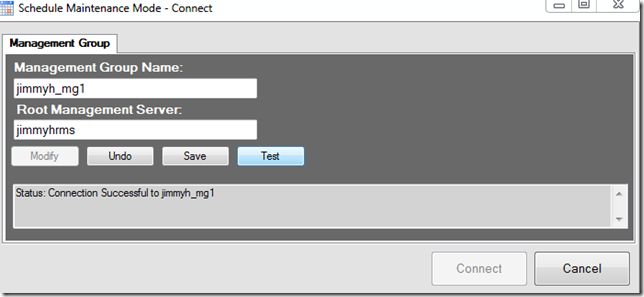
Enter the name of the Management Group and RMS, then click Test to verify we can connect:
Success!
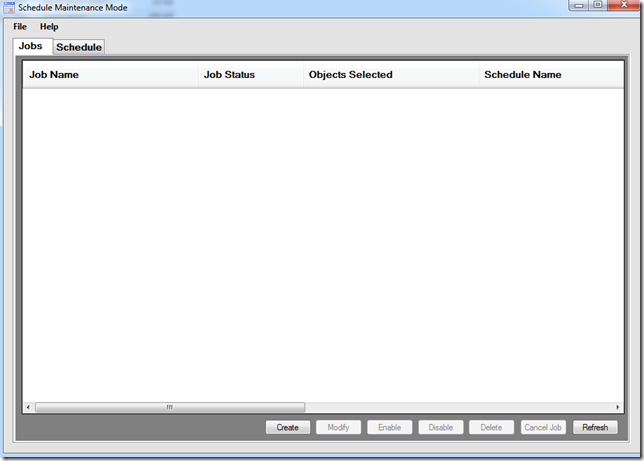
Click on “Save” to save your configuration (note that the “Connect” button won’t light up until you do this), then click on “Connect”…this should bring up the Jobs/Schedule UI:
If you get any errors running the tool, make sure:
- You have copied EnableMmodeWriteActionModule.dll and MOMSCRIPTAPILib.dll to the installation directory on the RMS
- You have restarted the Health Service on the RMS after copying the above DLL files
- Your workstation has the OpsMgr 2007 R2 Console and .NET Framework 3.5 installed
Usage
Using the tool is pretty simple….you create Jobs (which objects to put into MM) and Schedules (when to run the Jobs).
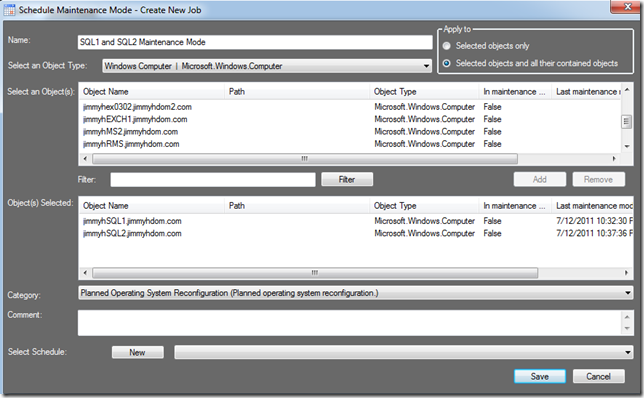
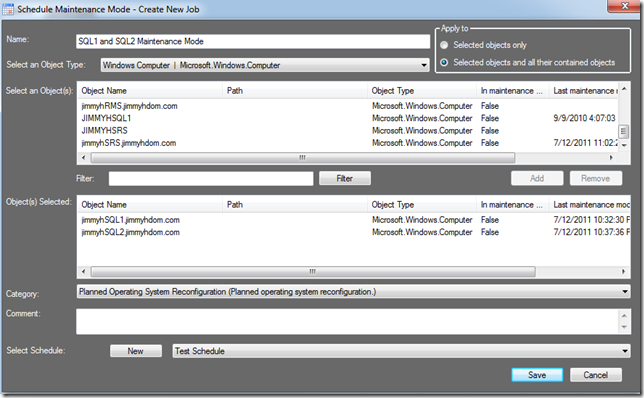
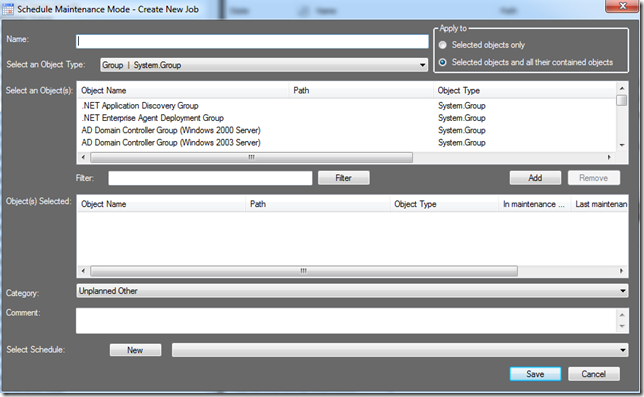
On the Jobs tab, click on “Create” to create a new Maintenance Mode job. Here, you will specify which objects will be put into MM. Select the object type, then select the specific objects and click “Add”. You’ll also need to give the job a Name, Category, and Comment. Here, I will put my SQL1 and SQL2 servers into MM. Since I want to take the servers offline, I will need to put all objects into MM, so I select “Windows Computer” as the Object Type and select “Selected objects and all their contained objects”.
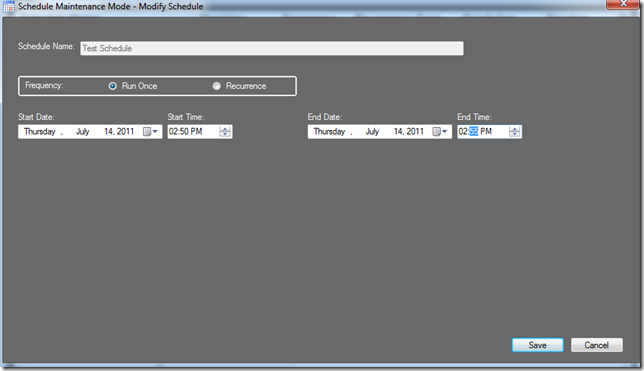
Next I’ll need to create a schedule to determine when the servers will go into MM and for how long. Click on the “New” button to create a new schedule (if you’ve already created other schedules, they will be seen in the drop down list.
Give the schedule a name, and select “Run Once” or “Recurrence”. For this job, I’ll just select “Run Once”, we’ll look at the Recurrence options later. NOTE: The scheduler will use the local time on the RMS.
A look in the console verifies that the servers are in Maintenance Mode:
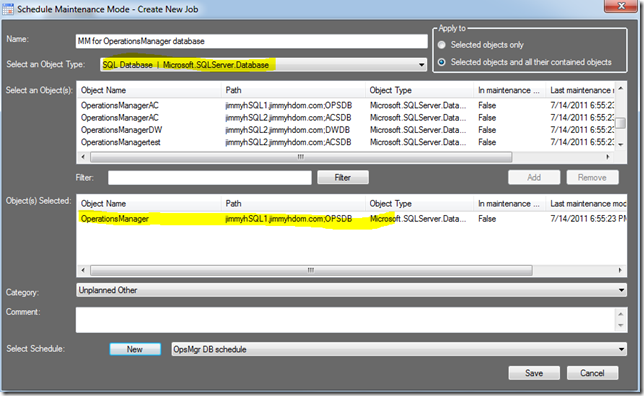
What if I don’t want to put all objects for a Computer into MM, and just want it for a specific object, like a SQL Database? Simple, create a new job, select the object type and the object:
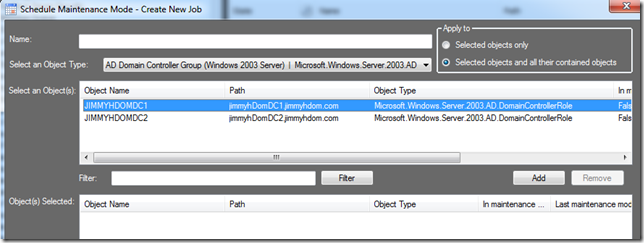
What if I want to put a group into MM? This one isn’t quite as obvious. If you select the group from the drop down list, the object list will show everything in the group and you’ll have to add each individually.
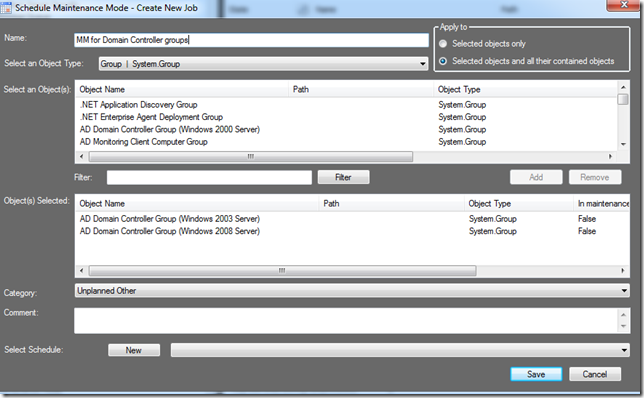
If you have over 20 objects in the group, this is not a good idea, and you’ll want to put the group object into MM. To do this, select the “Group | System.Group” item in the Object Type drop-down, then select the group from the Object list:
Canceling Maintenance Mode
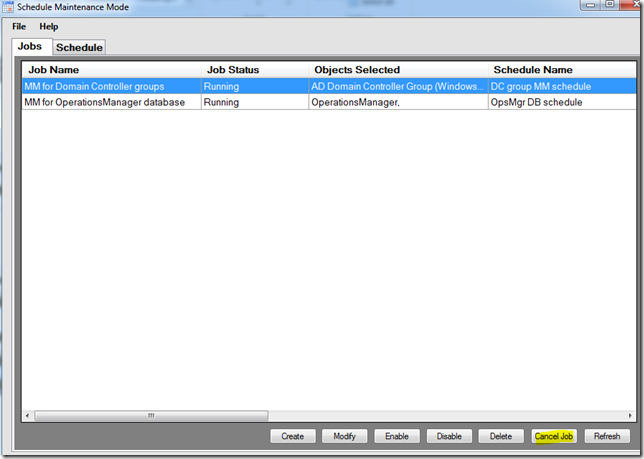
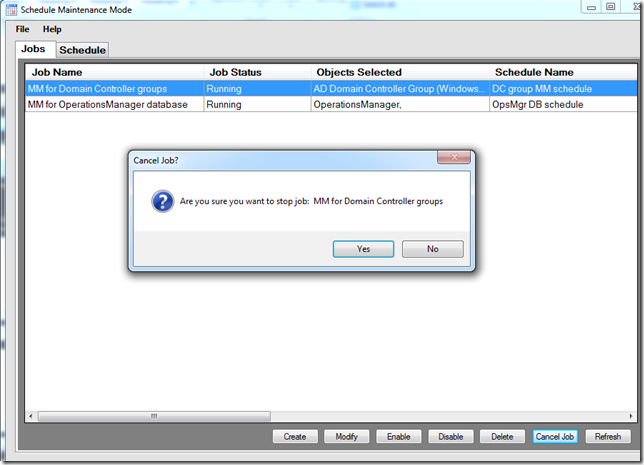
If you need to cancel a job before its end time, just open the scheduler tool, find the job, and click on “Cancel Job”
Recurrence options
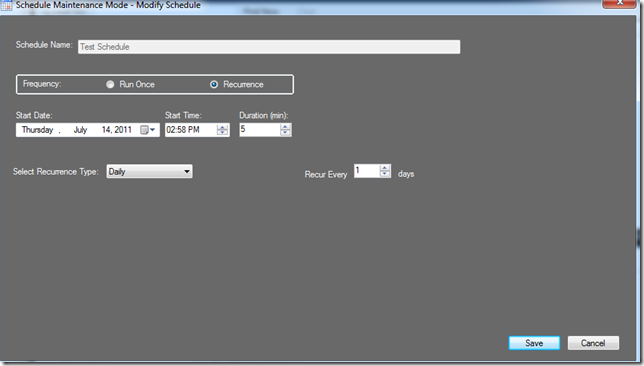
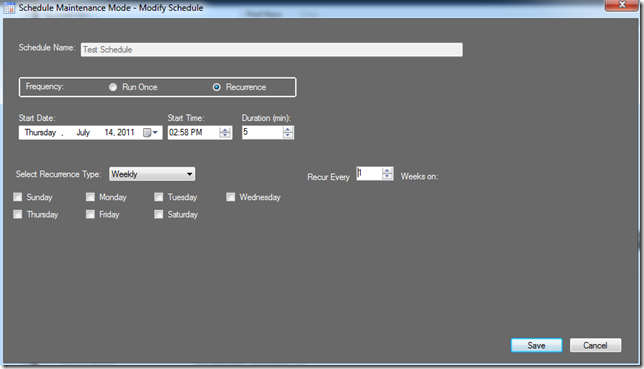
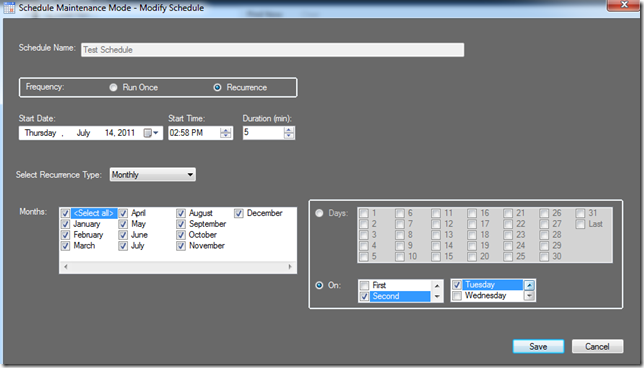
For scheduling the MM jobs, we have options for “Run Once” (you just give the start and end date/time) and “Recurrence” (daily, weekly, or monthly). For each of these, you supply the start date/time and duration (how long to be in MM)
Daily
For the “Daily” recurrence, you just specify number of days between jobs
Weekly
For the “Weekly” option, you specify how many weeks between jobs and which days of the weeks to run it
Monthly
For the “Monthly” option, you select which months to run the job in, and which day(s) of the month….you can select day 1-31, “Last day”, or the First/Second/Third/Fourth/Fifth Sun-Sat
Management Pack
The Management Pack for the Maintenance Mode Scheduler contains classes for the Jobs, Schedules, and “Schedule Maintenance Mode Service” (this is just the RMS). The MP contains three Rules:
Collect Scheduled Maintenance Mode Events
Target: Job component
This Rule collects Event ID 700, which is logged on the RMS when a MM job runs
Execute Maintenance Mode Workflow
Target: Job component
This rule runs every 60 seconds and manages the jobs and schedules (starts/stops MM)…here is some more info on this workflow (copied/pasted directly from the guide):
- Every minute, the Execute Maintenance Mode Workflow runs against each scheduled job created.
- If the Job Status is Scheduled, the workflow will read the schedule start time.
- If the start time is equal to the current running time, the workflow will place every object defined in the job into maintenance mode and update the Job Status to Running.
- If the start time is not equal to the current running time, the workflow will end.
- If the Job Status is Running, the workflow will read the schedule start and end time.
- If the current time is not past the end time, the workflow will check and make sure everything is still in maintenance mode. If something is not in maintenance mode and should be, the workflow will place it back in and drop an event to the event log. A rule targeting the job will read this event and generate an alert to notify the Operator that the object was placed back into maintenance mode.
- If the Job is past its end time the workflow will update the Job Status to say “Completed”
- If the Job Status is Completed, the workflow will check to see if this is run once or is a recurrence
- If recurrence, the workflow recalculates the next run time of the schedule, writes the completed job to history, and updates job status to Scheduled
- If Run once, the job status is updated to Run Once Finished and a history event dropped.
- If the Job is marked Canceled, the workflow removes each object from maintenance mode and marks the Job status as Completed – User canceled.
- If the Job is marked Finished (in the case of a run once job), the job is deleted
You can set an override on this rule to enable logging for troubleshooting purposes….set the “TraceLevel” parameter to 4 for the job that you need to troubleshoot, then review the log file on the RMS…details on this from the guide:
If HealthService is running under local system it is found under “C:\Windows\System32\config\systemprofile\AppData\Local”
If Health Service is running under some other account
“\Users\<AccountName>\AppData\Local”
The name of the files begins with “Enablemmode” and ends with the “ME.ID .log”
For example:
Enablemmode_2372ef81-5c64-75e3-5fe0-c297884004b2.log
Place back into Maintenance Mode
Target: Schedule Maintenance Mode Service
This Rule watches for event 623 on the RMS and generates an Alert. Event 623 indicates that an object was taken out of Maintenance Mode before its end time (according to the defined jobs/schedules). When this happens, the object will be placed back into MM (by the Execute Maintenance Mode Workflow Rule). The purpose of this Rule is to generate an alert when this happens.
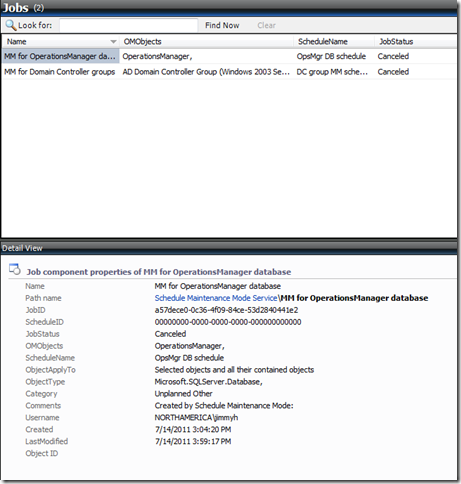
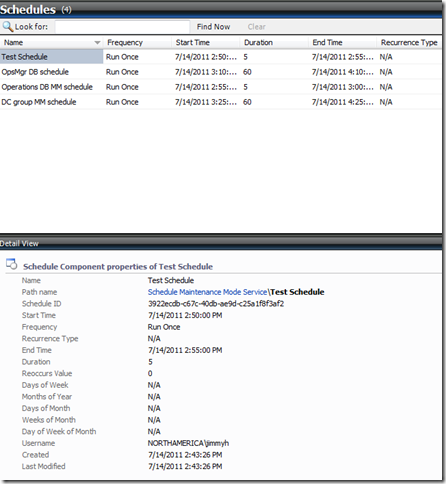
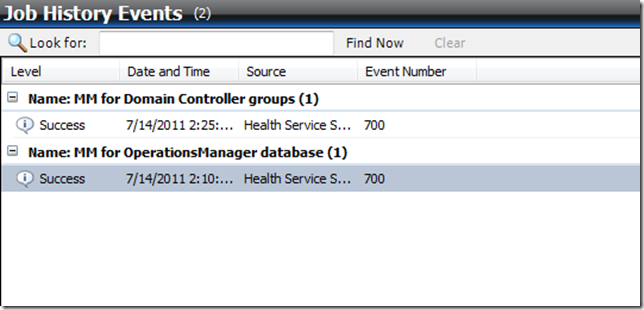
The Management Pack also contains views to show the Jobs, Schedules and Events. In the Monitoring section of the Console, navigate to the “Schedule Maintenance Mode” folder:
The Jobs view shows all of the Jobs that have been created, and their current status. Note that jobs that are scheduled to run only once are deleted after they have finished.
The Schedules view shows all of the schedules that have been created
The “Job History Events” view shows all of the Event ID 700 events that have been collected….these events tell use when the jobs start and finish
Here are some best practices and known issues (copied directly from Rob Kuehfus’ blog here:
Best Practices:
- Do not go beyond 20 Jobs scheduled. Anything over this will start to place too much load on your Root Management Server
- Do not schedule more then 20 items in one Job. If you need to go over this please create a group and target this. Note: The MP has a bug that only limits you to select up to six objects. I have attached an updated MP that corrects this issue below.
- When scheduling a group make sure to select system.group then select the group. If you select the group itself the tool lists the individual group membership.
Known Issues:
- A common issue with our international customers is a date time casting exceptions or the schedule is not landing on the correct day. This tool was designed and tested on EN-US only. I cannot make any promises but I will look into extending this to support other locals in the future. The work around is to install the Windows EN-US language pack.

