Part 4. Domain joined environment: Hyper-V Remote Management: You do not have the required permission to complete this task. Contact the administrator of the authorization policy for the computer ‘COMPUTERNAME’
Update 14th Nov 2008. I've just released a script which does all this configuration in one or two command lines: HVRemote
Quick links to the all parts in the series: 1, 2, 3, 4 and 5
So after even more feedback and questions, part 4 of this series provides the walkthrough steps necessary to perform Hyper-V remote administration in a domain joined environment.
For reference:
- Part one is the server configuration for a full server installation in a workgroup environment
- Part two is the client configuration for parts one and three
- Part three is the server configuration for a server core installation in a workgroup environment
- Part four, this post, contains the relevant bits from parts two and three as applicable to deploying remote management of Hyper-V in a domain environment
- Setting up and the pre-requisites for Hyper-V on server core are in this post.
- More information on server core commands is here
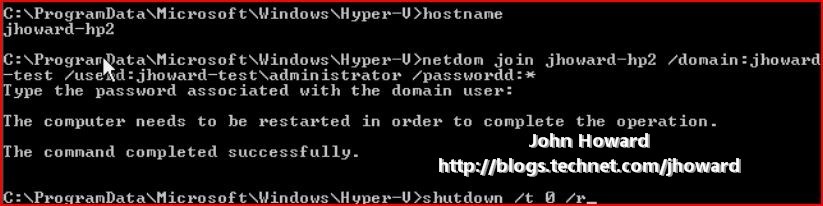
Follow the same steps for setting up the server core box itself as before, but remember to join the machine to the domain by using netdom join <computername> /domain:<domainname> /userd:<domain user> /passwordd:*. Don't forget to enable remote administration.
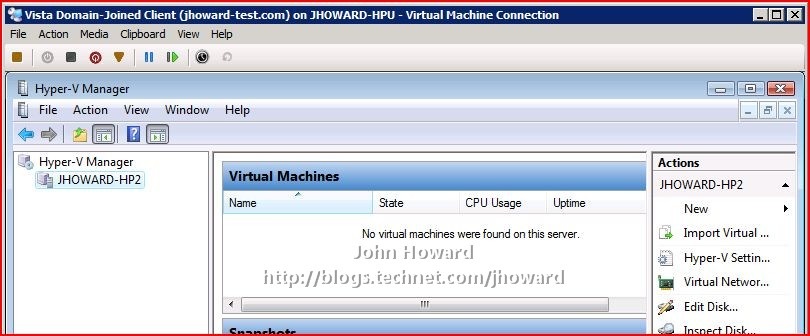
Let’s first logon as domain administrator on the Vista machine and connect to the remote machine using Hyper-V Manager. As you can see, that works fine.
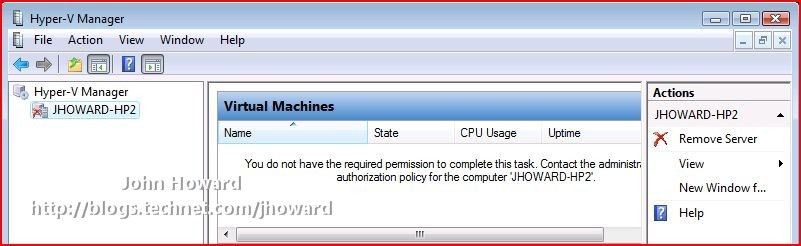
Obviously running as domain administrator isn’t a practical option in anything but a contrived lab environment. So I’ve created a standard user account in the domain called “domainuser” who is not an administrator either in the domain, the server core box with the Hyper-V role enabled, or on the Vista machine. Let’s see what happens when I start Hyper-V Manager on the Vista machine targeting the remote server core box. As you can in the screenshot below, it indicates that I am unauthorized. This is expected at this stage.
Step 1 Authorization Manager configuration
I need to authorize the domain user account for operations on the Hyper-V server, the same as I did in the workgroup environment. This is easier if I use an administrative account on the remote server core machine. For simplicity, I’m going to log back on to the Vista machine as domain administrator and run configure the Hyper-V authorization policy. (Note in the real world, you don't need domain administrator - this is for simplicity in the walkthrough only).
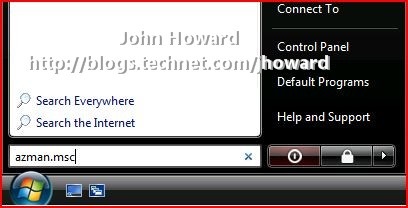
Logon to the Vista machine as Domain Admin and click start/run AZMan.msc.
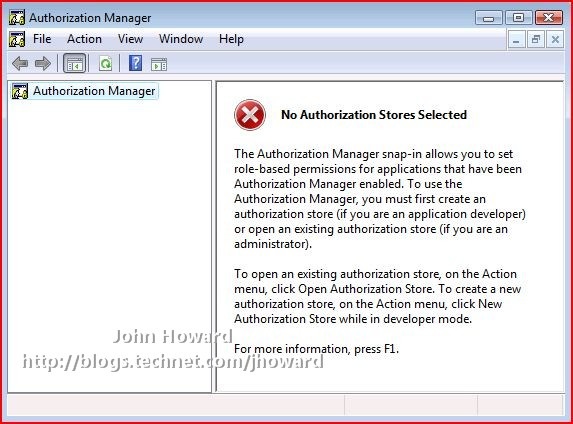
Now open InitialStore.xml from the %systemdrive%\programdata\microsoft\windows\Hyper-V directory on the remote server machine. Right click on Open Authorization Manager and select Open Authorization Store…
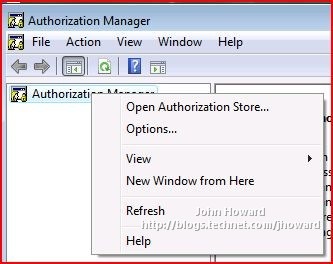
Select XML and enter the path to InitialStore.xml (or browse to it, noting that the programdata directory is hidden).
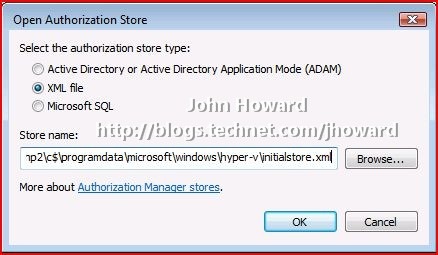
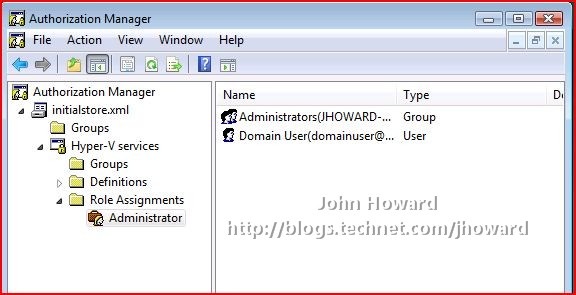
Expand the tree through Hyper-V services\Role Assignments\Administrator and select “Administrator”. Note that I’m making this walkthrough as simple as possible by making the domain user an administrator in the context of being able to perform all operations on the machine running the Hyper-V role. This does not however mean that the domain user becomes, or needs to be a local administrator on the Hyper-V machine (or on the Vista machine).
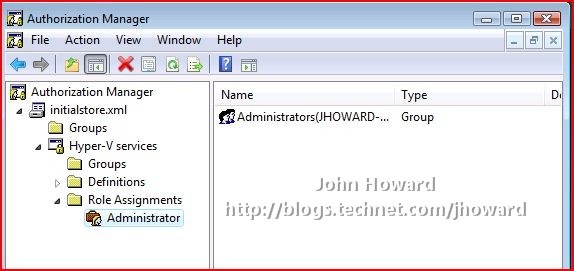
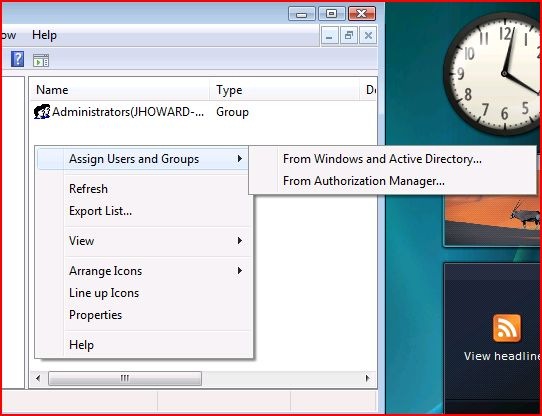
In the right-hand side of the window, right click and select Assign Users and Groups then From Windows and Active Directory….
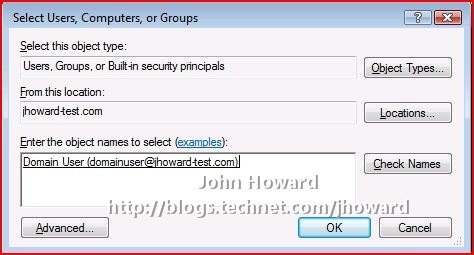
Select the domain user account and click OK.
You can now close Authorization Manager
Step 2 DCOM Configuration
Again, this is similar to the configuration steps necessary in the workgroup environment. You need to grant the appropriate users access rights to remote DCOM on the server. Use the same steps as in the workgroup configuration and add those users to the Distributed COM Users group.
On the Vista machine logged on with an account with administrative rights on the server core machine, click start/control panel/administrative tools/computer management.
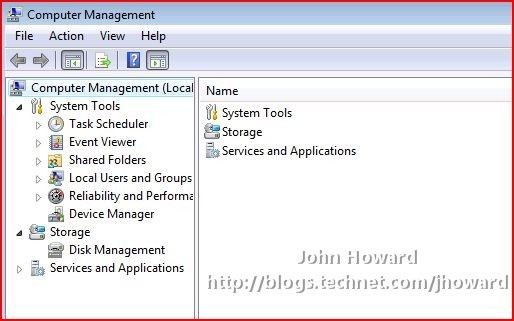
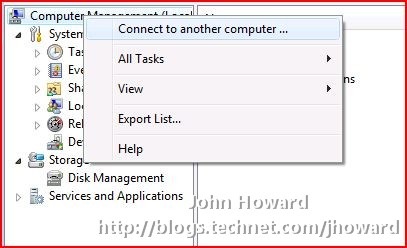
Remember in the server core configuration steps, I allowed remote management to enable this to work. If you get an error - go back to the server core configuration steps (links at top of this post). Right Click on the top of the tree on the “Computer Management (Local Computer)” node and click Connect to another computer…
Enter the name of the remote server (jhoward-hp2 in my walkthrough)

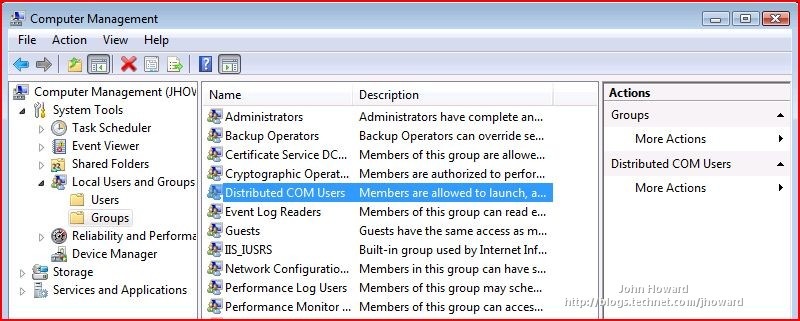
Expand the tree down through Computer Management/System Tools/Local Users and Groups/Groups and select Distributed COM Users on the right hand side.
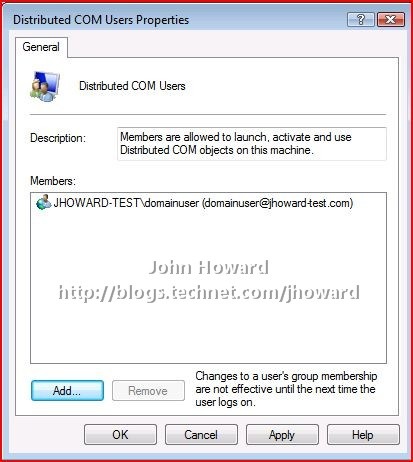
Double click on "Distributed COM Users", click Add… and select the appropriate users (domainuser in my walkthrough), and click OK.
Step 3. Remote WMI
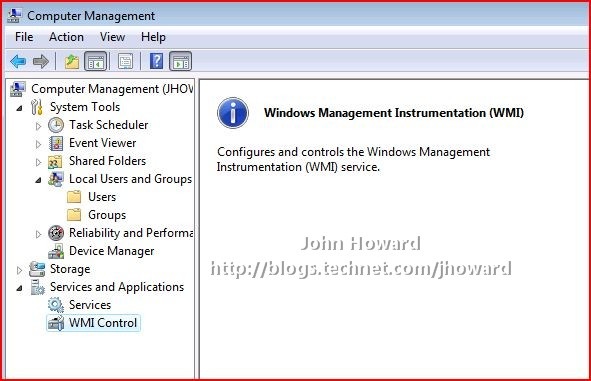
This step is the same as the configuration steps necessary in the workgroup environment. You need to allow the domain user account access to the Root\CIMV2 and Root\virtualization namespaces. While Computer Management is still open from Step 2, expand out Services and Applications and select WMI Control.
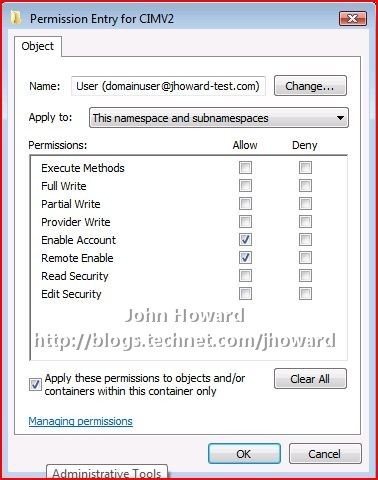
Right click on WMI Control and select properties. Then switch to the "Security" tab. Expand the tree and select the "Root\CIMV2" namespace node.
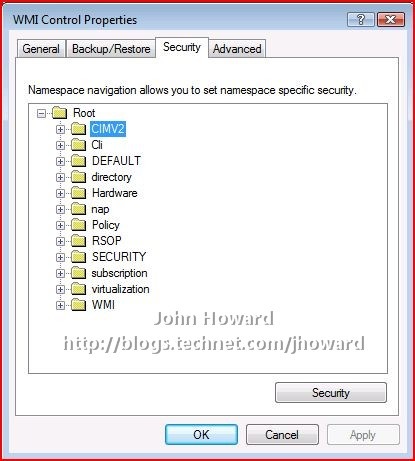
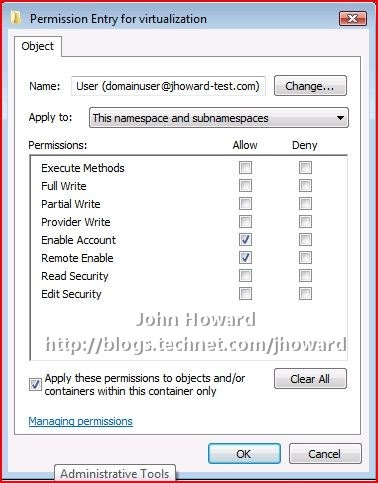
IMPORTANT: You need to set the security twice. Once for the Root\CIMV2 namespace, and then again for the Root\virtualization namespace.
Click the "Security" button. If the appropriate user or group does not already appear, use “Add…” as you did in Step 2 above to add them.
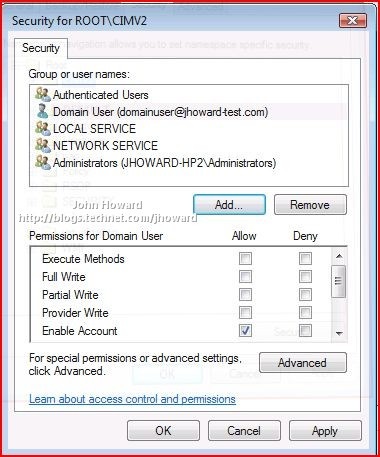
Now select the user and click the Advanced button below the “Permissions for <user>” area.
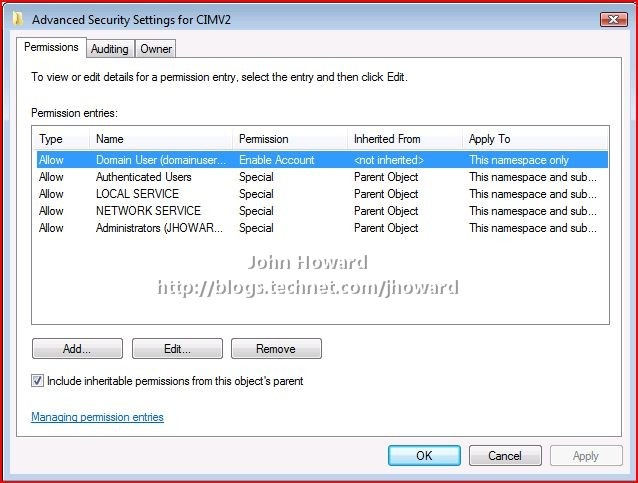
Again, make sure the user/group is selected and click Edit.
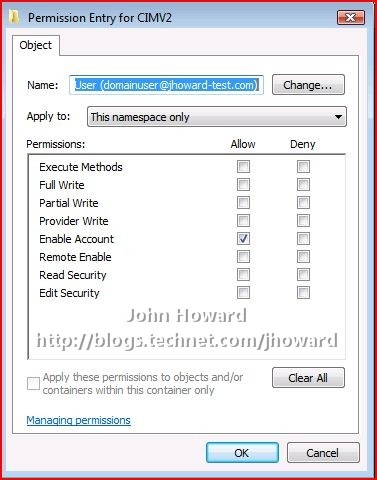
You need to make three changes here:
- In the “Apply to:” drop-down, select “This namespace and subnamespaces”
- In the Allow column, select Remote Enable
- Check “Apply these permissions to objects and/or containers within this container only”
The screen should look like below. If so, click OK through the open dialogs.
Repeat for the Root\virtualization namespace
Click OK as appropriate to confirm all open dialogs and close Computer Management.
After completing this step, reboot your server for the changes you made in step 2 to take effect.
Step 4. Test it out
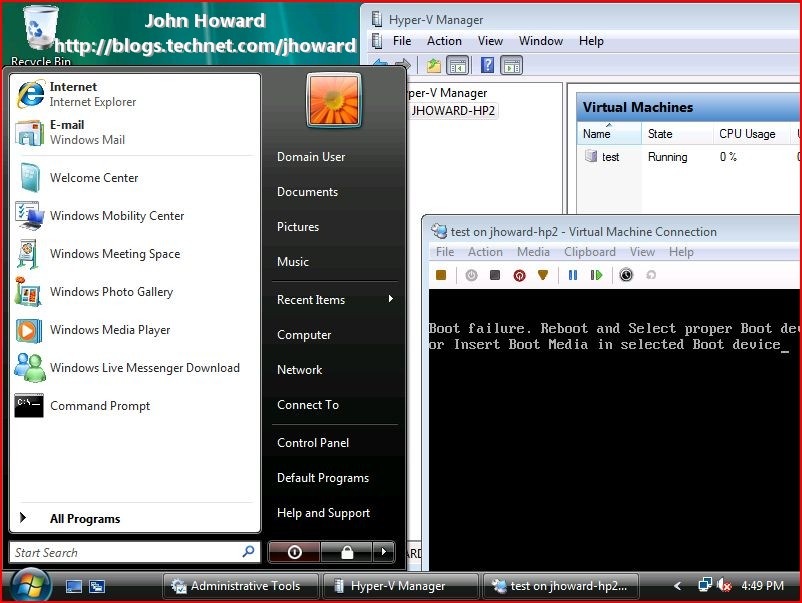
I logged back onto the Vista machine using the test domain user account. I started Hyper-V Manager and targeted jhoward-hp2, the remote server core machine. I then created a new virtual machine with all default settings, except selecting to add a virtual hard disk later. I started the virtual machine and connected to it. And as you can see in the screenshot below, the virtual machine is up and running (the boot failure message is expected as there’s no bootable media in the virtual machine).
Cool!
Cheers,
John.
Update 14th Nov 2008. I've just released a script which does all this configuration in one or two command lines: HVRemote