Part 3 - Hyper-V Remote Management: You do not have the required permission to complete this task. Contact the administrator of the authorization policy for the computer ‘COMPUTERNAME’
Update 14th Nov 2008. I've just released a script which does all this configuration in one or two command lines: HVRemote
Quick links to the all parts in the series: 1, 2, 3, 4 and 5
Although I thought I’d finished at part two, after even more emails and comments on part one and two, it quickly became obvious to me that I need to round off the series by answering “But what if my server is a server core installation”. In server core, you have none of the “niceties” of most of the user interface.
This blog post is an alternate to part one, covering the case where the server is server core. Before going any further, make sure you have followed the steps in my previous post to enable the Hyper-V role on server core and enable remote management. Remote management is important for this walkthrough - you'll need it to complete the steps.
Step 10 (On Client and Server)
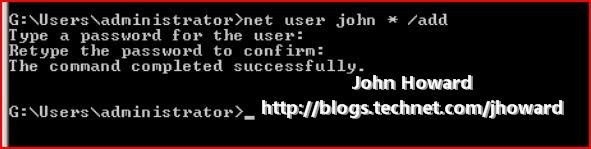
This mirrors step 1 in part one. Make sure you are using a username and password which matches between the client and the server. For this walkthrough, I created an account with the username “john” with the same password on both machines. The “john” account is not an administrator on the server machine, but is an administrator on the client machine (for convenience). Enter the following command.
net user john * /add
Step 11 (On Server)
This step mirrors step 2 in part one. Enable the firewall rules on the server for WMI (Windows Management Instrumentation). Enter the following command:
netsh advfirewall firewall set rule group="Windows Management Instrumentation (WMI)" new enable=yes
Make sure the command it successful and responds with Updated 4 rules(s). Ok.

Note: What you enter in quotes is just a name must match the group name defined in the Windows firewall itself. So if you are running a non-English language server, you will need to verify what group name this is.
Step 12 (On Server)
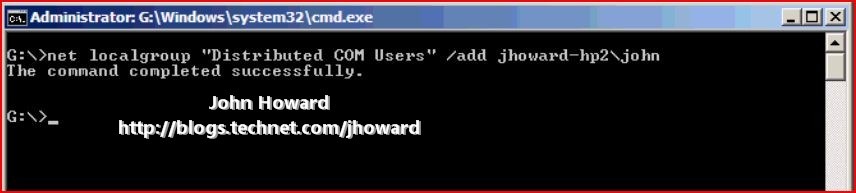
This step mirrors step 3 in part one. It grants appropriate DCOM (Distributed COM) permissions to the user(s) who are remotely connecting. In a full install of Windows Server 2008, this is (relatively) easy using dcomcnfg. Unfortunately, this is not available on server core. However, there is a built-in user group you can use which does the job just as well (in fact, although I haven’t tested it, this should work equally well on a full installation of Windows Server 2008).
You need to add the user account(s) or groups to the “Distributed COM Users” group. In my example, the server is named jhoward-hp2 and the local user account is john.
net localgroup “Distributed COM Users” /add jhoward-hp2\john
Step 12B (On the remote management console/client)
[Edited 16th May 2008. This was step 15, but moved to before step 13]
Follow steps 5, 6 and 7 in part two. These are identical and must be done on the client machine.
Step 13 (On Remote Management Machine)
This step mirrors 4 in part one and grants appropriate WMI permissions to the user(s) who are remotely connecting. You need grant access to two namespaces, and, as in step 3, you can add individual users, group(s) or the “Authenticated Users” group.
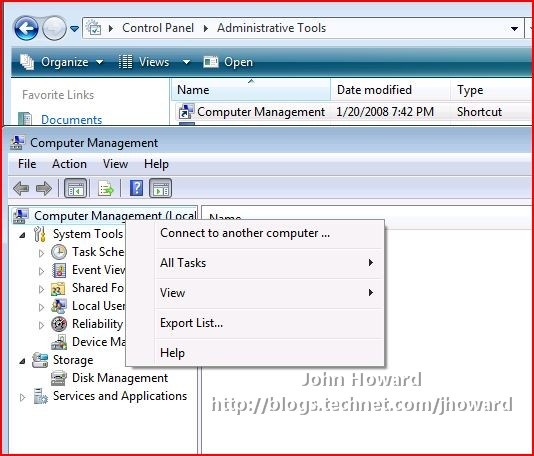
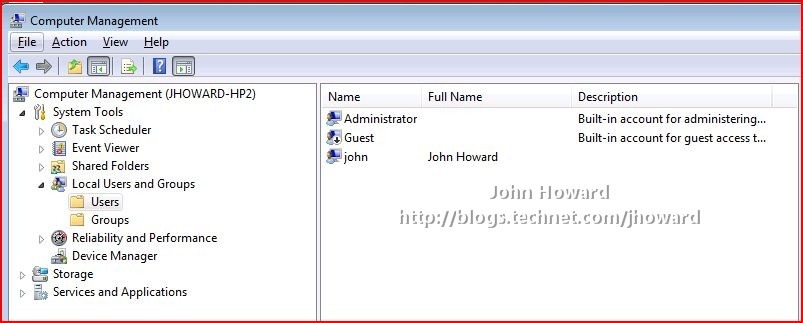
This is a little more challenging on server core as there is no computer management MMC. However, as I’ve already enabled remote management, I can do this from my remote management (Vista SP1) workstation. On that machine, I’m logged on with administrator credentials matching an account on the server machine.
Open Computer Management under Start/Administrative Tools. Right-click on the top most node, “Computer Management (Local Computer)”, and click “Connect to another computer …”
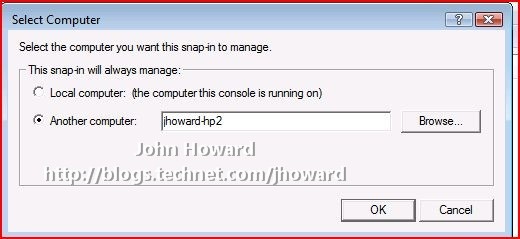
In the select computer dialog, enter the name of the remote server core machine and click OK. In my case, this is jhoward-hp2 (jhoward-hpu was the full installation). Then expand the tree down through Services and Applications\WMI Control and select WMI Control
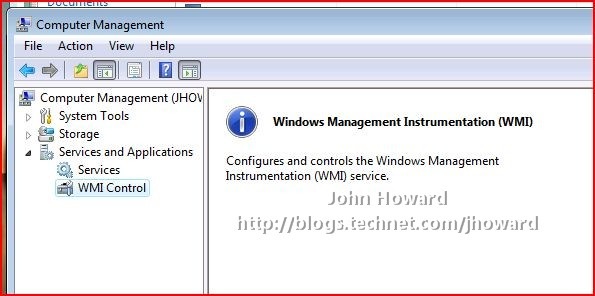
Right-click on WMI Control and select properties. Then switch to the Security tab. Select the Root\CIMV2 namespace node.
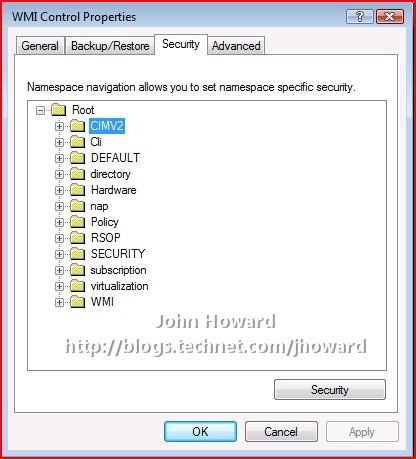
IMPORTANT: You need to set the security twice. Once for the Root\CIMV2 namespace, and then again for the Root\virtualization namespace.
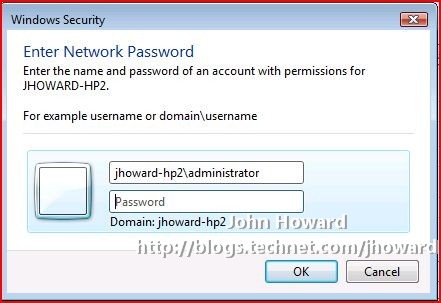
Click the Security button. If the appropriate user or group does not already appear, use “Add…” to add them. Note that when doing this remotely, you will be prompted for credentials. Make sure you entere the username as server\username as the default domain will be that of the client management machine

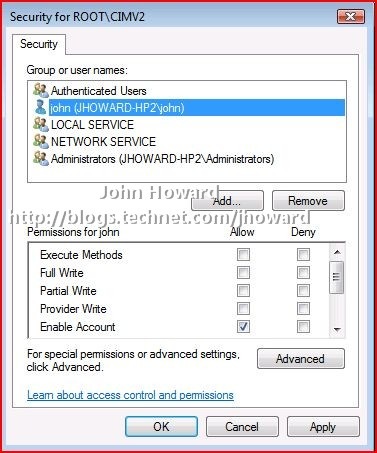
Now select the user and click the Advanced button below the “Permissions for <user>” area.
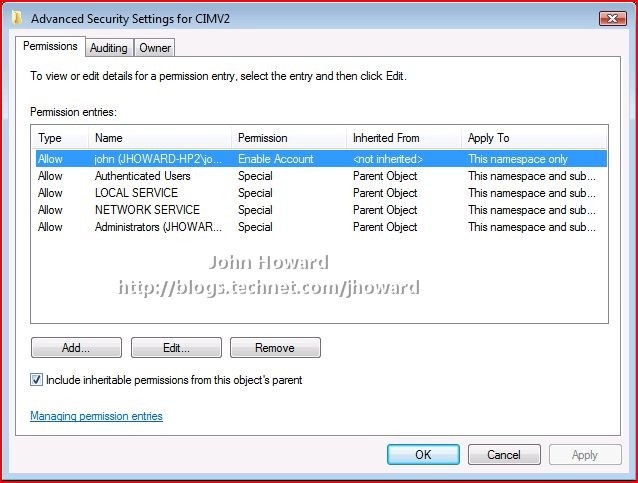
Make sure the user/group is selected and click Edit

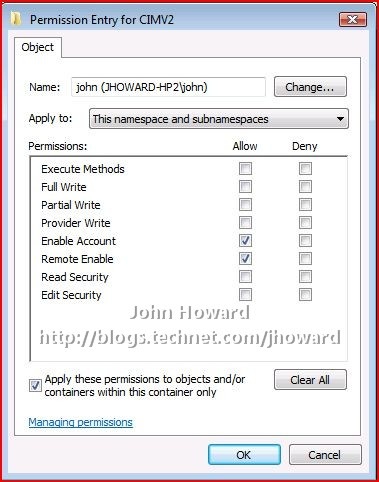
You need to make three changes here.
- In the “Apply to:” drop-down, select “This namespace and subnamespaces”
- In the Allow column, select Remote Enable
- Check “Apply these permissions to objects and/or containers within this container only”
The screen should look like this. If so, click OK through the open dialogs.
Repeat for the Root\virtualization namespace
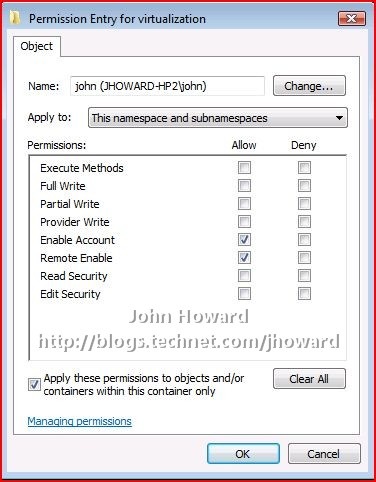
Click OK as appropriate to confirm all open dialogs and close Computer Management.
Step 14 (On Remote Management Machine)
This step mirrors step 5 in part one and configures the Authorization Manager (AZMan) policy for the server running the Hyper-V role. I am assuming in this walkthrough, you are using the in-box default policy and have not re-configured anything at this stage.
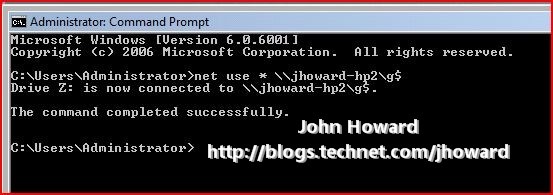
To make life a little easier, I’m first going to map a network drive on the remote management machine to the system drive on the machine running server core. In my case, the system drive is G. At an elevated command prompt on the client, type the following (replacing G and jhoward-hp2 as appropriate)
net use * \\jhoward-hp2\g$
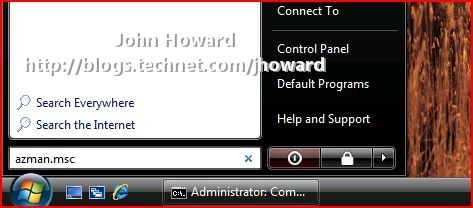
Open Authorization Manager by typing “azman.msc” in the box on the start menu.
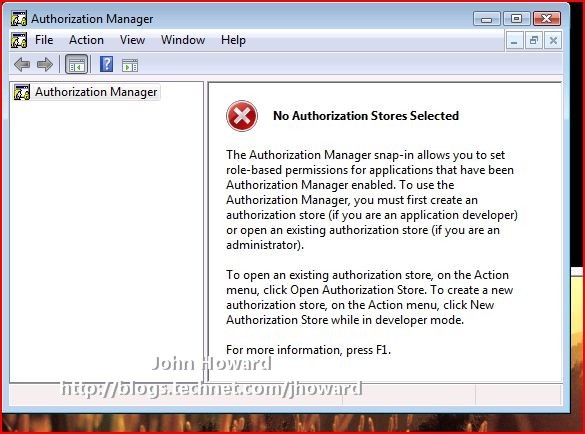
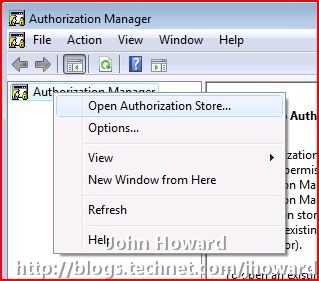
Right-click on the Authorization Manager and choose Open Authorization Store from the context menu.
Make sure the “XML file” radio button is selected, and browse to the \ProgramData\Microsoft\Windows\Hyper-V directory on the mapped drive, select InitialStore.xml, then click OK.
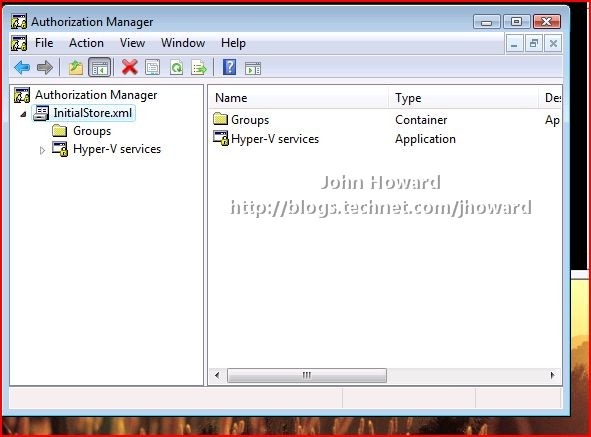
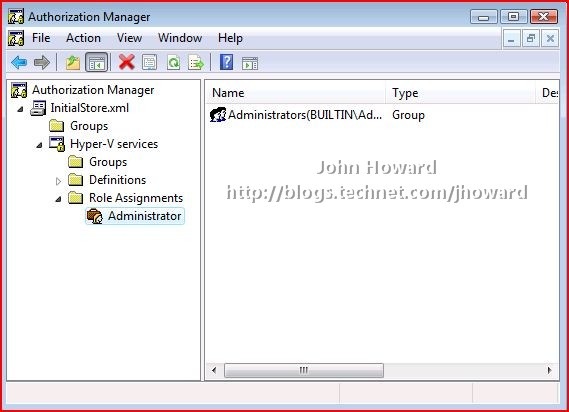
I’m going to keep this walkthrough as simple (!) as possible, and making my “john” account an Administrator in the context of Hyper-V authorization policy. Expand the tree down through InitialStore.xml\Hyper-V services\Role Assignments\Administrator, and select Administrator.
In the area on the right, right-click and select “Assign Users and Groups” then “From Windows and Active Directory…”.

Note that you are prompted for appropriate administrative credentials. Make sure you enter the username as server\administrativeaccount again, to ensure the domain name is that of the server.
At this point, I would say to add the appropriate users or groups like I did in the full installation option. However, I hit a snag. For some reason, AZMan running remotely did not seem able to find the “john” account (or any other user account I created on the core installation) even though it was definitely there as you can see using Computer Management on the remote machine targeting the server.
The answer (I thought) was to create a new user group and add the “john” account to that group. However, that also failed. All was not lost. First thing to do was to report a bug. Next, was to come up with a backup plan. Now at this point, I apologise in advance - it's a really horrible workaround, and involves hand-editing InitialStore.xml
Let’s take a look at InitialStore.xml on the full installation I made in part one, particularly the section with “Name=Administrator”. In the first screenshot taken using Internet Explorer to open the XML file, you can see that the “john” account has been added, the second screenshot being without “john” being an administrator.


So it just is a question of finding and adding the appropriate user/group sid as member. How hard can that be? (OK, don't answer that quite yet!) Thanks to the scripting guy, it didn’t take long to get the answer. I created the script below, test.vbs, and ran it on the remote management machine using "cscript test.vbs". (Replace jhoward-hp2 in both places with your server name, and john with the appropriate user name. Also make sure there is no space between 'john', and Domain= in the penultimate line.)
strComputer = "."
Set objWMIService = _
GetObject("winmgmts:\\jhoward-hp2\root\cimv2")
Set objAccount = objWMIService.Get _
("Win32_UserAccount.Name='john',Domain='jhoward-hp2'")
Wscript.Echo objAccount.SID

So now I had the account SID for the "john" account, I could use notepad to edit InitialStore.xml appropriately. I still had my network drive mapped.
IMPORTANT: Take a backup copy of InitialStore.xml now!

Unfortunately, notepad is not the most easy to use editor for XML files. There are plenty of freeware XML editor out there, but I stuck with notepad, if for no more reason than to prove that this whole walkthrough can be done using inbox components. Here you can see I’ve added a new member tag on the bottom line – everything from <Member>S-1-5-21-602….. to the following </Member>

Just to make sure I hadn’t made a huge editing error, I used IE again to confirm

And yes, you can now close the Authorization Manager MMC if it is still open on the remote management machine!
Important. You must reboot your server for the above changes to take effect.
Step 15 (On the remote management console/client)
[Edited 16th May 2008. Moved this step to earlier as step 12B. Ignore step 15 if you did it earlier]
Follow steps 5, 6 and 7 in part two. These are identical and must be done on the client machine.
Step 16 (Away from the keyboard)
This mirrors step 8 in part two. Take a very deep breath and congratulate yourself. Open beer, have a party, whatever takes your fancy. To have got this far, you deserve it. Make sure you have followed all the steps to the letter, especially the bit about restarting the server.
Step 17 (On the client)
Logon as the account you have given permissions to (“john” in my walkthrough) on the client.
Start Hyper-V Manager from Administrative Tools on the Control Panel. Enter appropriate administrative credentials if UAC is enabled and the account is not an administrator on the client.
Click Connect to Server and enter the name of the remote machine, accepting the EULA if this is a pre-release version of Hyper-V.
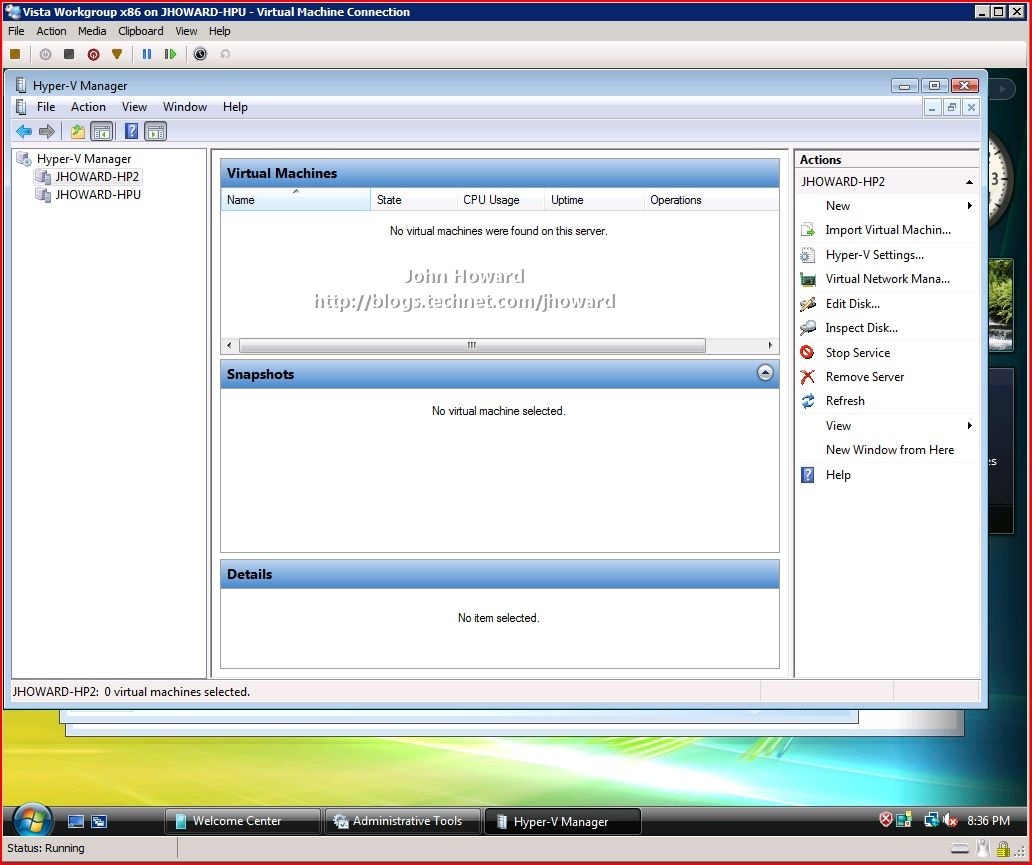
Watch in even more awe than you did in part 2 as you get a screen like below ;) Here I’m managing jhoward-hpu which is the full installation, and jhoward-hp2 which is the server core installation. Wow! I need some time off!
Cheers,
John.
Update 14th Nov 2008. I've just released a script which does all this configuration in one or two command lines: HVRemote