Creating an Outlook Profile for an Alternate User
Imagine you have full-access rights to a mailbox, and you want to create a profile for that user. While you could simply open "Other User's Folder", or add that user's mailbox to your own profile, there may be any number of reasons to create a custom, dedicated profile for that user.
You may be tempted to manually create the profile -- do not do this. In Exchange 2013 and 2016 there is little to no expectation you will be met with success. We use the mailbox GUID as the "Server" and really rely on Autodiscover to handle this for you. We'll get AutoD to hand us the other user's mailbox info, and we'll log on using our own credentials.
Create a new profile in Outlook, but change your answers in the autoconfiguration wizard so we're opening the other user's mailbox. You want Outlook to send the Autodiscover request for the target user, but authenticate as your own account. This way we get all the intended client access endpoints, and we're using our own credentials so there's no security issues.
[caption id="attachment_125" align="aligncenter" width="310"]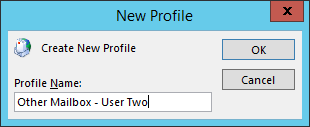 Step 1 - Create a New Profile[/caption]
Replace the auto-populated information with the target user's name and email address. Ignore the password here, we don't (and probably shouldn't) know the target user's password.
[caption id="attachment_135" align="aligncenter" width="694"]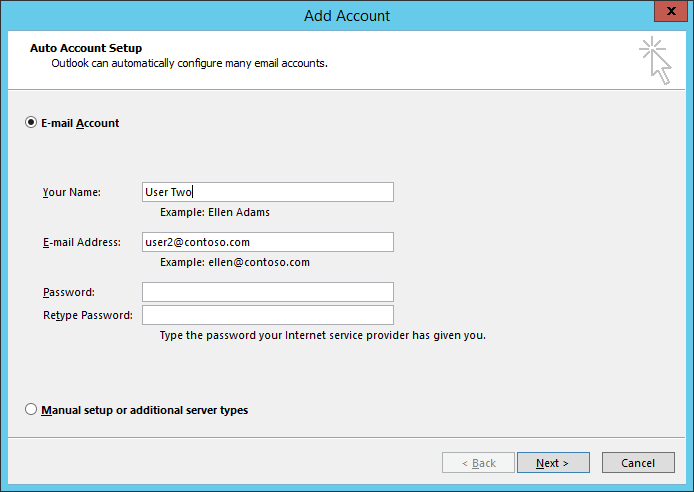 Step 2 - Fill in the wizard[/caption]
When you click 'Next' here, Outlook will run its auto-configuration routine, and should automatically authenticate as your current desktop user.
[caption id="attachment_145" align="aligncenter" width="694"]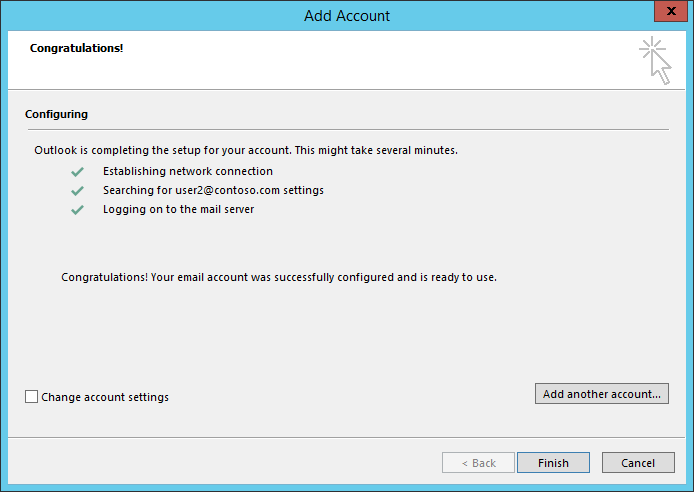 Step 3 - Auto-configuration[/caption]
Clicking 'Finish' will open Outlook (unless you started this wizard from the Mail control panel), and it will attempt to log in. If you get any authentication prompts, just use your existing credentials. Remember, this process is for creating a profile when you already have full access to the target mailbox.
[caption id="attachment_155" align="aligncenter" width="439"]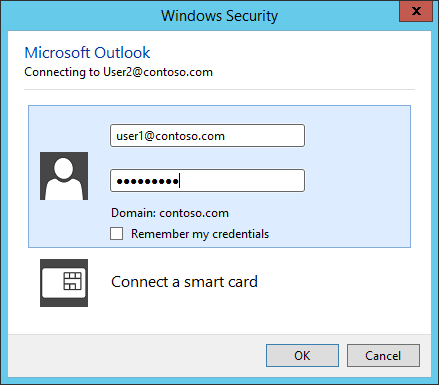 Step 4 - Auth as yourself[/caption]
You should have a clean profile connected only to the target mailbox. Success!
[caption id="attachment_165" align="aligncenter" width="497"]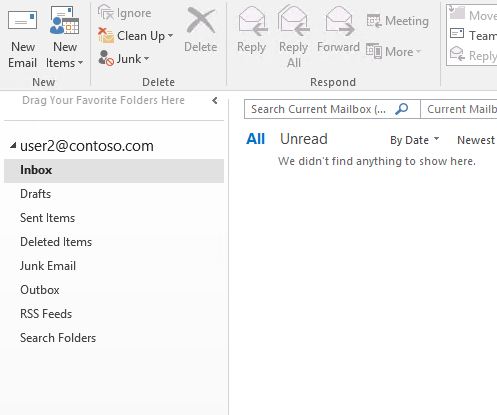 Step 5 - Profit![/caption]
Jason Slaughter