The Evolution of Collecting DirectAccess Client Diagnostic Log Information
A common administrator question when learning to troubleshoot DirectAccess client connectivity problems is:
“How can you create a client-side diagnostic log which provides specific detail about the DirectAccess configuration, connectivity state and other relevant system information which can be used to isolate the exact problem/issue?”
Depending on how far along the Windows evolutionary journey you are, the user experience in order to initiate the log capture process is different for specific versions of Windows. In my experience, customers often have a mixed Windows estate and therefore need to be aware of how to collect these diagnostic logs for Windows 7, Windows 8 and potentially even Windows 8.1 DirectAccess clients. Given this need, the following sections define the steps involved to collect/gather the logs for each respective version and associated considerations to be aware of.
Windows 7 and the DirectAccess Connectivity Assistant
First introduced as part of the Solution Accelerators series, the DirectAccess Connectivity Assistant (DCA) soon became a common component that was an essential part of any DirectAccess deployment. One of the key benefits of DCA to the administrator was that it would allow the user to create a diagnostic log, with minimal effort, which would collect relevant data and system information. This could then be sent to the administrator for offline review, or used during interactive troubleshooting assistance.
Instructions: Right-click the DCA icon in the System Tray and then select the Advanced Diagnostics option.
Note: If the Advanced Diagnostics option is not available, it may have been disabled by the administrator, or a support/helpdesk email address has not been defined.
Log files will be generated automatically and saved to the following location: %SystemDrive%\Users\%Username%\AppData\Local\Microsoft\DCA\
Windows 8 and the DirectAccess Properties Window
With the advent of Windows 8, the DCA was no longer needed as the operating system had been specifically designed to incorporate DirectAccess connectivity status and other key networking information within the View Available Networks (VAN) user interface. This negates the need to install a separate component and provides a consistent user interface where DirectAccess connectivity status can be viewed alongside all other network-related connectivity information. This was a welcome change.
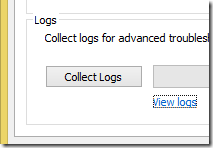
Instructions: Left-click the Network icon in the System Tray to show the View Available Networks (VAN) window. Right-click the DirectAccess network entry from the list of available networks and select the View connection properties option. From the DirectAccess Properties window, click the Collect Logs button.
Note: If the Collect Logs button is greyed out or not available, it may have been disabled by the administrator, or a support/helpdesk email address has not been defined.
Log files will be saved to the following location: %SystemDrive%\Users\%Username%\AppData\Local\Temp\Microsoft DirectAccess Logs\
Windows 8.1 and the DirectAccess Modern UI
With the increased need to provide a touch-friendly interface and adhering to Modern UI design specifications, the user experience of DirectAccess connectivity status provided in Windows 8.1 has been moved to the Networks Modern UI page. This avoids unnecessary switching to desktop and maintains uniformity with the rest of the networking connections like VPN, Wi-Fi etc. The existing DirectAccess Properties windows used in Windows 8 also required the user to switch to the desktop, which could be confusing when using Modern UI applications.
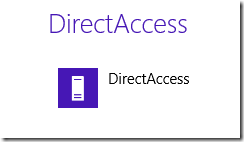
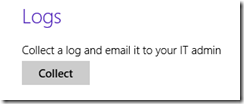
Instructions: Place the mouse pointer into the bottom-right corner of the desktop, select the Settings charm and then select the Change PC settings option. From the list of available PC Settings choose the Network option and then select the DirectAccess icon from the right-hand pane of the Connections window. Finally, click the Collect button under the Logs section.
Note: If the Collect button is greyed out or not available, it may have been disabled by the administrator, or a support/helpdesk email address has not been defined.
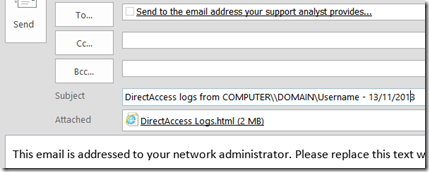
Once the logs have been collected, a new email message window titled DirectAccess logs from %COMPUTERNAME%\\%DOMAIN%\%Username% - %Date% should appear. This will be rendered based upon the default email application that is defined on the Windows 8.1 DirectAccess client, and is shown below for Outlook 2013.
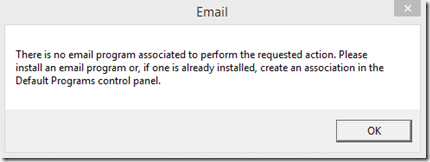
The log collection process in Windows 8.1 requires that an email program has been installed and/or a default email association has been defined, otherwise you will receive the error shown below. If the log collection process appears to be taking a long time (spinning circle) it may be necessary to switch to the desktop to actually see any errors related to the log collection process.
An email program and/or email association is required as the collected logs files are attached directly into a new email message window. Log files will not be saved to an obvious file location and will need to be either emailed to an administrator by clicking Send,or copied directly from the new email message window to an appropriate file location of choice. However, a copy of the collected log file can also be found in the following location: %SystemDrive%\Users\%Username%\AppData\Local\Temp with a default filename of %COMPUTERNAME%-%Date% %Time%-DirectAccess Logs.html
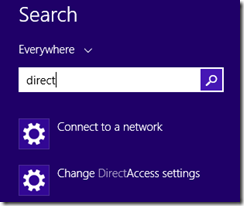
Tip: An alternate (easiest) way to access the DirectAccess Options screen in Windows 8.1 is to use the Search charm, typing direct into the search field and then selecting the Change DirectAccess settings option from the displayed search results.
So, there we have it; three different versions of Windows, three different ways to collect DirectAccess diagnostic log information. Happy log collecting DirectAccess troubleshooters!


