Streaming IoT Telemetry to Azure Event Hub : Part 1
I had a need to remotely monitor temperature and humidity from my kid's room. I looked on ebay and amazon and I didn't find any suitable device that can read both temperature and humidity and send the data to the cloud(for analytics etc) at a reasonable price, so I decided to build one for £11.
This blog documents/describes the process of building a temperature and humidity sensor component, how to stream the sensor data to Microsoft Azure Event Hub, perform some analytics operations and react upon the data with respect to certain pre-defined thresholds.
It was fun!
This blog post is in three series:
- The project schematic and Arduino sketch
- Setting up Azure Event Hub to process telemetry
- Developing/Coding the IoT Gateway & Result Analysis with PowerBI
The Schematic
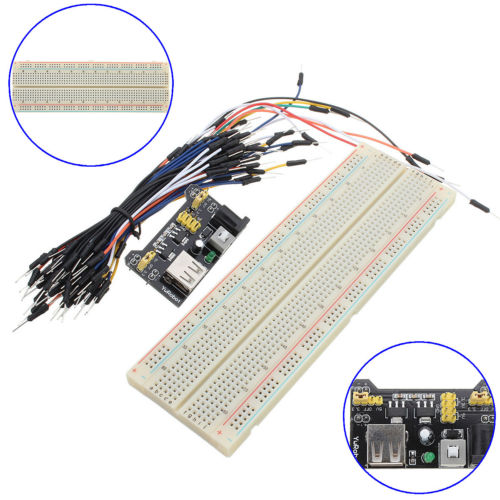
We'd need the following components:
- Breadboard and jumper cables
- 3.3V and 5V breadboard power supply unit
- 10KΩ resistor
- 100µF capacitor
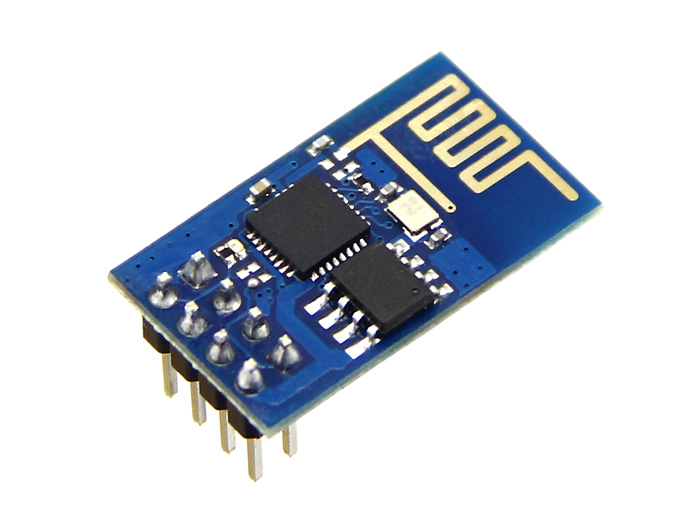
- ESP8266 Wifi Module
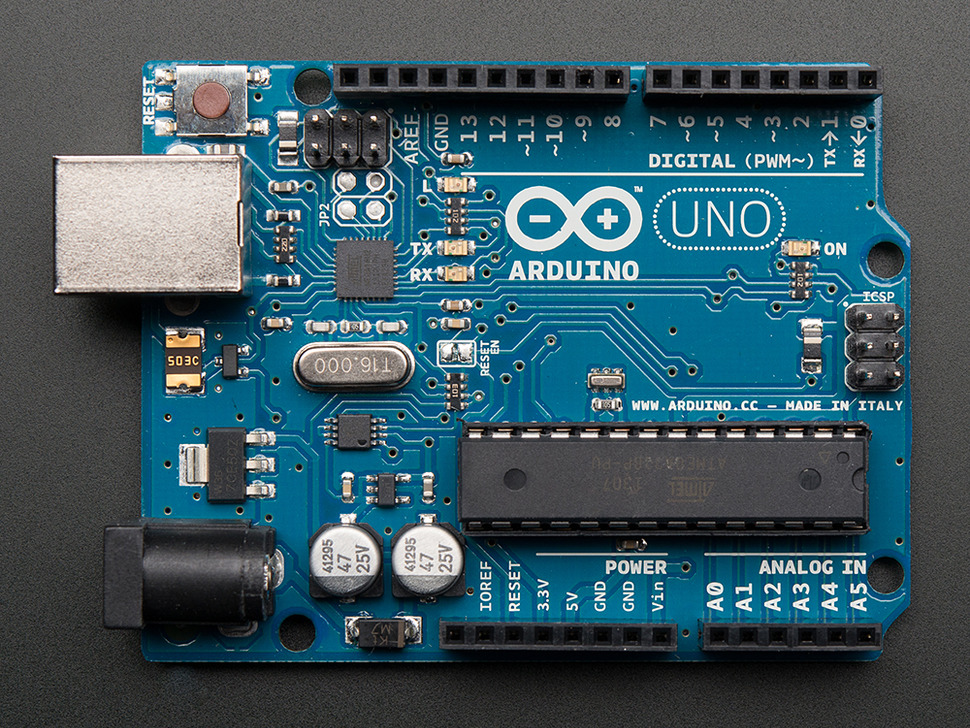
- Arduino Uno Micro controller
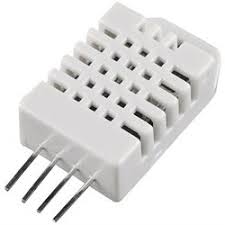
- DHT22 Sensor
I sourced all these components from aliexpress. I waited for about 3 to 4 weeks for them to be delivered, the wait was worth it because my core objective was to complete this project on a tight budget.
Connecting the DOTS!
This is a picture of my prototype connection 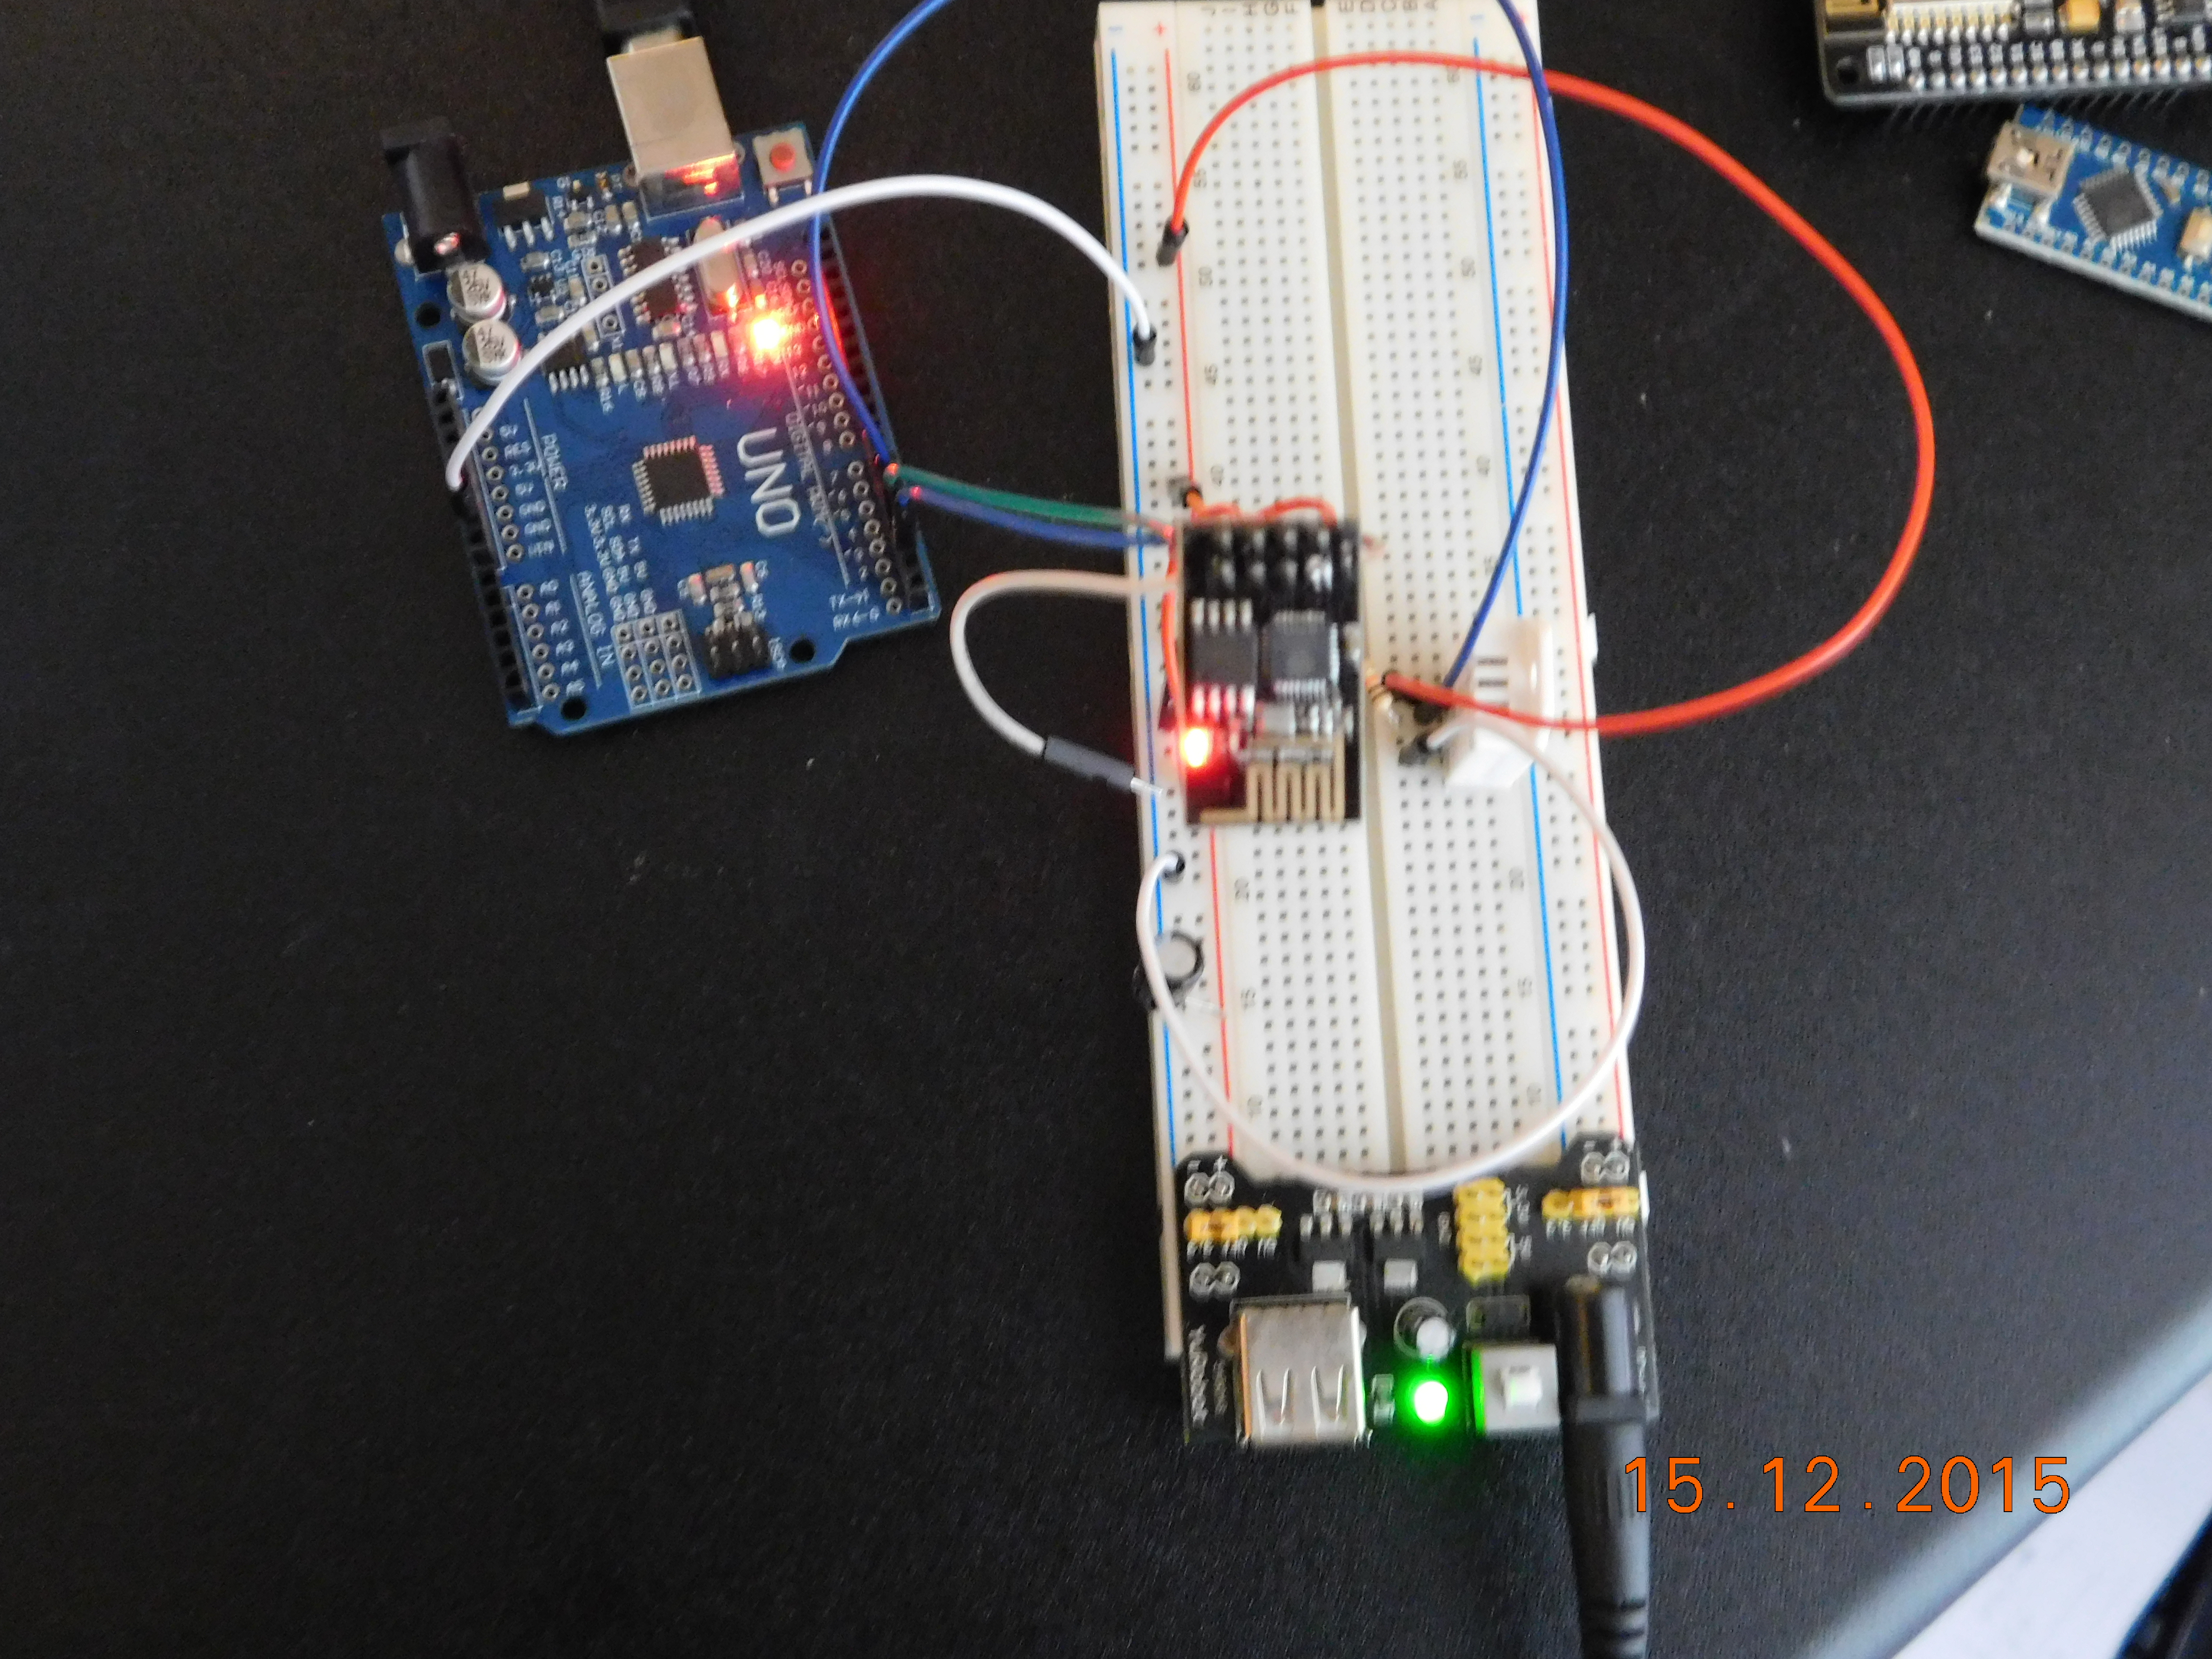
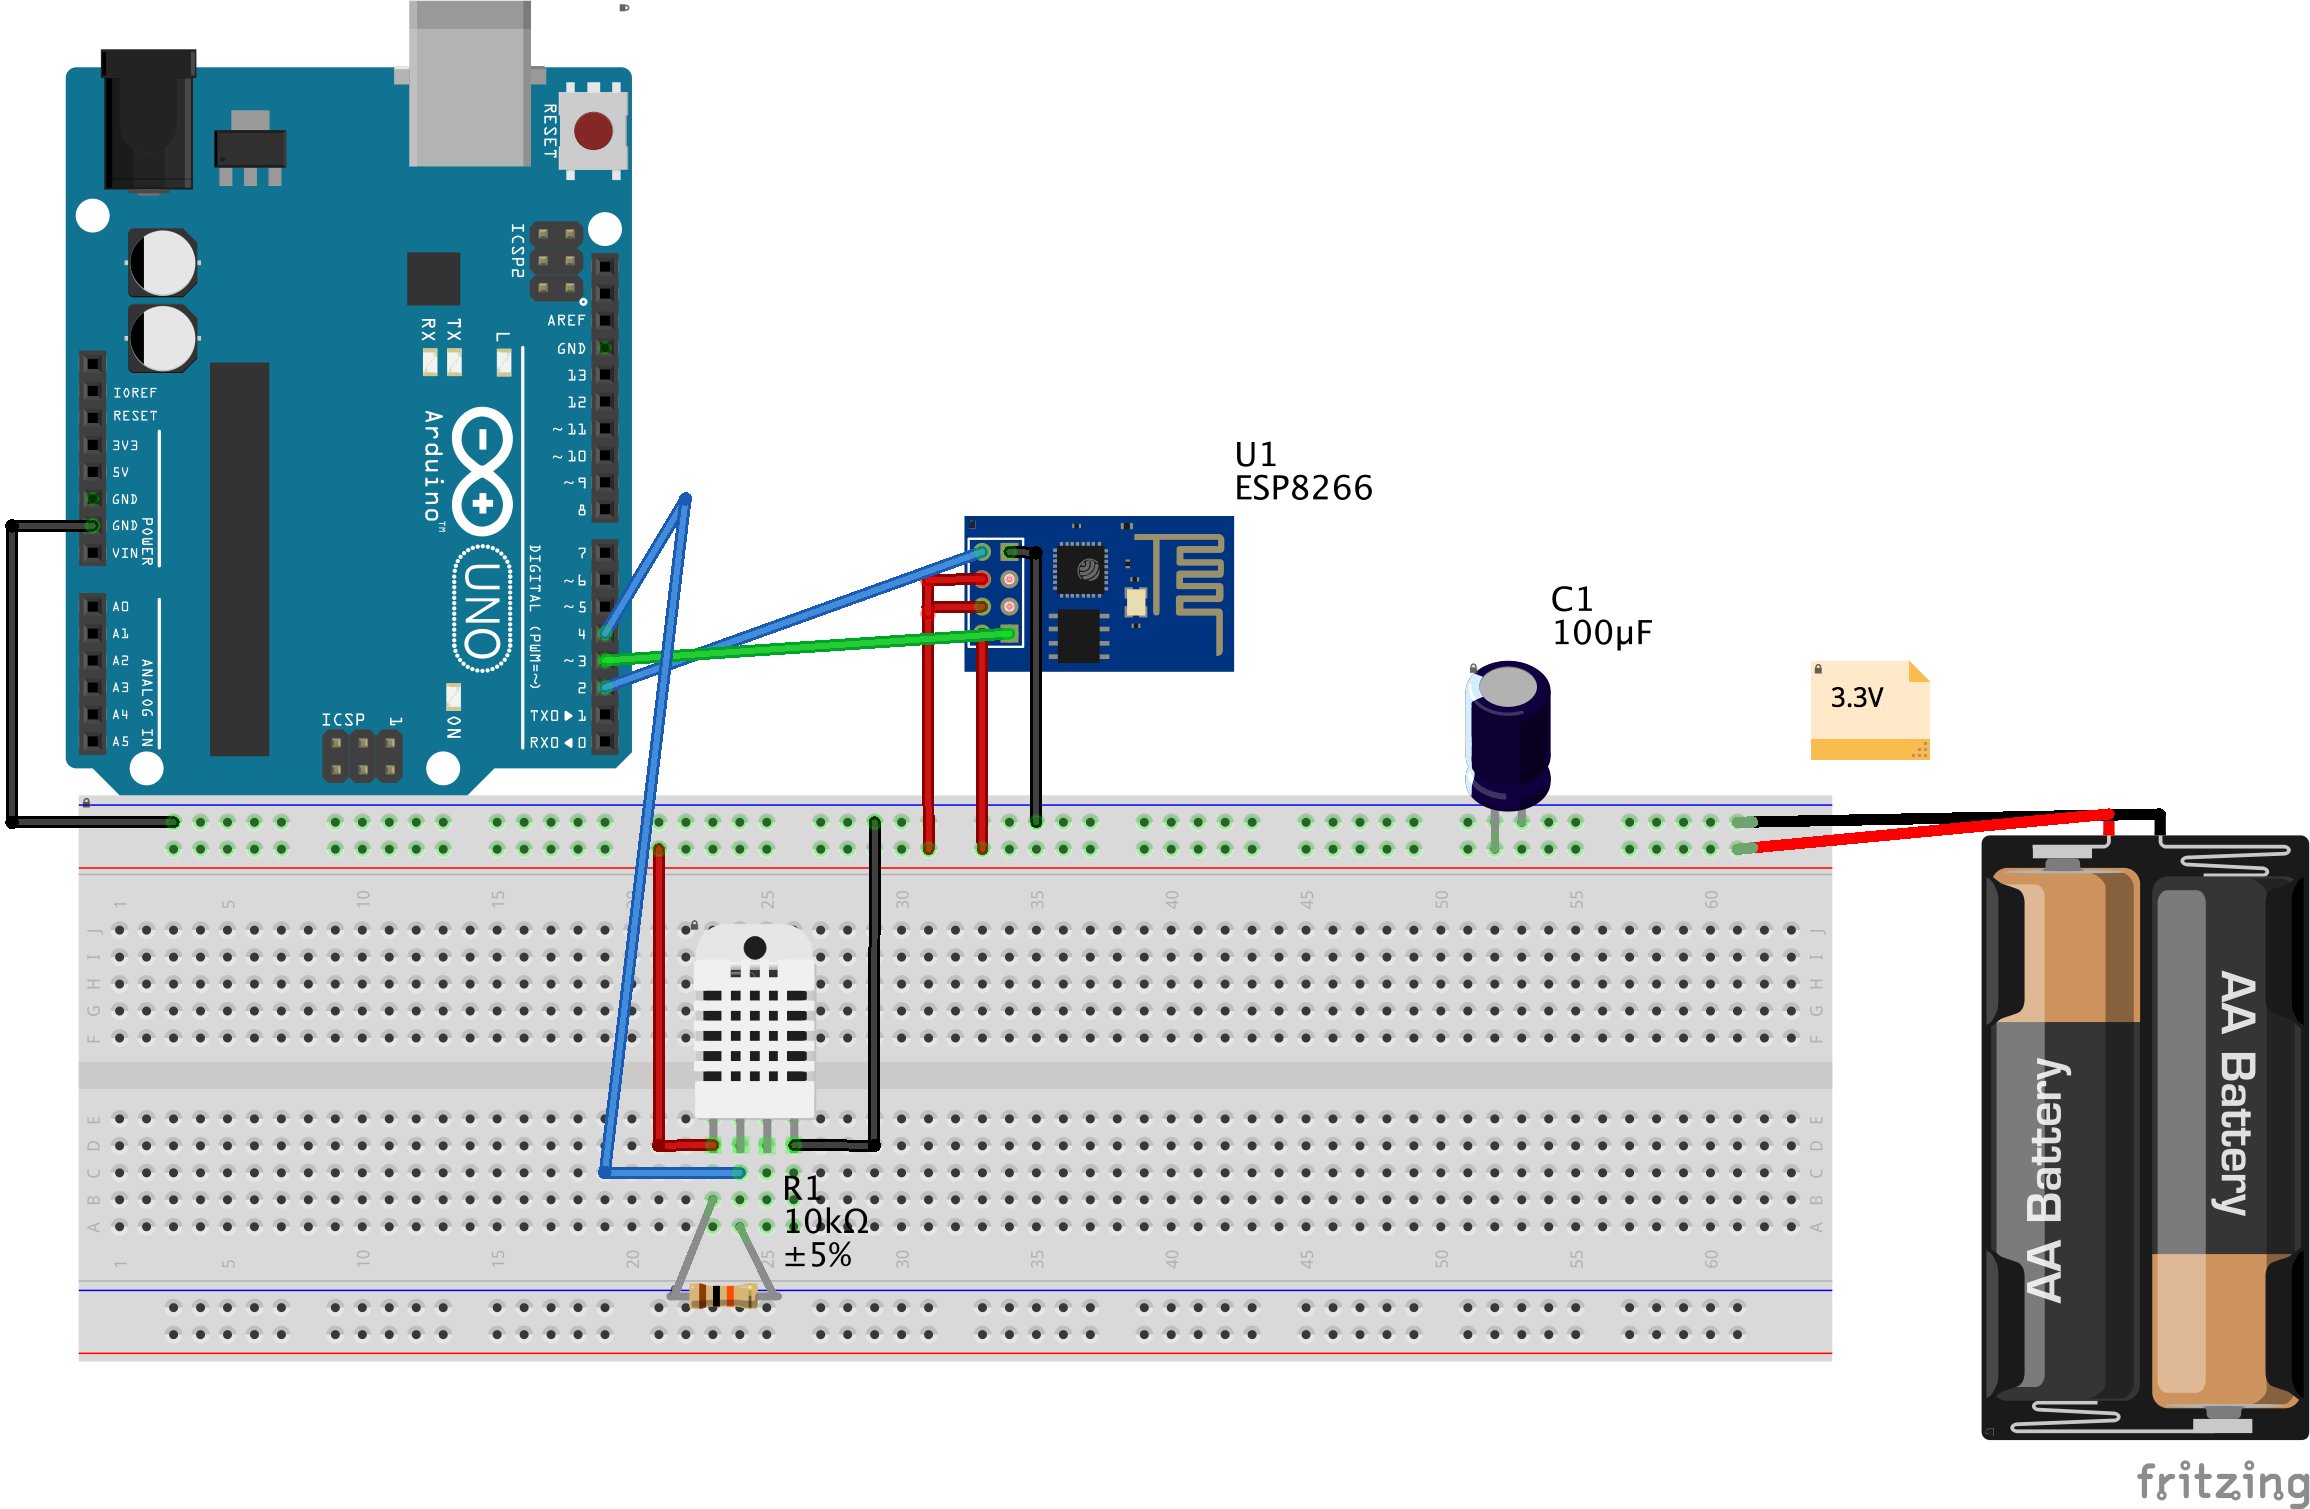
and I made a schematic diagram of how I connected all the components for a clearer representation:
The Arduino Sketch
A sketch is the name that Arduino uses for its programs.
First thing you may need to do is to flash your ESP8266 module with the latest AT firmware, I recommend using NodeMCU flasher.
Download and install the latest Arduino IDE if you have't done so. Then go to Tools -> Boards and select "Arduino/Genuino Uno" and the port you're connected to. Once that's done, upload this sketch onto the micro controller to ensure your ESP and Uno can talk to each other.
 #include <SoftwareSerial.h>

SoftwareSerial wifiPort(2, 3);  //Connect ESP Tx to Uno Pin 2, ESP Rx to Uno Pin 3

void setup()
{
  Serial.begin(9600);
  while (!Serial) {
  }
  wifiPort.begin(9600); // Most modern ESP-01 communicate at 9600 bps, change it if needed

void loop()
{

  wifiPort.listen();
  if (wifiPort.available() ) {
    Serial.write(wifiPort.read());
  }
  if (Serial.available() ){
    wifiPort.write(Serial.read());
  }
  delay(10);
}
You may test this out with these AT Commands. Ensure you get this right before continuing!
Let's advance our sketch a little bit. Go to thingspeak.com and create a channel & two fields. Note your channel key. Then upload this sketch onto your micro controller - after updating the SSID, PASS and channel key values respectively.
 #include <SoftwareSerial.h>
#define SSID "changeme"
#define PASS "changeme"
#define IP "184.106.153.149" // thingspeak.com
String GET = "GET /update?key=paste_channel_key_here&field1=";

SoftwareSerial wifiPort(2, 3);

void setup()
{
  Serial.begin(9600);
  while (!Serial) {
  }

  wifiPort.begin(9600);
   connectToWiFi();
}

boolean connectToWiFi(){
  Serial.println("AT+CWMODE=3");
  delay(2000);
  String cmd="AT+CWJAP=\"";
  cmd+=SSID;
  cmd+="\",\"";
  cmd+=PASS;
  cmd+="\"";
  wifiPort.println(cmd);
  delay(5000);
  if(wifiPort.find("OK")){
    Serial.print("Connected, IP address:  ");
    delay(2000);
    wifiPort.println("AT+CIFSR");
  delay(2000);
   Serial.println("All good!");
  wifiPort.println("AT+CIPMUX=1");
    return true;
  }else{
    Serial.println("Not good!");
    return false;
  }
}

void sendTelemetry(float tempF, float humP){
  String cmd = "AT+CIPSTART=4,\"TCP\",\"";
  //AT+CIPSTART=4,"TCP","bing.com",80
  cmd += IP;
  cmd += "\",80";
  Serial.println(cmd);
  wifiPort.println(cmd);
  delay(2000);
  if(wifiPort.find("Error")){
    Serial.println("Not good!");
    return;
  }
  cmd = GET;
  cmd += tempF;
  cmd += "&field2=";
  cmd += humP;
  cmd += "\r\n";
  wifiPort.print("AT+CIPSEND=4,");
  wifiPort.println(cmd.length());
  delay(3000);
  if(wifiPort.find(">")){
      Serial.println("sending command... ");
    wifiPort.print(cmd);
  }else{
   Serial.println("closing");
    wifiPort.println("AT+CIPCLOSE");
  }
}

void loop()
{

  wifiPort.listen();
  if (wifiPort.available() ) {
    Serial.write(wifiPort.read());
  }
  if (Serial.available() ){
    wifiPort.write(Serial.read());
  }
  delay(10);

   sendTelemetry(28.7,13.8);
}
The above sketch does two major things - i) it connects to your wifi network and ii)it sends static values to your thingspeak channel.
Next, download and install Adafruit's DHT library. You may need to modify and run the DHT test sketch to ensure your DHT22 sensor is working.
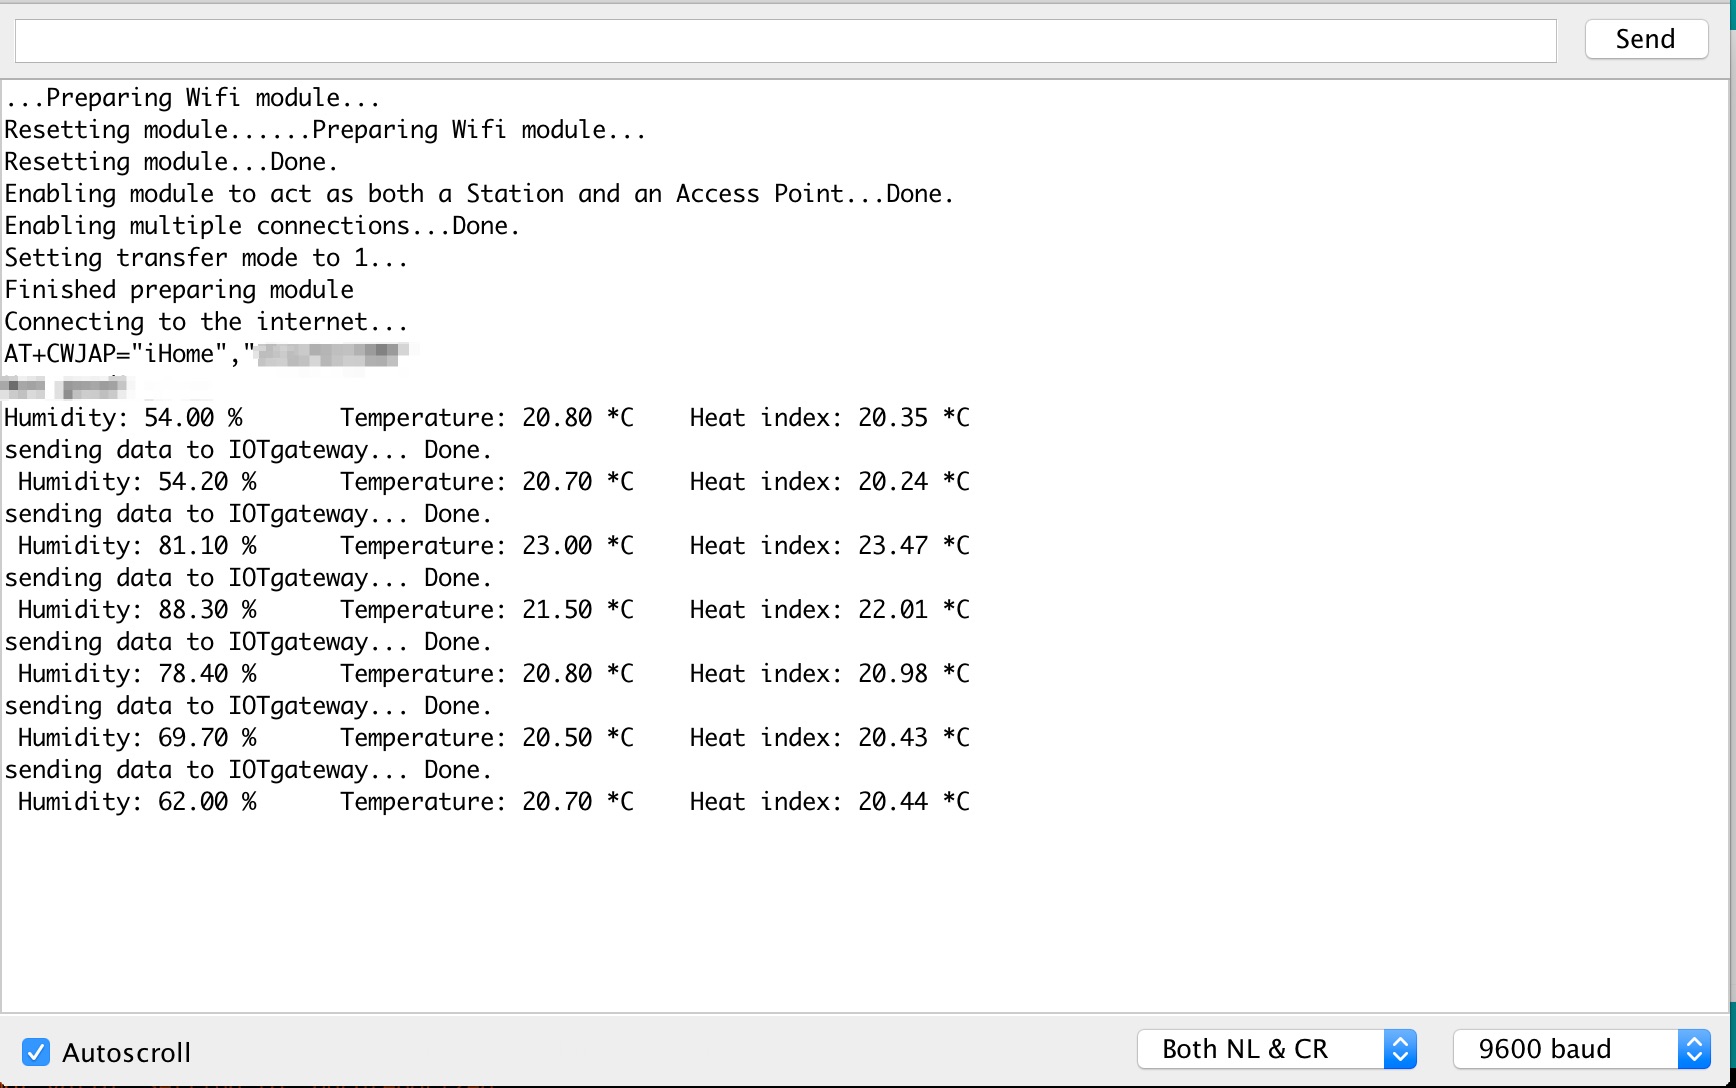
Also, you could modify the above sketch to send the sensor data to your thingspeak channel as well. Here is a screenshot of what my Arduino output looks like at this stage:
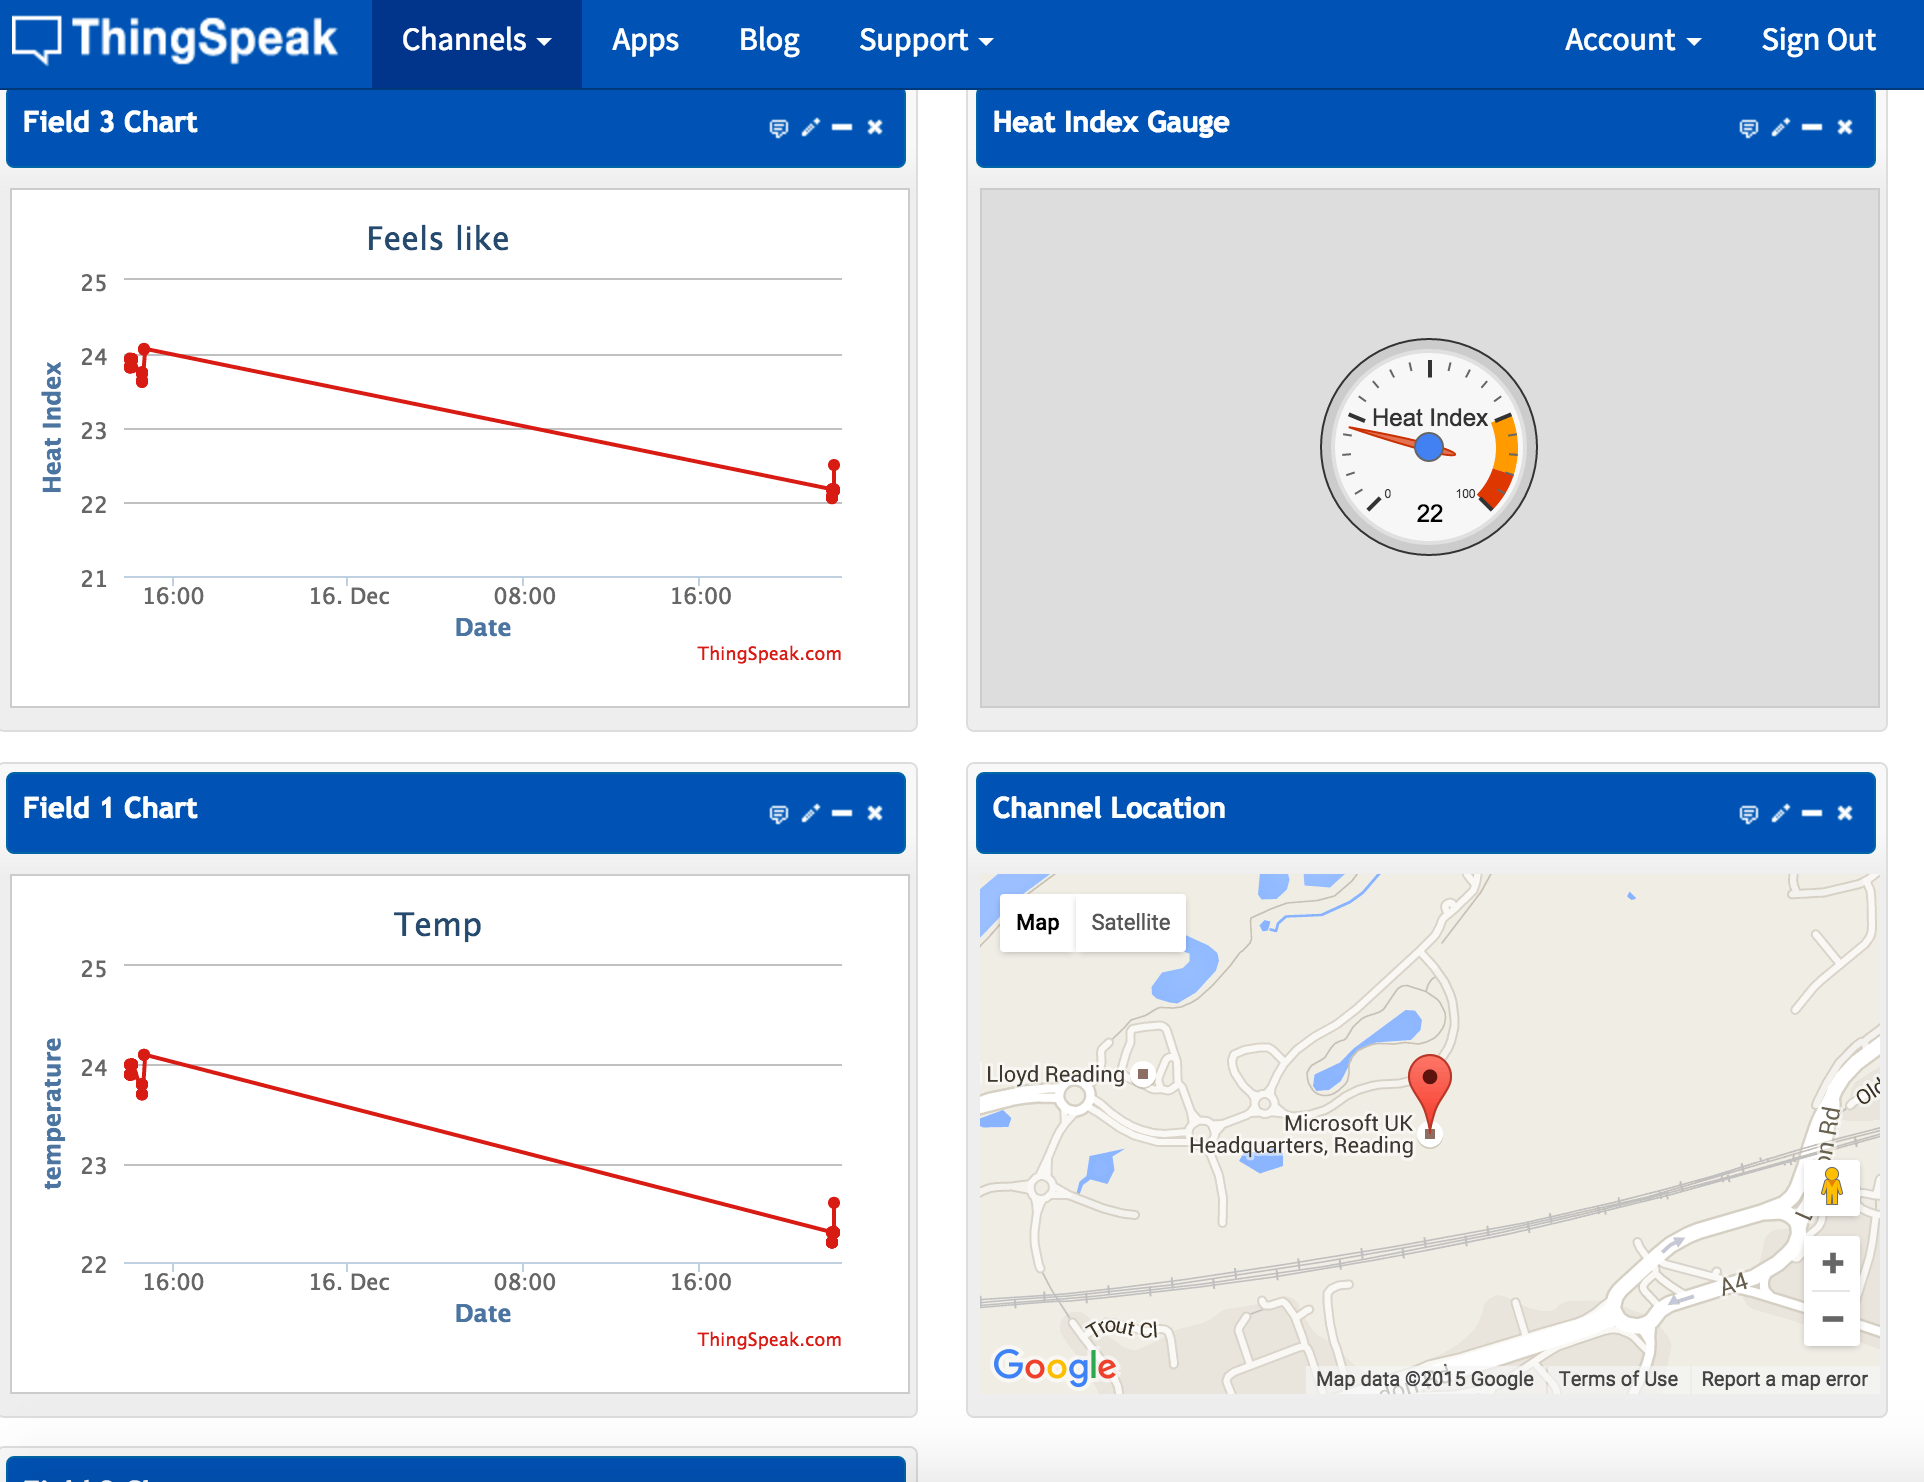
And this is what my thingspeak channel looks like - https://thingspeak.com/channels/67466
Well done for coming this far. The ESP module needs and deserves lots of patience!
Problem Statement
At the time of writing this blog, the AT firmware on ESP-01 wifi module does not have the ability to bind to HTTPS-only sites because it does not support SSL encryption. This is due to certain limiting factors such as certificate size and protocol support (TLS v1.2). There's a hack firmware here that claims to have it working on port 443, but it didn't work for me.
Unlike thingspeak.com, Microsoft Azure Event Hub does not allow HTTP connection. In other words, all connection must be done via SSL on port 443. To work around this (ESP01) problem, we'd need a service to mediate between the ESP component and Microsoft Azure Event Hub. That way, we can send telemetry data via ESP to the service on HTTP, then have the service forward the information to Azure Event Hub over SSL connection. Let's call this intermediary service the IoTGateway.
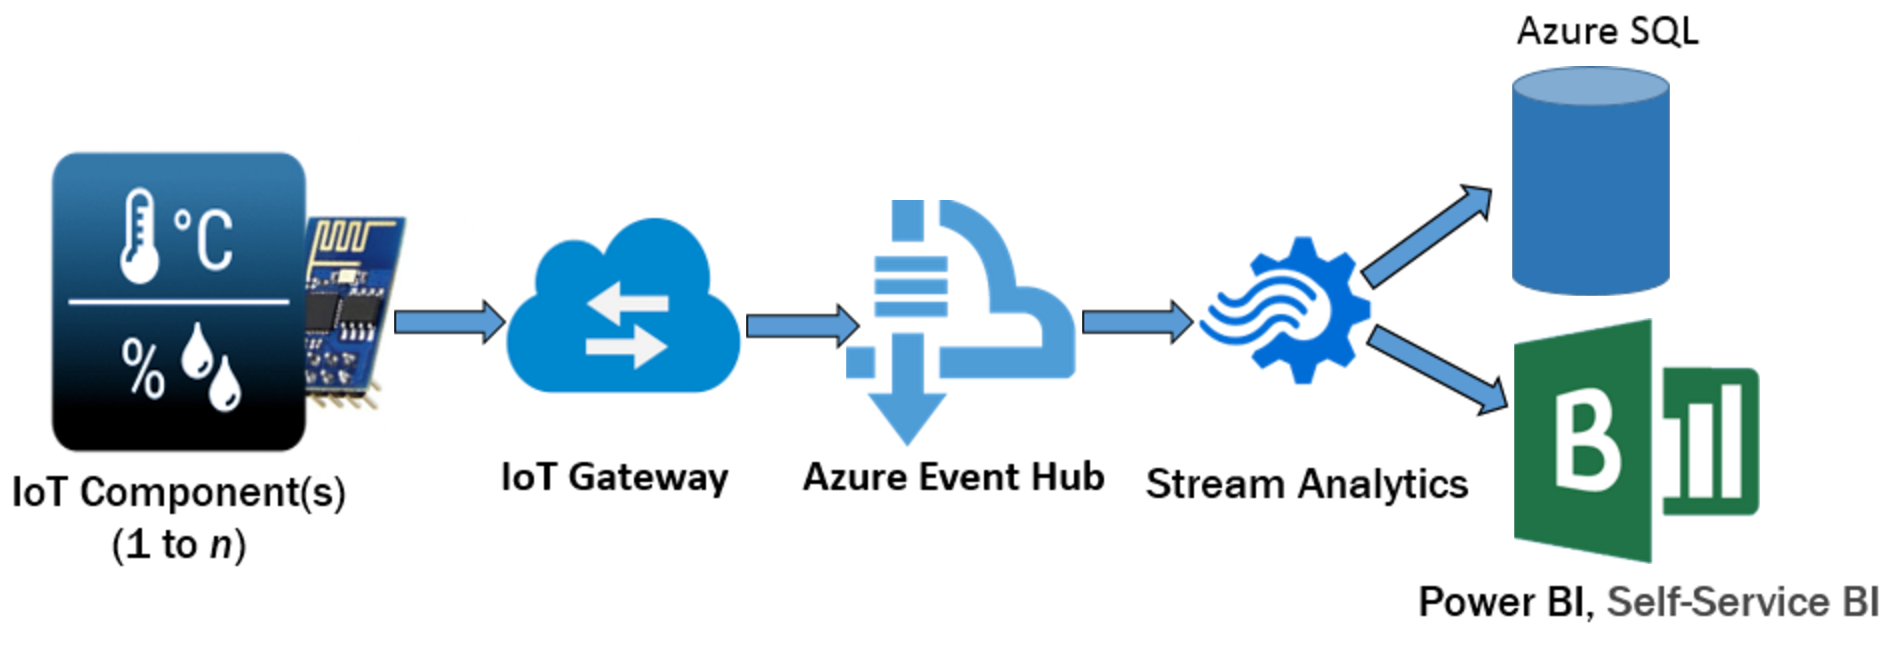
The IoTGateway has an API endpoint that receives JSON and/or forms data, stores it (for data redundancy purpose), then forward the data to Azure Event Hub. The diagram below depicts a high level design of the project.
Further, the Arduino sketch that sends telemetry data via ESP to the IoTGateway is shown below. In comparison to the previous sketch, I did some refactoring and reduced the number of serial prints to optimise memory utilisation - since they won't be needed in deployment mode:
 #include "DHT.h"
#include <SoftwareSerial.h>
#define SSID "change_me"
#define PASS "change_me"
#define GATEWAY_ADDRESS "icent.nut.cc" // iotGateway address http://icent.nut.cc:3000. Locked down to specific IP range
#define GATEWAY_PORT 3000
#define chipId "101"
#define initReqData "POST /dhts.json HTTP/1.1\r\nHost:"
#define DHTPIN 4 // the uno digital pin I'm connected to
#define DHTTYPE DHT22 // DHT 22

unsigned long previousMillis = 0; // will store last time DHT was acccessed
const long readInterval = 600000;   // read temperature,humidity and send readings to iotgateway every 10 minutes

SoftwareSerial wifiPort(2, 3); //Connect ESP Tx to Uno Pin 2, ESP Rx to Uno Pin 3
// Initialize DHT sensor.
DHT dht(DHTPIN, DHTTYPE);

void setup() {
    Serial.begin(9600);
    wifiPort.begin(9600); //  ESP baudrate

    //initalize the wifi module
    prepareWifiModule();

    //Connect ESP module to home/office wifi
    connectToWiFi();
}

void prepareWifiModule() {
    sendCommand("AT\r\n");
    sendCommand("AT+RST\r\n");
    sendCommand("AT+CWMODE=3\r\n");
    sendCommand("AT+CIPMUX=1\r\n");
    delay(2000);
}

void connectToWiFi() {
    // Serial.println("Connecting to the internet...");
    String cmd = "AT+CWJAP=\"";
    cmd += SSID;
    cmd += "\",\"";
    cmd += PASS;
    cmd += "\"";
    cmd += "\r\n";
    sendCommand(cmd);
    delay(2000);
}

void loop() {
    unsigned long currentMillis = millis();

    if(currentMillis - previousMillis > readInterval) {
    //save the next readInterval.
    previousMillis = currentMillis;

    // Read temperature as Celsius (the default)
    float hum = dht.readHumidity();

    // Read temperature as Celsius
    float tem = dht.readTemperature();

    // Read temperature as Fahrenheit (isFahrenheit = true)
    //float temF = dht.readTemperature(true);

    // Check if any reads failed and exit early (to try again).
    if (isnan(hum) || isnan(tem)) {
        Serial.println("Failed to read from DHT sensor!");
        return;
    }

    float hic = dht.computeHeatIndex(tem, hum, false);

    Serial.print("Humidity: ");
    Serial.print(hum);
    Serial.print(" %\t");
    Serial.print("Temperature: ");
    Serial.print(tem);
    Serial.print(" *C\t ");
    Serial.print("Heat index: ");
    Serial.print(hic);
    Serial.print(" *C ");
    Serial.print('\n');

    sendTelemetry(tem, hum, hic);

    }
}

void sendTelemetry(float t, float h, float hi) {
    char buff[10];
    String temperature_string;
    String humidity_string;
    String heatIndex_string;

    //convert floats to strings
    temperature_string = dtostrf(t, 2, 2, buff);
    humidity_string = dtostrf(h, 2, 2, buff);
    heatIndex_string = dtostrf(hi, 2, 2, buff);

   //Generate telemetry in json format
    String telemetry = "{";
    telemetry += "\"chipid\":\"";
    telemetry += chipId;
    telemetry +=  "\",\"location\":\"GBRG6\",\"description\":\"B4Z1\",\"temperature\":";
    telemetry += temperature_string;
    telemetry += "\",\"humidity\":\"";
    telemetry += humidity_string;
    telemetry += "\",\"heat_index\":\"";
    telemetry += heatIndex_string;
    telemetry += "\"}";

    // Or parameterize telemetery in post request..
    //Note that the dht[...] is a ruby on rails thing.

//    String telemetry = "dht[chipid]=";
//    telemetry += chipId;
//    telemetry += "&dht[location]=GBRG6&dht[description]=B4Z1&dht[temperature]=";
//    telemetry += temperature_string;
//    telemetry += "&dht[humidity]=";
//    telemetry += humidity_string;
//    telemetry += "&dht[heat_index]=";
//    telemetry += heatIndex_string;

    telemetry.trim(); //remove trailing whitespaces..

    delay(1000); //let the buffer load

    String requestHeader = GATEWAY_ADDRESS;
    requestHeader += "\r\n";
  //requestHeader += "Content-Type:application/x-www-form-urlencoded\r\nContent-Length:";  //if using post forms instead of JSON.
    requestHeader += "Content-Type:application/json\r\nContent-Length:";
    requestHeader += telemetry.length();
    requestHeader += " \r\n\r\n";

    delay(1000); //let the buffer load

    String http_request = initReqData;
    http_request += requestHeader;
    http_request += telemetry;
    http_request += "\r\n\r\n";

    delay(1000);

    //connect to gateway
    String cipStart = "AT+CIPSTART=4,\"TCP\",\"";
    cipStart += GATEWAY_ADDRESS;
    cipStart += "\",";
    cipStart += GATEWAY_PORT;
    cipStart += "\r\n";
    sendCommand(cipStart);

    delay(1000);

    //Serial.println(wifiPort.readString());
    if (Serial.find("ERROR") || Serial.find("Error")  || Serial.find("Unlink") || Serial.find("link is not")) {
        Serial.println("Could not connect to IOTgateway, retrying module initialization...");
        prepareWifiModule();
    }

    String cipSend = "AT+CIPSEND=4";
    cipSend += ",";
    cipSend += http_request.length();
    cipSend += "\r\n";

    sendCommand(cipSend);
    delay(1000);

    sendCommand(http_request);
    delay(3000);

    //close the TCP connection
    sendCommand("AT+CIPCLOSE=4\r\n");
}

String sendCommand(String command) {
    String response = "";
    const int timeout = 1000;
    boolean debug = true;

    wifiPort.print(command); // send the read character to the esp8266

    long int time = millis();

    while ((time + timeout) > millis()) {
        while (wifiPort.available()) {
            // The esp has data so display its output to the serial window
            char c = wifiPort.read(); // read the next character.
            response += c;
        }
    }

    if (debug) {
        Serial.print(response);
    }

    return response;
}
Please refer to this GitHub repo for an updated version of the above sketch (if any).
Next - > Setting up Azure Event Hub to process telemetries
References:
- http://www.electrodragon.com/w/ESP8266_firmware_flasher
- https://learn.adafruit.com/dht
- https://github.com/adafruit/DHT-sensor-library
- http://allaboutee.com
[bing_translator]