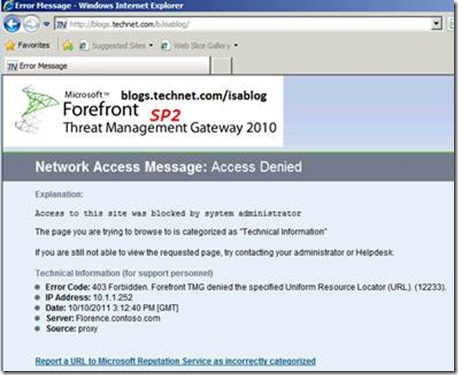
New in SP2: Improved Error Pages
In TMG 2010 Service Pack 2, we put our focus on bug fixing, in order to improve the overall experience with TMG 2010. However next to pure bug fixing, we also introduced some new features.
In this article we’ll provide a quick introduction to the new error pages and will provide a brief overview of how to modify them.
For more information please visit the Technet documentation about Customizing HTML error messages, which has been updated to reflect the changes in SP2.
In TMG SP2 you can now configure TMG to use an improved version of Error Pages. With these new error pages you now have the option to include pictures, e.g. including your company logo on the error page.
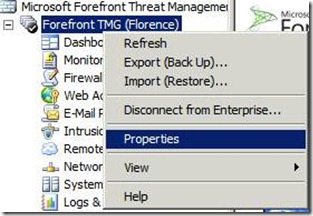
In order to configure TMG to use the new version of error pages, you have to open the TMG MMC, right-click the Array and select Properties:
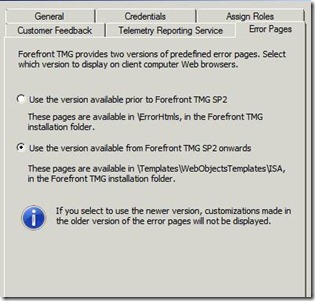
There’s a new tab called “Error Pages”:
As described in the UI, the new version of error pages can be found in the TMG installation directory \Templates\WebObjectsTemplates\ISA. After applying the changes the TMG Firewall service has to be restarted.
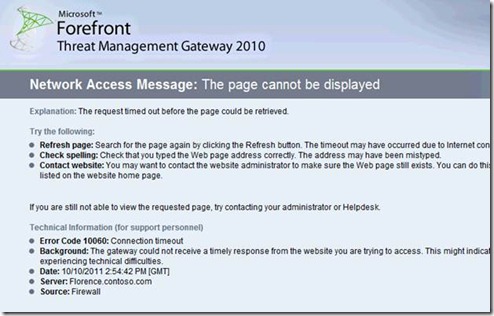
The new error pages will look like this when they are not modified:
If you want to modify the pages, there are two default HTLM error files in the \Forefront Threat Management Gateway\Templates\WebObjectsTemplates\ISA folder that can be used as templates for creating additional HTML error message pages, Default.htm for internal clients and DefaultR.htm for external clients.
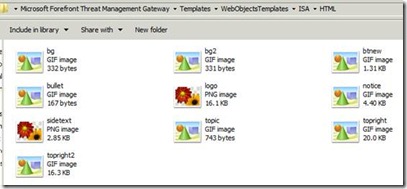
In the new error pages directory you can find a subdirectory HTML, containing the following files:
These image files will be used in the error pages. If you want to modify things like the Logo, you can do this by simply replacing the image files with your corporate identity logos, without having to modify the template html files.
Another option is to copy the objects/pictures you want to embed into the error pages into the HTML directory and add the reference into the error pages, like this: <img src="HTML/MyImage.gif"> </img>.For detailed information have a look at this Technet article.
Note: Before modifying the error pages or the image files, we strongly recommend to create a backup of the original files! Please be aware that you have to restart the Firewall service to use the modified images.
In my example I just performed some simple modifications to the logo.png file. Here’s how the modification might look like:
I’m sure you can do much nicer modifications though ![]()
Author
Philipp Sand
Microsoft CSS Forefront Security Edge Team
Technical Reviewer
James Kilner
Technical Writer
