Support-Tip: (AADCONNECT): How to deprovision an Azure AD CS object
*** DISCLAIMER ***
This blog has been put together for the purpose of illustration. You may have to change certain properties to fit your specific business needs.
*** DISCLAIMER ***
PRODUCT USED FOR TESTING/WRITNG BLOG
- Azure AD Connect (Build: 1.1.281.0)
SCENARIO DESCRIPTION / GOAL
Think about this scenario. You have synchronized several objects to the cloud via the Azure AD Connect Synchronization Service. You now have a business requirement and/or business need that requires you to remove (deprovision) users from O365. In order to achieve this, you will need to add some customization to your Azure AD Connect solution.
The best avenue is to create a new Synchronization Rule within the Azure AD Connect Synchronization Rules Editor. The goal of this blog is to hopefully illustrate how to Deprovision a user object from the Azure AD Connector Space and Azure (O365) that already has a connection through the provisioning process.
CREATE CUSTOMIZED SYNCHRONIZATION RULE
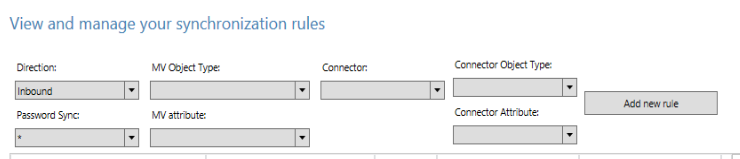
- Open the Azure AD Connect Synchronization Rules Editor and ensure that the Direction drop down is set to Inbound.
- Click the Add new rule button *NOTE: We are using an Inbound Synchronization Rule because we want to keep the object in the On-Premise Active Directory Connector Space (Source Connector Space) and the Metaverse. We want to Deprovision the Azure AD Connector Space object and the Azure Object.
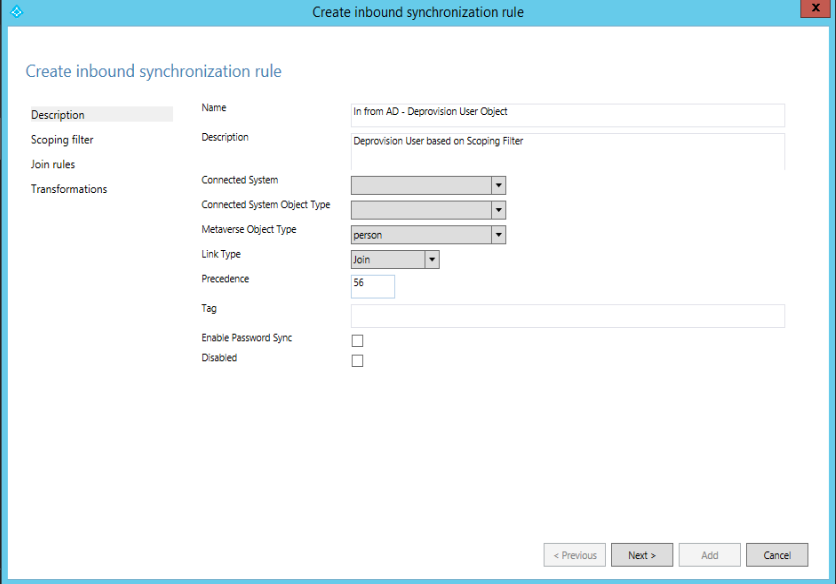
DESCRIPTION TAB
- Be sure to provide a good descriptive name for the synchronization rules purpose
- Connected System will be your On-Premise Active Directory Connector (or if you are using a different On-Premise connector like Generic LDAP, then it will be that connector).
- Connected System Object Type will be User Object
- In this scenario, since we are working with User objects, you would select Person for the Metaverse Object Type
- Link Type = Join
- Precedence in this case should be a lower number, normally below 100 will allow it to work.
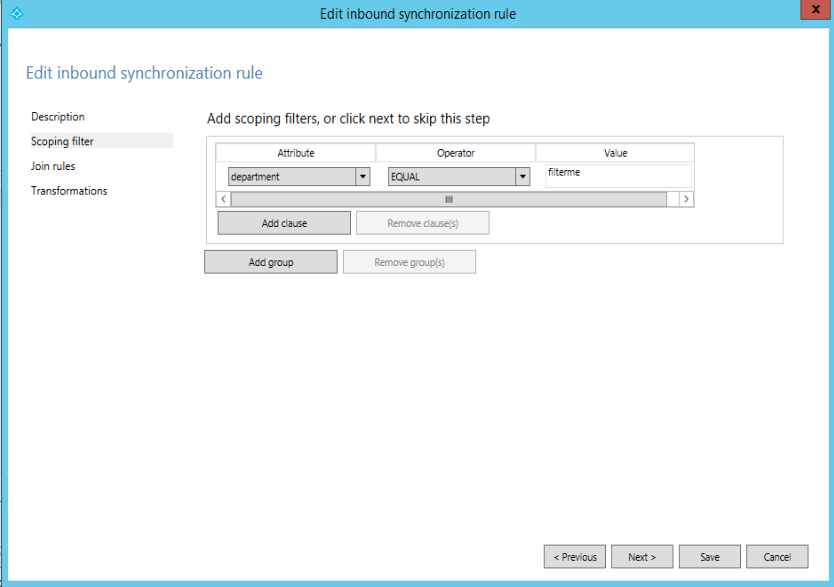
SCOPING FILTER
The Scoping Filter is an inclusive filter. If you have a specific set of users to work with in accordance with your business need, then the Scoping Filter will assist you in that manner. For the purpose of my lab scenario, I utilized the department attribute to do my filtering with the keyword "filterme".
Choose the attribute and keyword that works in accordance with your companies business rules/needs.
* NOTE: The extensionAttribute(s) are a very commonly used attribute for these types of scenarios.
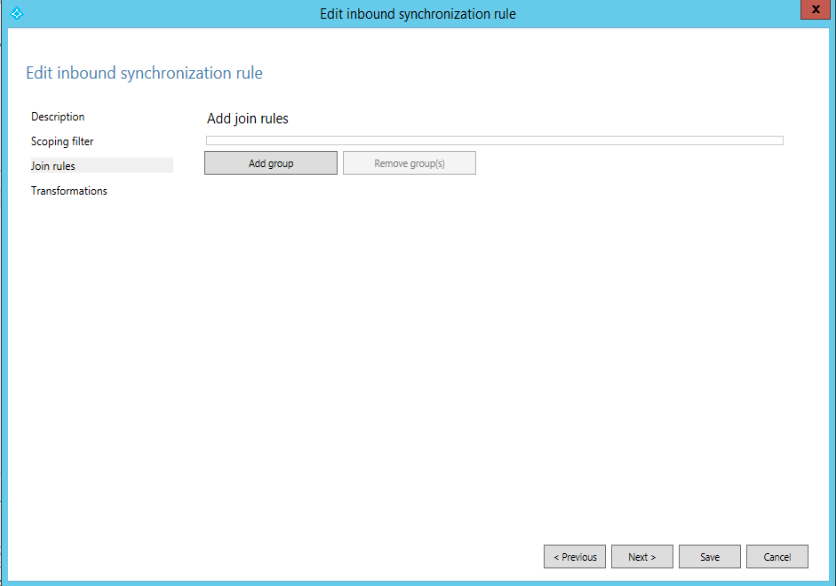
JOIN RULES
I did not use a Join Rule for my lab scenario because I did not need one. However, based on your business rules/needs you may need to have a Join Rule.
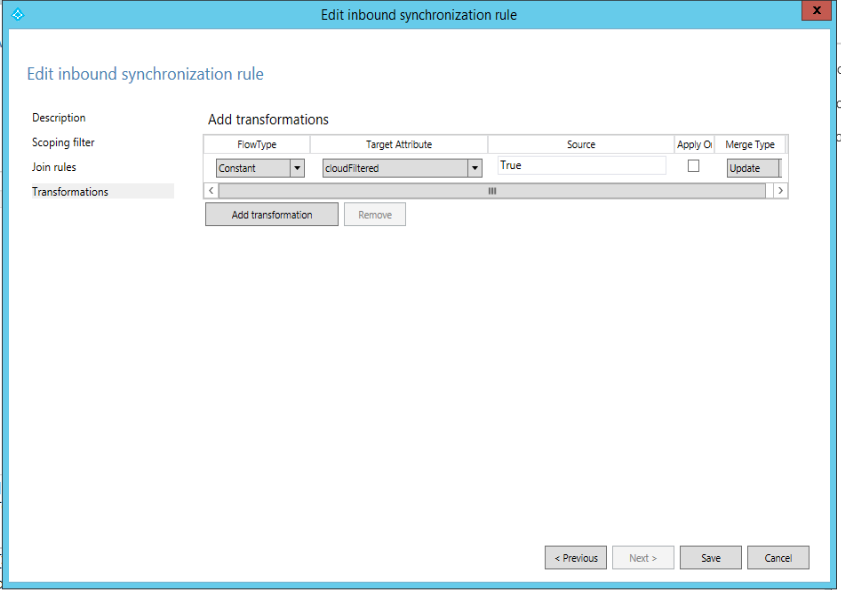
TRANSFORMATIONS
Our focus is to deprovision the object and in order to do this, we need to tell the Azure AD Connect Synchronization Service to break the connection between the Metaverse Object and the Azure AD Connector Space object. To do this, we set the Metaverse attribute cloudFiltered to "True".
TESTING - PREVIEW
You can test the new customized Synchronization Rule by utilizing the Preview Feature. If you Generate Preview on a test object you can confirm that the deprovisioning process is working. I would recommend to start with the Import Attribute Flow page. Here you will be able to see the cloudFiltered attribute being set to true.
Under Connector Updates you will see "Connector Deprovisioning" under the Azure AD Connector Space object.

- Go back to Start Preview and click the Commit Preview button to actually synchronize the object.
- Close all windows back to the Synchronization Service Manager Console and then select Connectors
- On the Connectors Tab, select the Windows Azure Active Directory Connector
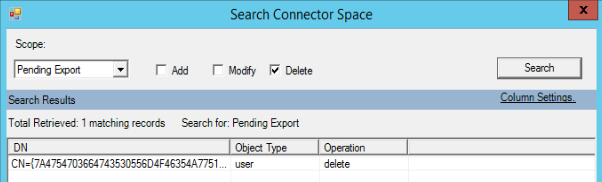
- From the Actions menu, select Search Connector Space and change the Scope to Pending Export and check mark just Delete and click the Search button
- In my scenario, I can see that my user is marked for Deletion.
Once you have the Pending Export, you can run an Export on the Azure AD Connector to export the delete to O365. It is important to note that if you do not execute a Delta Import directly after running the export, then you will have problems if you need to add the object back immediately.
ADDITIONAL LINKS
- SUPPORT TIP: How to control which attribute flows to UPN: https://blogs.technet.microsoft.com/iamsupport/2015/08/27/azure-ad-connect-sync-services-howto-control-which-attribute-flows-to-upn/
- SUPPORT TIP: How to create a custom synchronization rule for attribute flow (transformation flow): https://blogs.technet.microsoft.com/iamsupport/2015/08/27/azure-ad-connect-sync-services-howto-control-which-attribute-flows-to-upn/
- Understanding the default configuration: /en-us/azure/active-directory/connect/active-directory-aadconnectsync-understanding-default-configuration
- Azure AD Connect sync: Best practices for changing the default configuration: /en-us/azure/active-directory/connect/active-directory-aadconnectsync-best-practices-changing-default-configuration