Support-Tip: (AADCONNECT): Filter Provisioned CNF Objects
Hello again! Tim Macaulay here from the Identity Support team here at Microsoft. Recently I worked through an issue where we had CNF objects that had fully synchronized to the cloud. These objects were in some weird state in Active Directory, so our goal was to prevent these objects from making it to the cloud by setting the cloudFiltered attribute to True. Setting the cloudFiltered attribute to True will only allow the object to go as far as the Metaverse.
To accomplish this task, we have a couple options available to us depending on the build of Azure AD Connect that you are currently utilizing in your environment.
*NOTE: I am not certain of the specific Azure AD Connect build that we implemented the ability to clone default Synchronization Rules, so I am going to base the blog on build 1.0.9131.0 which I know has this feature available. If you are using a build that contains this feature, than you can use option #2 as well.
-
- Option #1: If you are using a build of Azure AD Connect that is below 1.0.9131.0
- Option #2: If you are using build 1.0.9131 or later
Option #1
If you are utilizing a build of Azure AD Connect in your environment that is below 1.0.9131.0 than you will need to create a new Synchronization Rule. Please find below, some detailed steps to guide you through the creation of the Synchronization Rule.
-
- Open the Synchronization Rules Editor
- Start > All Programs > Azure AD Connect > Synchronization Rules Editor
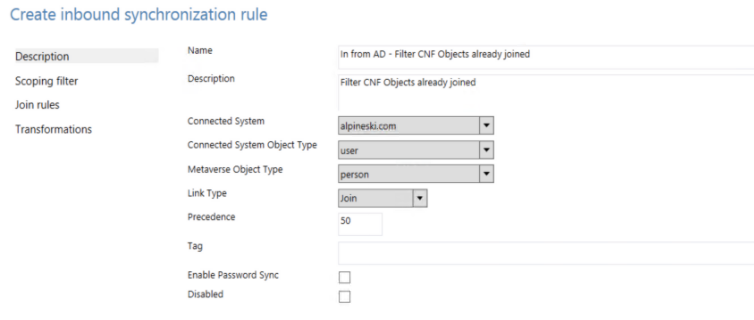
- Click the Add New Rule button in the upper right - The Synchronization Rule Dialog should open on the Description Tab.DESCRIPTION TAB (This tab is pretty self-explanatory. Here is a reference to help out)
NAME Title of the Synchronization Rule - This is how the Sync Rule will be displayed in the Sync Rule Editor DESCRIPTION Purpose of Synchronization Rule CONNECTED SYSTEM On-Premise Active Directory CONNECTED SYSTEM OBJECT TYPE User METAVERSE OBJECT TYPE Person LINK TYPE Join PRECEDENCE 50 TAG (leave blank) ENABLE PASSWORD SYNC (leave not checked) DISABLED (leave not checked)
- Open the Synchronization Rules Editor
*NOTE: The below snapshot is for illustration purposes
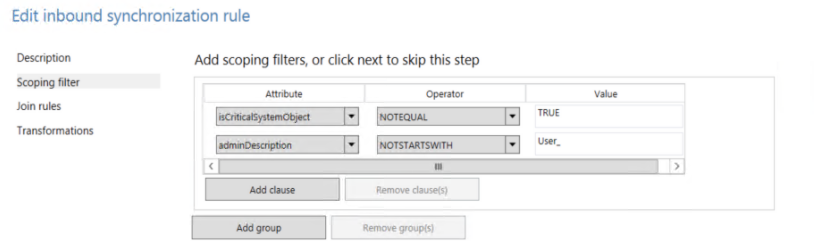
SCOPING FILTER TAB
Use this tab to identify which objects that we want to have this synchronization rule apply.
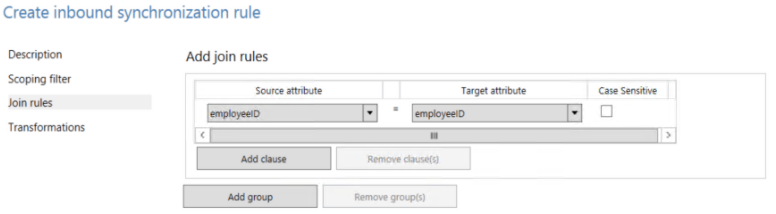
JOIN RULES TAB (You will need a Join Rule here. A Join Rule should be based on an attribute providing a unique value to uniquely identify the object.)
TRANSFORMATION TAB
This is where we will set the cloudFiltered attribute.
1. Click Add Transformation
| FLOW TYPE | Expression |
| TARGET ATTRIBUTE | cloudFiltered |
| SOURCE | IIF(IsPresent([isCriticalSystemObject]) || IsPresent([sAMAccountName]) = False || [sAMAccountName] = "SUPPORT_388945a0" || Left([mailNickname], 14) = "SystemMailbox{" || Left([sAMAccountName], 4) = "AAD_" || (Left([mailNickname], 4) = "CAS_" && (InStr([mailNickname], "}") > 0)) || (Left([sAMAccountName], 4) = "CAS_" && (InStr([sAMAccountName], "}") > 0)) || Left([sAMAccountName], 5) = "MSOL_" || CBool(IIF(IsPresent([msExchRecipientTypeDetails]),BitAnd([msExchRecipientTypeDetails],&H21C07000) > 0,NULL)) || CBool(InStr(DNComponent(CRef([dn]),1),"\ACNF:")>0), True, NULL) |
| APPLY ONCE | (leave not checked) |
| MERGE TYPE | Update |
![]()
Options #2
In this option, if you are using a build that contains the ability to clone a Synchronization Rule such as build 1.0.9131.0 then we can utilize the below steps to accomplish our goal.
- Open the Synchronization Rules Editor
- Start > All Programs > Azure AD Connect > Synchronization Rules Editor
- Select the In from AD - User Join Synchronization Rule
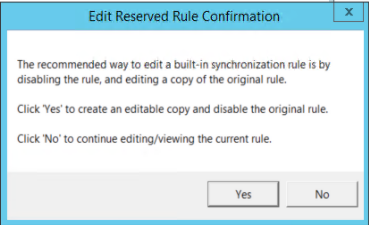
- Click the Edit Button
- In the Pop-Up Window click the Yes button
Now that we have cloned the In from AD - User Join, let's make it a bit more understandable for the task at hand. For this option, we only need to modify a few properties on the Description tab. Let's go over them now.
DESCRIPTION TAB
Leave all other properties alone, except for the below mentioned properties.
| NAME | In from AD - User Join - Cloned - Filter Joined CNF Objects |
| DESCRIPTION | Filter Joined CNF Objects |
| LINK TYPE | Join |
| PRECEDENCE | 50 |
TESTING
Ok. Now that we have created this new customized synchronization rule, we need to test it to ensure that it works good in the environment that we are currently working in. To test, we will utilize a feature known as Preview.
- Open the Synchronization Service Manager Console and select the Connectors Tab
- Select the On-Premise Active Directory Connector
- From the Actions menu, select Search Connector Space
- Change the Scope to RDN
- In the white space to the right, enter the start of the Distinguished Name (e.g. CN=Tim Macaulay)
- This will be the distinguished Name of the object in question
- Click the Search Button
- Once found, double click on the object to review the connector space properties of the object
- Click the Preview Button
- Click the Generate Preview Button
- Generate Preview will display what will happen with the object in question if it were to be synchronized
- Click Import Attribute Flow
- Locate and Review the Metaverse Attribute cloudFiltered
- cloudFiltered should be set to True now
- If cloudFiltered is not set to True, than something did not execute correctly
- Click on Connector Updates
- Expecting to see just one connector for the On-Premise Active Directory Connector
- It is possible that we will see the Azure Active Directory Connector. If it is there, it should contain the word "Deprovision"
ADDITIONAL INFORMATION
- Understanding the default configuration: https://msdn.microsoft.com/en-us/library/azure/dn800963.aspx
- AADSync - Configure Filtering - Part 1: http://blogs.technet.com/b/steady/archive/2015/01/08/aadsync-configure-filtering-part-1.aspx
- AADSync - Configure Filtering - Part 2: http://blogs.technet.com/b/steady/archive/2015/01/09/aadsync-configure-filtering-part-2.aspx
- Azure AD Sync Release Notes: http://social.technet.microsoft.com/wiki/contents/articles/24062.azure-ad-sync-release-notes.aspx