SPLA Reporting - Configuring SIL
This is a 4th post in the series about SPLA Reporting toolset from Microsoft. Previous posts are available here. Today I'll tell you how SIL must be configured inside Windows Server guest VMs to send the inventory data to SILA server. Currently SIL supports these operating systems:
- Windows Server 2012 R2 - included in November 2014 update rollup
- Windows Server 2012 nonR2 - additional installation, a part of Windows Management Framework 4.0.
- Windows Server 2008 R2 - additional installation, a part of Windows Management Framework 4.0.
Windows Server 2008 nonR2 and Windows Server 2003 are not supported. Yes, these versions are outdated, but I know that a lot of service providers still offer Windows Server 2008 nonR2 VMs, because it is the last Windows Server version that was shipped in 32-bits. So be aware of that.
High-level SIL configuration process can be split into 3 parts:
- Configure golden images that you use for new VM Templates
- Configure VMs and servers on which you have admin privileges (management servers or tenant servers that are fully managed as a service provider)
- Configure VMs and servers that are managed by tenants, no admin access there.
Find the SIL certificate, that we've created during SILA installation and let's start. In my case it is called SIL-AuthCert.pfx with password "StrongPassword123". All the script sources that I used are available on my OneDrive.
Configure golden images
First of all, you need to configure SIL inside your golden Windows Server images, so new VMs that tenants will deploy will be automatically configured to send the inventory data to your SILA server.
Windows Server 2012 R2
Create a new VM with Windows Server 2012 R2 as usual.
First of all, you need to check that you have 2 updated installed in a system:
- November 2014 Update Rollup - this is a required Windows update, and it was released more than a year ago. I'm pretty sure that you have it installed already.
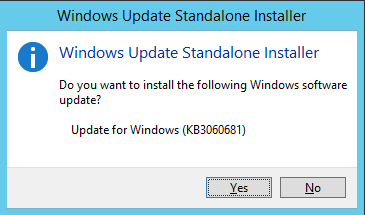
- KB3060681 Update - this update is "optional" in Windows Update catalogue, but it is required if you want to use SIL. So it is very important that you've installed this update in a system:
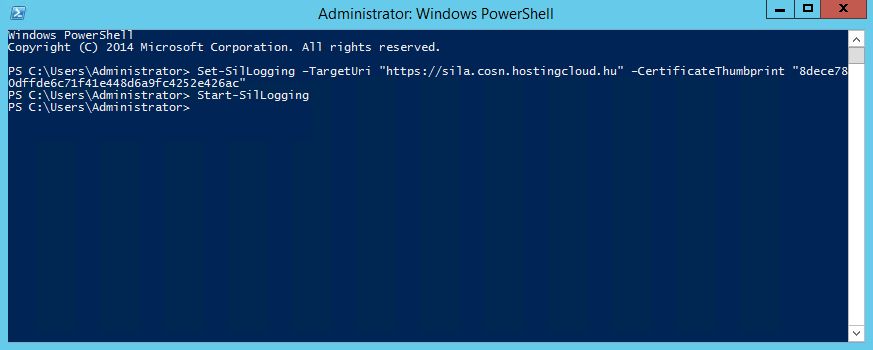
After that, open PowerShell with admin privileges and run 2 commands:
Set-SilLogging –TargetUri "https:// FQDNOFSILASERVER " –CertificateThumbprint " YOURCERTHUMBPRINT "
Start-SilLogging
OK, SIL in configured. But we need to configure automatic certificate installation during new VM deployment. The easiest way is to use SetupComplete.cmd file. Commands, specified in SetupComplete.cmd, automatically run during the first OS launch with Local System privileges.
- Go to C:WindowsSetup and create "Scripts" folder if it is not exist.
- Copy your SIL certificate to this folder.
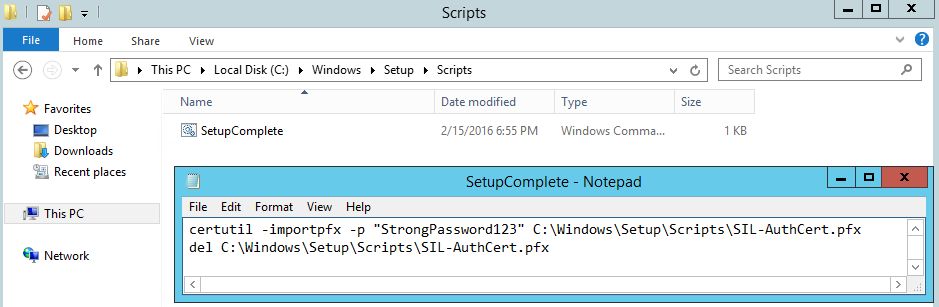
- Create a new text file named "SetupComplete.cmd" in this folder. Full path to the file will be C:WindowsSetupScriptsSetupComplete.cmd.
- Put this text to the file:
certutil -importpfx -p " StrongPassword123 " C:WindowsSetupScriptsSIL-AuthCert.pfx
del C:WindowsSetupScriptsSIL-AuthCert.pfx
As you see, during the first OS boot, SIL certificate and Trusted Root certificate will be added to the system, and after that PFX file will be deleted. Sysprep the system with "Generalize" option as usual. If you prefer offline image servicing, than you can install all needed updates via DISM, mount the VHDX file and copy SetupComplete.cmd and SIL Certificate to the C:WindowsSetupScripts folder.
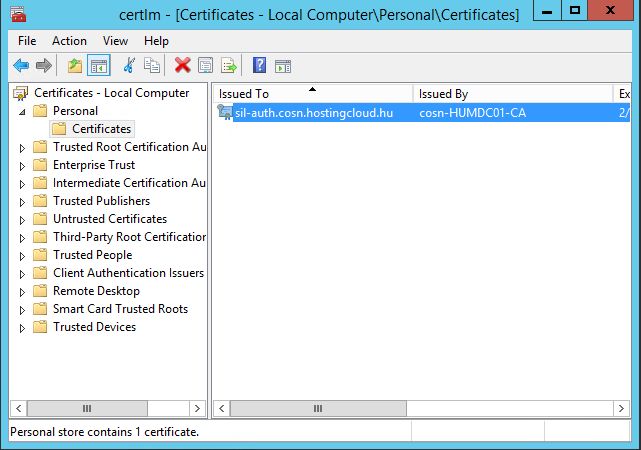
Create a new VM using this golden image. After logon, check that your SIL certificate is properly installed and trusted:
Open PowerShell with admin privileges and run this command:
Publish-SilData

If there will be no errors, then everything is OK.
Windows Server 2012
Preparation process of a golden image of Windows Server 2012 is pretty similar to Windows Server 2012 R2, but you need to install additional components.
- Install Windows Management Framework 4.0 for Windows Server 2012
- Request and install KB3109118 hotfix for WMF 4.0. It adds SIL to the Windows Server 2012.
In several weeks WMF 5.0 will be re-released (it was removed from the download center because of some issues), so instead of steps 1 and 2 you'll need just to install WMF 5.0.
Reboot the VM, logon, open PowerShell with admin privileges and run 2 commands:
Set-SilLogging –TargetUri "https:// FQDNOFSILASERVER " –CertificateThumbprint "YOURCERTHUMBPRINT "
Start-SilLogging
If there are no errors here like "unknown cmdlet", then SIL was properly installed in the system. After that configure SetupComplete.cmd script just like described previously for Windows Server 2012 R2.
Windows Server 2008 R2
Preparation process of a golden image of Windows Server 2008 R2 is pretty similar to Windows Server 2012 R2, but you need to install additional components.
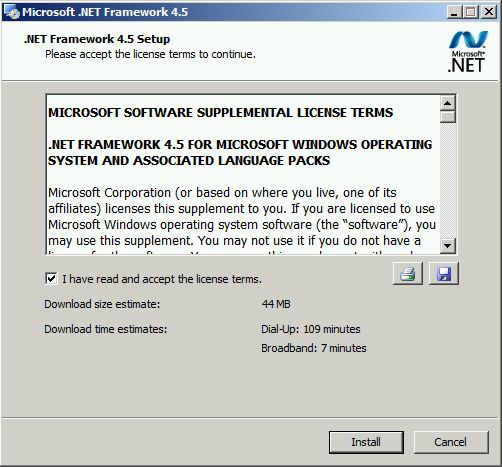
- Install .NET Framework 4.5
- Install Windows Management Framework 4.0 for Windows Server 2008 R2
- Request and install KB3109118 hotfix for WMF 4.0. It adds SIL to the Windows Server 2008 R2.
In several weeks WMF 5.0will be re-released (it was removed from the download center because of some issues), so instead of steps 2 and 3 you'll need just to install WMF 5.0.
Reboot the VM, logon, open PowerShell with admin privileges and run 2 commands:
Set-SilLogging –TargetUri "https:// FQDNOFSILASERVER " –CertificateThumbprint "YOURCERTHUMBPRINT "
Start-SilLogging
If there are no errors here like "unknown cmdlet", then SIL was properly installed in the system. After that configure SetupComplete.cmd script just like described previously for Windows Server 2012 R2.
Configure managed VMs and servers
After you've configured SIL in your golden images you'll need to configure managed VMs and servers. These are Windows Server machines, on which you have administrative privileges - management servers, servers with managed SaaS services, tenant server that you fully manage etc.
The approach will look like this:
- Install required updates - using a script or via WSUSSCCM.
- Import SIL PFX certificate
- Configure and enable SIL logging.
You can do it manually, but I like to automate such tasks. This is my example of the script for Windows Server 2012 R2 servers:
1) Query all computer accounts in the specified OU in AD
2) Connect to each of these servers
3) Check that OS version is Windows Server 2012 R2
4) Copy and install KB3060681 update
5) Import SIL certificate from the PFX file (with Trusted Root Certificate Authority)
6) Configure SIL
All required files (updates and PFX file) are located on the file server (in my case - \sila.cosn.hostingcloud.huShare ).
$ServerFQDNs = Get-ADComputer -SearchBase 'OU= OUNAME ,dc= DOMAINNAME ,dc= COM' -Filter '*' | Select -Expand DNSHostName
Foreach ($ServerFQDN in $ServerFQDNs) {
Write-Host "Configuring: $ServerFQDN"
$OSVersion = Dism /Online /Get-CurrentEdition | select -Last 6
if($OSVersion -Match "6.3.9601") {
Write-Host "OS Version is Windows Server 2012 R2"
copy \ FILESERVERFQDNSHARE Windows8.1-KB3060681-x64.msu \$ServerFQDNc$WindowsTemp
copy \ FILESERVERFQDNSHARE SILCERTIFICATE .pfx \$ServerFQDNc$WindowsTemp
Invoke-Command -ComputerName $ServerFQDN -ScriptBlock {
wusa C:WindowsTempWindows8.1-KB3060681-x64.msu /quiet /norestart
certutil -importpfx -p " PFXPASSWORD " C:WindowsTempSILCERTIFICATE .pfx
Set-SilLogging –TargetUri "https:// FQDNOFSILASERVER " –CertificateThumbprint "YOURCERTHUMBPRINT "
Start-SilLogging
}
}
}

Run it as a user with administrative permissions on every remote server (in my case - as Domain Admin).
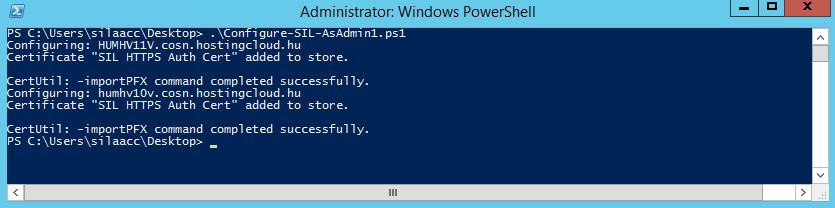
To check if it worked, connect to any of the managed VMs and run Publish-SilData. If there will be no errors, then everything is OK. You can modify this script to run on Windows Server 2008 R2 and Windows Server 2012 nonR2 by adding script blocks for other OS versions and by configuring updates installation.
Configure tenant VMs
This is a most tough step for most service providers, because tenants don't like when somebody external do some changes inside their VMs. But remember - "unmanaged VM" scenario is prohibited in SPLA. So you need to know what runs inside your tenant VMs, because correct license management is your responsibility. Another challenge - you don't have an admin access to tenant VMs. Local admin password is usually specified by a tenant during the VM creation. Also VM can be domain joined and located in a virtual network, isolated from outside.
My approach avoids all these problems, but requires some downtime for each affected VM (approximately 5-10 seconds longer that a simple VM restart). In high-level:
- Stop the running VM
- Mount VHDVHDXVMDK file
- Install the required Windows Updated using DISM
- Copy PFX file to the VM
- Create a startup script, that will run under Local System on the server launch.
- Start the VM
- This script will import PFX certificate and configure SIL on the server launch.
Here is an example for Windows Server 2012 R2 guest VM that runs on Hyper-V:
1) Get the list of all Hyper-V VM on a host
2) Stop the VM
3) Mount the OS disk
4) Check that OS version is Windows Server 2012 R2 (I can recommend to write an output of this command to a CSV file with the exact VM name, it will be very useful to understand what you run in "black boxes")
5) Copy SIL PFX certificate and a special PowerShell script (Configure-TenantVM.ps1) to the Temp folder inside Guest VM disk (for me it's E: drive, don't forget to check yours)
6) Mount HKLM registry hive and add new registry keys from Add-StartupScript.reg file
7) These registry changes create a Machine Startup script - Configure-TenantVM.ps1 - using Local Group Policy. It will configure SIL and import PFX certificate file after the VM boot.
8) Install KB3060681 update
9) Start the VM.
You need to run this script locally on every Hyper-V host, or you can modify it and use VMM to run it once and update all VMs in your environment. Procedure for VMWare is similar, you'll just need another tools to mount VMDK file instead of Mount-VHD that I've used here.
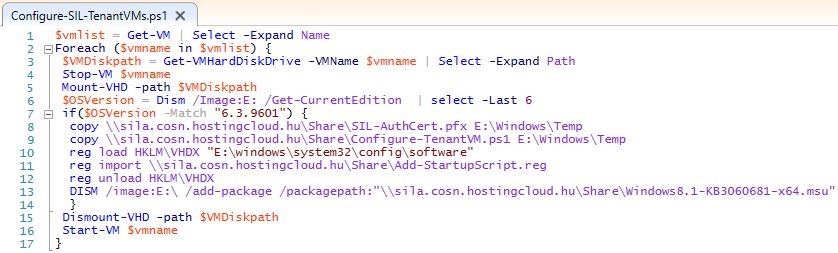
$vmlist = Get-VM | Select -Expand Name
Foreach ($vmname in $vmlist) {
$VMDiskpath = Get-VMHardDiskDrive -VMName $vmname | Select -Expand Path
Stop-VM $vmname
Mount-VHD -path $VMDiskpath
$OSVersion = Dism /Image: E: /Get-CurrentEdition | select -Last 6
if($OSVersion -Match "6.3.9601") {
copy \ FILESERVERFQDNSHARE SIL-AuthCert.pfx E: WindowsTemp
copy \ FILESERVERFQDNSHARE Configure-TenantVM.ps1 E: WindowsTemp
reg load HKLMVHDX " E: windowssystem32configsoftware"
reg import \ FILESERVERFQDNSHARE Add-StartupScript.reg
reg unload HKLMVHDX
DISM /image: E: /add-package /packagepath:"\ FILESERVERFQDNSHAREWindows8.1-KB3060681-x64.msu"
}
Dismount-VHD -path $VMDiskpath
Start-VM $vmname
}
Add-StartupScript.reg source:
Windows Registry Editor Version 5.00
[HKEY_LOCAL_MACHINEVHDXMicrosoftWindowsCurrentVersionGroup PolicyScripts]
[HKEY_LOCAL_MACHINEVHDXMicrosoftWindowsCurrentVersionGroup PolicyScriptsShutdown]
[HKEY_LOCAL_MACHINEVHDXMicrosoftWindowsCurrentVersionGroup PolicyScriptsStartup]
[HKEY_LOCAL_MACHINEVHDXMicrosoftWindowsCurrentVersionGroup PolicyScriptsStartup]
"GPO-ID"="LocalGPO"
"SOM-ID"="Local"
"FileSysPath"="C:\Windows\System32\GroupPolicy\Machine"
"DisplayName"="Local Group Policy"
"GPOName"="Local Group Policy"
"PSScriptOrder"=dword:00000001
[HKEY_LOCAL_MACHINEVHDXMicrosoftWindowsCurrentVersionGroup PolicyScriptsStartup]
"Script"="C:\Windows\Temp\Configure-TenantVM.ps1"
"Parameters"=""
"IsPowershell"=dword:00000001
"ExecTime"=hex(b):00,00,00,00,00,00,00,00,00,00,00,00,00,00,00,00
[HKEY_LOCAL_MACHINEVHDXMicrosoftWindowsCurrentVersionGroup PolicyStateMachineScripts]
[HKEY_LOCAL_MACHINEVHDXMicrosoftWindowsCurrentVersionGroup PolicyStateMachineScriptsShutdown]
[HKEY_LOCAL_MACHINEVHDXMicrosoftWindowsCurrentVersionGroup PolicyStateMachineScriptsStartup]
[HKEY_LOCAL_MACHINEVHDXMicrosoftWindowsCurrentVersionGroup PolicyStateMachineScriptsStartup]
"GPO-ID"="LocalGPO"
"SOM-ID"="Local"
"FileSysPath"="C:\Windows\System32\GroupPolicy\Machine"
"DisplayName"="Local Group Policy"
"GPOName"="Local Group Policy"
"PSScriptOrder"=dword:00000001
[HKEY_LOCAL_MACHINEVHDXMicrosoftWindowsCurrentVersionGroup PolicyStateMachineScriptsStartup]
"Script"="C:\Windows\Temp\Configure-TenantVM.ps1"
"Parameters"=""
"ExecTime"=hex(b):00,00,00,00,00,00,00,00,00,00,00,00,00,00,00,00
I must warn you - this reg file overrides the default Startup Script in Local Group Policy (#0). It's a good idea to modify the script and add this Startup Script after the last one exists in the tenant VM. Instead of Local Group Policy startup script you can use a method of importing a scheduled task to the registry (HKLMSoftwareMicrosoftWindows NTCurrentVersionScheduleTaskCacheBoot)
Configure-TenantVM.ps1 source:
Set-SilLogging –TargetUri "https:// FQDNOFSILASERVER " –CertificateThumbprint "YOURCERTHUMBPRINT "
Start-SilLogging
certutil -importpfx -p " StrongPassword123 " C:WindowsTempSIL-AuthCert .pfx
del C:WindowsTempSIL-AuthCert.pfx
del C:WindowsTempConfigure-TenantVM.ps1

Run the script and check the output. All VMs on the host will restart one by one.
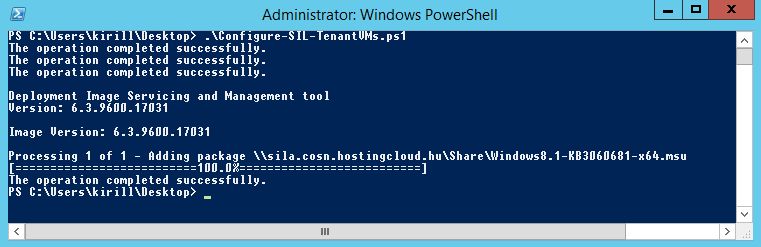
Procedure for Windows Server 2008 R2 and Windows Server 2012 nonR2 is pretty similar. As you see, this approach lets you uncover "black boxes" and know what Windows Server and SQL Server is installed in your tenant VMs. You can schedule a maintenance for weekend nights, backup all affected VMs, send an information message to the tenants and run the script. For tenants it will look like a planned VM reboot.
So configure SIL inside your Windows Server templates, configure managed VMs and unmanaged tenant VMs to get the most complete SILA report. About this - in the next post, which will be published soon.
This post is a part of a series about SPLA Reporting.
Part 1 - SPLA Reporting - Introduction
Part 2 - Installing SILA
Part 3 - Adding virtualization hosts to SILA
Part 4 - Configuring SIL (this post)
Part 5 - Creating and submitting inventory report