How to configure IIS SMTP cloud relay
If you have on-premises Line of Business (LOB) applications that need to send email and you no longer have an on-premises Messaging environment (Exchange or otherwise), you can use Exchange Online (EXO365) to send these messages. Below are the steps needed to accomplish this task:
Note : You must send SMTP Relay mail to pod51008.outlook.com:587 using an online activated user with an ExO Mailbox.
Note : You can send ALL MAIL to this endpoint and the SMTP Relay server WILL deliver mail to the proper location (i.e. EXO365 mail is delivered along with Internet Mail being routed out and delivered)
General SMTP Relay settings for Office 365
- User with mailbox
- SMTP Port = 587
- TLS Encryption required
- Server is pod51008.outlook.com (However, it is recommended that you use the server where the mailbox is located)
- Sign into Outlook Web App
- Navigate to Options, then select See All Options
- Under Account, My Account, Account Information, click the link Settings for POP, IMAP, and SMTP access...
- Information provided will be your SMTP settings
Configuring IIS
1. Create a user with an Exchange Online mailbox
- You can either create the user in your Active Directory, run Directory Synchronization, Activate user with Exchange Online license. (The user must not have an on-premise mailbox)
- Or you can create the user using Microsoft Online Portal or via Microsoft Online Services PowerShell Module and assign the user an Exchange Online license.
2. Configure either the LOB or IIS SMTP Relay server. In this example I am using an IIS SMTP Relay server that other applications can use to send mail:
- Install IIS onto an internal server, selecting to install the SMTP components
- Expand the Default SMTP Virtual Server and click the domains node
- Right-click Domains and select New > Domain > Remote
- Name = *.com and click Finish
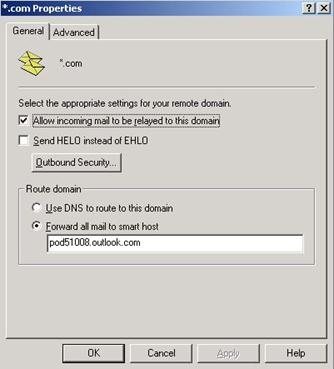
- Double-click the newly created domain
- Ensure “Allow incoming mail to be relayed to this domain” is checked
- For Forward all mail to smart host, type pod51008.outlook.com
4. Click Outbound Securityand configure the following settings
-
- Select Basic Authentication
- For User, type the user name and password of the Office 365 mailbox user
- Check the TLS encryption option
- Click OK

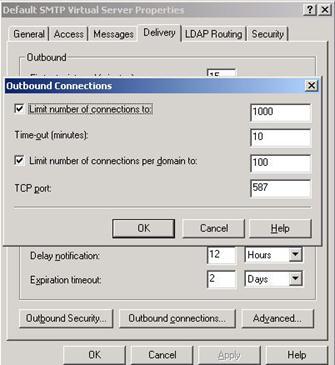
5. Right-click the Default SMTP Virtual Server node and select Properties
1. Click the Delivery tab
2. Click Outbound Connections
-
-
- TCP Port = 587
- Click OK
-
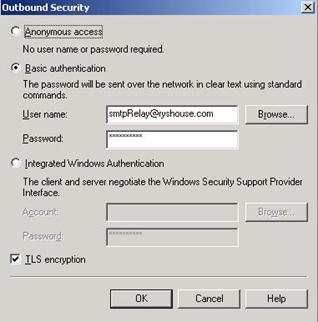
3. Click Outbound Security
-
- Select Basic Authentication
- For User, type the user name and password of the Office 365 mailbox user
- Check the TLS encryption option
- Click OK
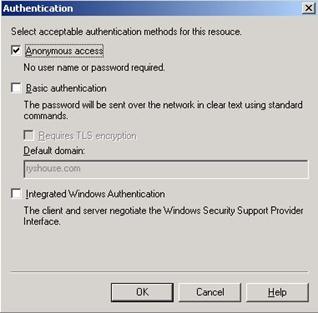
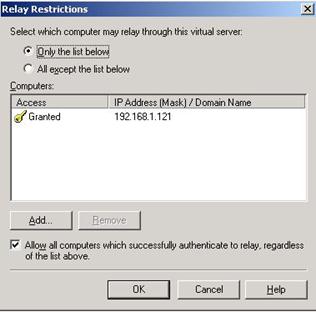
4. Click the Access tab
a. Then select Authentication tab, select Anonymous access, Then click OK
b. Then select Relay tab, then select Only the list below, Add the IP addresses of the client Line-of-Business machines which will be sending the email messages.
You should now be ready to go and your Line of Business applications can send email messages
Applies To:
Microsoft Office 365 for Enterprise