How to apply Retention Policies to all mailboxes
Summary
You can use retention policies to group one or more retention tags and apply them to mailboxes to enforce message retention settings. In some scenario, you may need create custom retention policy and apply to all users automatically.
Generally, to create custom retention policy and apply it to all mailboxes in the organization, you can follow the steps below:
1. Connect to Office 365 service through remote PowerShell.
https://help.outlook.com/en-us/140/cc952755.aspx
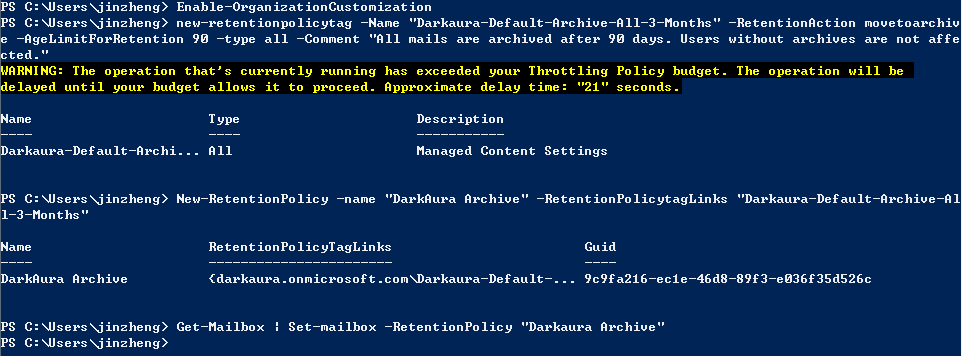
2. In PowerShell run Enable-OrganizationCustomization enable customization.
3. Create Retention Policy Tag by using New-RetentionPolicyTag similar to below:
New-RetentionPolicyTag -Name "Darkaura-Default-Archive-All-3-Months" -RetentionAction movetoarchive -AgeLimitForRetention 90 -Type all -Comment "All mails are archived after 90 days. Users without archives are not affected."
4. Create a Retention Policy to include the tag
New-RetentionPolicy -Name "DarkAura Archive" -RetentionPolicytagLinks "Darkaura-Default-Archive-All-3-Months"
5. Apply the Retention Policy to all the mailboxes:
Get-Mailbox | Set-mailbox -RetentionPolicy "Darkaura Archive"
6. Following command can be used to verify whether the retention policy has been applied to all the mailboxes:
Get-Mailbox -ResultSize Unlimited | select Alias, RetentionPolicy

7. Create the script.
a. Open Notepad.
b. Copy and paste the text that is between the # signs to Notepad.
##############################################################
Get-Mailbox -ResultSize Unlimited | select Alias |export-csv C:\users.csv
$Users = Import-csv -path "C:\users.csv"
$users | ForEach-Object
{
$alias = $_.Alias
Start-ManagedFolderAssistant $alias
}
##############################################################
c. On the File menu, click Save As.
d. In the Save As dialog box, click All Files (*.*) in the Save as type box, type Start_MFA.ps1 in the File name box, and then save the file to the desktop.
8. In PowerShell, run the script.
9. Drag the .ps1 file from the desktop to the PowerShell window. The path is automatically displayed in the PowerShell window.
10. To run the script, press ENTER.

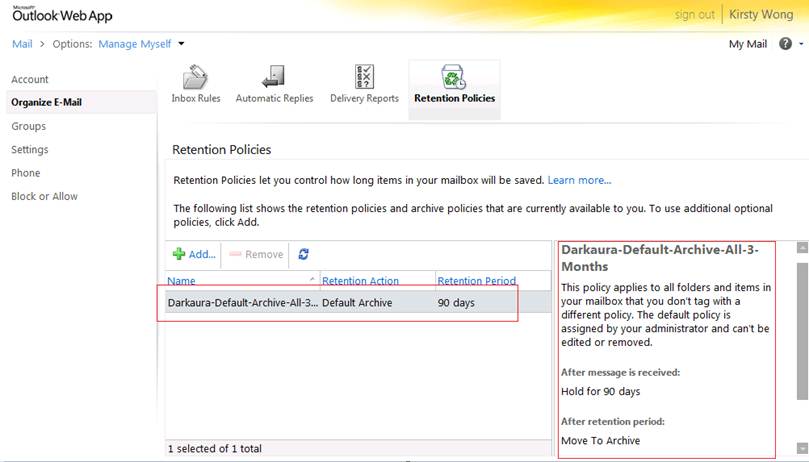
11. Login with any mailbox account in OWA .
a. Click Options, click See all Options.
b. Click Organize E-Mail, click Retention Policies.
c. Verify the custom Retention Policy is applied:
More Information
Set Up and Manage Retention Policies in Exchange Online with Windows PowerShell
https://help.outlook.com/en-us/beta/gg271153.aspx#nextsteps
Apply Retention Policies and Archive Policies to Your Messages
https://help.outlook.com/en-us/beta/cc950504.aspx
Applies To/Requirements
Office 365 for Enterprise
Exchange Server 2010 SP2