Excerpt From The Road Warriors Survival Guide Part 2 of 2 "Networking the Lab”
Once I got my base image configured – and in order to be a good corporate citizen running my Microsoft IT approved Windows 7 BitLocker image (See Part 1) – I ran into the issue of having to be wired to a network in order to provide Internet access to my VMs. Should your customer have a secure environment, plugging your laptop into their network isn’t going to happen; even if it does, plugging in to their network most likely won’t get your VMs access to the Internet. With that in mind, I needed a way to get my VMs connected – regardless of if I used a wired or wireless connection and the solution below is how I got it done!
Target: Provide seamless internet access over wired or wireless to my lab environment
Kill Shot: Enable and Configure RRAS on my Hyper-V host to NAT VM traffic
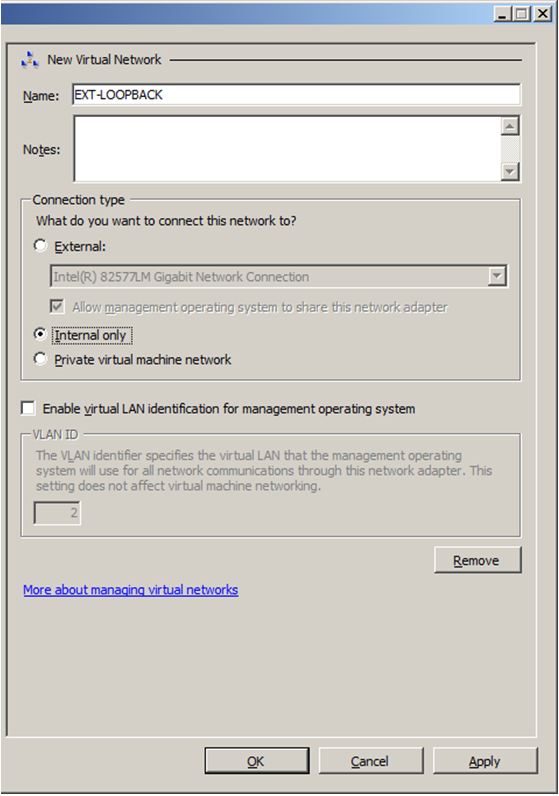
Create an Internal Virtual Network in Hyper-V Manager
1) In Hyper-V Manager, right click on the server name and choose Virtual Network Manager. In the far right window pane, below Create virtual network, Select Internal and click Add.
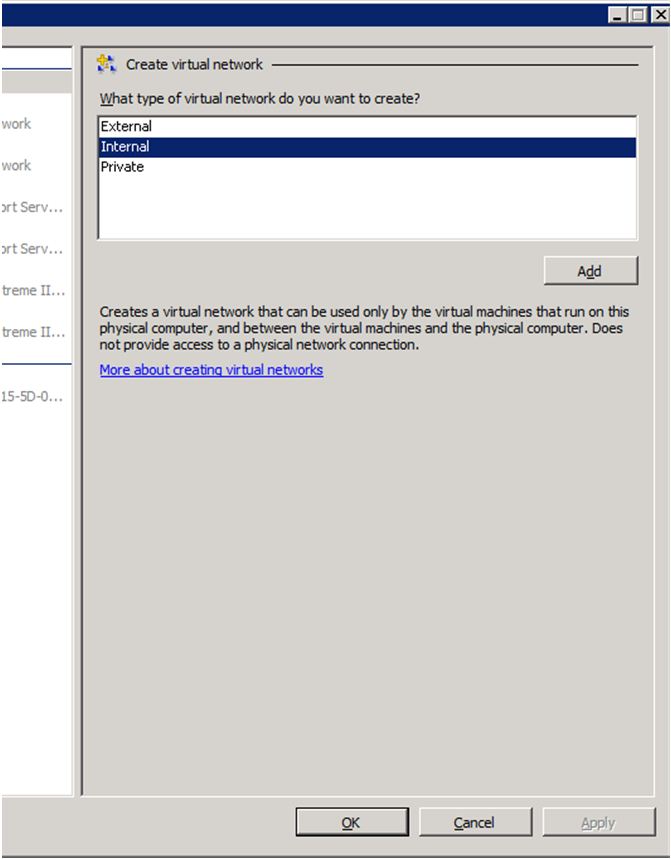
2) Name the New Virtual Network “EXT-LOOPBACK” and click OK
Configure the EXT-LOOPBACK
1) Open the Network and Sharing Center and click on Change Adapter Settings. Right click on the new adapter that shows EXT-LOOPBACK under the “Local Area Connection XX” name.
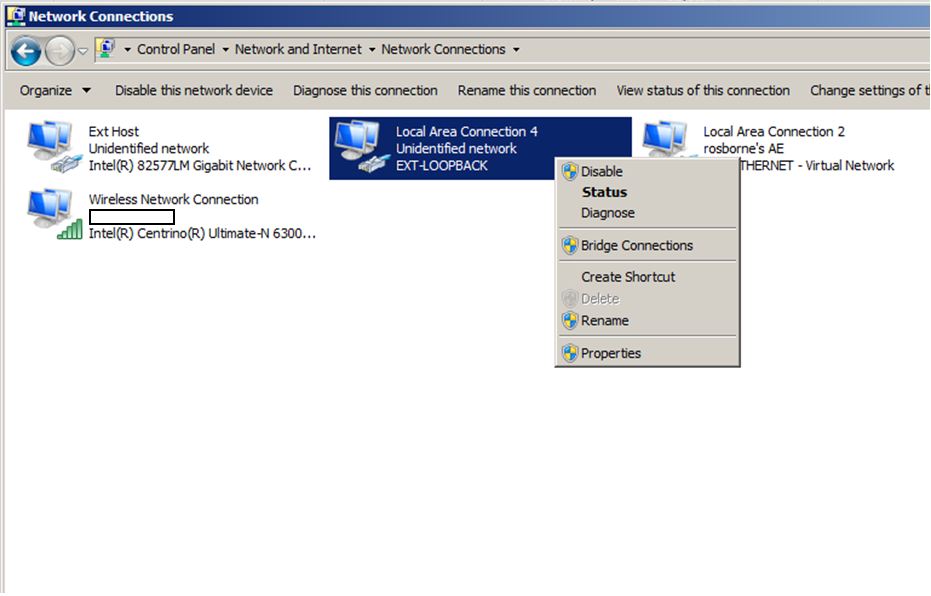
2) Rename the adapter to EXT-LOOPBACK; then click enter. Right click on the EXT-LOOPBACK adapter and select Properties then select the Internet Protocol Version 4 (TCP/IPv4) and click on Properties.
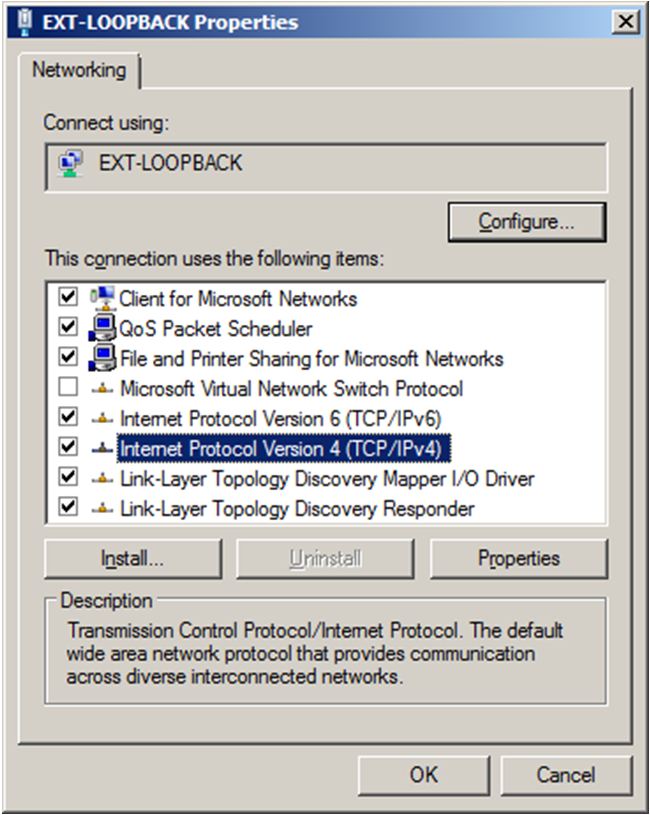
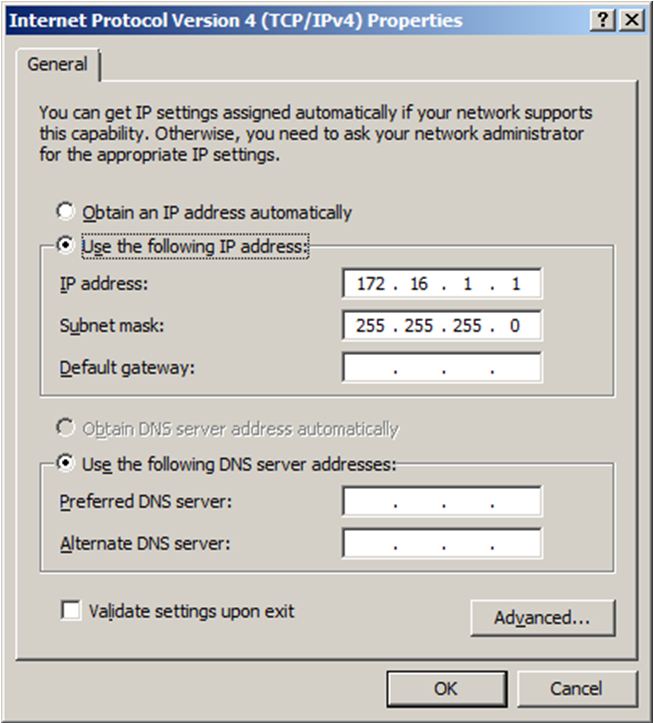
3) You need to specify an IP address and subnet mask as shown above. In this environment we used 172.16.1.1 as the IP address and 255.255.255.0 as the subnet mask. Do not populate any other field. Click OK
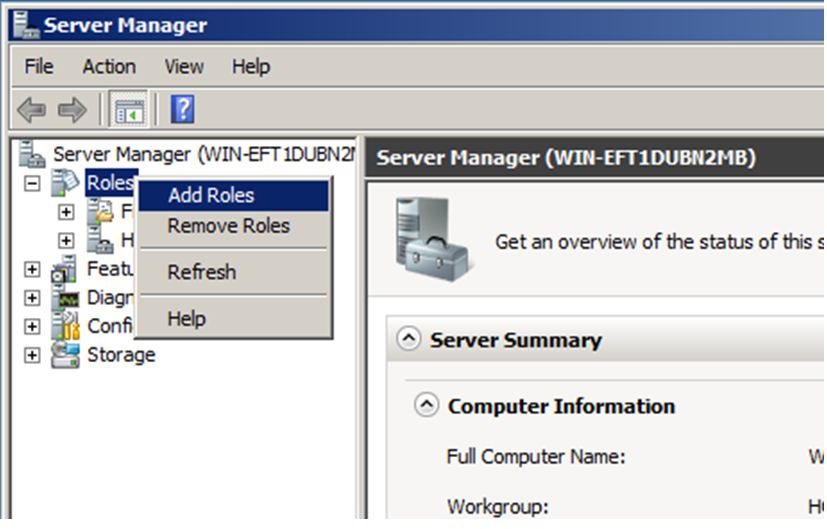
Add RRAS Role to Server Manager (on Host)
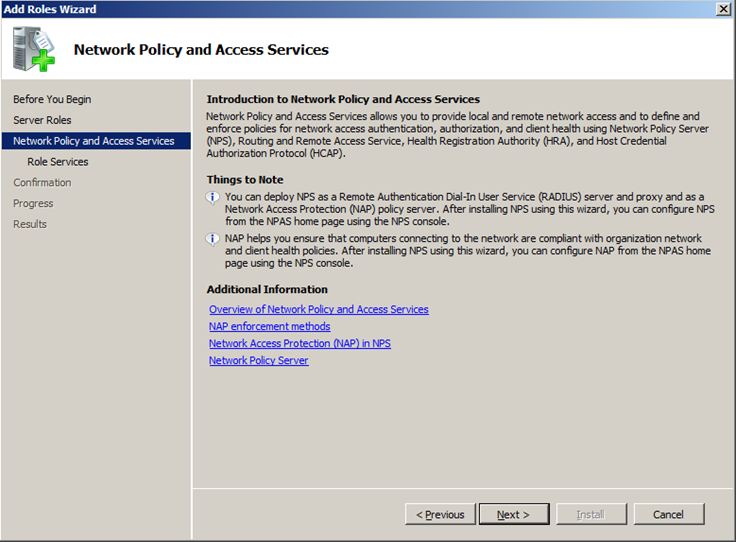
1) In Server Manager, Right click Roles and select Add Roles. Click Next
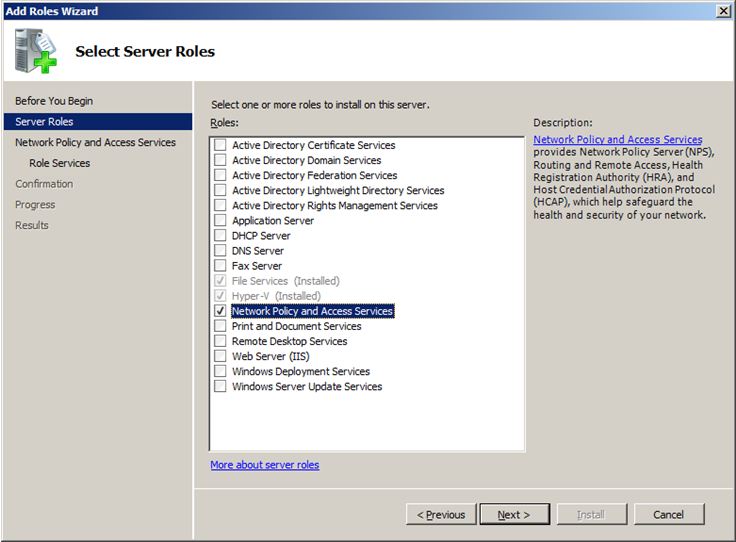
2) Next, check Network Policy and Access Services and click Next

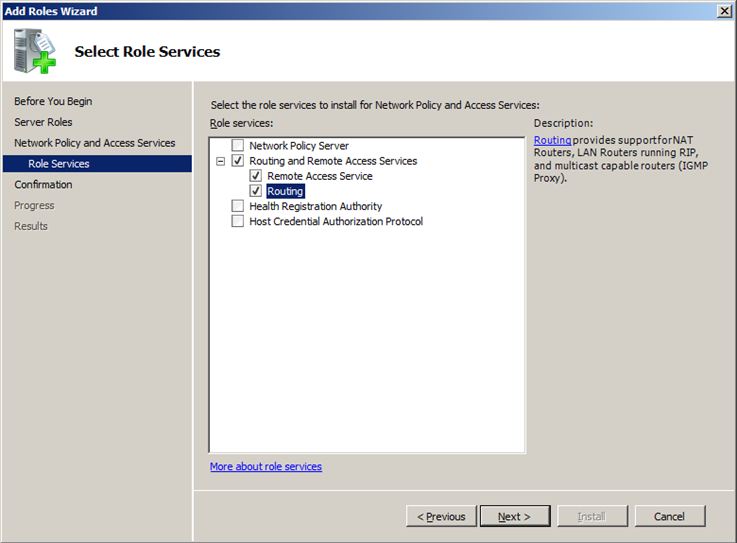
3) Check Routing and Remote Access Services and click Next. Click Install and then click Close.

Enable RRAS to Support the internal network
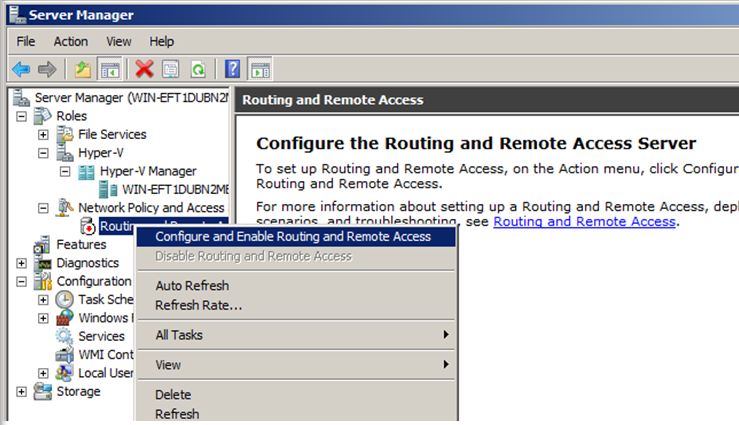
1) In Server Manager, right click Routing and Remote Access Server and select Configure and Enable Routing and Remote Access
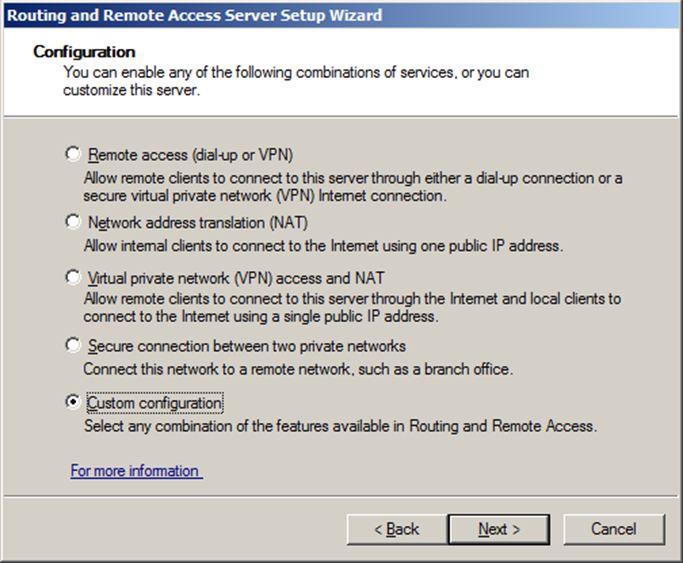
2) Select Custom Configuration
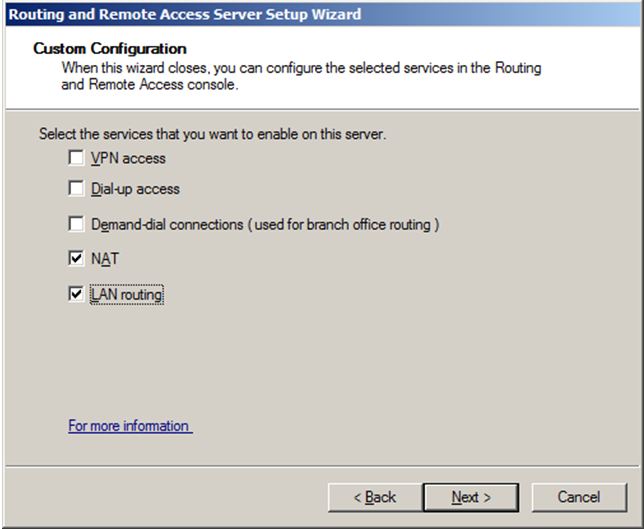
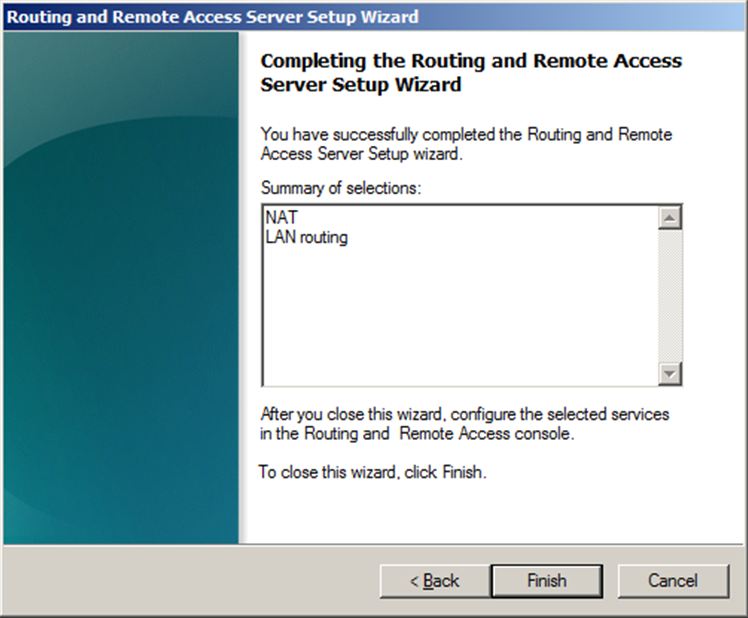
3) Select NAT and LAN Routing then click Next and Finish
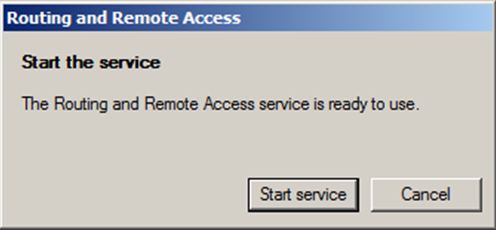
4) Select Finish; then click Start service, when prompted
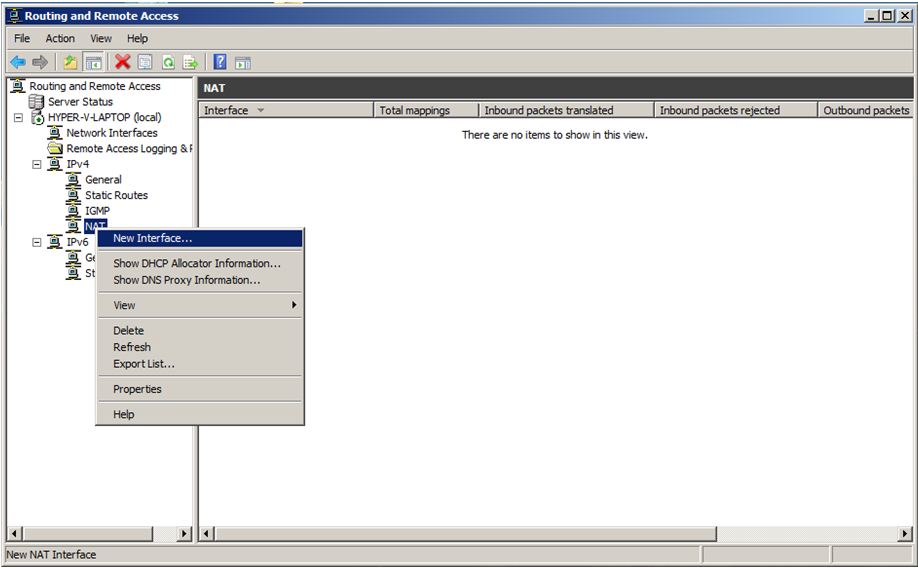
5) Expand IPv4 and select NAT then right click and select New Interface
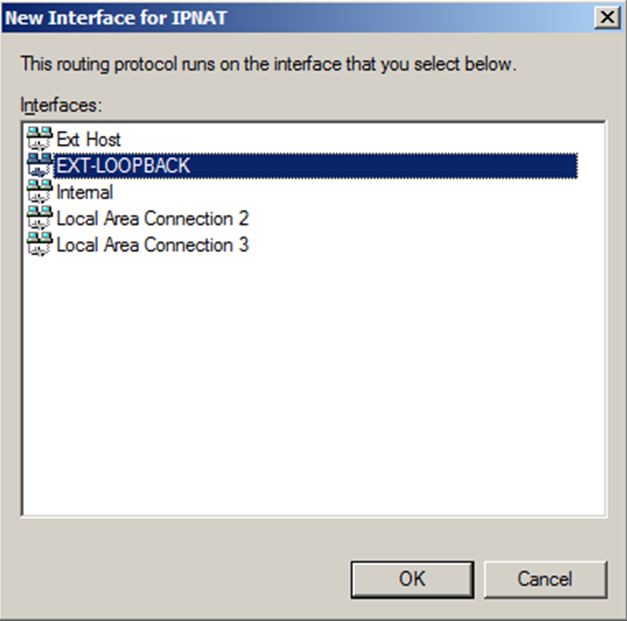
6) Chose the Wireless Network Connection. (you can aslo select your host Local Area Connection or add multiple external NAT connections by repeating these steps)

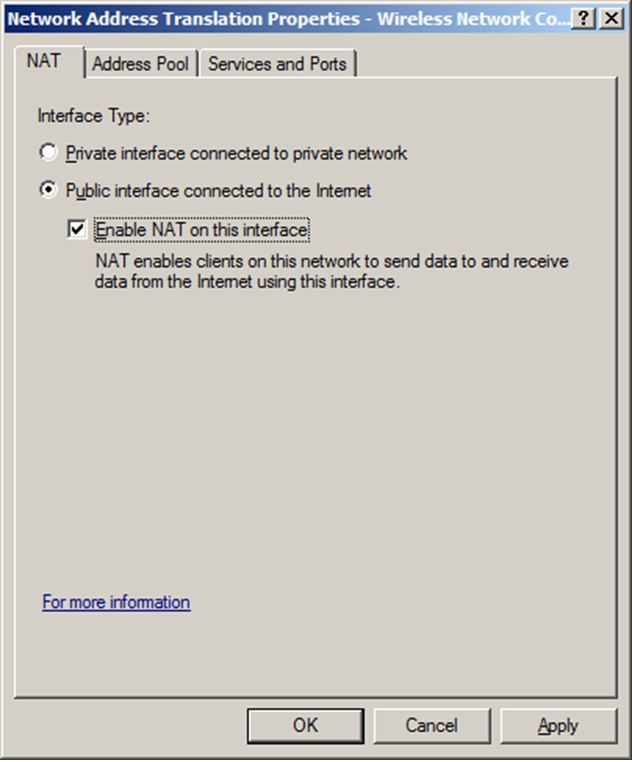
7) Chose Public interface and check the Enable NAT on this interface and click OK
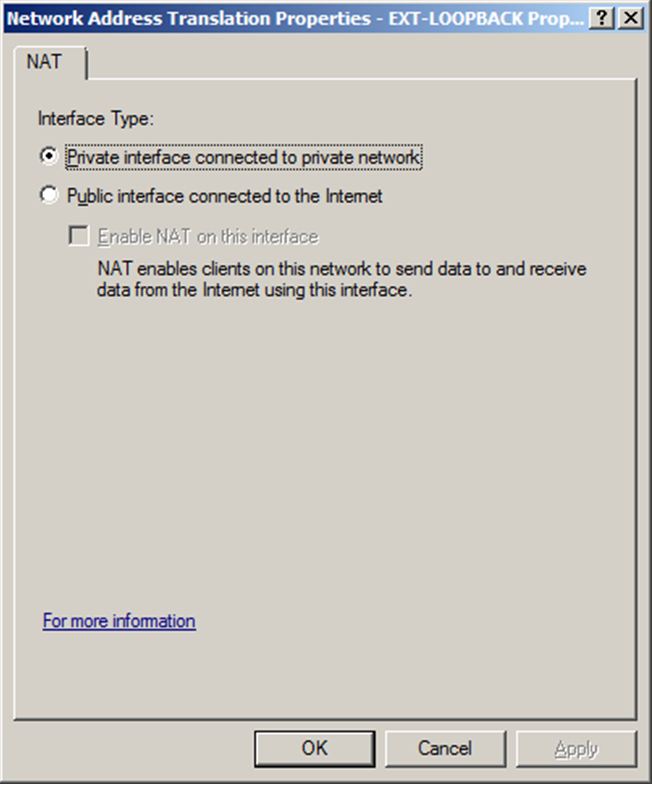
8) Next, right click on NAT again, select New Interface and select the EXT-LOOPBACK interface
9) Leave it at its default, Private interface connected to private network and click OK
10) You should now see the screenshot below:

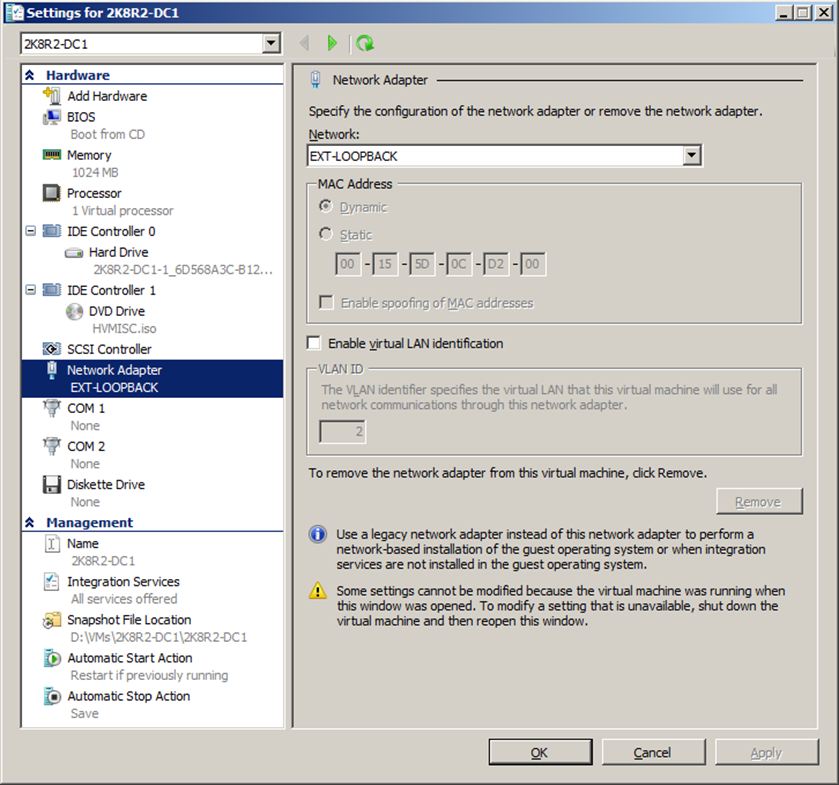
Modify the VM to support the new "EXT-LOOPBACK Network"
1) Select the VM in Hyper-V Manager

2) Go to the settings of the VM and select EXT-LOOPBACK for the Network: option on the VM's Network Adapter screen and click OK
Modify VM with Private IP Addressing Scheme
In this environment the network communicating with the VM is 172.16.1.0/24, which gives you a usable address range of 172.16.1.1-254 and a default gateway of 172.168.1.1. Any VM connected to this network with an IP on this range and using the default gateway IP assigned to the host should have Internet access. Remember to configure DNS settings as well for the VMs! You can setup your own DNS VM or point to a known public one.
Testing Connectivity from the VM
1) From the VM connected to the EXT-LOOPBACK network, try to ping the default gateway (Hyper-V host). If this fails verify your IP addresses on the VM and the Host. If you change the IP on the host, you may want to restart the RRAS service.
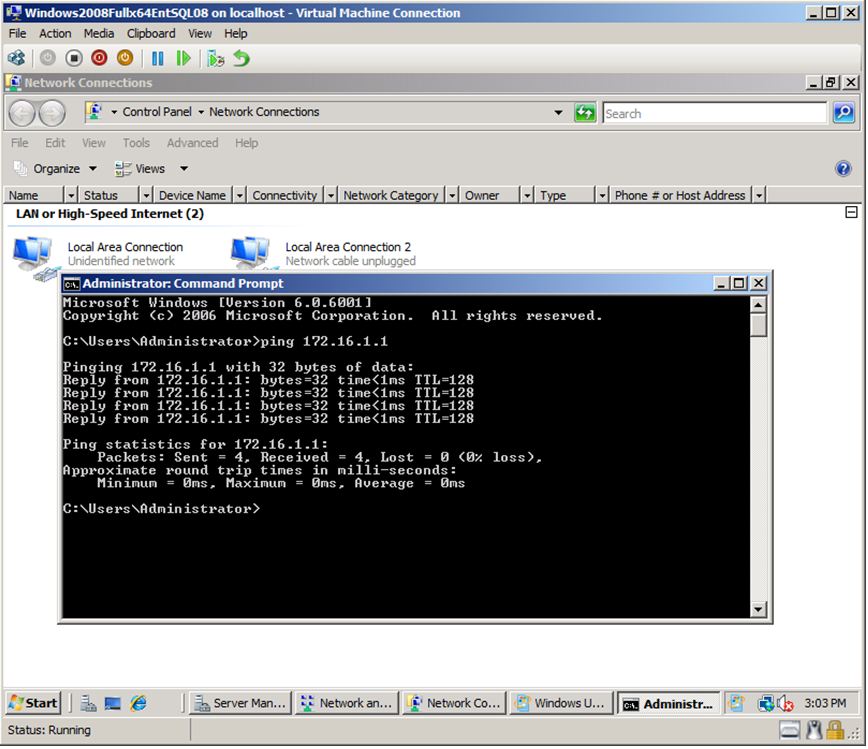
2) From the same VM, you should also be able to ping external resources such as www.Bing.com

Hope this helps you road warriors out there! Feel free to leave comments and suggestions. Again a special thanks to Roger Osborne and Joe Quint for getting this streamlined and documented!!