Use PowerShell to See What Windows Defender Detected
Summary: Microsoft Scripting Guy, Ed Wilson, talks about using Windows PowerShell to see what Windows Defender has detected.
Microsoft Scripting Guy, Ed Wilson, is here. Tomorrow is Windows PowerShell Saturday in Atlanta. There are still a few tickets left; but in the last few days, they have disappeared with a quickness. If you have a chance at all, you should grab this opportunity to hear some world class Windows PowerShell speakers wax eloquently about their favorite Windows PowerShell topics. The Scripting Wife and I will be there (in fact, I am doing two sessions). It will absolutely rock. If you have not yet seen Windows 8.1 on a Surface RT or Surface Pro, make sure you look up the Scripting Wife because she will have both devices with her. There is even a free Windows Azure lab that will be going on. It is a lot of action, for a sleepy autumn Saturday. Make sure you come by to say, “Hi.”
Note This is the fourth in a series of posts about the Windows Defender module in Windows 8.1. For more information, please see:
- Exploring the Windows Defender Catalog
- Use PowerShell to Explore Windows Defender Preferences
- Use PowerShell to Update Windows Defender Signatures
One of the things that always used to bother me about antimalware was that I could never seem to find out what it had detected. I mean, I would expect it to be recorded in the standard Windows Security log because of it being a security type of thing. Or maybe, even in the Windows Application log because after all, antimalware is in reality an application. But no go there.
In the past, Windows Defender used to log to the System log—I guess because it was part of the operating system. It also wrote to a text file log that it squirrelled away deep within the file system. I am not picking on Windows Defender, just stating the way things used to be (in fact, other antimalware products were just as obtuse).
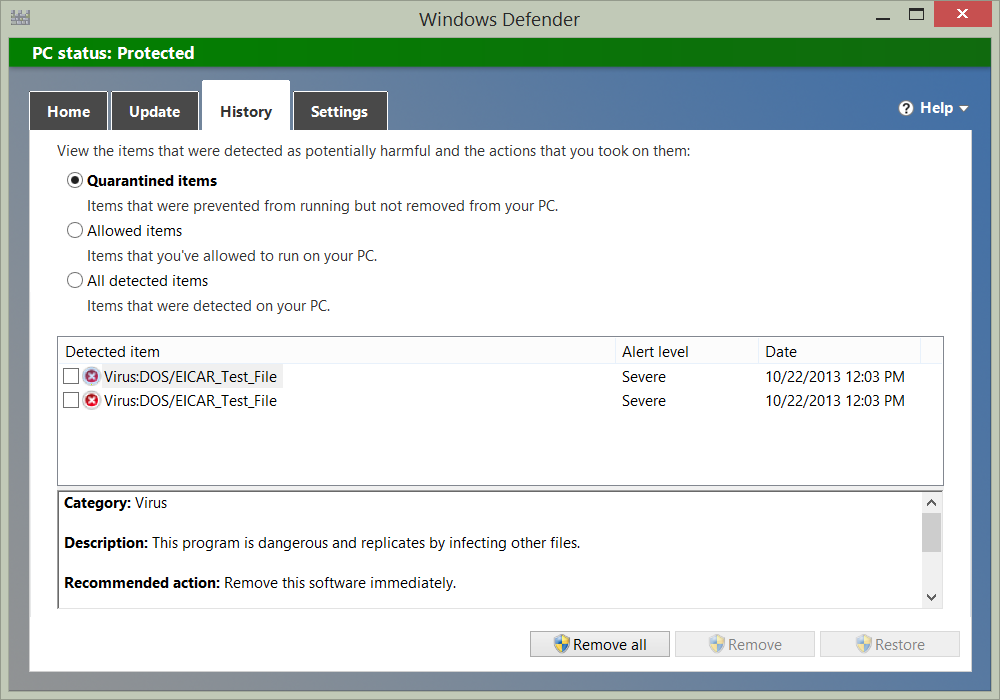
One thing that really bothered me about Windows Defender is that the user interface had no link to show the log file. Although in fairness, it does show the quarantined items, and it permits me to choose actions. The Windows Defender UI is shown here:
So I found a user interface. That does not do much for me in the way of checking on the status of my network. I mean, I am not going to remote into each computer on the network, open the Windows Defender application, and go to the History tab to look at what has been detected, am I?
So I guess I can go through the event logs and see where detected events are located. But wait! This is Windows 8.1, and I am running Windows PowerShell 4.0, so I don’t have to do that either. I can use Windows PowerShell to solve this issue.
The two detection functions
There are two functions in the Windows Defender module that report what Windows Defender detects. These two functions are shown here:
PS C:\> get-command -verb get -Noun *threat, *threatd*
CommandType Name ModuleName
———– —- ———-
Function Get-MpThreat defender
Function Get-MpThreatDetection defender
Note Remember that the functions in the Windows Defender module all remote. First you create a CIM session (that can contain connections to hundreds of computers, then you pass the CIM session in the –SIMSession parameter. For more information about this technique, see these Hey,Scripting Guy! Blog posts.
Threat detection
To find out what Windows Defender has detected by using Windows PowerShell, use the Get-MpThreatDetection function. With no parameters, it displays all threats that are detected on the local computer:
Get-MpThreatDetection
The command and associated output are shown in the following image.
One of the interesting things to do is to look at the ThreatID and the various times related to the attack. To do this, I focus in on the ThreatID property and the *Time properties:
PS C:\> Get-MpThreatDetection | Format-List threatID, *time
threatID : 2147519003
InitialDetectionTime : 10/22/2013 12:03:04 PM
LastThreatStatusChangeTime : 10/22/2013 12:03:32 PM
RemediationTime : 10/22/2013 12:03:32 PM
threatID : 2147519003
InitialDetectionTime : 10/22/2013 12:02:55 PM
LastThreatStatusChangeTime : 10/22/2013 12:03:08 PM
RemediationTime : 10/22/2013 12:03:08 PM
By looking at this, I see that the threat was initially detected, and that the threat continued for a few seconds before the remediation took place. If I want to look at what resources were used in the attack, I use Select-Object and the ExpandProperty parameter to hone in on what files contained the payload. This is shown here:
Get-MpThreatDetection | Select-Object -ExpandProperty resources
The command and the output associated with the command are shown here:
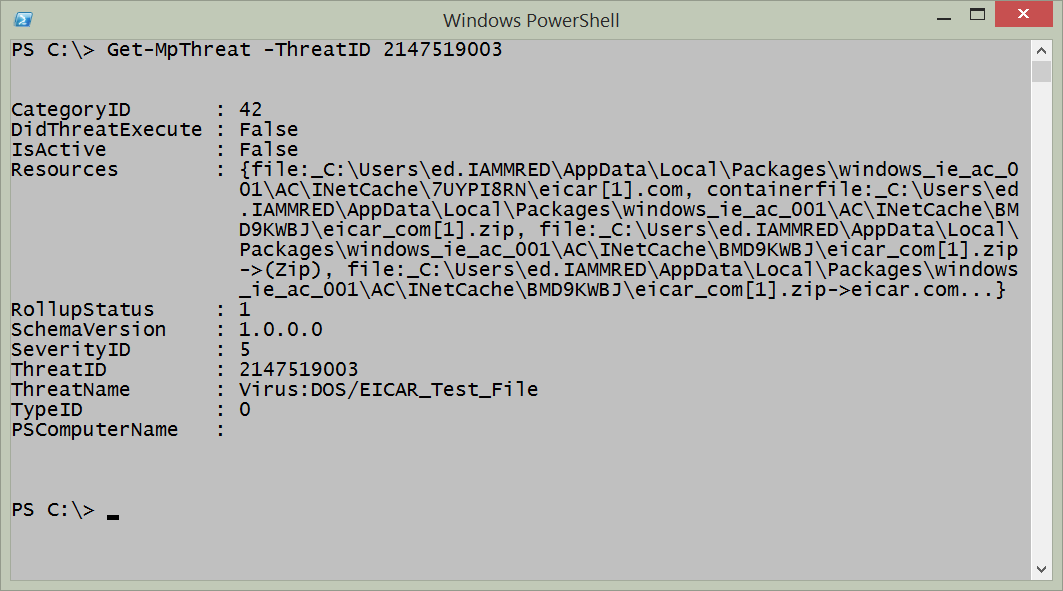
My earlier query revealed the specific ThreadID that was detected. I can use this information, and find more information about the particular threat. To do this, I use the Get-MpThreat function as shown here:
Get-MpThreat -ThreatID 2147519003
The following output shows a nicely organized pane of information:
This time I can see the name of the threat that was detected, in addition to the resources that relate to the file. By looking at the resources, I can also see the path the threat vector took. In this case, it came from the Internet via Internet Explorer.
That is all there is to using Windows PowerShell to review malware detected by Windows Defender. Join me tomorrow when I will talk about more cool stuff.
I invite you to follow me on Twitter and Facebook. If you have any questions, send email to me at scripter@microsoft.com, or post your questions on the Official Scripting Guys Forum. See you tomorrow. Until then, peace.
Ed Wilson, Microsoft Scripting Guy


 Light
Light Dark
Dark
0 comments