Use PowerShell to Create a Character’s Word Document
Summary: Microsoft Scripting Guy, Ed Wilson, shows how to use Windows PowerShell to create a Word document that displays all characters in a font.
Microsoft Scripting Guy, Ed Wilson, is here. If it is Tuesday, I must still be at TechEd 2012 in Orlando, Florida. In fact, this morning at 10:30 I have an autograph session at the O’Reilly booth. They will be handing out a few free copies of my Windows PowerShell 2.0 Best Practices book, so get in line early if you want to ensure success for scrounging one. If not…well, you can always buy one.
Note This week I am talking about using Windows PowerShell to automate Microsoft Word. I have written extensively about this subject in the past. Today’s blog continues working with inserting special characters in a document. Yesterday, I talked about the basic technique to Add a Symbol to a Word Document by Using PowerShell.
Printing out all characters and codes from a font
When you work to automate Microsoft Word (whether you are using VBScript, Windows PowerShell, or some other language), many of the steps end up being exactly the same, no matter what you are doing. In yesterday’s blog, I discussed each of the steps. Today I am going to skip past the steps after I list the three basic steps.
Just the steps
- Create an instance of the Word.Application object. Store the returned object in a variable.
- Make the Word application visible.
- Add a document object to the Word application.
You will nearly always perform these same three steps, no matter what you are doing with Word automation. The code to perform these three steps is shown here.
$word = New-Object -ComObject word.application
$word.visible = $true
$document = $word.documents.add()
Creating and using a Selection object
In yesterday’s Hey, Scripting Guy! Blog, I mentioned that there are two objects that expose the InsertSymbol method. Those objects are the Range object and the Selection object. Yesterday, I used the Range object, so today I will use the Selection object. For this example, it really does not matter much which object exposes the method. I guess the point of the exercise is to show you that the method behaves the same, no matter which object exposes it.
To create a Selection object use the Selection property from the Document object, and store the returned Selection object in a variable. This technique is shown here.
$selection = $word.Selection
From yesterday’s blog, we also know that the characters range from 33 through 255. This is a perfect time to use the for statement because we know exactly how many items with which we will work. The following code uses the for statement to control a loop that goes from 33 through 255 and increments by 1.
For($i = 33 ; $i -le 255; $i++)
{
Inside the for loop, I use the TypeText method from the Selection object to write the number that is contained in the variable $i. The `t creates a tab character in Windows PowerShell. Therefore, the TypeText method displays a number and then tabs over one tab stop. The command is shown here.
$selection.TypeText(“$i `t”)
Now I need to use the InsertSymbol method to display the character that is associated with the specific character code represented by the number stored in the $i variable. In the code that follows, I use the font “Segoe” to illustrate that this technique works with any installed font.
$selection.InsertSymbol($i,”Segoe”)
The TypeParagraph method creates an empty paragraph between each line that displays a character code and its associated symbol. Without the TypeParagraph method, the text would wrap line after line, and it would be difficult to read. The code to create the space between the lines of output is shown here.
$selection.TypeParagraph()
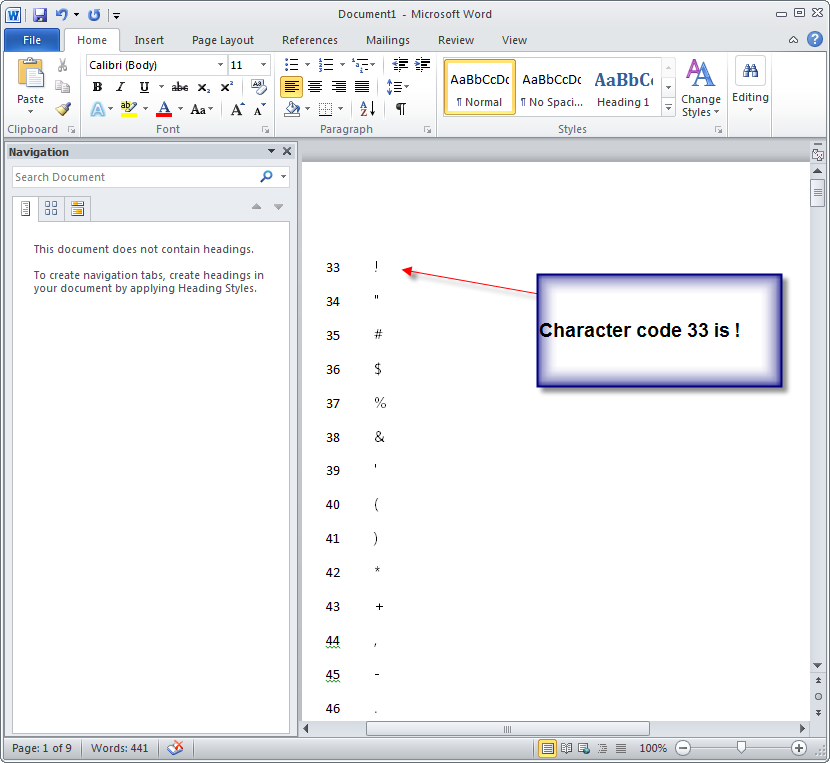
The complete CreateWordSymbolFile.ps1 script appears here.
CreateWordSymbolFile.ps1
$word = New-Object -ComObject word.application
$word.visible = $true
$document = $word.documents.add()
$selection = $word.Selection
For($i = 33 ; $i -le 255; $i++)
{
$selection.TypeText(“$i `t”)
$selection.InsertSymbol($i,”Segoe”)
$selection.TypeParagraph()
}
When I run the script, the output in the image that follows appears.
Microsoft Word Automation Week will continue tomorrow when I will talk about creating a table in a Microsoft Word document and inserting corresponding special characters in it. It is a really cool blog, and it illustrates several useful techniques.
I invite you to follow me on Twitter and Facebook. If you have any questions, send email to me at scripter@microsoft.com, or post your questions on the Official Scripting Guys Forum. See you tomorrow. Until then, peace.
Ed Wilson, Microsoft Scripting Guy


 Light
Light Dark
Dark
0 comments