Learn How to Use PowerShell to Automate MDT Deployment
Summary: Guest blogger, Matt Hester, shows how to use Windows PowerShell and MDT to automate deployment of Windows.
Microsoft Scripting Guy, Ed Wilson, is here. Today, guest blogger, Matt Hester, joins us to wrap up MDT Week.
Matt Hester has been involved in the IT Pro community for over 15 years. Prior to joining Microsoft, Matt was a successful Microsoft Certified Trainer for over eight years. After joining Microsoft, Matt continues to be heavily involved in the IT Pro community as an IT Pro evangelist, presenting to audiences nationally and internationally. In his role at Microsoft, Matt has presented to audiences in excess of 5000 and as small as 10. Matt has written four articles for TechNet Magazine. In addition, Matt has published two books with Sybex:
- Microsoft Windows Server 2008 R2 Administration Instant Reference
- Automating Microsoft Windows Server 2008 R2 with Windows PowerShell 2.0
Take a test drive with Matt’s list of favorite Microsoft products and resources:
Evaluation Downloads for Virtualization, Management, and Training Resources
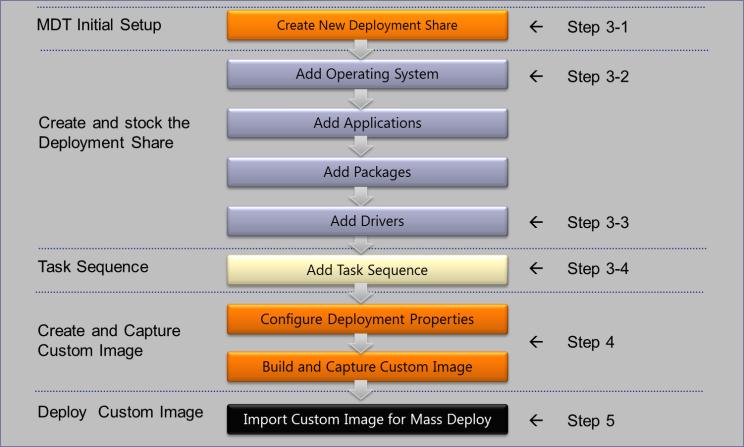
Deploying Windows 7 is a hot topic that most of you or your departments are currently tackling. Hopefully, you are familiar with the Microsoft Deployment Toolkit 2010 (MDT). If you are not, the MDT is a FREE tool that provides you with a framework to create custom images for deployment in your environment. The images can be for servers or client computers. The tool helps you put together all the necessary components (such as the operating system, applications, and drivers) into a standard image. Additionally, you can create task sequences to make sure your deployment is run in the proper order and correctly. Then MDT will put all the pieces together in a custom image that you can deploy in your infrastructure.
The MDT images can be deployed via DVD, USB, a network share, or PXE boot—and the deployment can be physical or virtual. The secret sauce behind the MDT images is they are stored in the Windows Imaging (WIM) file format. WIM is designed to help deploy Windows technologies. The WIM file format is hardware agnostic, and unlike other imaging tools, you do not need a different image for each change in hardware. The only exception is that it is recommended you have a different image for 32-bit vs. 64-bit systems. You can learn more here: ImageX and WIM Image Format.
Built-in Windows PowerShell support
What makes MDT even greater is the fact that it has built-in Windows PowerShell support. As you move through the MDT wizards, you will see the ever friendly View script button. This gives you a way to learn the syntax of the MDT. More importantly, by copying and saving the scripts, you can give yourself a quick and dirty backup to re-create your MDT environment if you need to.
You can also load the MDT Windows PowerShell cmdlets through the Microsft.BDD snap-in. You may find it interesting that name of the snap-in is BDD—BDD is the acronym of the former tool, Business Desktop Deployment, which was the predecessor of the MDT. Use the following script to load the snap-in:
Add-PSSnapIn Microsoft.BDD.PSSnapIn
There was also a new version of the MDT launched recently: MDT 2012 Beta 2. Although the fundamentals of the MDT 2012 Beta 2 are the same as MDT 2010, there is one difference in accessing the Windows PowerShell cmdlets, even though the Windows PowerShell cmdlets are currently the same in the beta. The Windows PowerShell cmdlets are now located in a module. Use the following script to load the cmdlets with the MDT 2012 Beta 2:
Import-Module “C:\Program Files\Microsoft Deployment Toolkit\bin\MicrosoftDeploymentToolkit.psd1”
Create a deployment share
Overall, the cmdlets that work with MDT allow you all the functionality to create your deployment environment. The first thing you will do in the MDT is create a Deployment Share. The Deployment Share is the key to the entire MDT environment. All of the resources you use to build your deployment images will be placed and stored in the MDT Deployment Share. Use the following script to create a Deployment Share:
new-PSDrive -Name “DS002” -PSProvider “MDTProvider” -Root “C:\DeploymentShare” -Description “MDT Deployment Share” -NetworkPath “\\2008R2DEP\DeploymentShare2$” -Verbose | add-MDTPersistentDrive -Verbose
Create a Windows PowerShell drive
After the Deployment Share is created, you can create a Windows PowerShell drive to reference in the other commands for the MDT process:
New-PSDrive -Name “DS002” -PSProvider MDTProvider -Root “C:\DeploymentShare”
Add a task sequence
The following cmdlets, which add an operating system, driver, and task sequence will all leverage the Windows PowerShell drive:
#Add the operating system
import-mdtoperatingsystem -path “DS002:\Operating Systems” -SourcePath “D:\Deploymentshare\Operating Systems\Windows 7 x64” -DestinationFolder “Windows 7 x64” -Verbose
#Add the driver
import-mdtdriver -path “DS002:\Out-of-Box Drivers” -SourcePath “D:\Drivers” -ImportDuplicates -Verbose
#Add the task sequence
import-mdttasksequence -path “DS002:\Task Sequences” -Name “Corporate Windows 7 Image” -Template “Client.xml” -Comments “This will deploy Windows 7 to all the desks” -ID “dep7” -Version “1.0” -OperatingSystemPath “DS001:\Operating Systems\Windows 7 ULTIMATE in Windows 7 x64 install.wim” -FullName “Windows User” -OrgName “Contoso” -HomePage “www.bing.com” -AdminPassword “pass@word1” -Verbose
#Update the Deployment Share
update-MDTDeploymentShare -path “DS002:” –Verbose
Update a Deployment Share
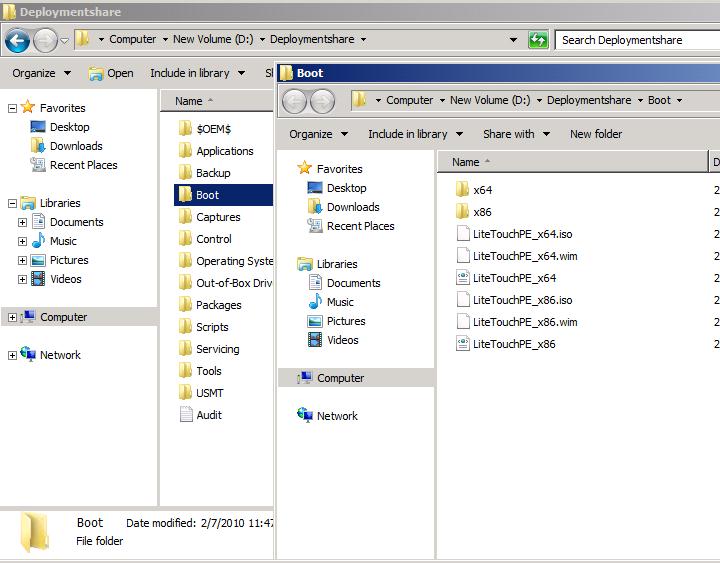
Although updating the Deployment Share is a simple Windows PowerShell command, it does preform a crucial task in the deployment process. Updating the Deployment Share is actually going to configure the Deployment Share with the boot environment. This environment contains all the common files and scripts to build your custom image. This process will also create two preinstallation (PE) WIM files (x86 and x64). The PE environment is the installation platform that will begin the installation process and allow your installation to access the Deployment Share for your applications, drivers, operating systems, and so on.
Although the files that are created during the update share process are extremely portable, one of the advantages is combining the WIM files with the Windows Deployment Services (WDS). WDS is a built-in role for your servers running Windows Server 2008 R2. The main reason you will want to use WDS is the built in PXE support. This allows your servers to accept network boot requests to deploy your images. The MDT PE image can be placed in the WDS share so you can accept the PXE boot requests, allow access to the PE WIM file, and then access the remaining resources in the Deployment Share.
Use WDSUTIL to update images
Unfortunately, WDS does not support Windows PowerShell. However, WDS has a great command prompt tool called WDSUTIL. While WDSUTIL is a command prompt tool, it does wish it could be a Windows PowerShell tool, and it is has pseudo Windows PowerShell syntax. If you look at the following WDSUTIL command, you can see what I mean with the Add-Image switch. By-the-way, the following command adds the PE WIM file to the WDS server. This provides WDS with the ability to take PXE boot requests and access the files created in the MDT to deploy an image.
wdsutil /Verbose /Progress /Add-Image /ImageFile:C:\DeploymentShare\Boot\LiteTouchPE_x64.wim /ImageType:Boot
As you can see, by using these free tools and Windows PowerShell scripts, you can quickly build and create your MDT environment. You can also take the power of the MDT and combine it with the WDS to have a lite-touch deployment platform. This allows you to quickly build and create a solid platform to deploy your corporate standard images in your environment.
Resources
- Download Microsoft Deployment Toolkit (MDT) 2010 Update 1
- Download Microsoft Deployment Toolkit 2012 Beta 2
~Matt
Thank you, Matt, for sharing your time and knowledge. Join us tomorrow for the first post of 2012. Happy New Year to you all.
I invite you to follow me on Twitter and Facebook. If you have any questions, send email to me at scripter@microsoft.com, or post your questions on the Official Scripting Guys Forum. See you tomorrow. Until then, peace.
Ed Wilson, Microsoft Scripting Guy


 Light
Light Dark
Dark
0 comments