Installation “guide” for System Center Virtual Machine Manager 2012 Beta
In a previous post, I documented an installation of System Center Configuration Manager 2012 Beta in the hopes that I could help save folks time by avoiding a few hurdles. I went ahead and documented the installation of System Center Virtual Machine Manager 2012 Beta as well. You can download the Word document I created as well. As with that previous post and document, this is not “official” by any means, but is based on my experience installing the product. Just in case you don't already have the beta bits, you can grab them here.
I will be doing the same for System Center Operations Manager 2012 Beta as soon as I get my hands on the bits and have a free moment (or two) to go through the setup. I will follow all of this up with experiences in configuring the environment to actually do something. 
In order to install SCVMM 2012 Beta, I did do some pre-work that I will share below.
I setup an Active Directory Domain using Windows Server 2008 R2 SP1 as the single DC / GC. I did not do anything out of the norm in setting up this server.
On a separate server, I installed System Center Configuration Manager 2012 Beta with SQL Server 2008 SP1 and Cumulative Update 10. I documented that process in another document.
For the server that I will install SCVMM 2012 Beta onto, I also used Windows Server 2008 R2 SP1. I joined this server to the AD Domain. I also installed the following Windows Roles and Features:
- .Net Framework 3.5 SP1
- Web Server Role with following features
- NET Extensibility
- ASP.NET
- Default Document
- Directory Browsing
- HTTP Errors
- IIS 6 Metabase Compatibility
- IIS 6 WMI Compatibility
- ISAPI Extensions
- ISAPI Filters
- Request Filtering
- Static Content
- PowerShell 2.0 (already installed as part of Windows Server 2008 R2 SP1)
- Windows Automated Installation Kit (WAIK) for Windows 7
Depending on which SCMVV 2012 Beta roles you install, you may not need all the above items. I chose to install the VMM Management Server, VMM Console and VMM Self Service Portal onto the server.
In addition to the above Windows Roles and Features, I also downloaded and installed the SQL Server 2008 R2 Command Line Utilities and the SQL Server 2008 R2 Native Client (https://www.microsoft.com/download/en/details.aspx?displaylang=en&id=16978). These are considered optional components, but for full functionality, you’ll want to have these components as well.
I will now walk through the entire installation process screen by screen so that we don’t miss any steps.
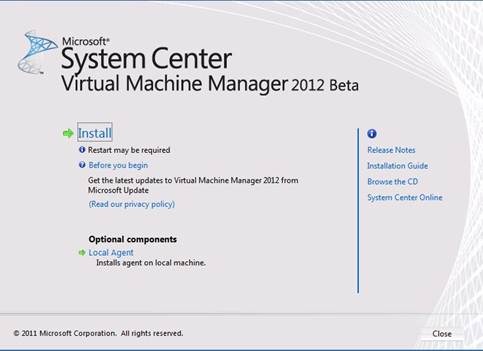
I inserted the SCVMM 2012 Beta DVD into the drive and accepted the autorun. Following is the startup splash screen. After clicking the Install link, I am presented with the Setup Wizard. The first action item is to select the VMM roles I wish to install onto this server.

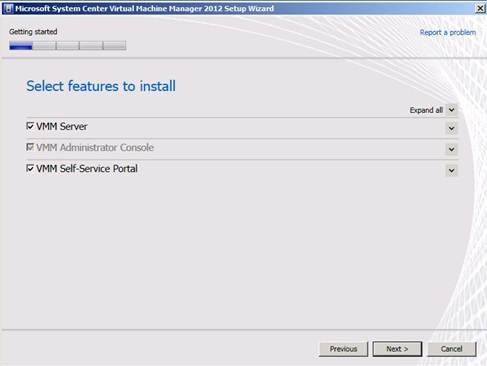
Getting Started – Select features to install
The VMM Server and VMM Self-Service Portal can be installed onto different servers for performance and scalability needs. Since I am only setting up a small lab, I will install both roles and the Administrative Console onto the single server.

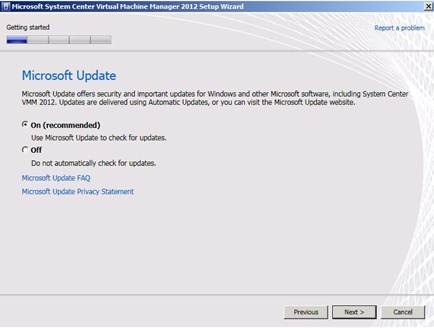
Getting Started – Microsoft Update
If you want to use Microsoft Update to keep your VMM server up to date, select the default option of On.

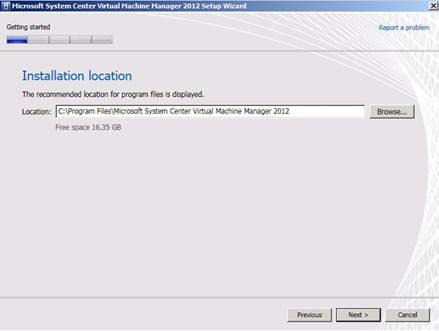
Getting Started – Installation Location
This screen is straight forward. I accepted the default installation location.

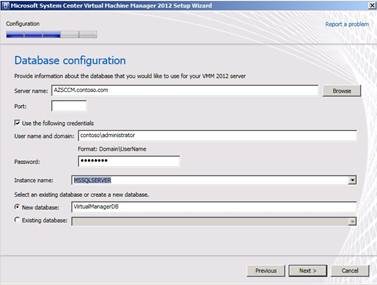
Configuration – Database Configuration
I now need to specify the information for the SQL Server that I will be using. In my case, I browsed to AZSCCM.contoso.com (SQL 2008 and SCCM 2012 server). I am using the default SQL Server port of 1433, so I can leave that field empty. If I have a need to use a different port in my environment, I can enter the custom port here. You do have to specify credentials that have access to SQL Server to configure the Instance and Database for use by SCVMM. I was lazy and only have the Administrator Account setup with access to anything in my lab, so I am using those credentials. I also selected the Instance Name of MSSQLSERVER from the dropdown list and accepted the default Database Name.

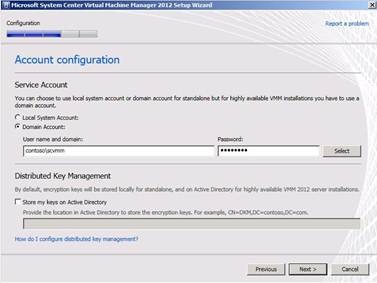
Configuration – Account Configuration
I pre created a domain service account for SCVMM (member of the local Administrators group on SCVMM server. I am opting not to store keys in Active Directory on this rev of my lab.

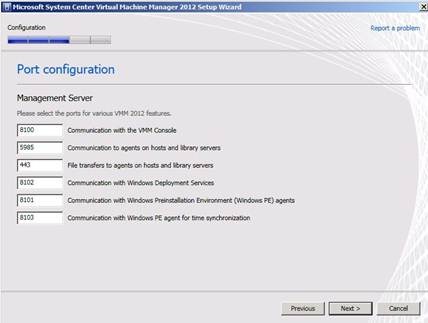
Configuration – Port Configuration
This screen is straight forward. I accepted the default ports for all the management components.

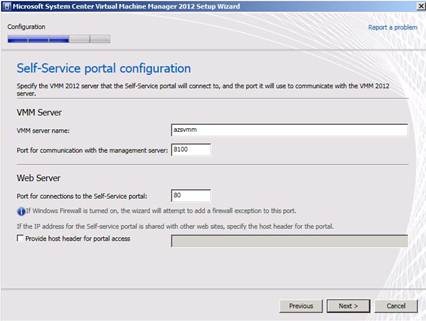
Configuration – Self-Service Portal Configuration
Since the Self-Service portal can be a different server, the setup does ask us for the name of the server that is hosting this service. Since I am installing all the components onto a single server, the server name was prepopulated automatically for me. I accepted the default settings for the port communications and continued.

Configuration – Library Configuration
Since this is the first VMM server I am installing into the organization, I do not have a library and I did not preconfigure a location for the library. I went ahead and accepted the default Share name, location and description. In your environment, you will want to store this on storage that can handle the IO needed for your needs. If I had a nice iSCSI storage unit, I would have used that. Since I don’t and my lab in this rev is very small, I am fine with the default location.

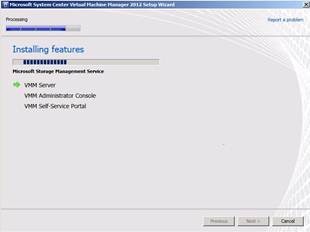
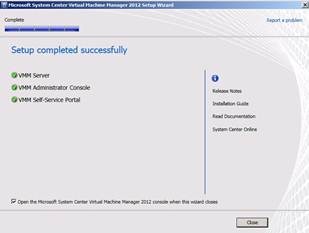
Processing – Installing Services
At this point the selected features are installed. When installation is complete, you should see the screenshot on the right with three green check marks denoting a successful install.


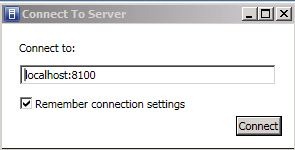
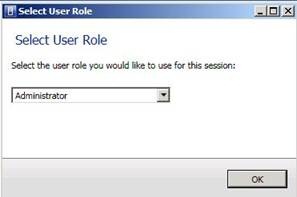
Administrator Console
Upon closing the Installation Wizard, the VMM Management Console starts (since I left the check box selected). I am prompted for the server to connect to as well as the User Role for this session. After making the appropriate selections, the Administration Console opens and you can start configuring resources. One thing to keep in mind is that the Hyper-V hosts need to be a member of the AD Domain. I will not be doing a walk-through of the entire Administration Console in this document as the intent of this document was to detail the setup.


