Evaluation of StorageCraft ShadowProtect Server 4
On February 21st, I wrote a post about Backup Strategies for File Servers and Exchange (https://blogs.technet.com/b/haroldwong/archive/2011/02/21/backup-applications-and-strategies-for-exchange-and-file-servers.aspx) where I promised to evaluate some backup products. I already did a write up for Backup Exec 2010 R2 and DPM 2010. It took a little time, but I have finished my evaluation of StorageCraft ShadowProtect Server 4!
Quick Synopsis
The first thing to note about StorageCraft’s ShadowProtect Server 4 is that it is not your traditional backup program. It is a sector level backup program which will backup entire volumes on your server. I downloaded the 30 day trials of ShadowProtect Server 4 and ShadowProtect ImageManager Standard and installed them onto my “Backup” Server. I have to admit that I struggled initially to figure out how to configure settings within the program. I decided to reach out to StorageCraft to get some assistance. Kimber Barton and Brett Twiggs were the two Systems Engineers that walked me through the different settings and options. I also found out that to do granular restores of Exchange, I needed Granular Restore for Exchange (GRE) as well. Since there is no trial edition of this product, Brett Twiggs spent some time to demo (via Lync Conferencing) the tool to me so I could at least see the tool in action.
I do like ShadowProtect Server and ImageManager. Once I learned how to use the management tool, it was fairly simple to use. The full power of the product is the ability to perform continuous snapshots throughout the day (as frequently as every 15 minutes). ImageManager is then a necessary tool (Standard is no additional charge) to manage and consolidate all the different snapshots. There are a lot of additional capabilities (like VirtualBoot) that I did not take time to evaluate here, but will probably take time to explore at a later time.
Also, ignore the date and times that show up on my screenshots as I am using old starting images that I never activated so I “cheated” and set my clock back. J
Impressions
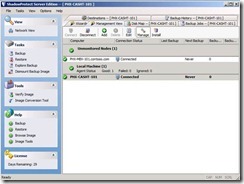
I used the same test environment as previously with DPM and Backup Exec - one Domain Controller, one Exchange 2010 Server and my Backup Server. The install of ShadowProtect Server and ImageManager was simple and straight forward. The management console was a bit confusing for me because I couldn’t figure out how to add the Exchange Server as a managed node so I could back it up. The Wizard that performed the push install required files that did not come with the 30 day trial. Brett pointed out where I could download the push install files from the StorageCraft website and once I downloaded those files, I was able to push the agent to the Exchange Server. Below is the Management screen once the Exchange Server rebooted and the management tool connected to it.
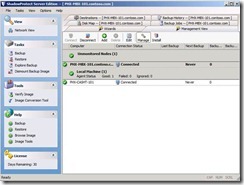
To create a backup job for the Exchange Server, I needed to switch the focus to it by choosing to “Manage” it. Once I do that, the console shows the focus is now on the Exchange Server (PHX-MBX-101). The screenshot is below.
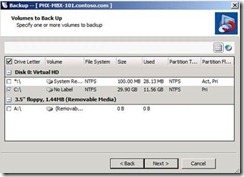
I then used the Backup Wizard to create the backup job. Below are some of the key screens when configuring the backup. The first one is where I select the volume on the Exchange Server that I’m interested in. My environment is not setup for production use, so I have everything on my C drive. The key here is that I need to select both the C: volume and volume(s) where the Exchange databases are located.
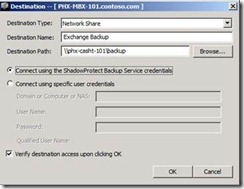
Since the backup job is stored locally on the server being backed up, I created a share on what I refer to as the “Backup Server” so that all the backup images could be stored on one server. In the wizard, I configured the destination to point to that share (\\PHX-CASHT-101\Backup).
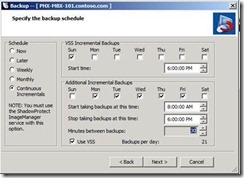
As I mentioned in my Quick Synopsis, the power of the tool is the ability to do Continuous Incremental backups throughout the day. The key on this page is to set the window for the continuous period (usually main working hours) and the frequency. In addition, I can select one additional Incremental outside of that time window. I accepted the defaults on the screenshot below but did change the frequency to every 30 minutes. In reality, I would probably select every day in the first section (VSS Incremental Backups) with a start time of 10 PM. For Additional Incremental Backups, I would specify the key working hours (maybe 7 AM – 6:30 PM).
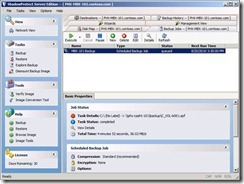
After completing the Wizard, I have my Backup job and can see the status of the job and when the next backup will run. Because I didn’t want to wait a couple of hours before I had multiple images to “play” with in ImageManager, I forced the job to Execute a few times.
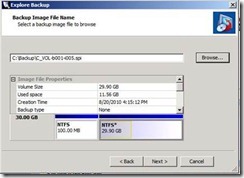
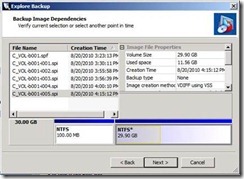
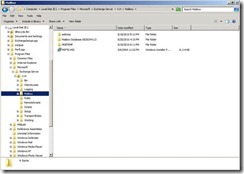
To see what is in the backup, I used the Explore Backup Wizard to mount one of the backups so I could view it. Depending on which backup image I chose, there are additional dependencies that are also loaded (remember, these are incrementals). I chose to mount this as drive E so I could use Explorer to examine the backup.
Below is the Exchange database location within the backup. Since the backup tool is not specific to Exchange, but the entire volume, I cannot do a restore of a single mailbox or even just the Exchange database itself using this tool. I would really need to use the GRE tool to do that.
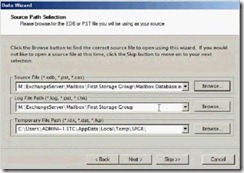
Since Brett was willing to demo GRE to me, I was able to take a few screenshots from his demo to include in my post. Once I mount the backup that I would like to recover Exchange data from, I would start GRE and select the database in question.
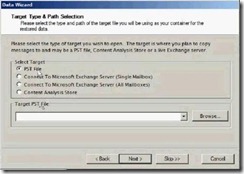
I then have the option to target an individual mailbox, all mailboxes on a Server or a PST.
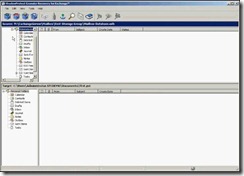
Once I select the target, I am presented with all the mailboxes in the backup and I can start restoring individual items or entire mailboxes (depending on what I select as a target). In the screenshot below, Brett selected a PST as the target.
If I am able to get a trial edition of GRE in the future, I will test it out for myself and walk through the different options. I will also update this post to include my personal experiences with that tool.
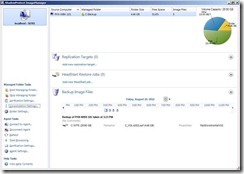
I also wanted to show ImageManager. The below screenshot shows my Backup folder already added in as a managed folder. The tool will consolidate all the daily incremental backups into one daily backup, then at the end of the week, it will take all these consolidated daily backups into a consolidated weekly. At the end of the month, a consolidated monthly will be created from the weekly backups.
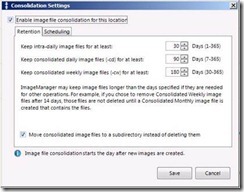
I can set the retention period for how long I want to keep the intra-day incrementals and consolidated daily and weekly images. I’m sure you can imagine that the amount of space required does increase if I choose to keep everything for a year so I need to make sure things get “pruned” to meet my recovery and retention windows.
Harold Wong
