Evaluation of Data Protection Manager 2010
I finally got a chance to install Microsoft Data Protection Manager 2010 in my lab environment and test it out.
I was quite happy with the interface and ease of use on configuring backups and restores (protection / recovery). The terminology was a bit different, but not totally confusing. This is definitely not the exact same thing as a backup program and therefore the settings are also different. I could not figure out how to export or take some of the backups offline to secondary storage – other than Tape.
Impressions
I happen to be the kind of person who never reads the manual when testing out stuff so some of my experiences could have been better but such is life.
The installation of DPM 2010 was straight forward and easy. The slowest part was the installation of SQL Server 2008 SP1.
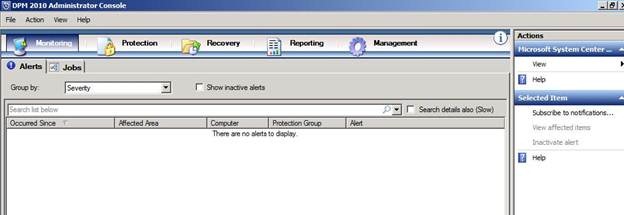
Once I had it installed, I fired up the DPM 2010 Administrator Console to take a look at the management interface. It was quite plain and seemed simple.

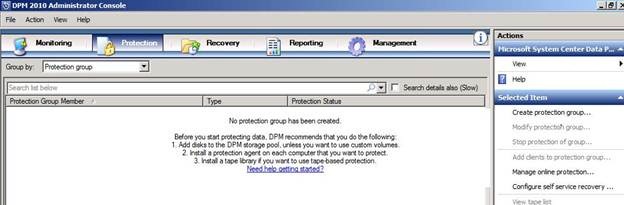
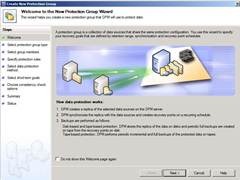
I decided to start creating a Protection Group and the nice thing about the console is that it told me I had to do three things before I could start protecting my data. [Note: Funny thing is that I took a screenshot of this but never actually read the notice. I didn’t read this until I looked through the images before writing the blog post. Lesson learned – read the notices as it will save time. J] Instead, I immediately started creating a new Protection Group and realized that I needed to install agents to the remote servers before I could enumerate them.

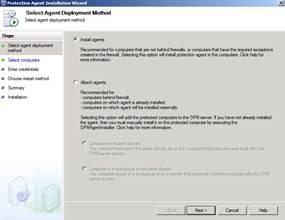
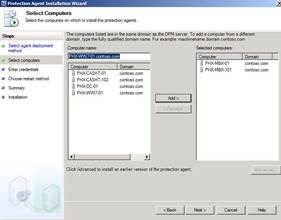
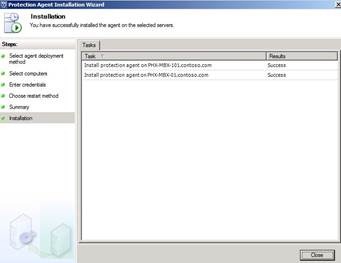
This is done from the Management tab of the Console and was quite simple using the Wizard. I’ve included a few of the screenshots from the wizard below.


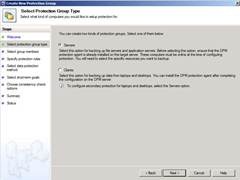
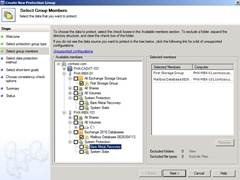
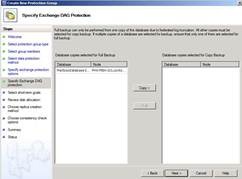
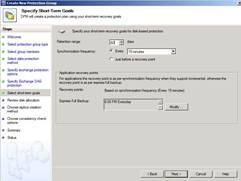
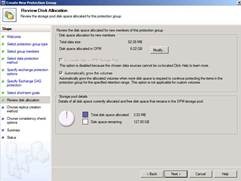
As I started to step through the Protection Group Wizard, I found that I didn’t configure any disks for use by DPM 2010 so I had to go back to cancel out of the Wizard (again) and add Disks from the Management tab. I didn’t realize that the volume had to be raw (non-formatted) in order for DPM 2010 to use it as a Protection disk so I had to delete the volume I created and just have DPM configure the raw disk for use. With that complete, I started the Protection Group Wizard again and configured a Protection Group for Exchange. The steps are simple and allow me to select the data I want to have protected and the frequency that snapshots would be taken. I also specify how many days I want for retention as well as when a full backup would be performed. Some of the key screenshots from the Wizard are below.


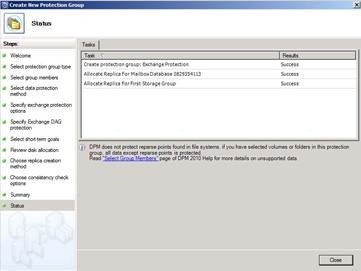
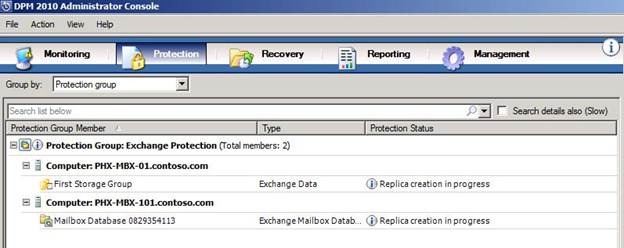
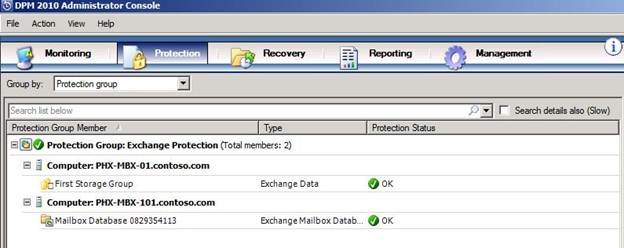
Once I completed the Wizard, I could see the newly created Exchange Protection Group with the servers and databases being protected (backed up). After a few minutes, the Protection Status showed OK and I was good to go.


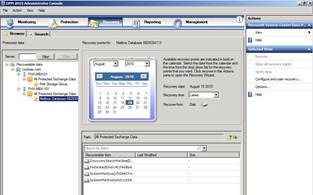
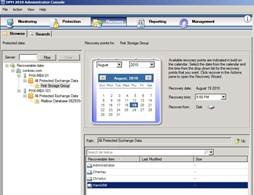
The last piece was testing the ease of recovery so I quickly walked through a Recovery test. I was able to expand down to the mailbox level. The recovery wizard allowed me to restore to an RSG or to a folder location on my hard drive (or network drive). The process was simple and straight forward.


I also created a Protection Group for files to see how that worked and it was just as simple as creating an Exchange Protection Group. DPM 2010 also gives me an option to create a bare metal “backup” which can be useful. As far as I can tell, this option does not require me to purchase an additional agent or license other than the Enterprise ML. I did see that I could make file recovery available to the end user so they could recover files on their own. I decided not to test out these features at this time but will definitely look at it a bit more in the future.
Harold Wong