Connection Group Case Study #2: Paint.NET
To continue my current obsession with App-V connection groups, I want to use another case study to go examine how to implement connection groups for applications that use plug-ins or add-ins. Sometimes you may encounter applications which have no actual registration of configuration storage of plug-ins. The plug-in is simply loaded and dynamically integrated simply because it happens to be in a specific directory.
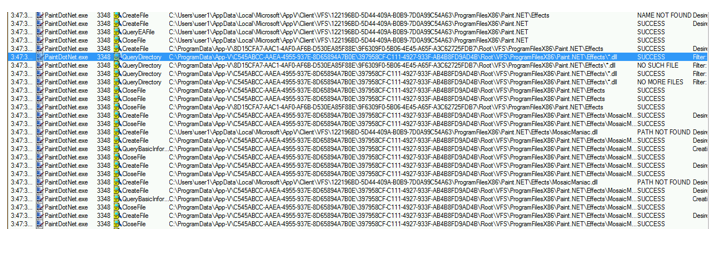
Paint.NET has yielded some interesting discussions out there regarding the challenges people are having with getting connection groups to work with Paint.NET plug-in DLLs. I looked at one of those problematic scenarios where Paint.NET was sequenced as a primary application and a few DLL’s were placed into a separate package. The packages were then brought together using a connection group. I took a look at the procmon trace of the failed load. As you can see in the trace below, Paint.NET loads plug-ins by simply making a query for *.DLL files located in the \effects subdirectory using a QueryDirectory Operation:

The filter response in Procmon will show null. The thing is, the plug-ins are actually there – but not in the main packages directory. In fact, if you open a command prompt inside the converged connection group, you will see everything correctly (the plug-ins beneath the effects) subdirectory. Even though the directories converged, the method used by Paint.NET is only going to receive filter responses from the primary package.
So we need a filter return of the plug-ins, which means we want a single directories to converge in the virtual environment. This will require a modification to the sequencing process. I will walk through the process of sequencing Paint.NET for use with plug-in packages in a connection group first – and then I will dive into the plug-in sequencing and how to bring them together through a connection group.
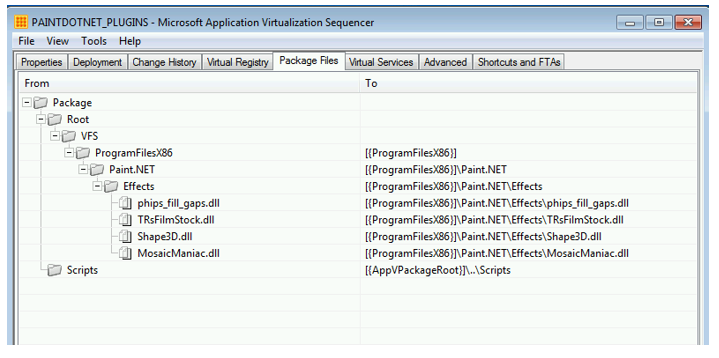
In this example, I am using Paint.net version 3.5.11. I will also be using the following plug-ins for demonstration purposes only: MosaicManiac, TRsFilmStock, Shape3D, and Fill_Gaps.
The Primary Paint.NET Package
Before you start sequencing Paint.NET, you will need to first create an exclusion. You can do this by going to the “Tools” menu and then select “Options.”
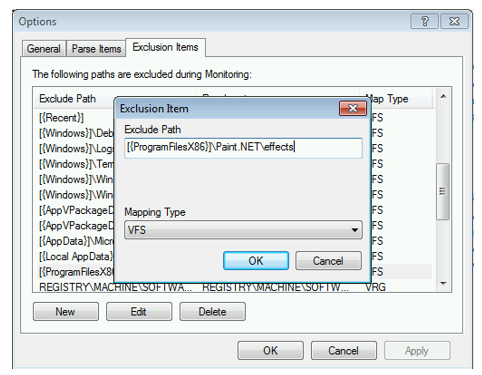
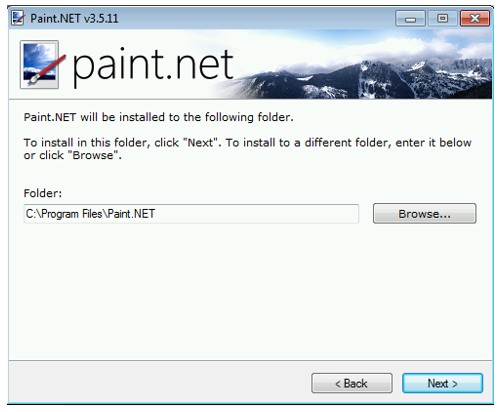
You will need to add in a VFS exclusion of the plug-in path in the tokenized format – [{ProgramFilesx86}]\Paint.NET\effects. Once you have done this, you can proceed to sequence Paint.NET as a standard application. Sine we will be using Paint.NET with connection groups and we want the VFS directories to converge, you will need to select a fake PVAD that is different from the normal Paint.NET installation directory. We will still install Paint.NET to its normal directory, but we want it to be different from the PVAD.

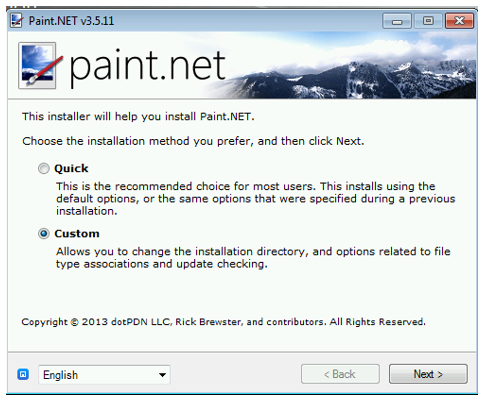
Aside from the PVAD configuration, you will want to run a custom installation of the Paint.NET installer.
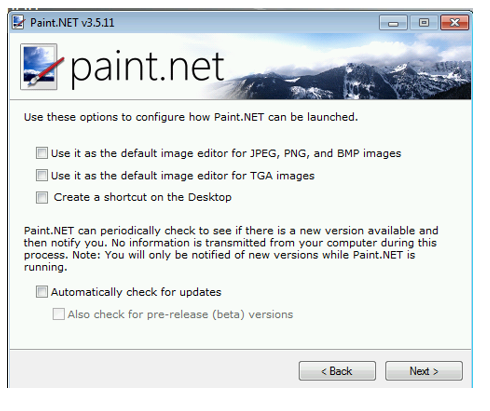
On the options page with the Paint.NET installer, I usually leave all of these blank especially the updating option as I would normally service this application the same way I would service other application updates - through App-V.
I then select the C:\Program Files\Paint.NET directory to ensure that the installation goes to a VFS tokenized path.
Then complete the sequence as normal.
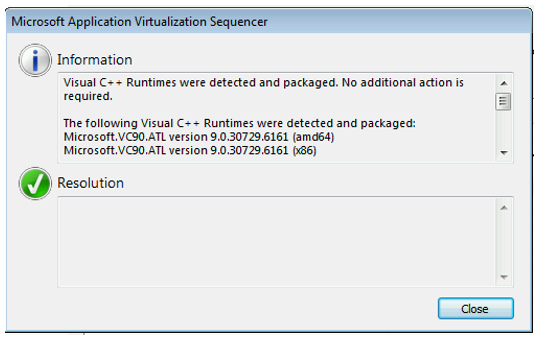
You will note that if the VC runtimes are not already installed on the machine, the App-V Service pack 2 sequencer will detect these runtimes and include them in the package.
Once you have finished, save the package and copy it off the sequencer. Revert the sequencer to a clean state and either copy back the Paint.NET package or install the Paint.NET application natively.
Sequencing the Plug-ins
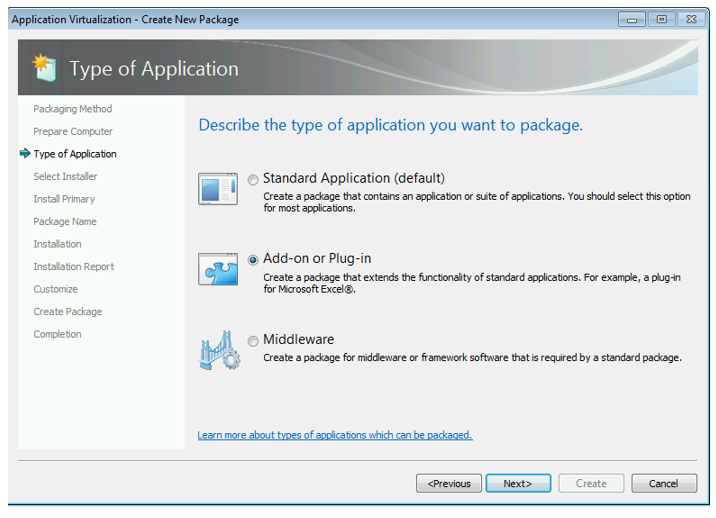
Like any other add-in or plug-in, you will want to follow the “add-in or plug-in” workflow.
Be sure to select “Custom Installation” as you will be using the command prompt to copy the DLLs for the plug-ins into the \effects subdirectory. On the next screen, you will need to either have Paint.NET installed or expand the existing Paint.NET package to disk (Devirtualize.)

On the “Package Name” screen, you will need to ensure that you select a fake PVAD (one different from the actual installation path of Paint.NET) to ensure that the files will be copied into a VFS folder.
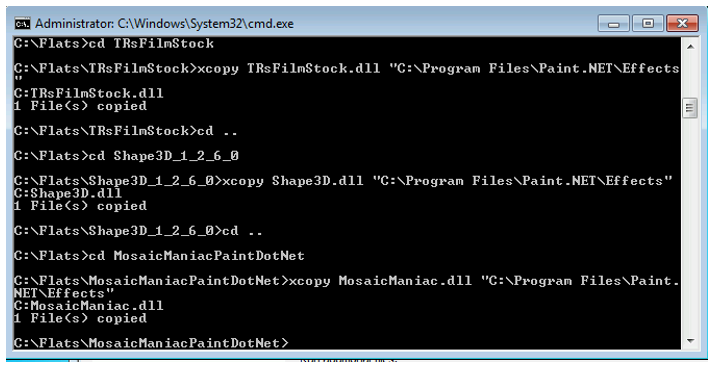
During Monitoring – open up a command prompt and copy the DLLS to the \Effects subdirectory.
After you have finished copying, navigate to the paint.net directory and launch Paint.NET from a command prompt to verify the plugin DLLs load. Then close the command prompt and select “I am finished installing” and click “Next.”
Verify the package contains these files and the directories are set to merge (Grey.)
Remember, if it is grey it overlays.
Then save the Plug-in package and move it to a staging area with the parent application. You can now being testing. First add and publish both packages. Target should not matter so long as the connection group you create and enable matches the target of the packages it contains. Once the packages are published you can create the CG XML document. The order in which you do this does not matter. If you wanted to create the document in advance of publishing, that is fine. I just use the published GUID paths in explorer easier for copying and pasting when I test. But your methods may differ according to your preferences.
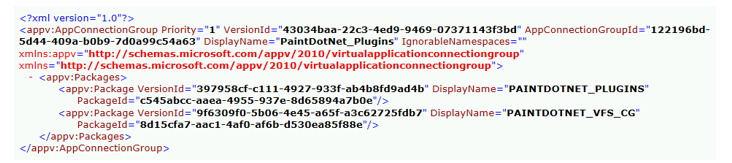
In the CG XML document, you will notice that I have my plug-in package at the top of the package order. I then add and enable the connection group.
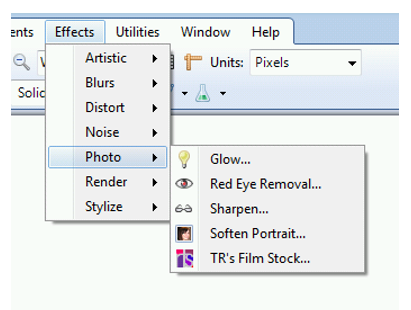
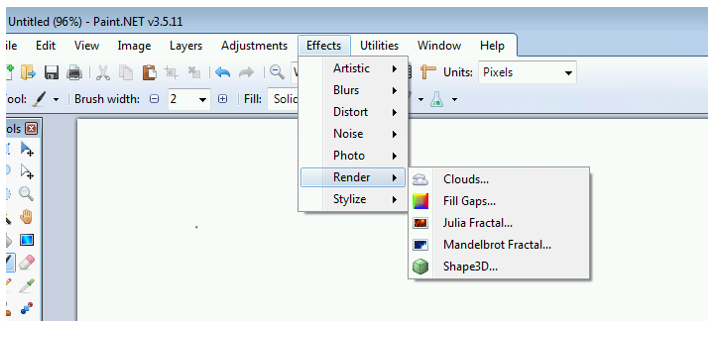
You will notice that the connection groups work when you launch Paint.NET, navigate to the “Effects” menu, then select the submenus then you notice the plug-ins have loaded.
You’ll observe the difference in behavior using ProcMon – where the query for DLLs is met with success and the subsequent ones found will then be loaded: