Connection Group Case Study: Notepad++
Notepad++ uses plug-ins that register through a configuration file. This is one of the most common methods used by applications. Too often people run into problems because they order the primary application too high in the packages list inside the connection group. As a result, the configurations conflict with the one from the main package were overriding the one from the plug-in package. So to avoid this problem, and to allow more flexibility of deployment and connection group interaction, I will show you how I recommend you sequence these types of applications. I will be using Notepad++ as an example as it can fall into this same problem. My hope is that you can avoid this problem in the future with Notepad++ (and subsequently those applications that load plug-ins in the same style.)
For this example, I will be using Notepad ++ version 6.5.3 downloaded (from https://notepad-plus-plus.org/) Please bear in mind that Notepad updates very frequently although I do not think there will be drastic changes forthcoming in how the application manages its plug-ins. For the plug-ins, I will be using the following examples:
- TextFX: https://sourceforge.net/projects/npp-plugins/files/TextFX/NPPTextFX.v0.26.bin.zip/download
- XML Tools: https://sourceforge.net/projects/npp-plugins/files/XML%20Tools/Xml%20Tools%202.3.2%20r908%20Unicode%20Beta4/xmltools_2.3.2_r908_unicode_beta4.zip/download
These plug-ins differ as one of them actually requires overlays to the Notepad++ program files.
The Sequencing Process
Notepad++ uses a normal installation procedure. The installation is almost straight forward so the only adjustments I will make are:
1.) Sequence to a fake PVAD.
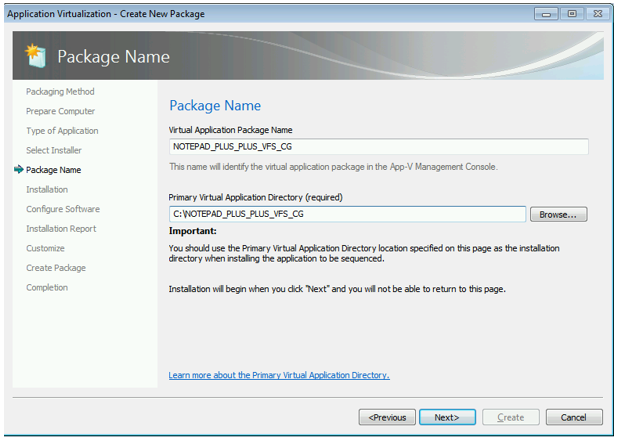
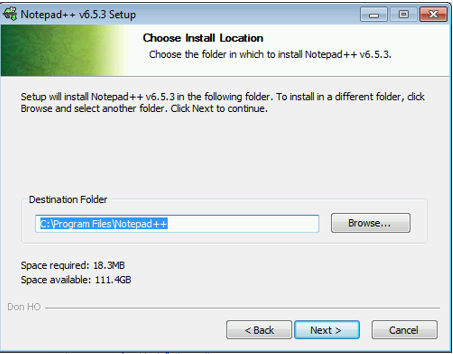
2.) I will then install Notepad to the %PROGRAMFILES% directory to get a tokenized VFS installation (using the \VFS\ProgramFilesx86 directory.
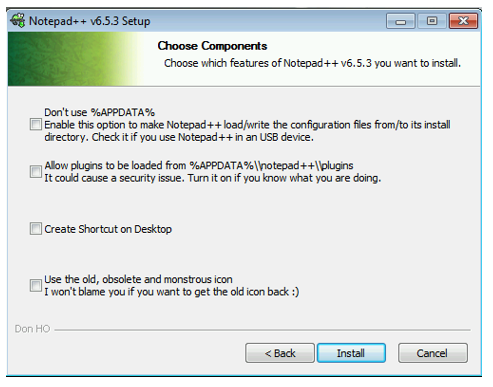
3.) When I get to the “Components” dialog page, I disable updaters and for demonstration purposes, I do not select any plugins except the plug-in manager as I want to do all of this through connection groups.

4.) On the next page, I leave everything blank. If you check the box to “Don’t use %APPDATA%” you will run into problems with Notepad as it will try to open immutable assets for modification once virtualized. I will also be converging the main program directories for the plug-ins and I do not want to be loading plug-ins from the %AppData% folder.
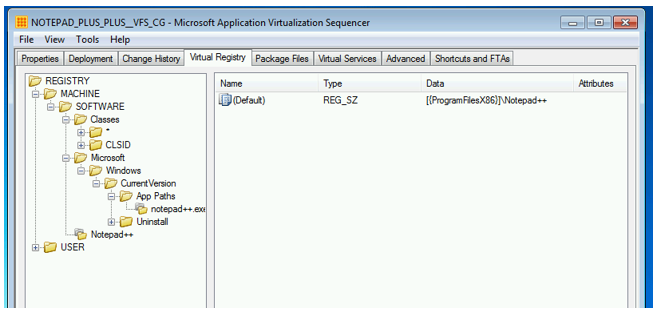
5.) I will then sequence the application as normal opting to provide advanced customization so I can get to the tabbed, advanced package editor. Here, I will verify that the paths in the registry for Notepad are properly tokenized.
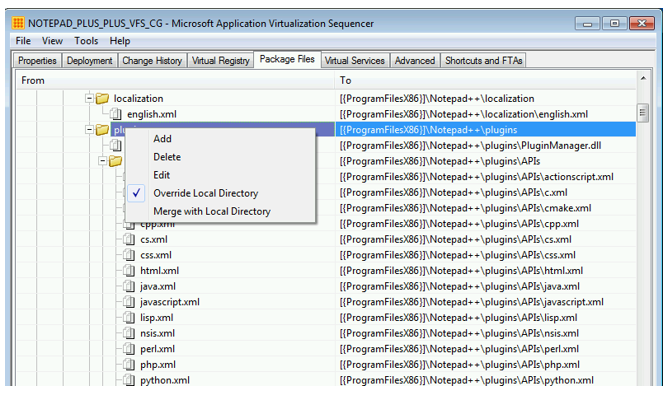
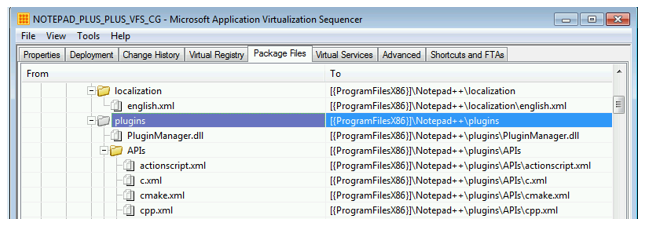
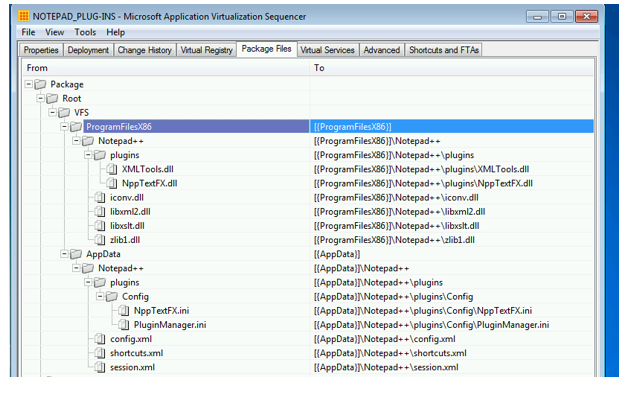
6.) Then I will go to the “Package Files” tab to perform two very important tasks.
7.) I will be changing the convergence settings for the ProgramFilesx86\Notepad++\plugins directory from “Override Local Directory” to “Merge with Local Directory.” This will change the color to grey.
8.) I will then save the package, copy it off, and then revert my sequencing machine. (PLEASE NOTE – I only mentioned particulars here that go outside the norm of sequencing. I am making an assumption that the reader is familiar with the basics of sequencing.)
Sequencing the Plug-in Package
Now that the primary application has been virtualized, I will need to reuse this package on the sequencer when it comes time to virtualize the plugins for Notepad++. I will copy the parent package to the reverted clean sequencer. In the case of these plug-ins – since they are DLL’s I have downloaded and extracted them into a staging directory on the sequencer as well.
Sequence as an Add-In
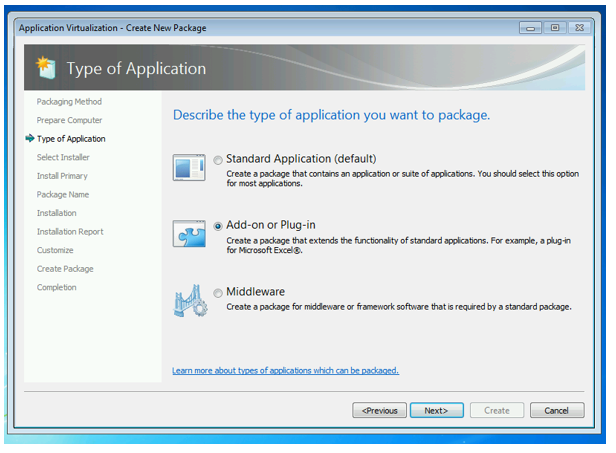
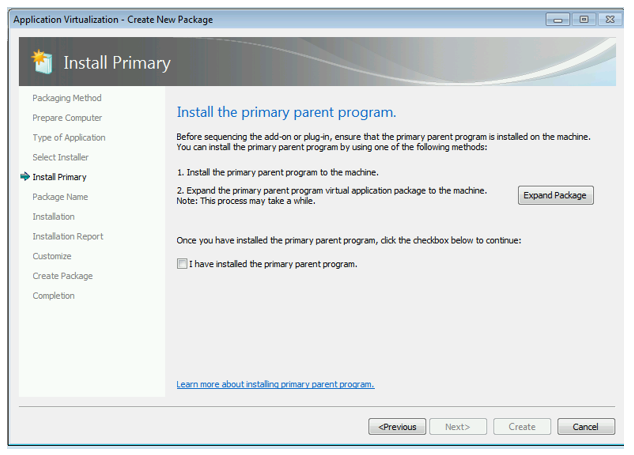
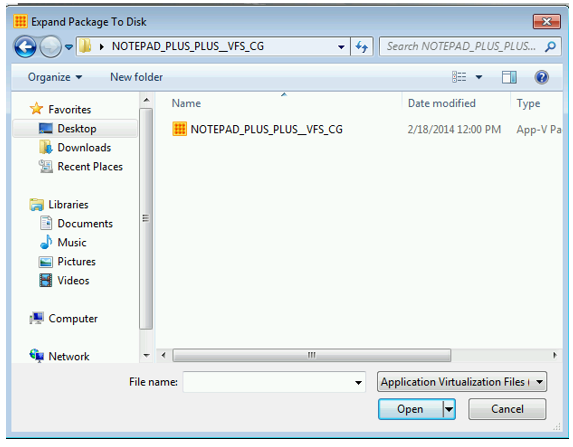
You will need to use the “Add-in or Plug-in” workflow as it will give you the opportunity to expand the virtualized package (Devirtualize) to the local machine so you can launch the parent application during sequencing to ensure that the plug-ins load and that the configuration will get registered properly and then stored inside the plug-in package.
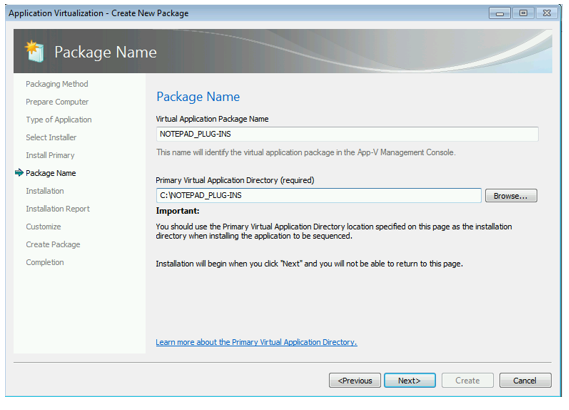
In this example, I am pointing to my previous package I just sequenced and will be selecting this package as the primary parent application.
I then ensure that I do a custom installation so I can name my plugin package properly AND I will also use a fake PVAD to ensure that everything that gets captured goes to a VFS or tokenized path.
Once all of that is completed, I can proceed to install my plugins while the sequencer is monitoring. When I click the “run” button to proceed with the installation, I choose a command prompt (C:\Windows\System32\cmd.exe.)
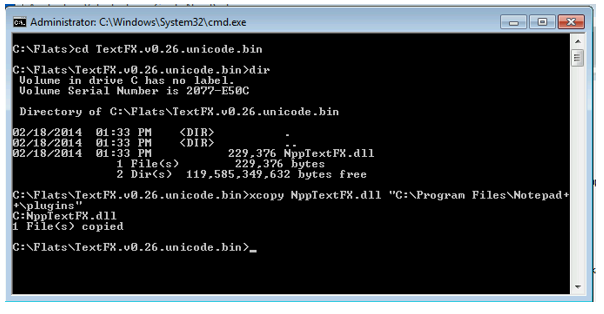
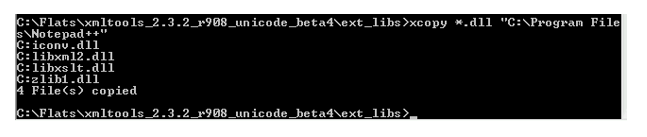
Since these plug-ins are DLL’s I use xcopy to copy them over to the C:\Program Files\Notepad++ directory.
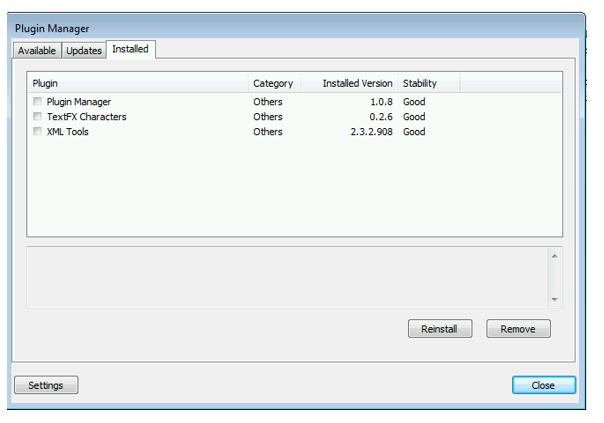
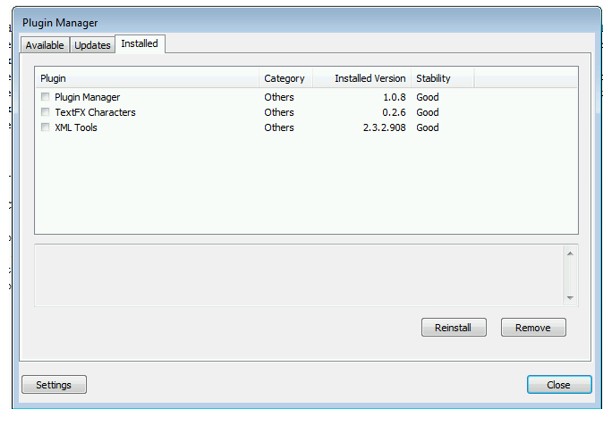
Since I am still in the monitoring phase, I now want to ensure that the plug-ins get loaded and registered to automatically load through Notepad++’s plug-in manager. From that same command prompt, I launch the NOTEPAD++ application and verify the plug-ins are there from the plug-in manager. I see they are there:
I can now close Notepad, stop the command prompt and stop monitoring by checking that I have finished installing and clicking next. I will then click through and select the customize screens until I get to the final editing tabbed mode. You will notice that this way when you view the advanced editing Files tab the files are already set to merge and they are in the tokenized path. If they are not set to merge, you will want to make that adjustment.
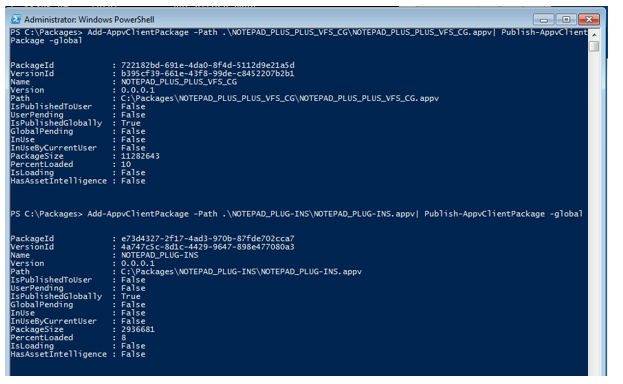
Then save the Plug-in package and move it to a staging area with the parent application. You can now being testing. First add and publish both packages. Target should not matter so long as the connection group you create and enable matches the target of the packages it contains.
Once the packages are published you can create the CG XML document. The order in which you do this does not matter. If you wanted to create the document in advance of publishing, that is fine. I just use the published GUID paths in explorer easier for copying and pasting when I test. But your methods may differ according to your preferences.
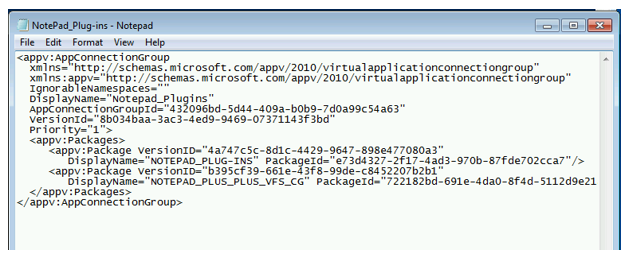
In the CG XML document, you will notice that I have my plug-in package at the top of the package order. I then add and enable the connection group.
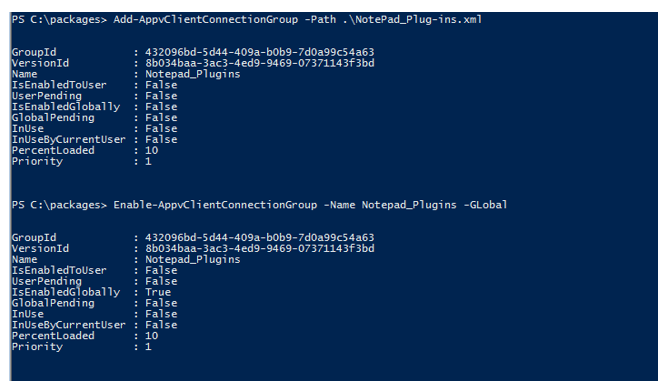
Once the connection group is enabled, I then launch Notepad++ and navigate to the plug-in manager where I find my plug-ins loaded properly.
More case studies to come.