Configuring SCOM 2012 (R2) PowerShell Modules on Windows 2012 (R2) Core
Last week I had the challenge to configure SCOM 2012 PowerShell modules on a Windows 2012 R2 Server core. It is quite simple once you figured out all necessary steps :)
This short post should walk you through the necessary steps.
Pre-requisites
To accomplish this task, you need:
- Local Admin right on the core server
- WinRM and [optionally] SMB access to the core server (for simpler file copy)
- Either use the content of my attached ZIP file SCOMPSModuleForCoreServer or copy two folders from a standard R2 Management Server to a separate location:
- C:\Program Files\Microsoft System Center 2012 R2\Operations Manager\Powershell
- C:\Program Files\Microsoft System Center 2012 R2\Operations Manager\Console\SDK Binaries
Step by step Guide
Step 1: Copy all files to the core server
If you want to use my scripts without any modification:
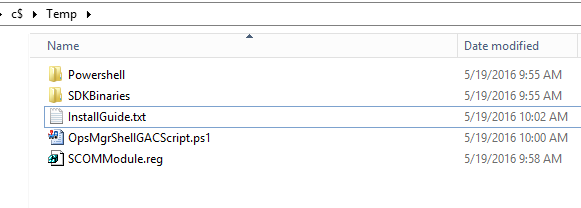
- Create a folder C: \Temp
- Copy the content of the ZIP to C: \Temp or copy the previously saved folders PowerShell and “SDK Binaries” to C: \Temp
Step 2: Move the PowerShell folder
Move C: \Temp\PowerShell to the target location on the core server (maybe you have to create the parent folder structure). It does not matter to which location. In my example I will use [C:\Program Files\Microsoft System Center 2012 R2\Operations Manager\]
Step 3: “GAC” the necessary assemblies
The PowerShell module relies on three assemblies (DLLs) stored in the “SDK Binaries” folder:
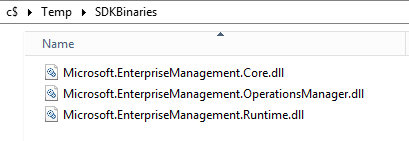
These binaries must be placed into the Global Assembly Cache (GAC ) on the core server.
To simplify this process, I have created a short PS script which can be executed on the core server to import the DLLs into the GAC (or simply execute the following lines in the PS console):
 PS> [System.Reflection.Assembly]::Load("System.EnterpriseServices, Version=4.0.0.0, Culture=neutral, PublicKeyToken=b03f5f7f11d50a3a")
PS> $objPublish = New-Object System.EnterpriseServices.Internal.Publish
PS> $objPublish.GacInstall("C:\temp\SDKBinaries\Microsoft.EnterpriseManagement.Core.dll")
PS> $objPublish.GacInstall("C:\temp\SDKBinaries\Microsoft.EnterpriseManagement.OperationsManager.dll")
PS> $objPublish.GacInstall("C:\temp\SDKBinaries\Microsoft.EnterpriseManagement.Runtime.dll")
[OPTIONAL] Step 4: Modify PSModulePath and the registry
If you want your core server to behave exactly like a “normal” SCOM SDK installation, you should
Modify the PSModulePath environment variable
Enter an elevated PS shell on the core server and execute:
 PS> $CurrentValue = [Environment]::GetEnvironmentVariable("PSModulePath", "Machine")
PS> [Environment]::SetEnvironmentVariable("PSModulePath", $CurrentValue + ";C:\Program Files\Microsoft System Center 2012 R2\Operations Manager\Powershell\", "Machine")
Modify the registry
Import the .REG file included in the ZIP with
PS > reg import c:\Temp\SCOMModule.reg
Windows Registry Editor Version 5.00
[HKEY_LOCAL_MACHINE\SOFTWARE\Microsoft\System Center Operations Manager\12\Setup\Powershell\V2]
"InstallDirectory"="C:\\Program Files\\Microsoft System Center 2012 R2\\Operations Manager\\Powershell\\"
Step 5: Reboot the server
The core server should be rebooted to make the GAC aware of the new DLLs.
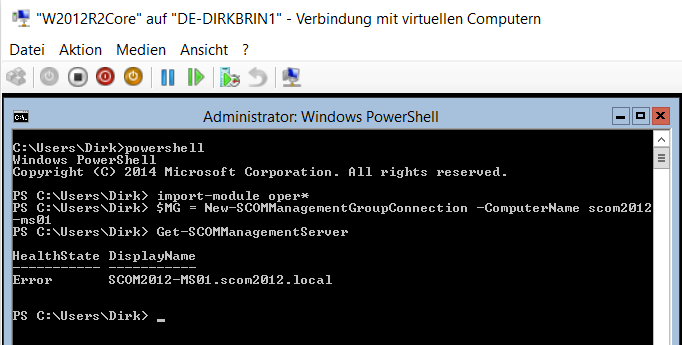
Step 6: Test the PowerShell module
To test our steps, connect to your core server, import the Operations Manager module (if you executed step 4, you can simply import the module without specifying a path) and execute some SCOM Cmdlets:
Summary
In this short blog post I showed you how you can install an OpsMgr PowerShell module on a Windows Core server. Hope that might help you.