PowerShell Web Access - a walkthrough.
PowerShell Web Access
Recently on a customer engagement, I was asked to help out with a solution to provide limited access to PowerShell. If you haven’t come across PowerShell Web Access (PSWA) before, then I would recommend reading up on this as it is awesome.
In this blog post, we’ll walk through setting up PSWA to permit a group of users to run a custom PowerShell module on a server.
The module
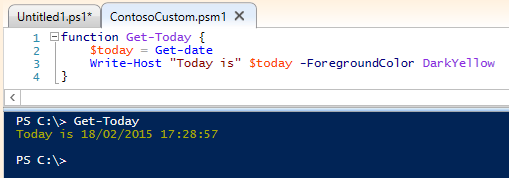
Custom PowerShell modules provide a great way of encapsulating custom functions that you run against your environment. For the purpose of this blog post, we have a module called ContosoCustom that contains a single function: Get-Today, which returns todays date:
PSWA Architecture
The requirements for PSWA are pretty straightforward. If you view this TechNet article, you should see. The architecture for this walk through is as follows:
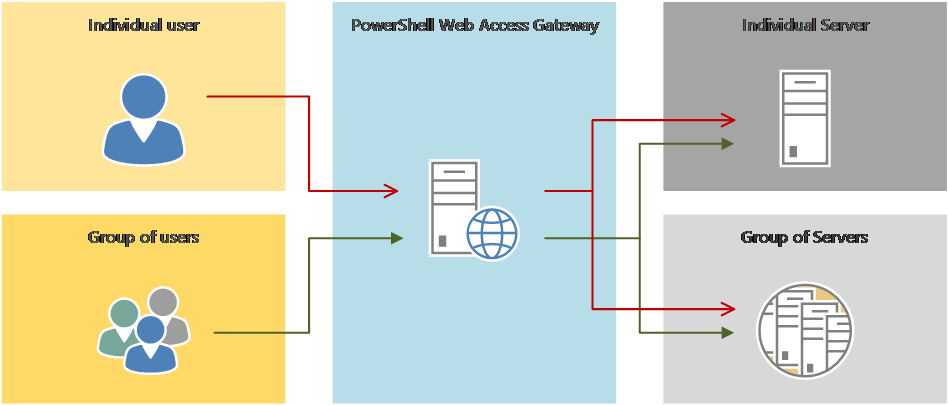
The only component required is the PowerShell Web Access Gateway. You should also be able to see that once provisioned, we can allow the following access:
Individual access to an individual server.
Individual access to a group of servers.
Group access to an individual server.
Group access to a group of servers.
The following steps install PSWA on a server.
Step 1: Installation of Windows PowerShell Web Access
Open Windows PowerShell (either the ISE, or a PowerShell session).
Type the following command:
Install-WindowsFeature –Name WindowsPowerShellWebAccess –Computername <server_name> -IncludeManagementTools –Restart
Step 2: Configure the Windows PowerShell Web Access Gateway
You should use a valid SSL certificate for this step if you are deploying this to your production environment.
Type the following command:
Install-PswaWebApplication
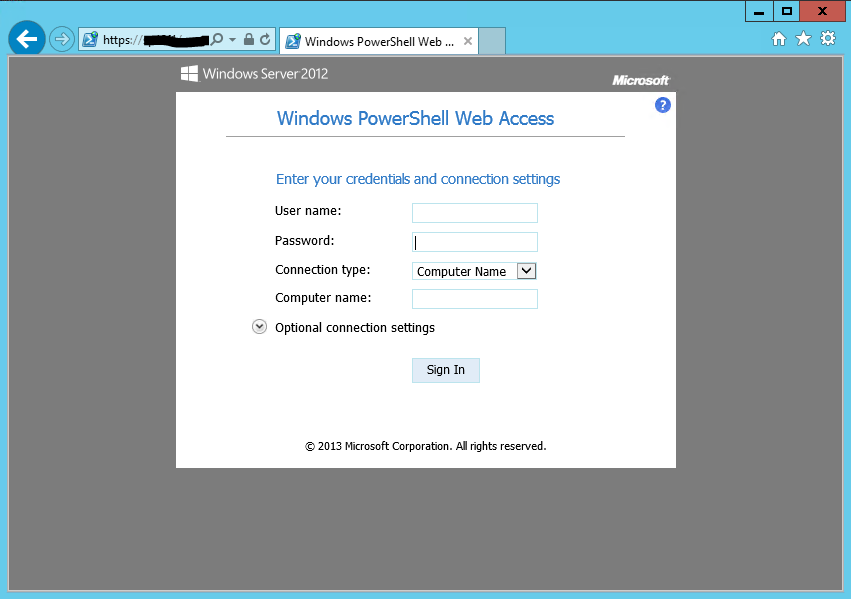
When you have completed these steps, you should be able to view the web-based console sign in page by navigating to https://<server_name>/pswa
The remaining steps of this walkthrough define and configure ‘restrictive authorization rules’. Authorization rules explicitly provide users and group’s access to a computer, or a group of computers.
Before we learn how to create rules, we need to look at one of the parameters: ‘ConfigurationName’.
This allows us to specify a session configuration. You can learn more about these here.
Below are the steps required for us to create a new session configuration that allows access to our custom PowerShell module. We then need to register this session to allow our users to access it.
Step 1: Create a new session configuration
Run the following command:

This creates a new file (.pssc extension) that imports our custom PowerShell module when a session starts.
Step 2: Register the session configuration
Run the following command:

Now that session configuration is registered, we can create the various authorization rules to allow access
Rule 1: Authorize a group of users access to a single server:

Type the following command:
Add-PswaAuthorizationRule –ComputerName “<computer_name>” –UserGroupName “<domain>\<group>” –ConfigurationName ContosoCustom
Verify connectivity with user:
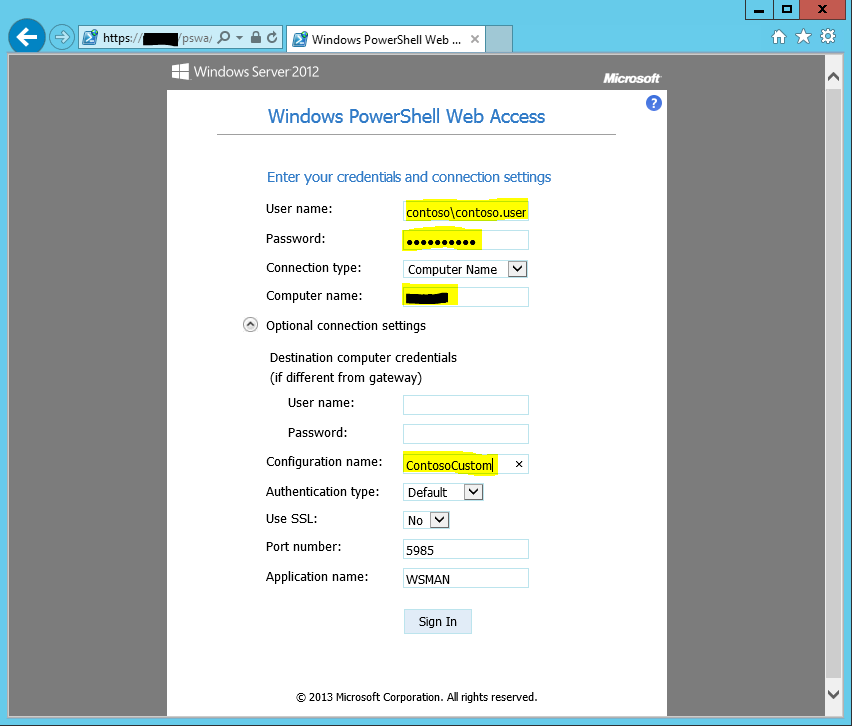
The user should be able to log in successfully. Verify the custom module has been imported:
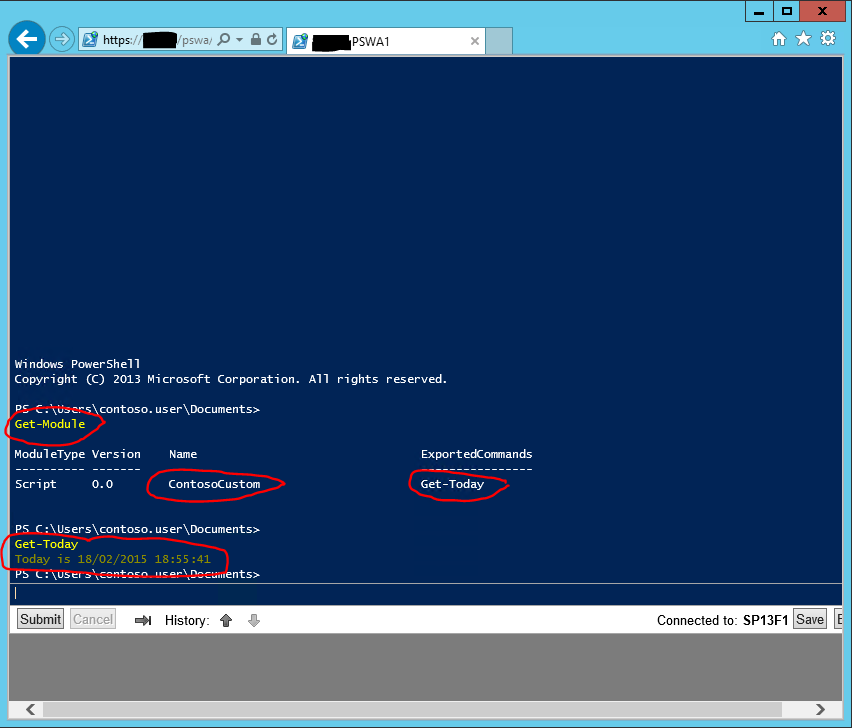
You’ll notice that our custom module has been imported. It contains our custom function which the user is also able to runwer (Get-Today).
To summarise: Windows PowerShell Web Access is a great way of providing access where granular levels of control are required.