Microsoft Azure Databricks (English version)
During the datavore 2018 event in Montreal, we delivered a workshop on Azure Databrick. I had to prepare the data preparation and Engineering part of the workshop. In this article I share the content we used during this workshop.
Presentation of Azure Databricks
Databricks is our new collaborative Big Data and Machine Learning platform. This new first-class Azure service is an Apache Spark-based analytics platform optimized for Azure. Azure Databricks comprises the complete open-source Apache Spark cluster technologies and capabilities. Workloads like artificial intelligence, predictive analytics or real-time analysis can be easily and securely handle by Azure Databricks.
This article consists of two major parts
- Part 1: Setting up the Azure environment
- Part 2: Using Databricks
- Workshop: Data Engineering with Databricks
Part 1: Azure configuration
Resource Group creation
A resource group is a logical grouping of your resources in Azure to facilitate its management. All Azure resources must belong to a resource group.
First, you need to connect to the Azure portal: Https://portal.azure.com
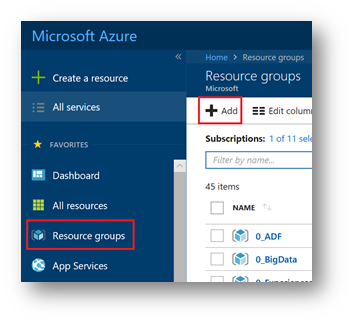
From the Azure portal, click « Resource groups » and then click « Add »
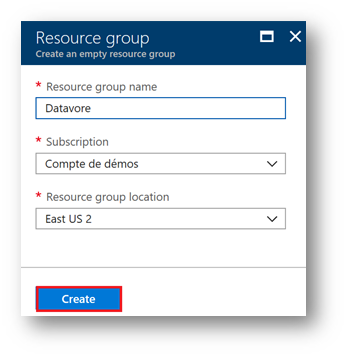
Fill in the information of your resource group.
For this lab, choose the region "East US 2". Click on "Create"
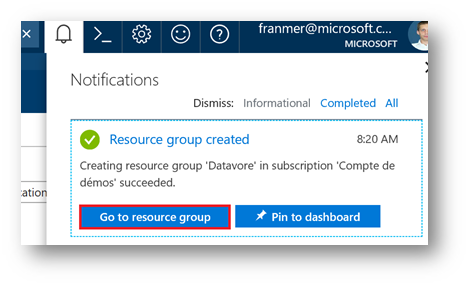
Once the resource group is created, a notification appears at the top right of the screen. Click on " Go to Resource Group ».
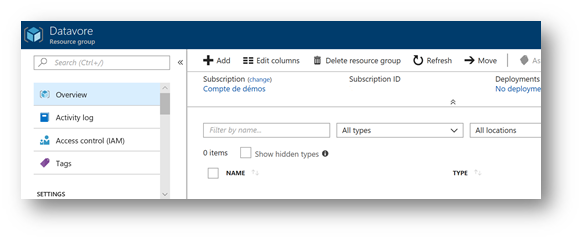
Your resource group is created and ready to be used.
Create an Azure Storage Account
An Azure Storage Account is a cloud service that provides highly available, secure, durable, scalable, and redundant storage. Azure storage consists of storage of BLOB objects, file storage, and queue storage. For our Lab, we will use the storage of BLOB objects. For more information about Azure storage, you can view this article: /fr-fr/azure/storage/
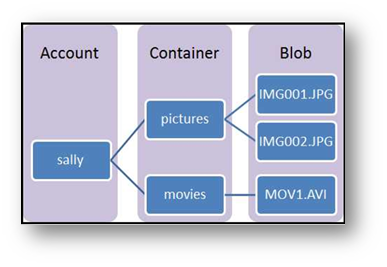
To have a quick overview, a storage account can contain one or more containers that themselves will contain BLOBs (folders and files)
The storage account can be created in the same way as we did for resource group through the portal. But it is also possible to use the « Cloud Shell », natively integrated to the portal. That's what we're going to do below.
At the top of the Azure portal, click the "Cloud Shell" icon.

The « Cloud Shell » will open at the bottom of the screen. Click on "Bash (Linux)"
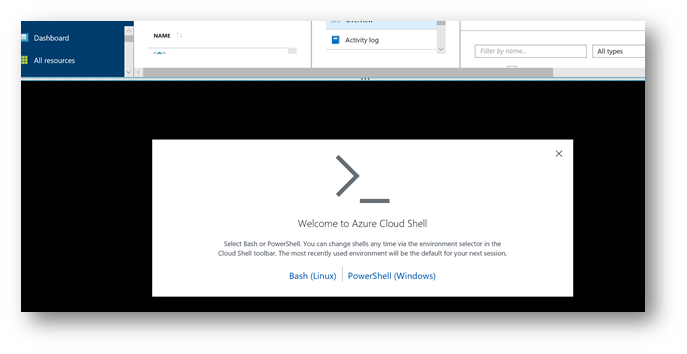
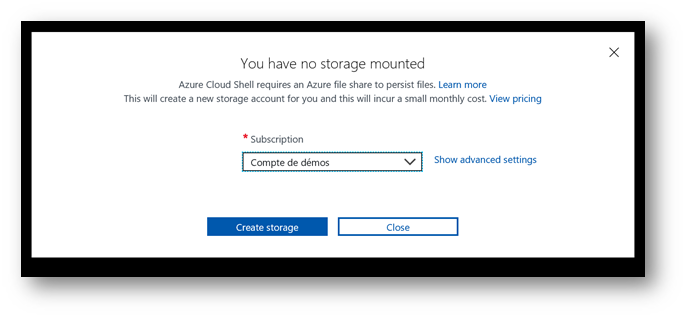
If this is the first time you run the "Cloud Shell", the next window will appear. Choose your Azure subscription, and then click "Create storage".
Once set, the "Cloud Shell" is ready to be used.

The creation of a storage account can be done with the following command:
az storage account create --name <yourStorageAccount> --resource-group <yourResourceGroup> --location eastus2 --sku Standard_LRS
In the case of this example, here is the corresponding command line:
az storage account create --name datavorestorage --resource-group datavore --location eastus2 --sku Standard_LRS
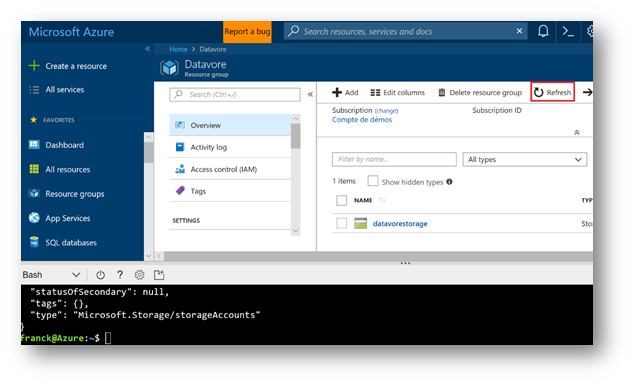
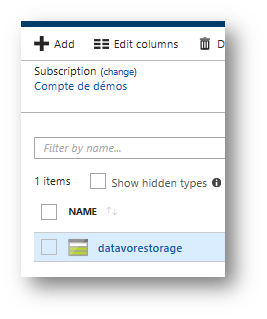
After few seconds, the storage account is created. Click on the "Refresh" button of your resource group. Your storage account should then appears in your resource group.
If you click on your account storage, you will then access to the various functions and properties of the storage account. In particular, the information connection by clicking on « Access Key ».
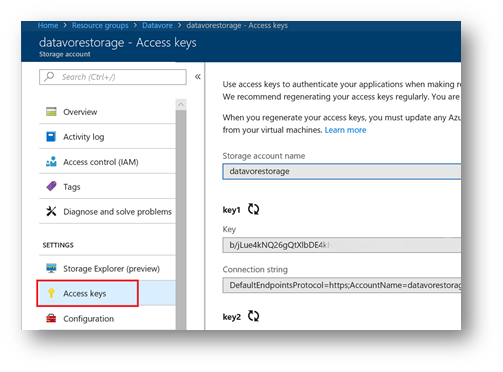
Now that the storage account is available, we'll create the containers to store our different files.
Before creating the containers, you must be able to access the storage account. To do this, you have to get your account key. Below is a command to retrieve your keys (you can also retrieve your keys through the portal as shown above).
az storage account keys list --account-name <yourStorageAccount > --resource-group <yourResourceGroup> --output table
In our example, here is the command used:
az storage account keys list --account-name datavorestorage --resource-group datavore --output table 
Copy one of the two keys. Then export the information from your storage account with the following commands:
export AZURE_STORAGE_ACCOUNT="<YourStorageAccount>"
export AZURE_STORAGE_ACCESS_KEY="<YourKey>"
Here are the command lines About our workshop:
export AZURE_STORAGE_ACCOUNT="datavorestorage"
export AZURE_STORAGE_ACCESS_KEY=" yqwBdGRgCW0LWdEuRwGdnxKPit+zXNrrVOxXQy57wq6oHmCSy2NnoA3Pr9E4pMgJPwcVeg8uQt1Uzk5YAWntiw=="
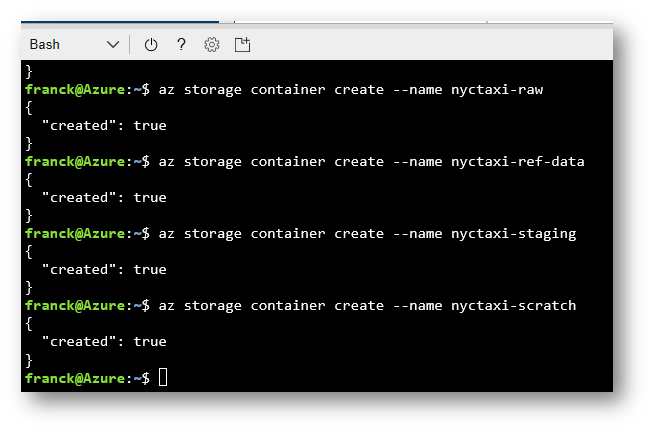
Containers Creations
To create the containers, copy the below scripts in your Cloud Shell
az storage container create --name nyctaxi-consumption
az storage container create --name nyctaxi-curated
az storage container create --name nyctaxi-demo
az storage container create --name nyctaxi-raw
az storage container create --name nyctaxi-ref-data
az storage container create --name nyctaxi-staging
az storage container create --name nyctaxi-scratch
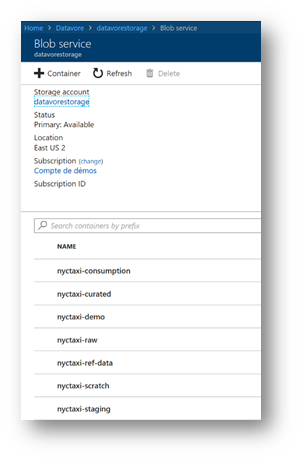
To verify the creation of your containers, from the Azure portal, click your Azure storage account
In "Overview" section, click « Blobs »
You must find the containers created previously
Copying files for the workshop
Reference data
The files are stored in one of our storage account. Do not change the key below!!
Run this script in the "Cloud Shell »
export SRC_STORAGE_ACCOUNT="franmerstore"
export SRC_STORAGE_ACCESS_KEY="eSSFOUVLg4gB3iSxuFVh/lDVoMeQHCqVj67xHdaYcPYoMSUqFuD+E2OeDhY4wRZCEF97nCRGOV0i7WJDyoOd7g=="

And then the following command:
azcopy --source https://franmerstore.blob.core.windows.net/nyctaxi-staging/reference-data/ --destination https://datavorestorage.blob.core.windows.net/nyctaxi-staging/reference-data/ --source-key $SRC_STORAGE_ACCESS_KEY --dest-key $AZURE_STORAGE_ACCESS_KEY --sync-copy --recursive
In our example, here is the command to run with the storage account used in this example:
azcopy --source https://franmerstore.blob.core.windows.net/nyctaxi-staging/reference-data/ --destination https://datavorestorage.blob.core.windows.net/nyctaxi-staging/reference-data/ --source-key $SRC_STORAGE_ACCESS_KEY --dest-key $AZURE_STORAGE_ACCESS_KEY --sync-copy --recursive
Copying transactional data
For this lab, let's just take a subset of the data. If you want to recover the whole dataset, refer to the index at the end of the document (this will take at least 2h).
For this lab, we will only work on the year 2017, but nothing will prevent you later to rerun the scripts by simply changing the year.
Here are the scripts to copy transactional data:
azcopy
--source https://franmerstore.blob.core.windows.net/nyctaxi-staging/transactional-data/year=2017/ --destination https://<YourStorageAccount>.blob.core.windows.net/nyctaxi-staging/transactional-data/year=2017/ --source-key $SRC_STORAGE_ACCESS_KEY --dest-key $AZURE_STORAGE_ACCESS_KEY --sync-copy
--recursive
In our example, so we'll have:
azcopy
--source https://franmerstore.blob.core.windows.net/nyctaxi-staging/transactional-data/year=2017/ --destination https://datavorestorage.blob.core.windows.net/nyctaxi-staging/transactional-data/year=2017/ --source-key $SRC_STORAGE_ACCESS_KEY --dest-key $AZURE_STORAGE_ACCESS_KEY --sync-copy
--recursive 
To verify the result of your copy, you can run the following command:
az storage blob list --container-name nyctaxi-staging --output table 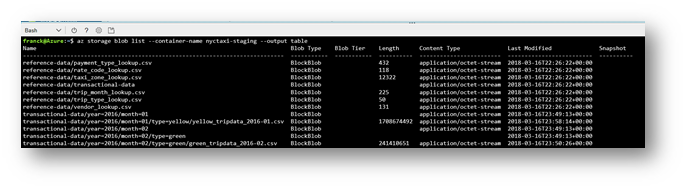
Create an Azure SQL Database
From the Azure portal, click on « + Create a resource », « Databases » and then on « SQL Database »
Then fill in the values for your database
- You may need to create a SQL server.
- Click on « Configure required settings », « Create a new server ».
- Fill in the SQL server information. Remember your SQL Server password!
- Click on " Select ».
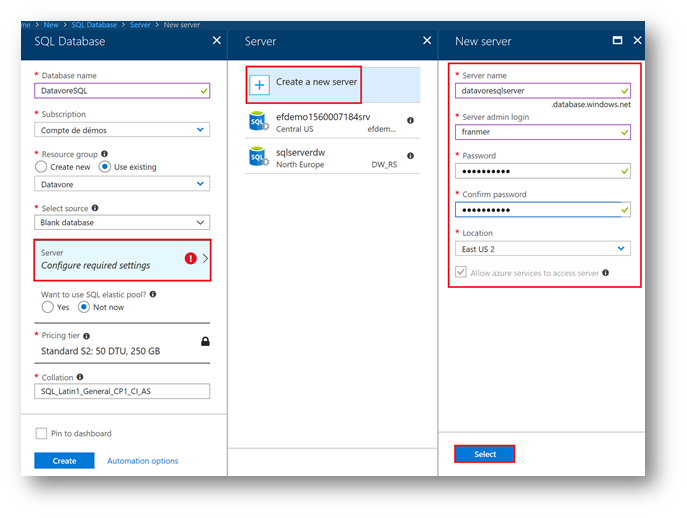
Continue to fill in your database information. Then click on « Create »
Create SQL tables
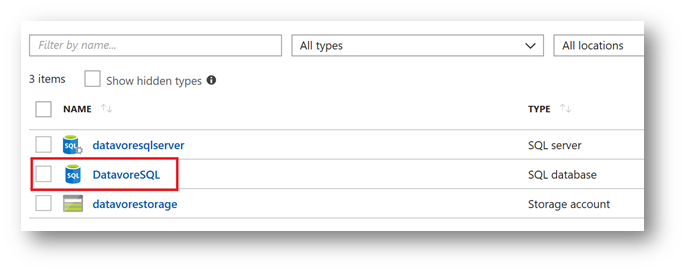
From the Azure portal, click on your newly created database.
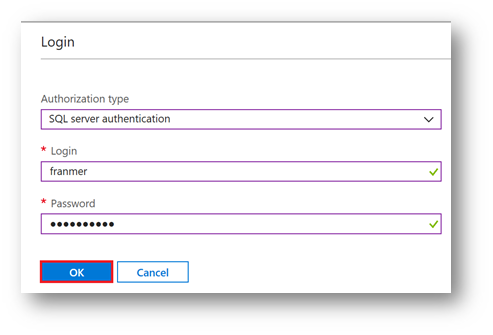
Click on « Query Editor », then « Login »
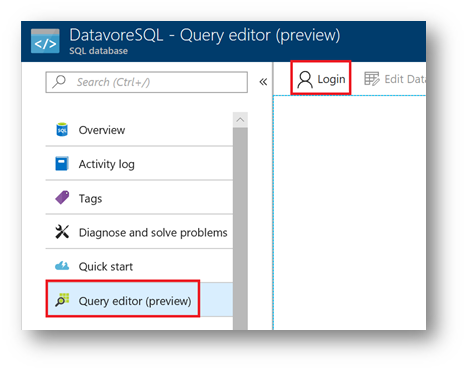
Enter your SQL credentials, and then click "Ok".
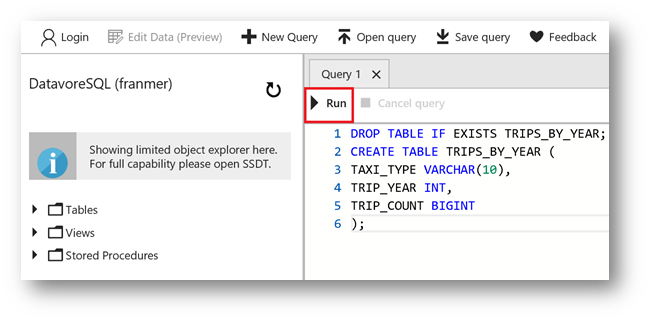
Create tables
From the Azure portal, copy the T-SQL script below to the editor, then click on "Run"
Drop Table If exists TRIPS_BY_YEAR;
Create Table TRIPS_BY_YEAR (
TAXI_TYPE varchar(10),
TRIP_YEAR int,
TRIP_COUNT bigint
);
Repeat the operations for the following two tables
Drop Table If exists TRIPS_BY_HOUR;
Create Table TRIPS_BY_HOUR (
TAXI_TYPE varchar(10),
TRIP_YEAR int,
TRIP_HOUR INT,
TRIP_COUNT bigint
);
Drop Table If exists BATCH_JOB_HISTORY;
Create Table BATCH_JOB_HISTORY
(
batch_id int,
batch_step_id int,
Batch_step_description varchar(50),
Batch_step_status varchar(10),
Batch_step_time varchar(25)
);
Alter Table BATCH_JOB_HISTORY
Add Constraint Batch_step_time_def
Default CURRENT_TIMESTAMP For Batch_step_time;
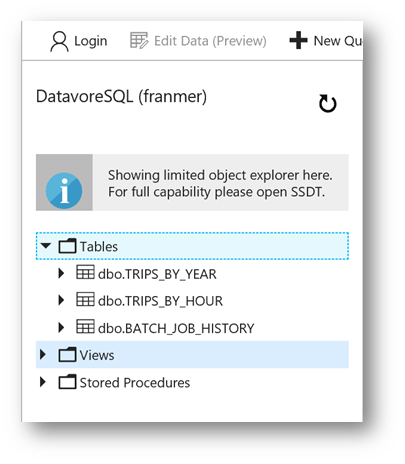
You will see your tables from the Azure portal
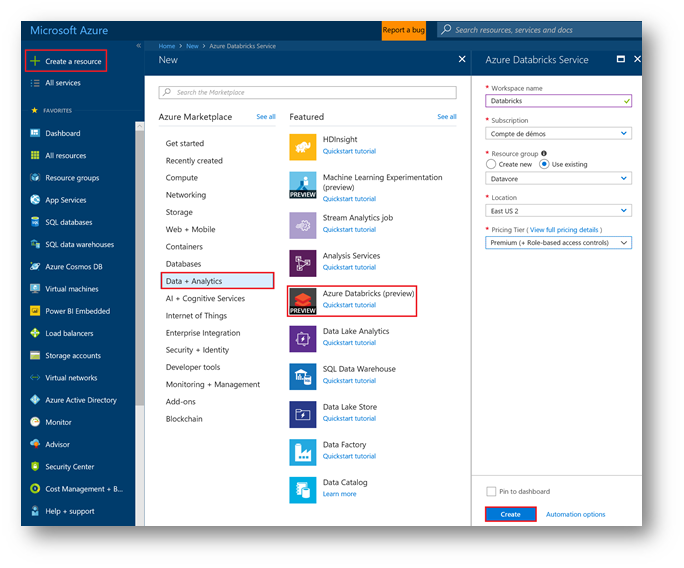
Create Azure Databricks
From the Azure portal, click on « + Create a Resource », « Data + Analytics then« Databricks Azure ».
Fill in the information in your « workspace » . Select your resource group and select region « EAST US 2 » in "Location" field.
Click on "Create".
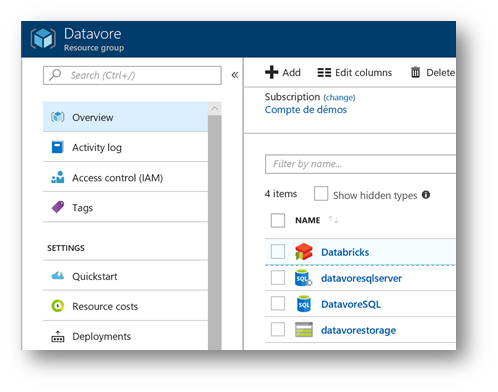
After you create your Databricks workspace, your resource group should contain the following resources:
Provisioning a cluster and start analyzing your data
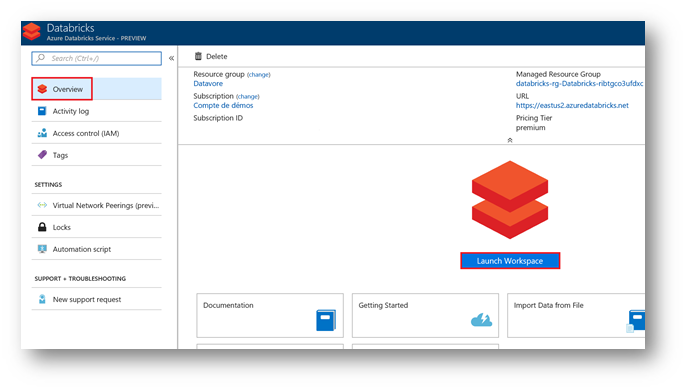
Click on your Databricks resource
In the "Overview" section, click on "Launch Workspace" button.
Your Azure infrastructure is ready. You can now start your data analysis with Azure Databricks.
Part 2: Using Databricks
Workshop: Data Engineering with Databricks
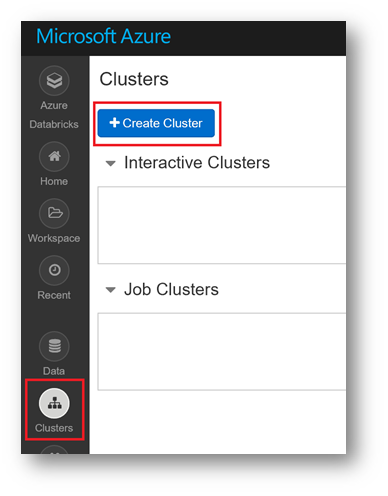
Create the cluster
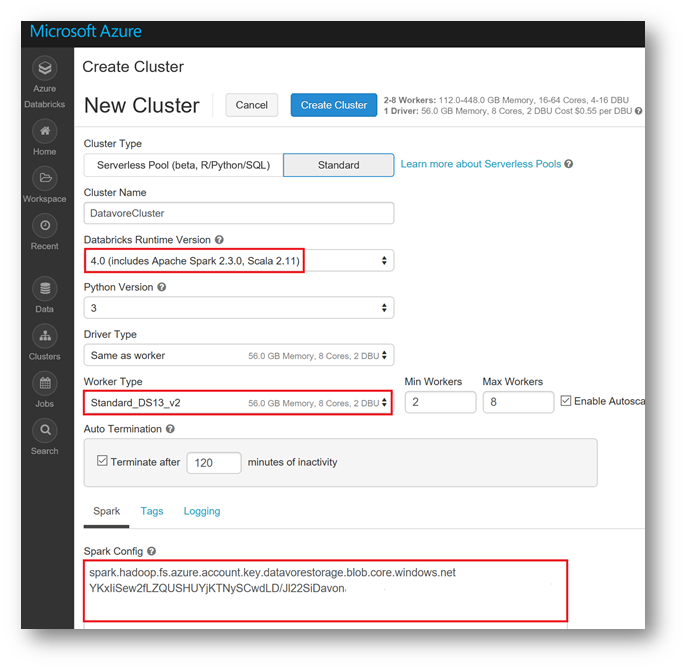
In the Databricks workspace, on the left, click on "Clusters", and then "Create Cluster"
Here are the parameters you need to set for your cluster:
- Databricks Runtime Version: 4
- Python Version: 3
- Worker Type: STANDARD_DS13_V2
- Spark Config: spark.hadoop.fs.azure.account.key.<yourStorageAccount>.blob.core.windows.net <yourKey>
Below is the sample configuration for this Workshop . 
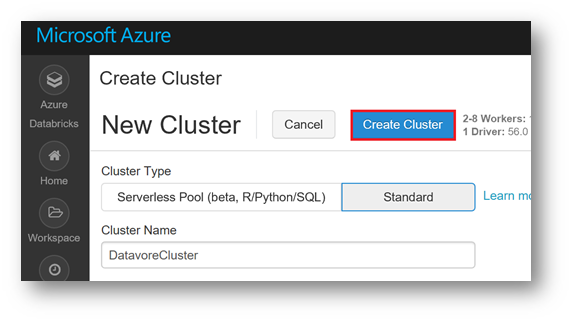
Click on "Create cluster"
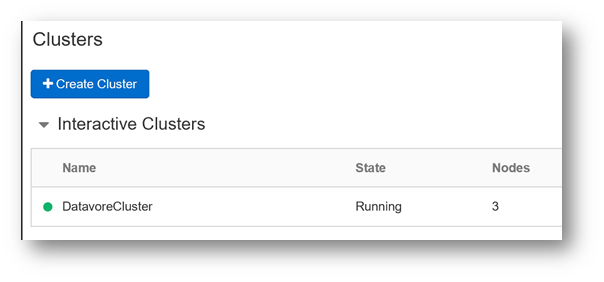
After a few minutes, your cluster is ready
Notebooks
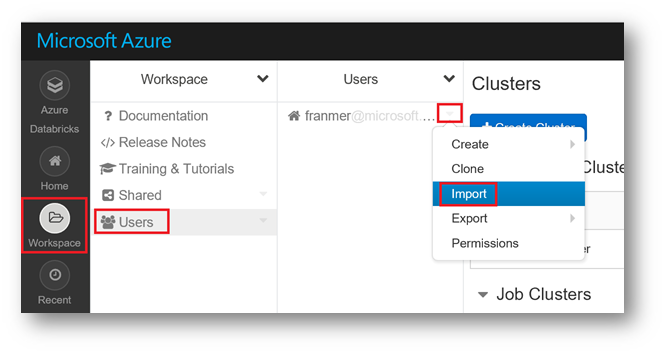
On the left side of the screen, click on "Workspace" then "Users".
To the right of your alias, click the arrow and then "Import"
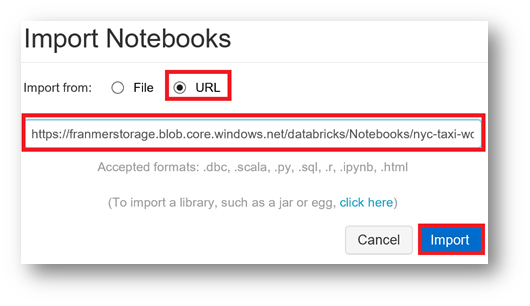
In the Window "Import Notebooks", click on "Url" then copy the address below
Https://franmerstorage.blob.core.windows.net/databricks/Notebooks/nyc-taxi-workshop.dbc
Click on the « Import » button
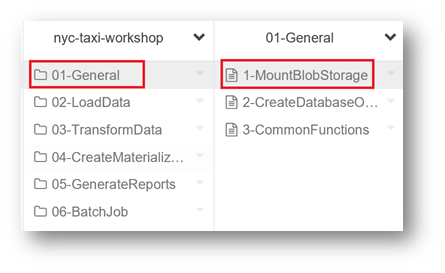
Notebooks must appear in your workspace.
Attach notebook to a cluster
Before you can start using any notebook, you need to attach it to a cluster.
Click on "Detached" and then select a cluster.
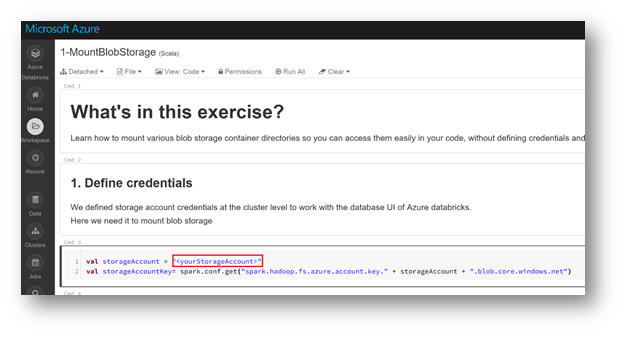
Configure your Notebook
In some Notebooks, think to replace value with your storage account information:
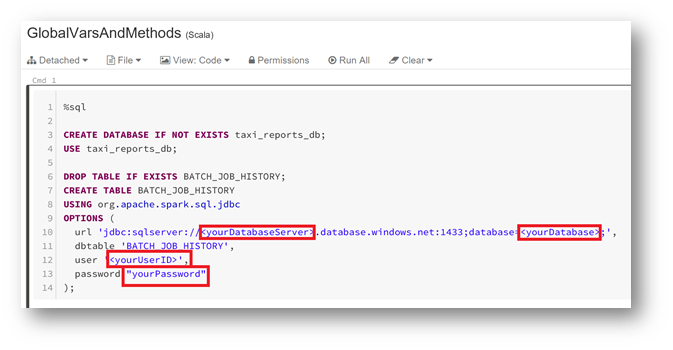
In the Notebook "2-CreateDatabaseObjects", fill in the fields for your Azure SQL server, SQL database and SQL Server credentials.

In this example, we will have:


Click on the Notebook « 1-LoadReferenceData » to continue the workshop with Databricks
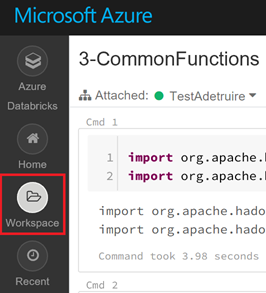
During the workshops, to return to your workspace to change working notebooks, click "Workspace" to the left of the screen.
From now, continue the workshop with the notebooks. Below are tips that can be useful for the different notebooks in this workshop.
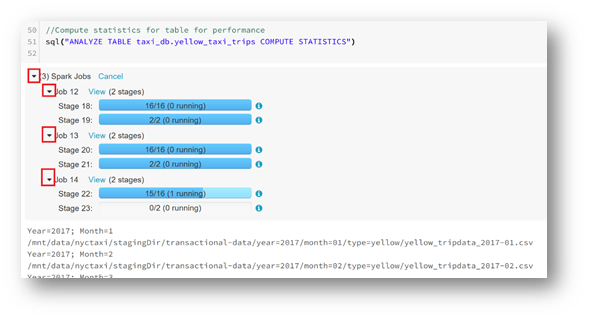
Tips with Notebooks
Some jobs will take several minutes. You can check progress by clicking on the arrows to the left of the jobs.
In the part "05-GenerateReports", in the Notebook "Report-1", you will find reports.
On the upper right of cell, click the graphic icon.
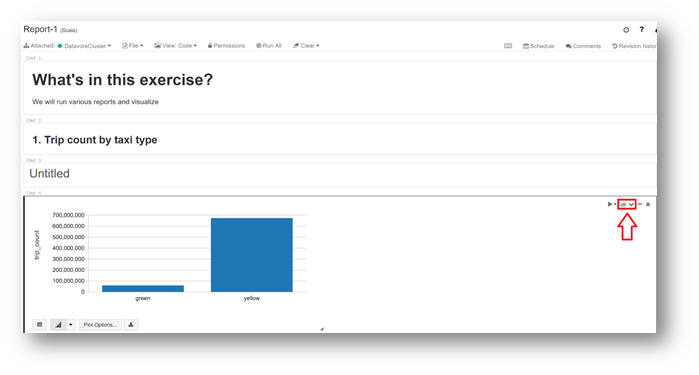
On the contextual menu, click "Show Code"
The script behind the report is displayed, like you can see below:
Under the graph, many options are available to change the visualization of your data

In the part "06-BatchJob", in the Notebook "GlobalVarsMetHods" , don't forget to fill in the values of your SQL Azure base.
First part:
Second part:
Interactive report with Power BI Desktop
After doing the latest notebook from the workshop, it can be interesting to connect Power BI Desktop to your Databricks storage .
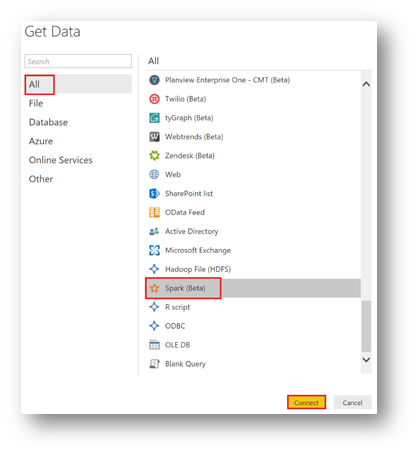
From Power BI Desktop, click « Get Data » then « More »

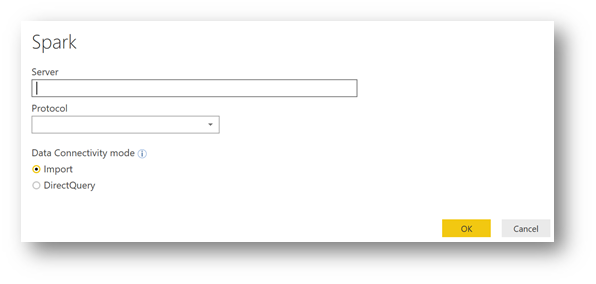
Select the "Spark" connector and click "Connect"
The Spark window appears. You need to provide the connection information
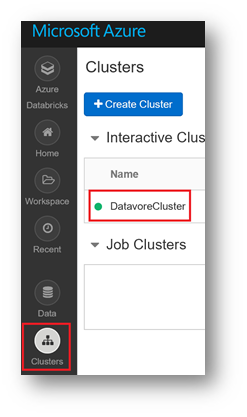
Right now, the Databricks cluster address is not trivial to find. But here's how to do it.
From your Databricks workspace, click "Clusters", and then the name of your cluster ("DatavoreCluster" in our example)
From the Databricks workspace, click on "Clusters" and click on " JDBC/ODBC ».
In the « JDBC URL » field, compose the server address with the 2 elements surrounded in red, and add Https to create a valid http address.
For our example this will give:
https://eastus2.azuredatabricks.net:443/sql/protocolv1/o/1174394268694420/0317-035245-abed504
Here's what it gives in Power BI Desktop. Click on "Ok".
Now you need the permissions .
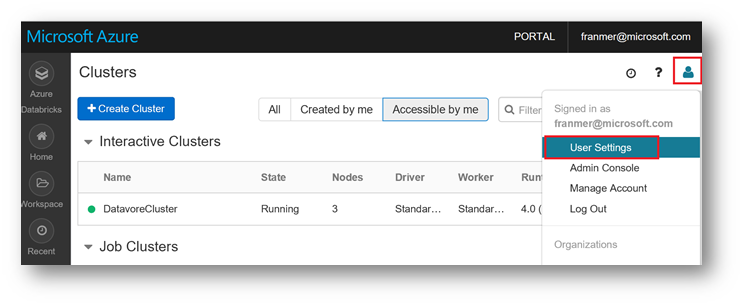
It is necessary to generate an access token.
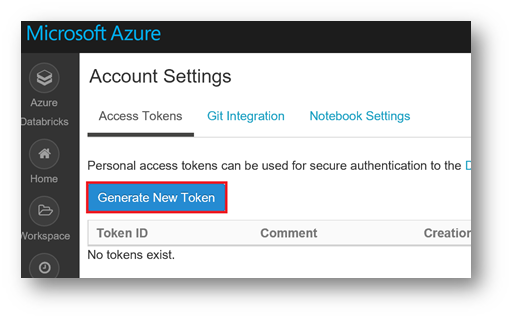
In the Databricks workspace, click the top right on the user icon, and then click "User settings"
Click on "Generate New Token"
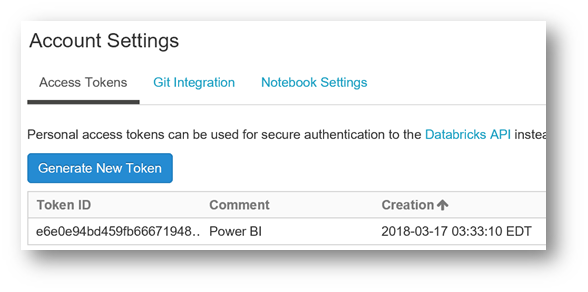
Give your token an explicit name and click on "Generate"
From the "Generate New Token" window, copy and Keep this token, because it won't longer be possible to recover it later.
Click on "Done".
The token is generated!
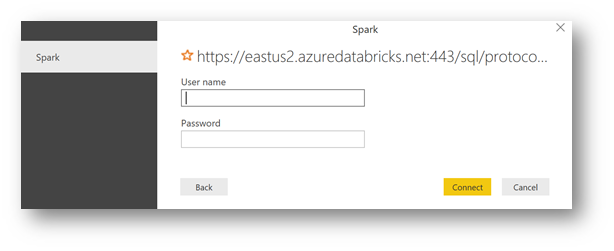
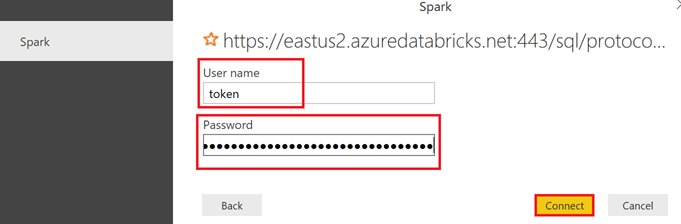
From Power BI Desktop, copy the token in the field " Password ", and then use token in the field "User Name" (It's not something that can be made up, isn't it ?).
Click on "Connect".
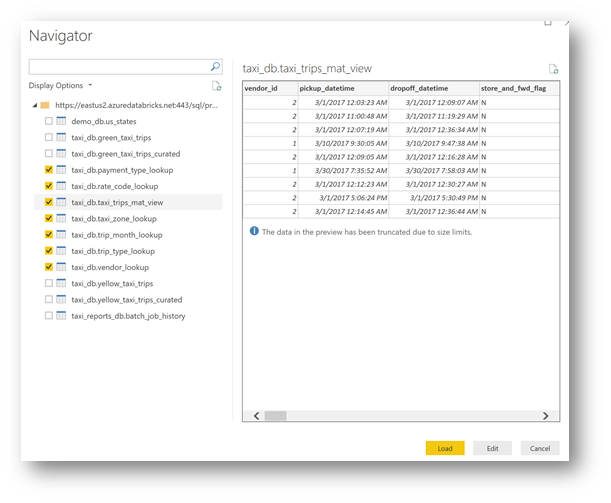
Now, you are ready to explore your data. Select the 7 tables below, then click "Load"
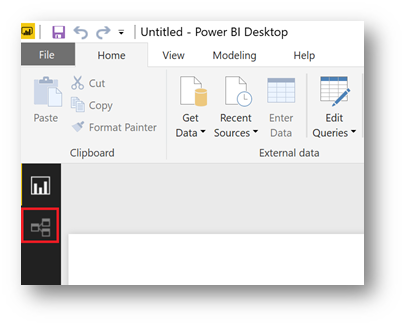
Once connected to the data, click on the link icon on the left side.
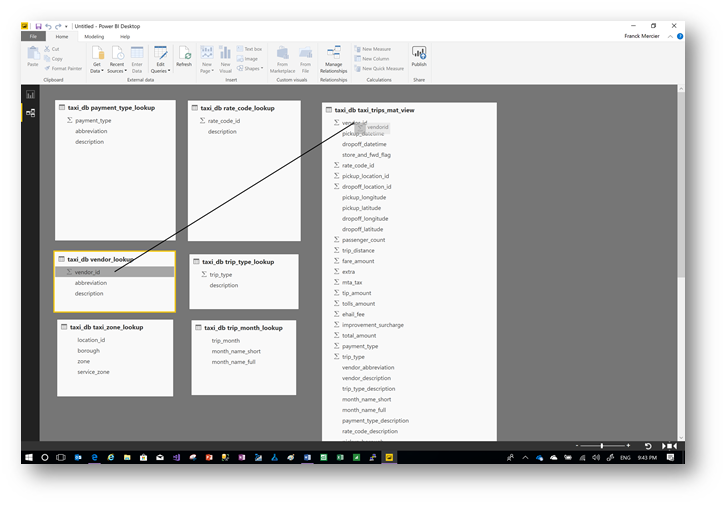
By a simple drag and drop, build the connections between tables.
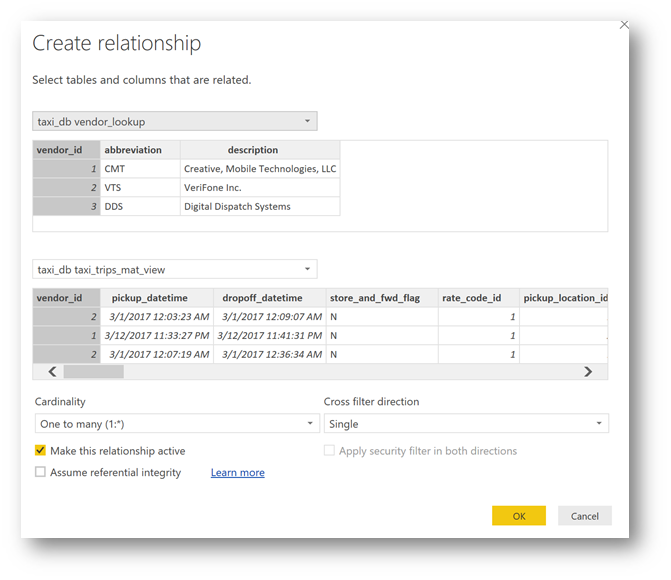
The "Create relationship" window appears, click on "Ok"
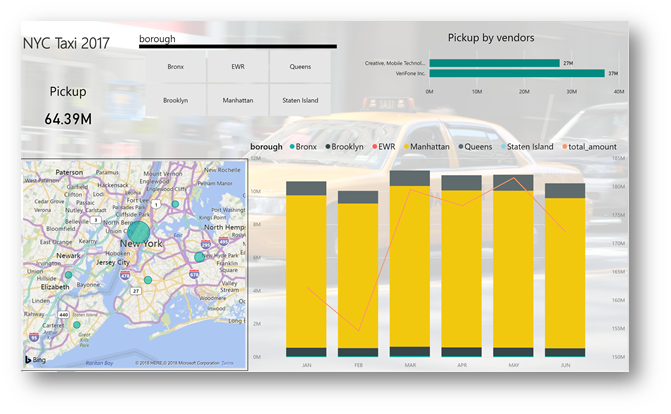
After you have done all the links, here is an example of what you can get:
Here is an example of a report
Index
In the case you want to load all the data in your storage account, it is possible to do this with the following command:
azcopy
--source https://franmerstore.blob.core.windows.net/nyctaxi-staging/ --destination https://<YourStorageAccount>.blob.core.windows.net/nyctaxi-staging/ --source-key $SRC_STORAGE_ACCESS_KEY --dest-key $AZURE_STORAGE_ACCESS_KEY --sync-copy --recursive
In our example this command line will be:
azcopy
--source https://franmerstore.blob.core.windows.net/nyctaxi-staging/ --destination https://datavorestorage.blob.core.windows.net/nyctaxi-staging/ --source-key $SRC_STORAGE_ACCESS_KEY --dest-key $AZURE_STORAGE_ACCESS_KEY --sync-copy –recursive