Mailbox migration – Do it yourself guide
Let’s say you are running Exchange 2010+ on-premises but are not eligible for migrating with FastTrack Center. And you are looking for references to help you moving the mailboxes. Or even better, you are looking for a tool that helps you automate the migration process. You came to the right place: In the previous post we introduced the process and a sample tool that helps you identify potential issues that would prevent a mailbox from being moved to Exchange Online. Now we are documenting the remaining steps for a mailbox migration.
Migrating mailboxes – step by step
The first thing you should do is to make sure your mailboxes are ready for migration. You do that following the procedure documented at Pre-flight – Checking objects before an Exchange hybrid migration.
Then check the additional migration pre-requisites:
- Exchange hybrid is configured
- Users are licensed for Exchange Online
- A migration endpoint exists in Exchange Online
Once you checked the pre-requisites and ran the pre-flight against all the mailboxes targeted for migration, you can choose between exporting the migration commands, scheduling the migration and running the migration immediately.
Exporting the migration commands
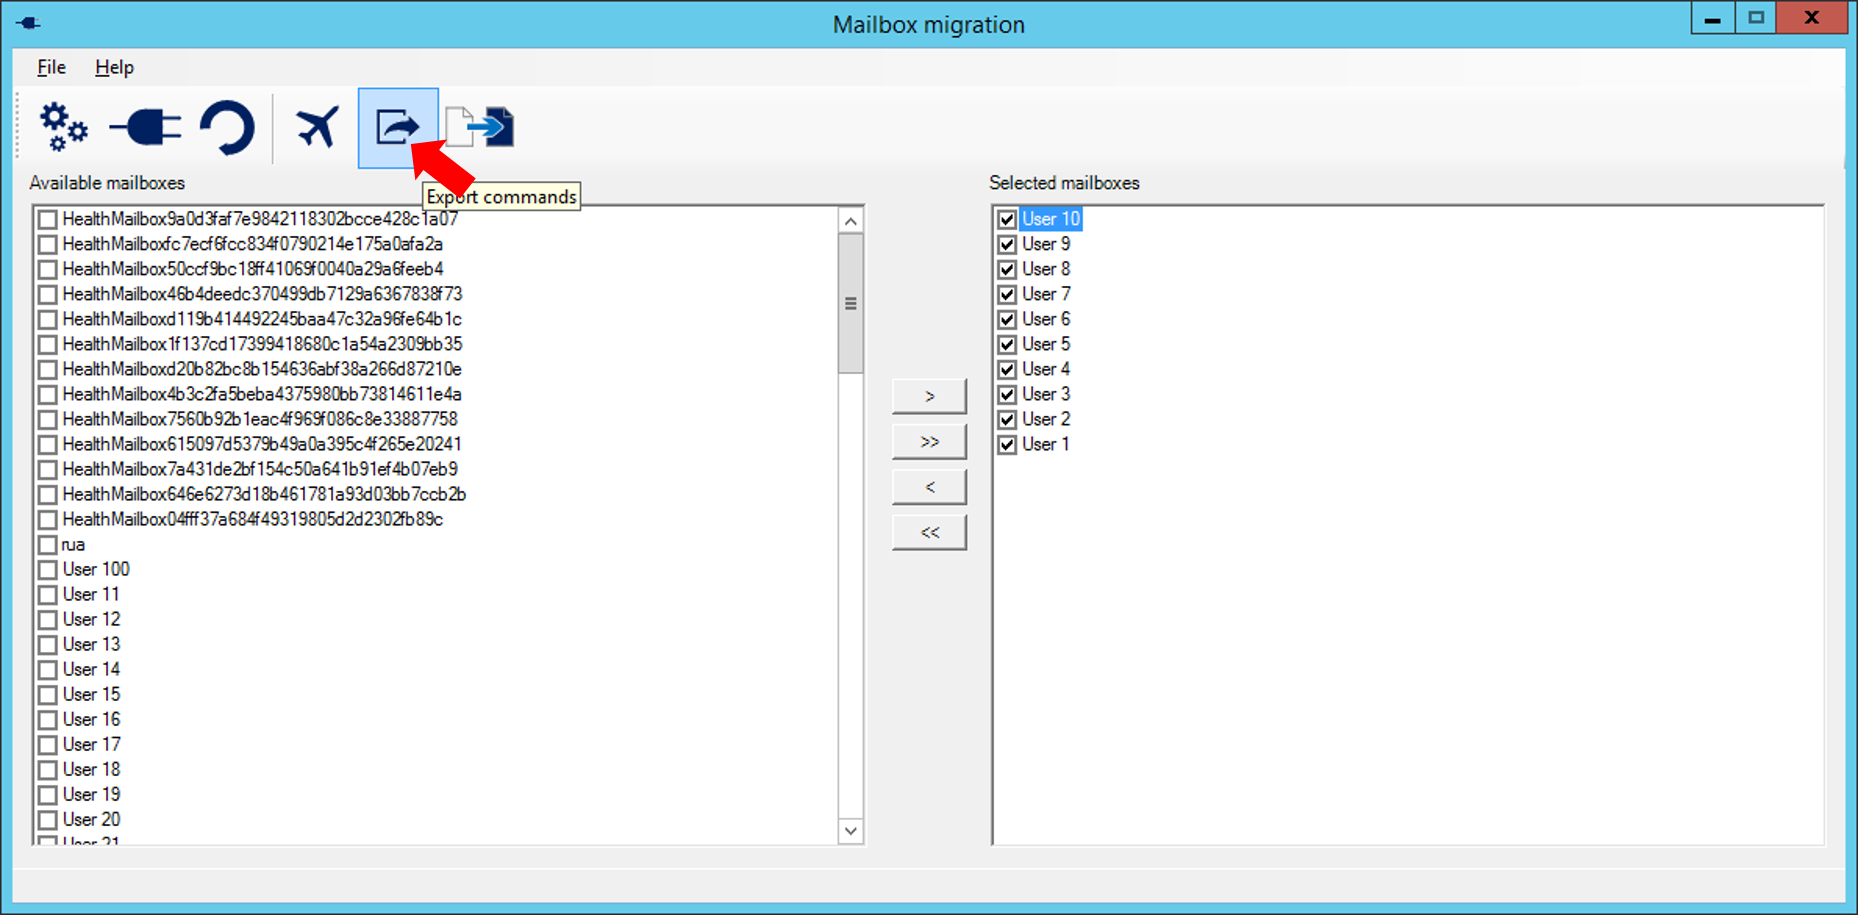
With the sample Pre-flight & Migration tool open, if you just want to export the migration cmdlets and use them later, you can select the mailboxes to migrate and click the export commands button:
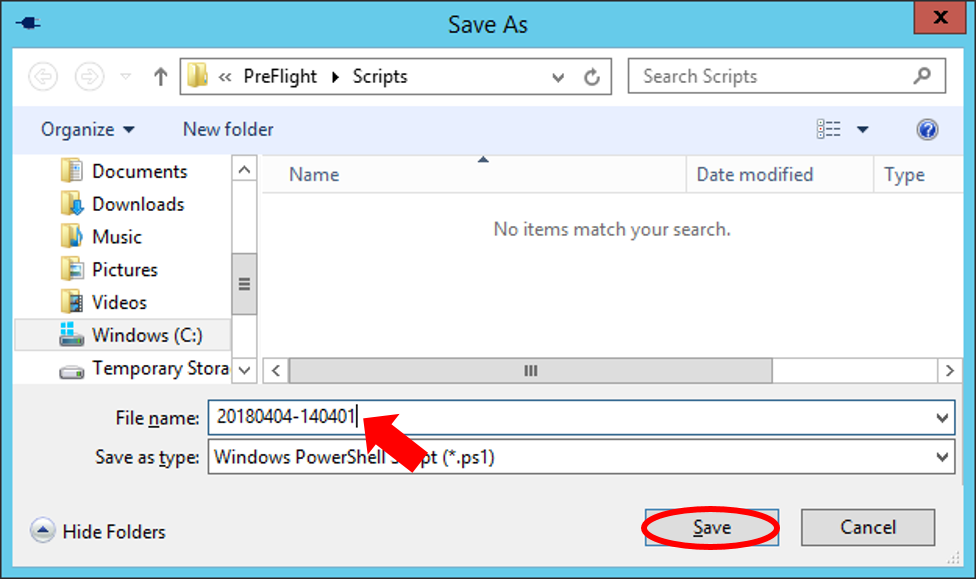
Then you give the script a name and save it.
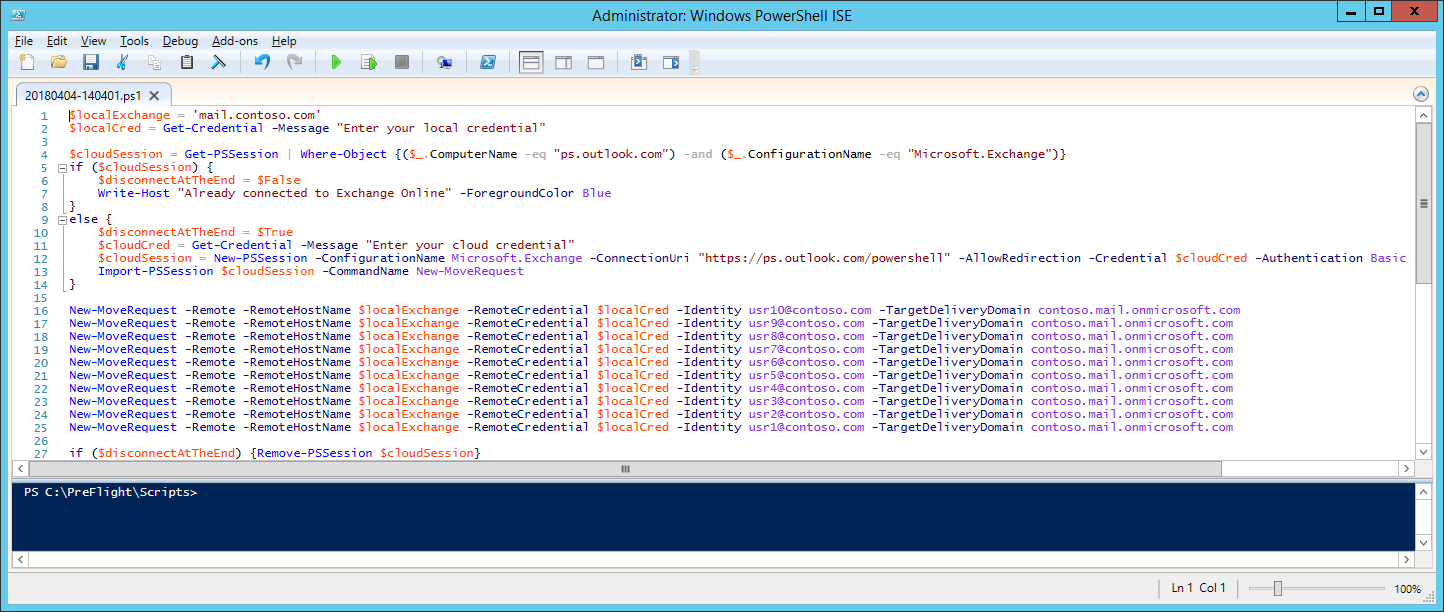
The script generated will look like the example bellow:
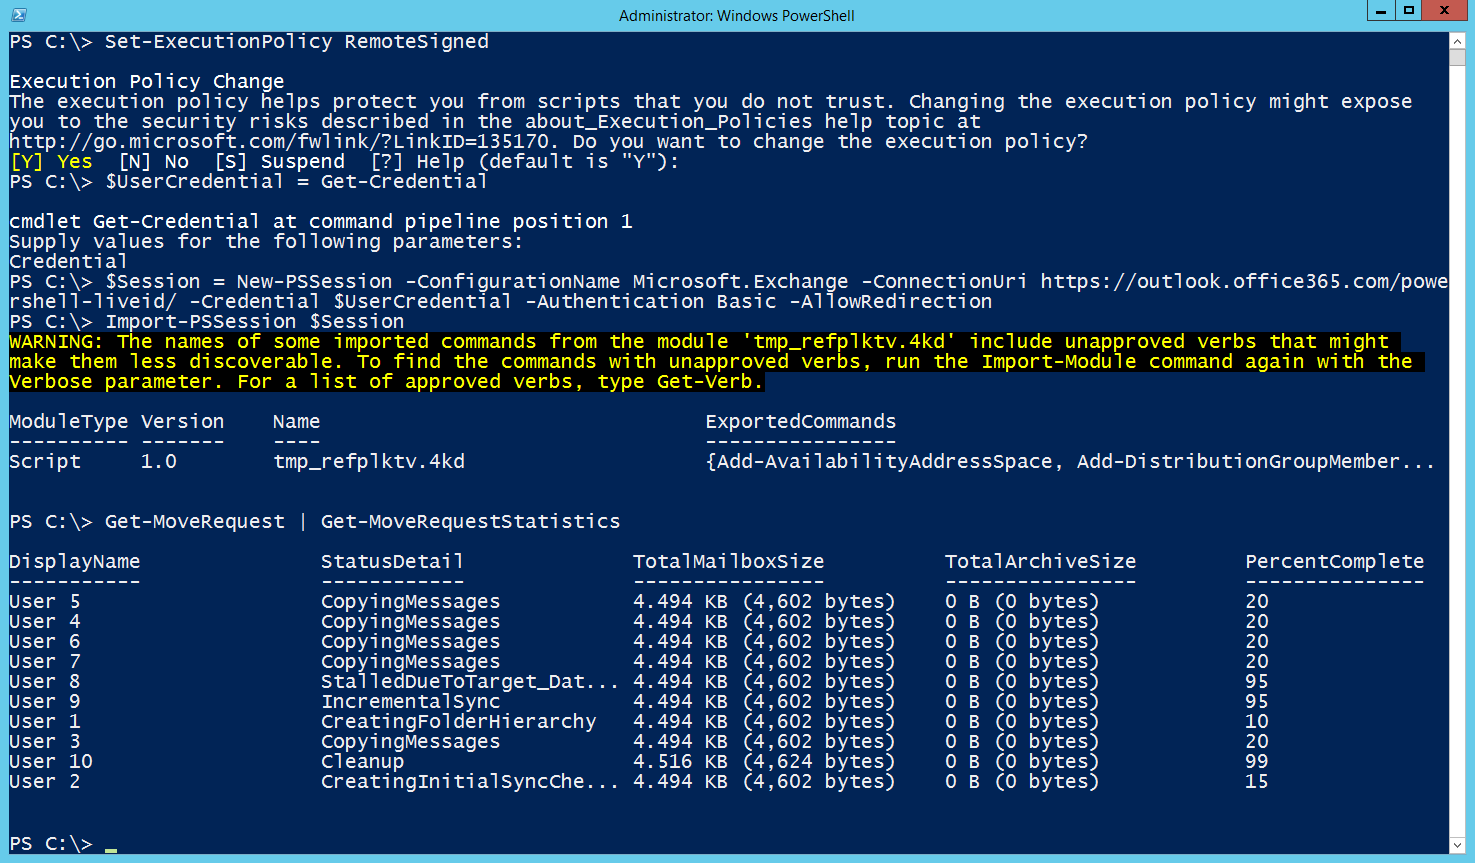
After starting the mailbox migration, you will be able to monitor it via PowerShell. You will need to connect to Exchange Online using the procedure documented at Connect to Exchange Online PowerShell and the run the following cmdlets:
| Get-MoveRequest | Get-MoveRequestStatistics |
You should see something like the image below:
Please bear in mind that you will not see those migration requests in EAC (Exchange Admin Center). That’s because EAC only shows information regarding migration batches, and the exported commands do not create a migration batch.
If you want the ability to monitor the migration from EAC, you can use the option to migrate now or schedule a migration as explained below.
Migrating now or scheduling the migration
If you want to start migrating the mailbox immediately or schedule the migration, you can do so using the Pre-Flight & Migration tool as well. There are at least two advantages of starting the migration from the tool:
- You can monitor the migration from EAC in addition to Exchange Online Management Shell
- The process to start the migration is faster (the migration itself will not be faster)
And you can always refer to the source code to see the difference between the processes. Or even change it, since it is offered under the MIT license.
Now, with the tool open, mailboxes checked for migration (pre-flight) and selected, you click the Migrate button.
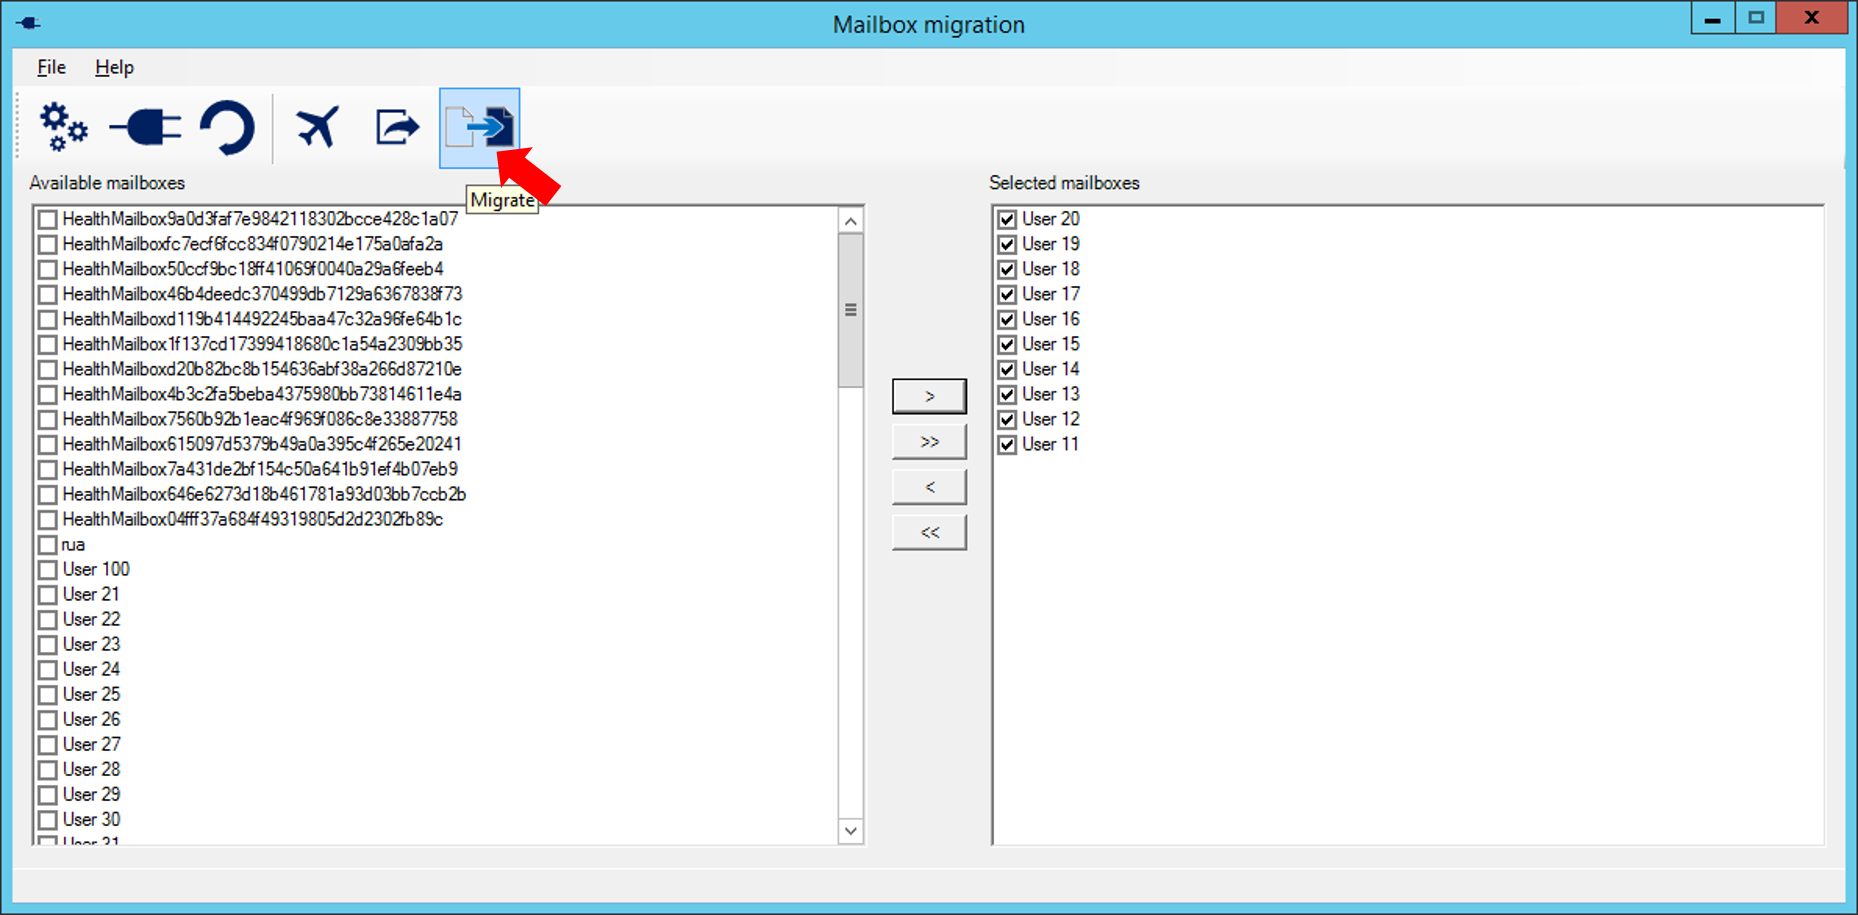
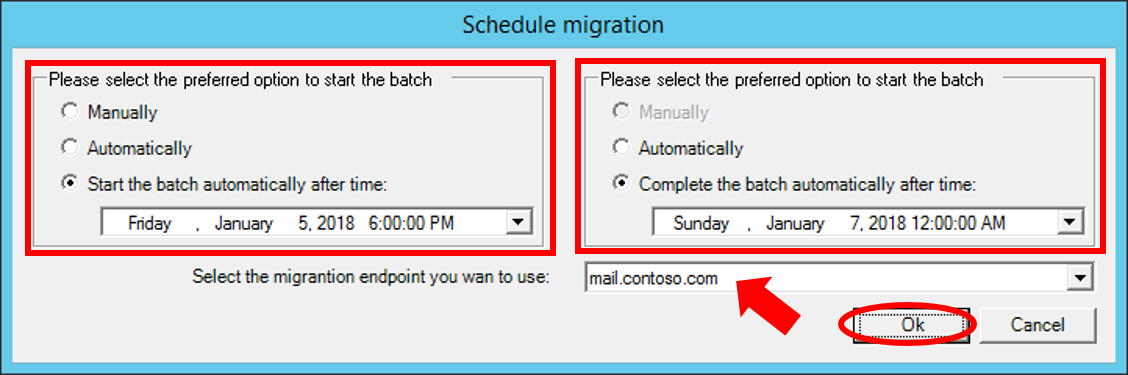
It will open a dialog giving you the migration options:
- Create the batch but does not start the migration
- Create the batch and start it immediately
- Create the batch and schedule it for automatic start later
You can also pick one of three options for the job completion:
- Complete the job manually (useful for those wanting strict control over the job)
- Complete the migrations automatically and as soon as possible
- Schedule a time to complete the migration (it will begin completing each migration: it does not mean all the migrations will be finished by the exact time you enter)
You can then choose a migration endpoint if you have more than one and click Ok.
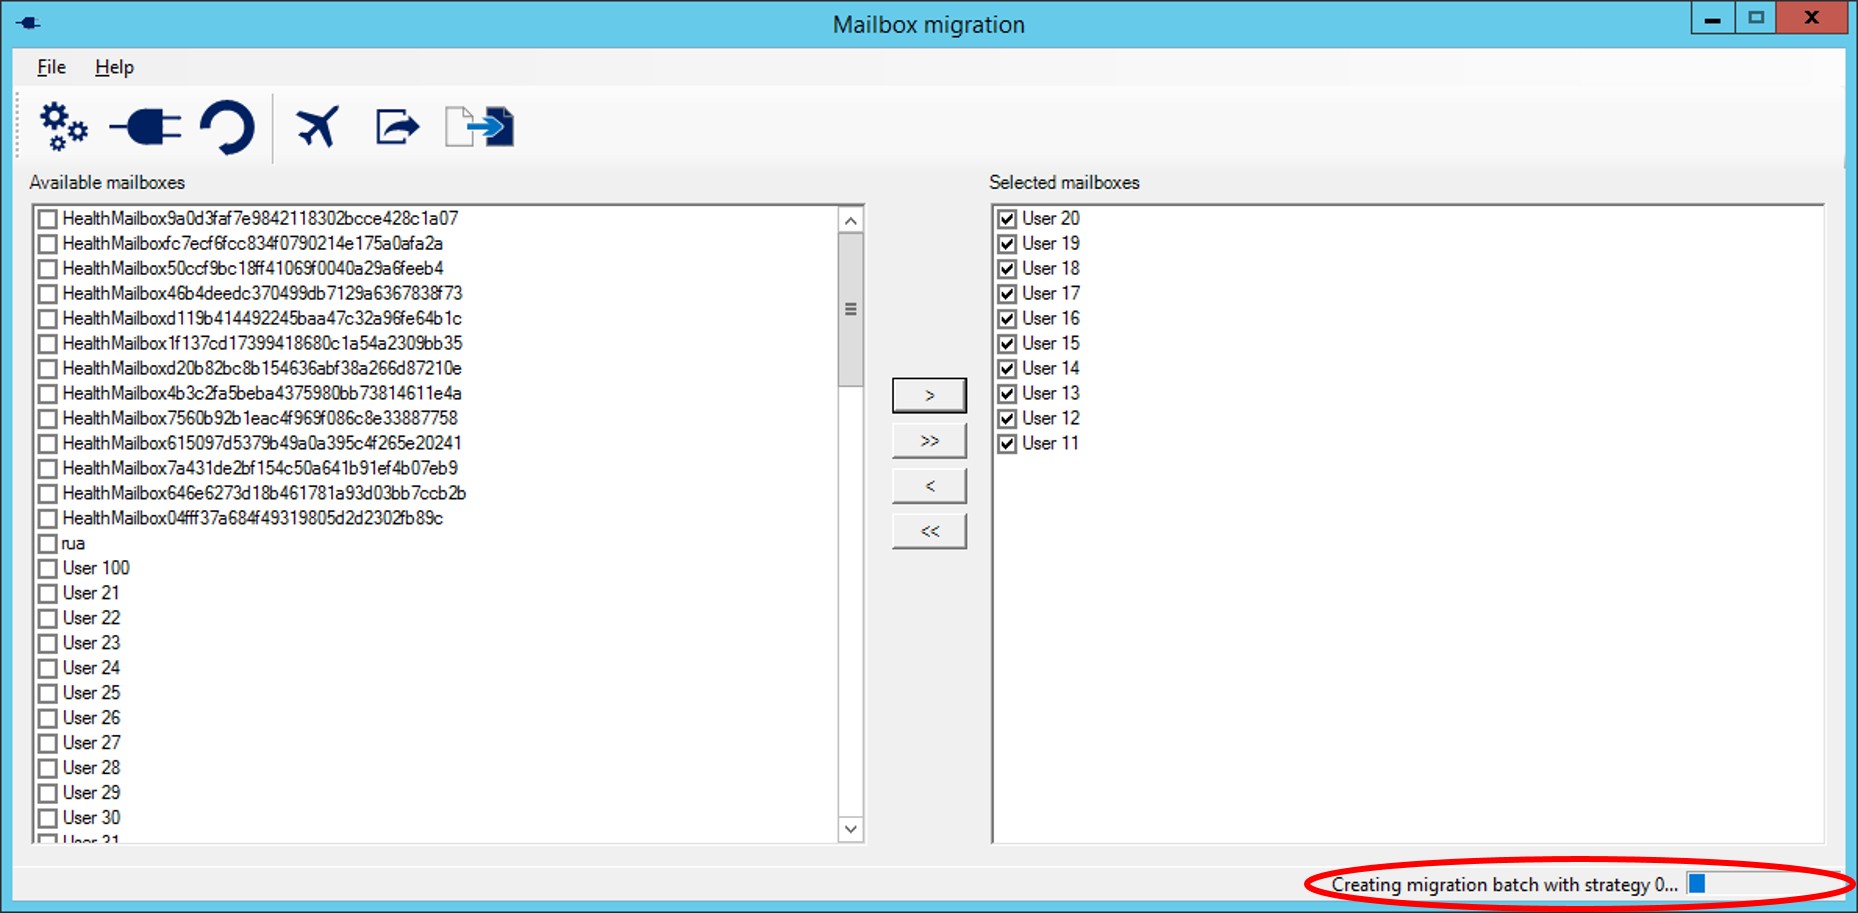
You will see the progress bar at the bottom of the screen for a brief moment then the migration batch is created.
If you look at the EAC, you will see the newly created migration batch:
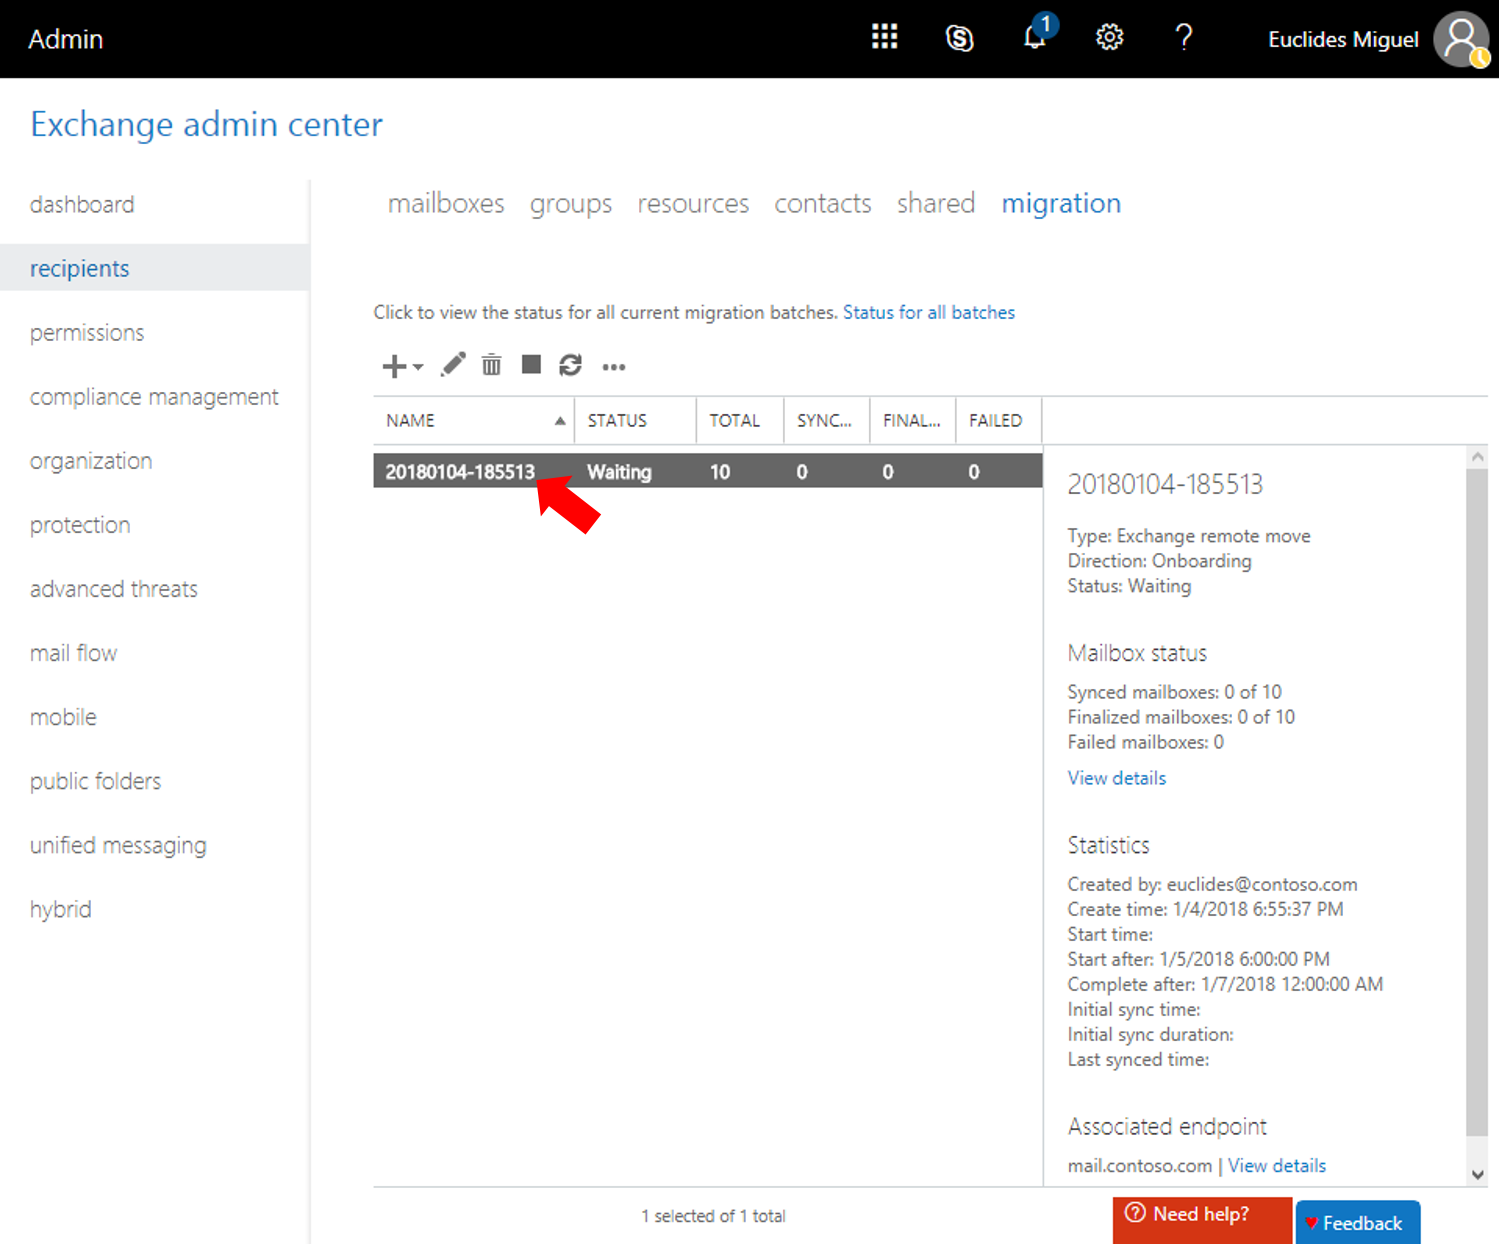
That's it. Enjoy!