Tip o’ the Week #296 – Win10 Xbox App: snap snap, grin grin
There are a variety of apps out there for grabbing your PC screen in video format, using for making tutorials, saving gaming footage or other activities. There are many free screen capture apps  (like Microsoft’s Expression encoder, which is still available though no longer being developed) that seem to be either pretty complex (if feature rich) , or else they add all kinds of undesirable gunk to your PC at time of installation (does anyone really want the Ask Toolbar ?) , they force a length limit or watermark on your resulting video, etc. There are other, commercial, products (eg Camtasia) which are really good, though again can be feature-rich and complex.
What if you want to do a simple screen recording to help make a point, and you don’t want to spend ages learning how to use a Swiss Army Knife of a tool, or installing garbage/spyware on your PC, and can’t justify spending a bunch of cash for a software package you’ll use once or twice?
Well, if you’ve got Windows 10, you may be pleased to know there’s an app that comes with the OS that can be used to do exactly this – the Xbox App. You can use it to take screen snaps (though with desktop OneNote installed, you can quickly grab an area of the screen to the clipboard by pressing SHIFT+ WindowsKey +S) , or youcan save video footage of a target application window.
Since the functionality comes with the Xbox app, it’s safe to assume that it’s really intended to save game footage to your machine, but since it works with any windowed app too, then consider it a bonus regardless of whether you’re into gaming or not. Note that it only records one window, so if you’re looking to grab the whole desktop then you’re better off looking at the top of this tip, for Expression, Camtasia or others.
Capturing a window
Launch the Xbox app by clicking on the icon on your Start menu, or press Start and just type Xbox…
 Next, start the app you wish to record, then press WindowsKey+G, which will open the Game Bar.
The Xbox app will ask to confirm that the target app you’re trying to record is a game – it doesn’t matter whether the app is or isn’t a game, so  just pretend that your target app is a game and launch the Game Bar.
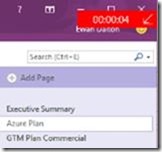
 With the Game Bar open, you can either take a screenshot with the Camera icon, or begin recording video with the red circle Record icon. During recording, a small red indicator appears at the top of the currently selected window to confirm that recording is taking place, and showing the duration of the current recording. Clicking it will stop the recording, and pressing WindowsKey+G again will show the Game Bar again.
 Even easier, If you have the Xbox app running and the game bar is open, you can flick around to your target app just start recording the current application by pressing ALT+WindowsKey+R or grab a screenshot by pressing ALT+WindowsKey+PrtScrn.
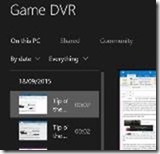
Once your recording is complete, you can find it along with any screenshots with File Explorer under ThisPC\Videos\Captures. You can also find any of your recording in the Xbox app under Game DVR. That’s all there is to it.
