Installing Office 2013/O365 with the Office Deployment Tool (ODT) for C2R
The intention of this post is to focus on the Office Deployment Tool (ODT) as part of the troubleshooting process.
In case you have trouble installing the click-to-run (C2R) version of Office, the ODT may come in handy and help to get your new Office installed.
The key concept is that the ODT allows to separate the file download from the installation process which helps to exclude network related issues from the picture.
If your computer is already in a troubled state from a previous failed attempt and you want to first try the default setup option, consider to follow the troubleshooting steps below:
- Run the fix-it to remove reminiscences of previous failed installations:
https://support.microsoft.com/kb/2739501/en-us : Uninstall Microsoft Office 2013 or Office 365
- Check task scheduler and make sure there are no Office entries left here (if there are any you should delete them) :

- Start the machine in clean boot:
https://support.microsoft.com/kb/929135: How to perform a clean boot to troubleshoot a problem in Windows 8, Windows 7, or Windows Vista
- Disable firewall and antivirus; consider disabling proxy settings.
Here is a complete article of basic troubleshooting steps for installation issues: https://support.microsoft.com/kb/2822317/en-us : General troubleshooting for installing Office 2013 and Office 365
If you still encounter installation issues after testing the above steps, an essential step is the Office Deployment Tool.
We’ll show you the step by step instructions for the ODTin a bit but some administrative notes first.
* NOTE: The general usage of the ODT is shown as well in this blog post: https://blogs.technet.com/b/odsupport/archive/2013/06/19/using-the-office-deployment-tool.aspx
* More information on the Office Deployment Tool is available here:
=> https://technet.microsoft.com/en-us/library/jj219422.aspx : Office Deployment Tool for Click-to-Run
=> https://www.microsoft.com/en-us/download/details.aspx?id=36778: Office Deployment Tool for Click-to-Run (download link)
=> https://support.microsoft.com/kb/2842297/en-us: Product IDs that are supported by the Office Deployment Tool for Click-to-Run
That being said, here is a hands on example of the steps to install Office click to run via the Office Deployment Tool.
Please follow the outlined order.
1. Download the Office Deployment Tool from the above link.
- The resulting file will be an executable archive:
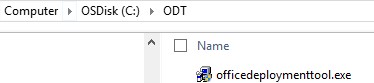
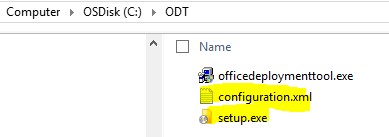
- Once you extract it (by simply double clicking on it), it will contain 1 setup and 1 configuration file.
2. You then need to modify the configuration file “configuration.xml” .
- Open the file in Notepad
- Here is how the default looks like and the pieces that need or can be amended:
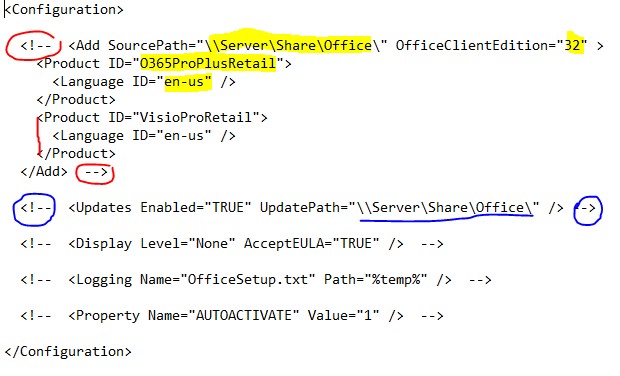
-> The comment markers <!-- and --> (highlighted in Red) need to be removed.
-> The value for SourcePath need to be replaced by a valid path on your machine.
Note: This is the target path for the downloaded files.
The simplest way would be to use the same path where you have placed the Office Deployment Tool.
For example in my case, I saved the Office Deployment Tool in C:/ODT, therefore I will replace \\Server\Share\Office\ with C:\ODT\.
The above are the ‘must do’ edits.
Now, the optional elements are:
-> Bitness of Office: by default it is 32, you may switch it to 64 if you wish. Note: The recommended default is 32 bit.
-> Product ID:
- you should enter the product you need to install or for which you have a bought a license
- you can find a list with available products here:
https://support.microsoft.com/kb/2842297/en-us : Product IDs that are supported by the Office Deployment Tool for Click-to-Run
-> Language:
- by default we have English, in case you want another language, please replace accordingly
- a list of language codes is available here:
https://msdn.microsoft.com/en-us/library/ms533052(VS.85).aspx : Language Codes
-> Additional products:
- By default the configuration file references Office 365 Professional Plus Retail and Visio Professional Retail
- You may remove the Visio set if you only wish to download one package, and replace the Office 365 Professional Plus with the needed product (if it is another product)
-> In case you need to configure other aspects of the installation you may also remove the <!-- and --> for the other settings.
- A recommendation in this respect, in order to ensure that product updates are downloaded and installed automatically is to edit also the part highlighted in blue above
- The comment markers <!-- and --> (highlighted in Blue) need to be removed
- The path \\Server\Share\Office\ should be replaced with the path from which Office is actually downloaded, as you will see in what follows: https://officecdn.microsoft.com/pr/39168D7E-077B-48E7-872C-B232C3E72675
To summarize, here is how a basic configuration should look like:
<Configuration> <Add SourcePath="C:\ODT" OfficeClientEdition="32"> <Product ID="O365ProPlusRetail"> <Language ID="it-it"/> </Product> </Add>
<Updates Enabled="TRUE" UpdatePath="https://officecdn.microsoft.com/pr/39168D7E-077B-48E7-872C-B232C3E72675"/> <!-- <Display Level="None" AcceptEULA="TRUE" /> --> <!-- <Logging Name="OfficeSetup.txt" Path="%temp%" /> --> <!-- <Property Name="AUTOACTIVATE" Value="1" /> -->
</Configuration> |
A full description of available customizations in the configuration.xml is available here.
After modifying and saving the configuration.xml, we need to run a couple of commands in a CMD (Run as Administrator):
3. The first is for downloading the setup files on the local machine.
- The syntax looks like this:
C:\PATH to setup>setup.exe /download "Path to configuration file\configuration.xml"
Therefore, using the cd command you need to move into the folder where you have stored the deployment tool, then input the above command.
In my case, I stored the setup and the configuration file in C:/ODT as seen above.
Therefore the command will look like this:

If all is well with the connection to the Office CDN servers, it should start downloading:
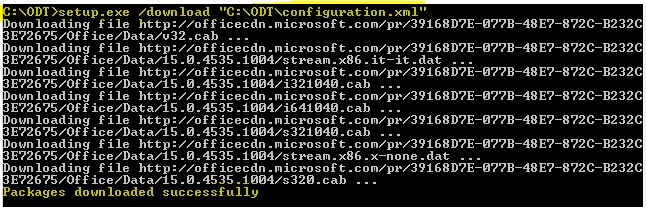
And you will have a confirmation at the end that the packages have been downloaded successfully.
If you then check in the folder where you have stored the setup.exe and the configuration file, you will see that a new folder has been created, containing the necessary components for the installation.
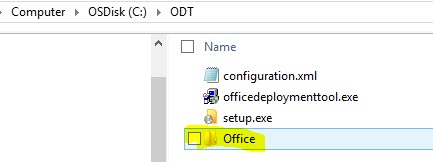
The new folder structure won’t contain a setup executable file to run. The installation has to be performed through the deployment tool as well, with a very similar command as the one for download.
4. In order to install, we need to simply replace the parameter of the above command, from /download to /configure:
- The syntax will look like this:
C:\<PATH to setup>setup.exe /configure "<Path to configuration file>\configuration.xml"
- In my example, this is how it will look like:

- After running this command, the installation dialog should come up and Office will start installing:
 (in my case I was installing an Italian version hence the progress bar is in Italian)
- When the installation completed, you will also have the confirmation in the command prompt:

5. On the Office interface, you will then be prompted to activate the product either with a live account (1) or with a product key (2) .

Enjoy your new Office!