Mailing Systems in CRM 2011 Demystified - Part 2
 In the first article of this series, titled, Mailing Systems in CRM 2011 Demystified - Part 1, Aishwarya Ramachandran explains how to set up the Outlook Client in CRM 2011. In this article, she explains how to set up CRM Online with Exchange Online and Email Router.
Configuring CRM online + Exchange online + Email Router
Here are some documents available on MSDN that would help throughout the setting up of the email router.
- Microsoft Dynamics CRM 2011 for E-mail Router Installing Guide for use with Microsoft Dynamics CRM Online
- How to configure the Microsoft Dynamics CRM on-premises and Microsoft Dynamics CRM Online E-mail Router in different deployment scenarios
The Microsoft Dynamics CRM E-mail Router is a software component that creates an interface between Microsoft Dynamics CRM Online and
- Microsoft Exchange Server 2003
- Microsoft Exchange Server 2007
- Microsoft Exchange Server 2010
- Microsoft Exchange Online
- SMTP, or a
- POP3-compliant e-mail server.
After the E-mail Router is installed, it transfers e-mail messages to the Microsoft Dynamics CRM system, and it sends outgoing e-mail messages that users created in the Microsoft Dynamics CRM system.
If your organization uses e-mail queues, you must use the E-mail Router. Queues are not supported by using Microsoft Dynamics CRM for Outlook.
Step: 1
Installing the email router for CRM 2011
You can download the email router from this link here : Microsoft Dynamics CRM 2011 E-mail Router
This follows the normal pattern of installation and there would be a window like the one below that requests for confirmation on all the components that should be installed.
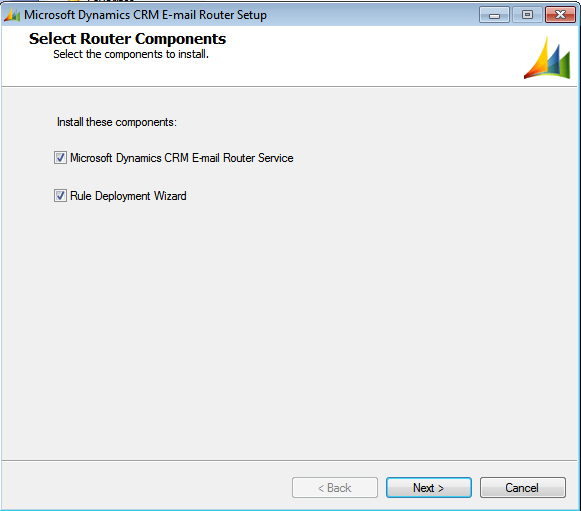
Fig: 1 – Select the components when installing E-mail Router
Once the installation is complete a folder called “Microsoft Dynamics CRM 2011 E-mail Router” gets installed in your system. This folder contains:-
- Microsoft Dynamics E-mail Router Configuration Manager
- Rule Deployment Wizard
After you install the E-mail Router, you must run the E-mail Router Configuration Manager, an application that is installed during Microsoft Dynamics CRM E-mail Router Setup. You can use the E-mail Router Configuration Manager to configure the following:
- One or more incoming profiles : An incoming profile contains the information about the e-mail systems that will be used to process incoming e-mail messages.
- One or more outgoing profiles : An outgoing profile contains the information about the e-mail systems that will be used to process outgoing e-mail messages.
- One or more deployments : The Deployments area contains information about the Microsoft Dynamics CRM deployment and maps to an incoming and outgoing profile.
- Users, queues, and forward mailboxes : This area contains information about each user that will use the E-mail Router for e-mail tracking. You can also configure e-mail routing for queues and define a forward mailbox.
The Rule Deployment Wizard is used to configure the forward mailbox, which would be explained in the next part of this blog.
Step 2:
Ensure that the user is configured to utilize ‘E-mail Router’
To configure you should navigate to:- Settings >> Administration >> Users >> *Open the user’s record’ >> Scroll to the middle and look for “Email access type – Incoming”

Fig: 2 - A section of a user record in CRM online
The email address given in the user record must be approved by the CRM Administrator.
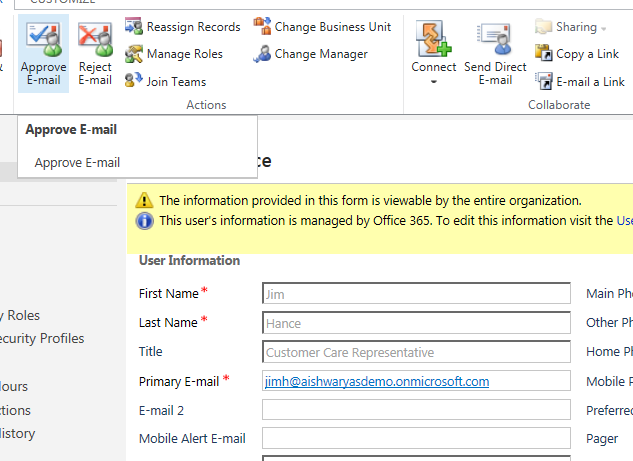
Fig: 3 - Approving a user’s email ID from within the users record
Step 3:
Open the E-mail router Configuration Wizard and configure Outgoing Profile for Exchange online
To configure an Outgoing profile for Exchange Online:
1. Start the E-mail Router Configuration Manager by pointing to Start and then click on All Programs, click on Microsoft Dynamics CRM 2011 E-mail Router, click on Microsoft Dynamics CRM E-mail Router Configuration
2. Click Configuration Profiles and then click New
3. In the E-mail Router Configuration Profile dialog box, type a profile name. For example, type OutgoingExchangeOnlineE-mail
4. For Direction, select Outgoing
5. For E-mail Server Type, select Exchange Online. The value for Protocol automatically changes to Exchange Web Services and the value for Authentication Type automatically changes to Clear Text.
Important: Clear Text is secure because SSL is required when Exchange Online is the e-mail server.
6. In the Server field, enter the complete URL for the outgoing e-mail server. Use the Exchange Web Services (EWS) URL format (EWS/exchange.asmx), as shown in the following example:
https://podxxxxx.outlook.com/EWS/Exchange.asmx
You can find the value of ‘xxxx’ in the URL when you go to the ‘Outlook’ tab of any user in O365.

Fig: 4 - CRM System Users Outlook URL
7. Go ahead and create a profile like the one I have created in my environment
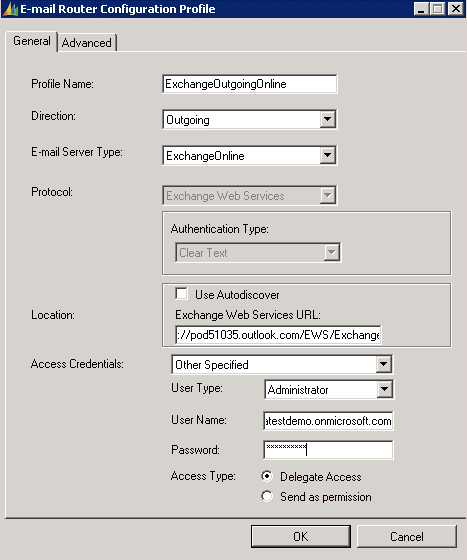
Fig: 5 - Creating an Outgoing Profile
Tip:
Instead of typing a URL, you can select the Use Autodiscover option to use the Autodiscover service as the way to obtain the Exchange Web Services URL.
Note: If you select Administrator as the user type, you must select either Delegate Access or Send As permission as the access type. Delegate Access causes e-mail to be sent as "Send on behalf of" messages. Send As permission causes e-mail to be sent as "Send As" messages.
Critical: The credentials specified in the outgoing profile must have "PublishingEditor" permissions (Delegate Access) or Send As permissions on the Exchange Online mailboxes that need to be accessed. Exchange Online administrators and users do not have this by default. To add delegate permissions, Full Access
permissions must be granted to the user in the Outgoing Profile. To add Send As permissions, Send As permissions must be granted to the user in the Outgoing Profile. These permissions must be added via Powershell.
To Connect Windows Powershell to the Exchange Online Service
To give an Administrator Full Access Permissions to a Mailbox
To Give a User Send as Permissions
9. Click on Ok
10. Within the E-mail Router Configuration Manager, click on Publish
Step 4:
Open the E-mail router Configuration Wizard and configure Incoming Profile for Exchange online
To configure an Incoming Profile with Exchange Online:
1. Start the E-mail Router Configuration Manager by clicking on Start and then click on All Programs, click on Microsoft Dynamics CRM 2011 E-mail Router, click on Microsoft Dynamics CRM E-mail Router Configuration.
2. Click Configuration Profiles and then click New
3. In the E-mail Router Configuration Profile dialog box, type a profile name. For example, type Incoming E-mail
4. For Direction, select Incoming
5. For E-mail Server Type, select Exchange Online. The value for Protocol automatically changes to Exchange Web Services and the value for Authentication Type automatically changes to Clear Text.
Important: Clear Text is secure because SSL is required when Exchange Online is the e-mail server.
6. In the Server field, enter the complete URL for the incoming e-mail server. Use the Exchange Web Services (EWS) URL format (EWS/exchange.asmx), as shown in the following example:
https://podxxxxx.outlook.com/EWS/Exchange.asmx
You can find the value of ‘xxxx’ in the URL when you go to the ‘Outlook’ tab of this user in O365.

Fig: 6 - CRM System Users Outlook URL
Tip: Instead of typing a URL, you can select the Use Autodiscover option to use the Autodiscover service as the way to obtain the Exchange Web Services URL.
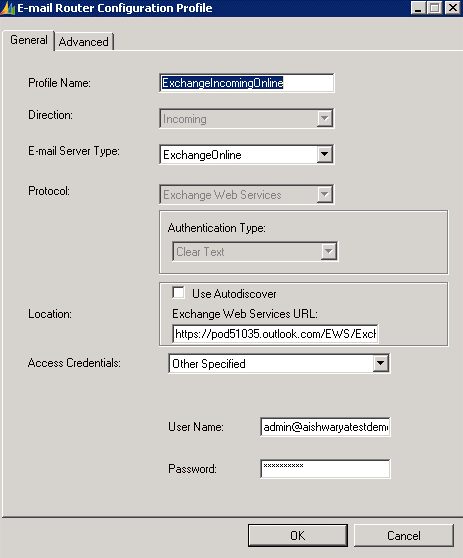
Fig: 7 - Creating an Incoming Profile
Step 5:
Now that the incoming and outgoing profile have been set the next step is to setup the deployment in E-mail configuration wizard
- If you are connecting to Microsoft Dynamics CRM Online and your organization uses Microsoft Office 365, enter:
- https://disco.crm.dynamics.com/<OrganizationName> where Organization Name is a placeholder for the actual ID of your organization.
- This information can be found by navigating to
- Settings >> Customizations >> Developer Resources
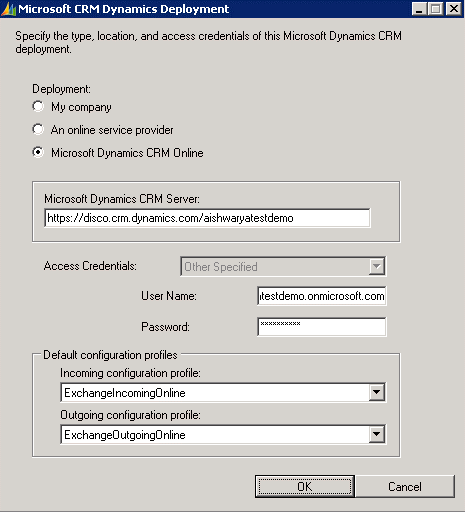
Fig: 8 - Creating a new deployment
Don’t forget to ‘Publish’ your changes prior to moving to Users, Queues and Forward Mailboxes

Fig: 9 - The dialog that would be seen when ‘Publish’ is created in the E-mail Router Configuration Wizard
Step 6:
Once the Outgoing Profile, the Incoming profile and the Deployments has been configured the next step is to
- Load data
- Test access
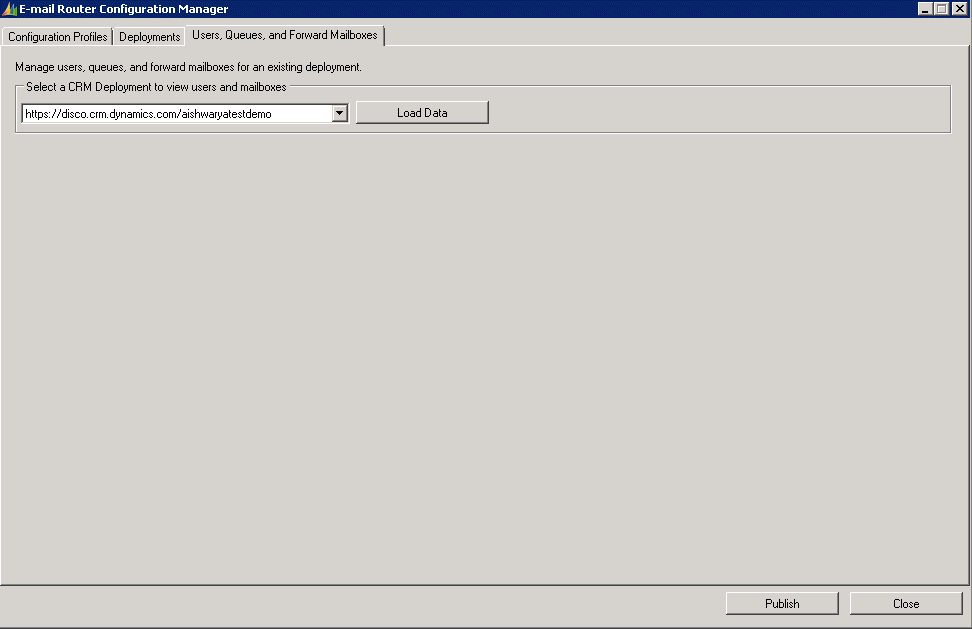
Fig: 10 - The discovery web Service URL get automatically copied at the last section of the wizard
Once data is loaded the users in your CRM system that has been configured to utilize the email router as its mailing system would be seen here.
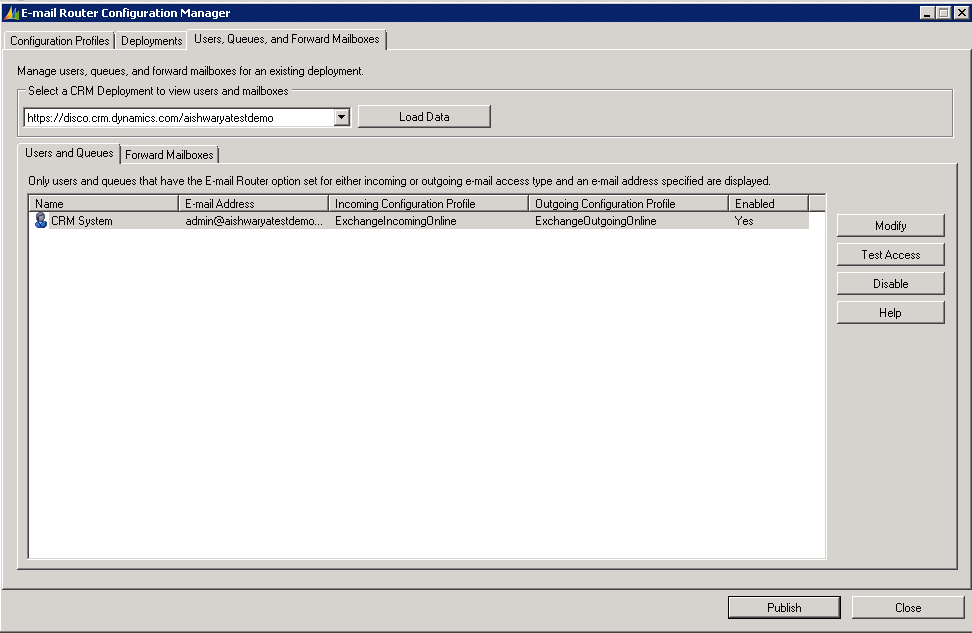
Fig: 11 - All the users that use the email router would load once ‘Load Data’ is selected
Once the Incoming and Outgoing status of all your users succeeds, you should not have any more issues
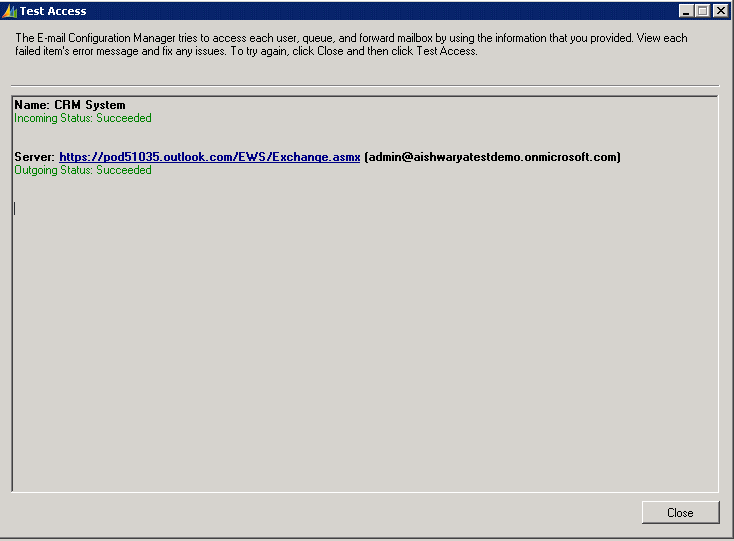
Fig: 12 - The window that would be seen when incoming and outgoing status succeeds
Now keeping the e-mail router open go ahead and try sending an email from your CRM system and you should be able to get it working!!
Hope this helps.
Until next post!