Issue Configuring SQL Mirroring for Lync Server 2013 when SQL is Not Running Under A Service Account
Lync Server 2013 now supports the ability to use SQL mirroring to provide high availability for the Lync Server 2013 back end. You can learn more about SQL mirroring in Lync Server 2013 from the Back End Server High Availability TechNet article. This post talks about an issue I ran into while attempting to setup SQL mirroring in my lab when SQL Server wasn't running under a service account. The solution is slightly different depending on which version of SQL Server you are running.
You use Topology Builder to configure SQL mirroring for Lync Server 2013. When you publish the topology after setting up SQL mirroring, you will see the following dialog box:
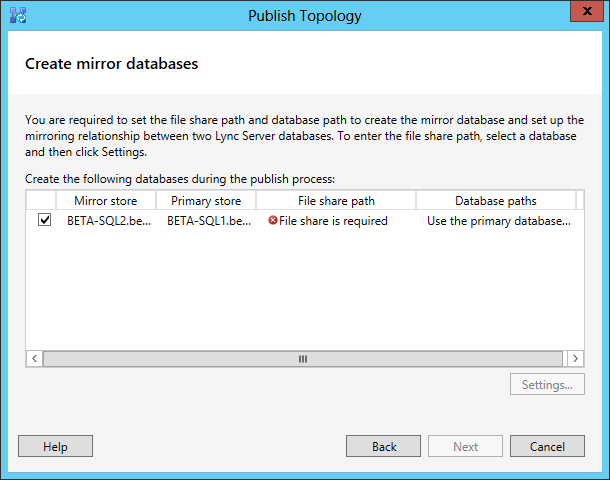
SQL mirroring requires a file share so that it can place backups of the databases there for the mirror server to access. You need to select the mirror store and click on Settings in order to define the file share location:
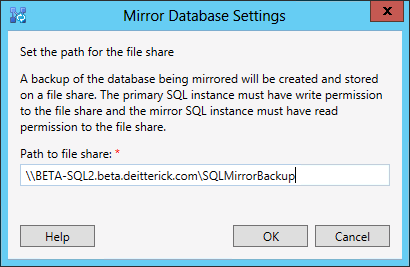
Take particular note of the permissions required.
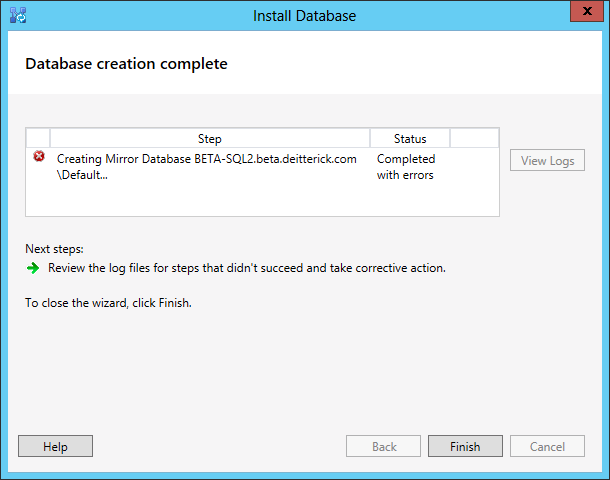
You can see from above that the step failed. Looking at the log, you can see the following:
Error setting up mirroring or witness for database rtcxds: Microsoft.Rtc.Management.Deployment.MirrorDatabaseException: Cannot backup database "rtcxds". Verify that the primary SQL Server instance is available and that the account running the primary SQL Server instance has write access to the specified file share. Exception: Microsoft.SqlServer.Management.Smo.FailedOperationException: Backup failed for Server 'BETA-SQL1.beta.deitterick.com'. ---> Microsoft.SqlServer.Management.Common.ExecutionFailureException: An exception occurred while executing a Transact-SQL statement or batch. ---> System.Data.SqlClient.SqlException: Cannot open backup device '\\BETA-SQL2.beta.deitterick.com\SQLMirrorBackup\DbDataBackup-rtcxds-BETA-SQL1.beta.deitterick.com-[2012_07_29][03_11_33].bak'. Operating system error 5(Access is denied.).
BACKUP DATABASE is terminating abnormally.
at Microsoft.SqlServer.Management.Common.ConnectionManager.ExecuteTSql(ExecuteTSqlAction action, Object execObject, DataSet fillDataSet, Boolean catchException)
at Microsoft.SqlServer.Management.Common.ServerConnection.ExecuteNonQuery(String sqlCommand, ExecutionTypes executionType)
--- End of inner exception stack trace ---
at Microsoft.SqlServer.Management.Common.ServerConnection.ExecuteNonQuery(String sqlCommand, ExecutionTypes executionType)
at Microsoft.SqlServer.Management.Common.ServerConnection.ExecuteNonQuery(StringCollection sqlCommands, ExecutionTypes executionType)
at Microsoft.SqlServer.Management.Smo.ExecutionManager.ExecuteNonQuery(StringCollection queries)
at Microsoft.SqlServer.Management.Smo.BackupRestoreBase.ExecuteSql(Server server, StringCollection queries)
at Microsoft.SqlServer.Management.Smo.Backup.SqlBackup(Server srv)
--- End of inner exception stack trace ---
So we're getting an access denied error when trying to connect to that share. We know from the dialog box above that we need to give out rights to the file share:
The primary SQL instance must have write permission to the file share and the mirror SQL instance must have read permission to the file share.
That makes sense, but in this case we're not using a service account for the SQL instance to run under, so what exactly do we give rights to? This is where the process differs depending on what version of SQL Server you are running.
SQL Server 2008 R2
When installing SQL Server 2008 R2 you have the option to run the SQL Server service under NETWORK SERVICE. The solution in this case is fairly simple. You just need to add NETWORK SERVICE with Read/Write permissions to the file share that you defined:
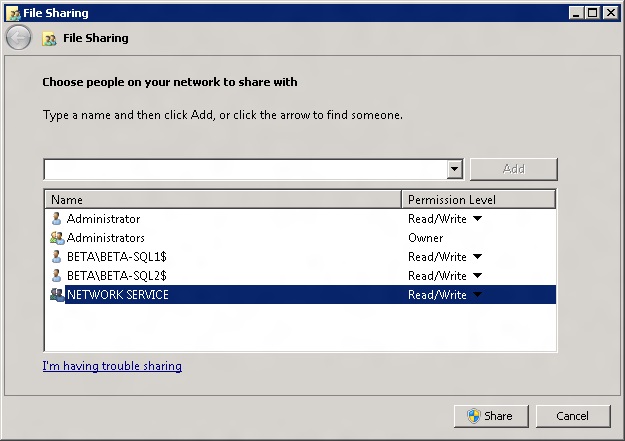
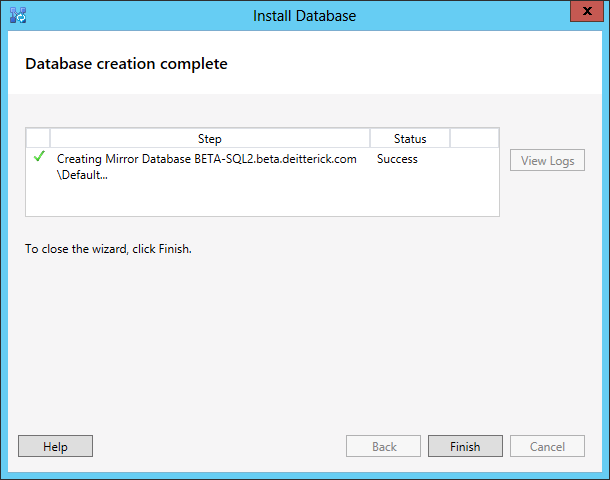
After you add NETWORK SERVICE, you can run Install Database from Topology Builder and the process will complete successfully:
SQL Server 2012
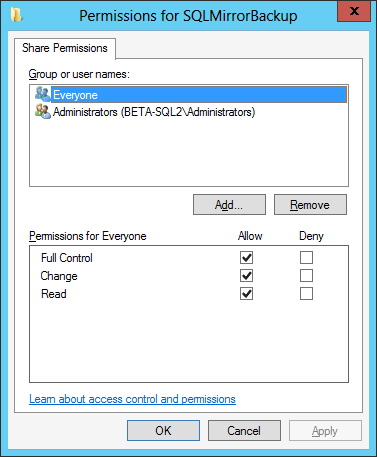
The default account that SQL Server 2012 runs under is slightly different than in previous versions of SQL Server. The installer defaults to using "NT Service\MSSQLSERVER" if you are running the default instance, or "NT Service\MSSQL$InstanceName" if you are using a named instance of SQL. You can read more about the new account types in the Configure Windows Service Accounts and Permissions TechNet article. Checking the Share Permissions for the file share that we created, you can see that Everyone has full access:
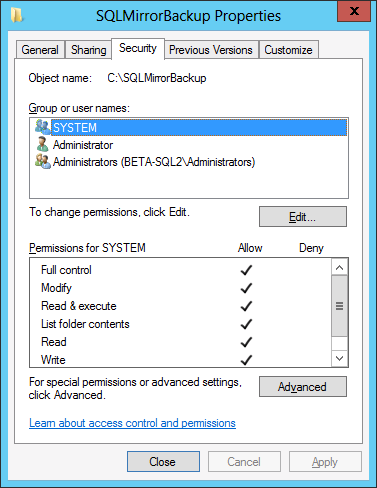
But looking at the file permissions, you can see that only SYSTEM and Administrators have access:
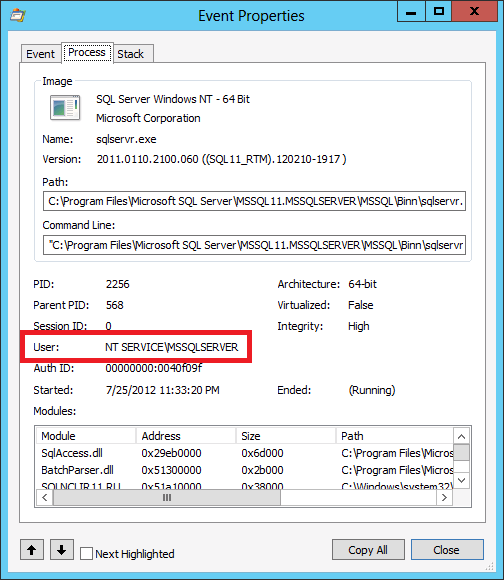
So we need to give rights to the folder we created so that both SQL servers can access it, but since SQL is running under a virtual account, what do we give rights to? First, I wanted to verify that the SQL Server was actually trying to make a connection using the virtual account. Even though I was running Topology Builder and publishing the topology from the Lync Server, the configuration of SQL mirroring happens on both SQL Servers. I took a Process Monitor trace on the primary SQL Server and found the access denied event when it tried to place the SQL database backups in the shared folder:
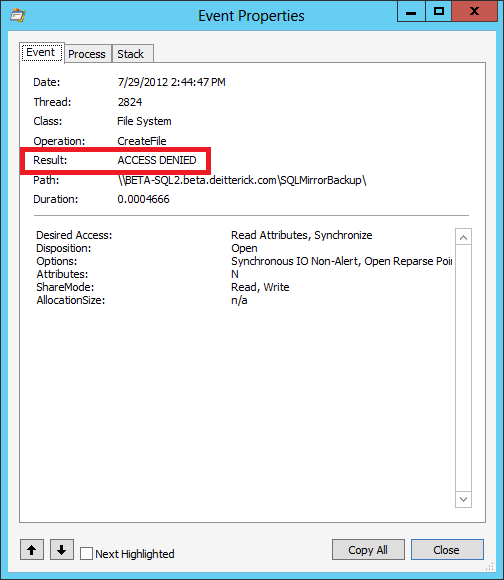
Looking at the Process tab, you can see that the user account was "NT Service\MSSQLSERVER":
Unfortunately, unlike SQL Server 2008 R2, you can't just assign "NT Service\MSSQLSERVER" access to the file share and be finished. However, there is some good information listed in the Configure Windows Service Accounts and Permissions TechNet article. Specifically:
Services that run as virtual accounts access network resources by using the credentials of the computer account in the format <domain_name>\<computer_name>$.
So the SQL Server service will use the computer account when it needs to access network resources. Because of that, there are 3 different ways that you can assign rights, depending on where the file share is located. The first way is to add Everyone Full control to the folder:
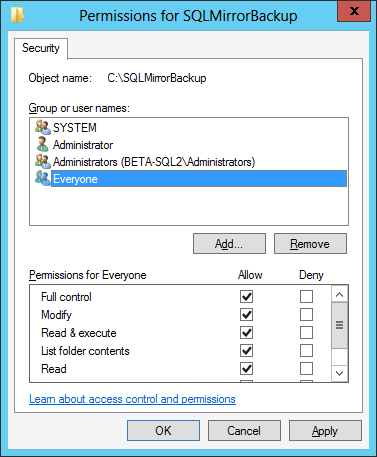
This is the easiest way and will allow both SQL Servers access to the file share. It's also a bit overkill, since it opens up more access than is needed. The second option is to add both computer accounts Full control to the folder:
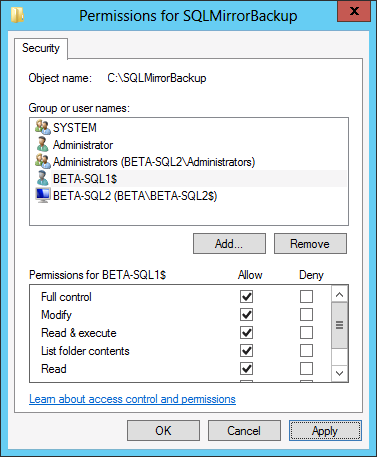
This option only works if the file share is not on one of the SQL Servers. That is because the computer account is only used in this case to access resources that aren't on the local computer. And in this example, that's not true for BETA-SQL2, since the file share is located on that computer. The last option is to add the computer account of the SQL Server that doesn't have the file share on it and the "NT Service\MSSQLSERVER" account of the SQL Server that does have the file share on it:
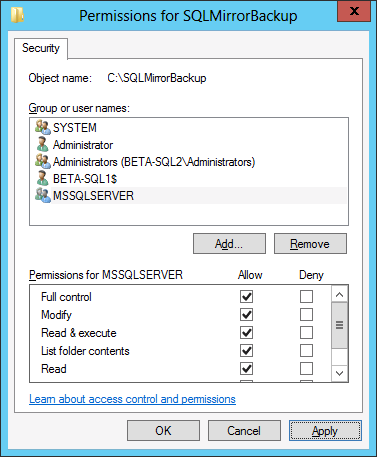
This allows the SQL Server without the file share on it to use the computer account to gain access to the file share and it allows the SQL Server service from the computer that does have the file share on it to have access as well. Depending on which option you choose, after you add the necessary account(s), you can run Install Database from Topology Builder and the process will complete successfully:
So if you are going to be setting up SQL mirroring for Lync Server 2013 and you are not using a service account to run SQL Server, make sure that you give the necessary account(s) the rights that they need to connect to the file share.