How to Configure DHCP Scope Options for Lync Server 2010 Using Infoblox DHCP Appliance
Update 7/10/13 - Added some additional recommendations when configuring the scope options.
Configuring the DHCP scope options for Windows DHCP servers is a simple task. Configuring them for a non-Windows DHCP server is a whole other story. I've run into a couple customers running Infoblox DHCP appliances and getting all of the correct settings for Lync Phones to sign in using PIN authentication can be tricky. A huge thank you to Conlan Barkovic at CALIBRE Systems for working through the steps with me and putting together these steps!
Lync requires custom DHCP options to be configured for the Lync 2010 phones to sign in using PIN authentication. In the steps below the Infoblox appliances are running firmware version 6.01-112715.
Follow the steps below to configure the DHCP options:
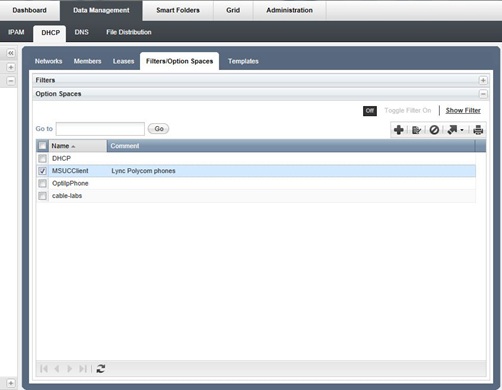
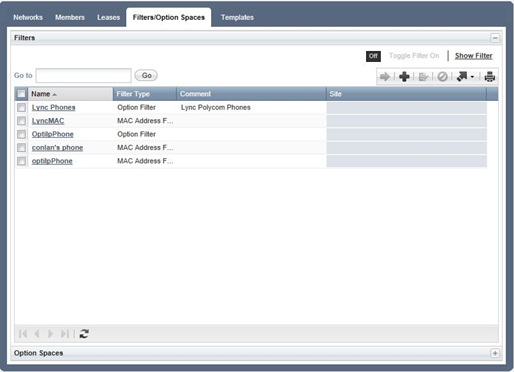
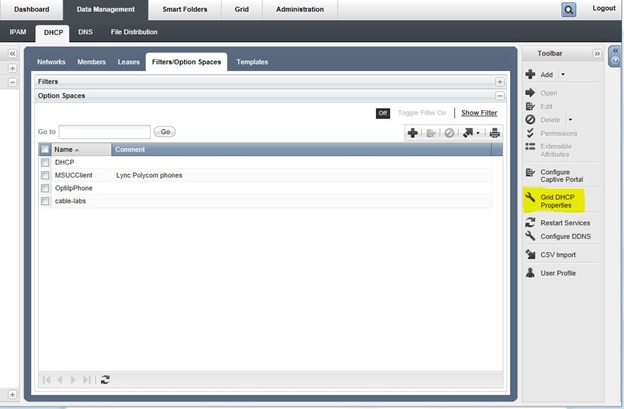
1. Go to the "Data Management" tab and select "DHCP", then select "Filters/Option Spaces". It should look like the image below, if you don’t see the header for Option Spaces, click on the Filters header once and you should then see the Option Spaces section. In the below picture the option has already been configured. You will need to click the add button (+).
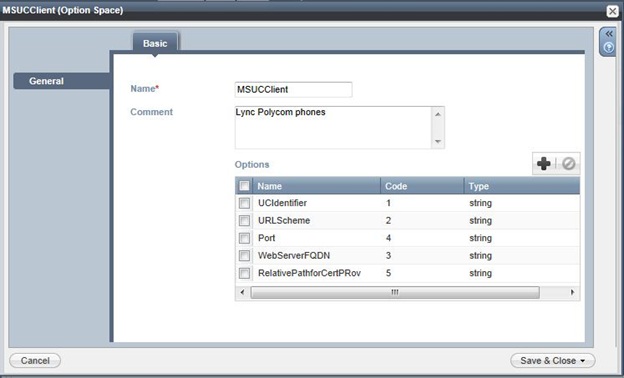
2. Make sure the option name matches identically to the example seen (MSUCClient). The comment can be whatever makes sense to you for management.
3. You will now need to configure the options. The "Code" field corresponds to the sub-option number and the "Type" field refers to the data type entered for the option. The below picture shows you what it should look like after all options are configured.
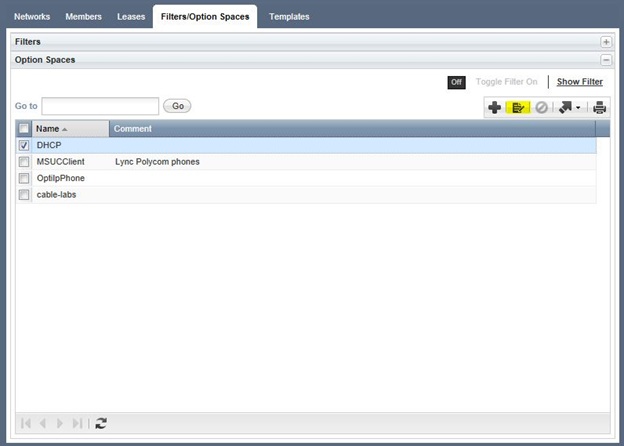
4. Now select the DHCP option space and click the edit button.
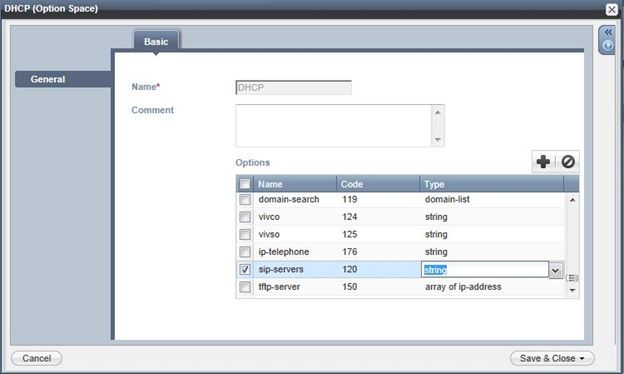
5. Check the list of codes and see if option 120 already exists, if it doesn’t create the option code by clicking on the plus sign. The Name field should be "sip-servers", the code field should be "120", and the Type field should be "string".
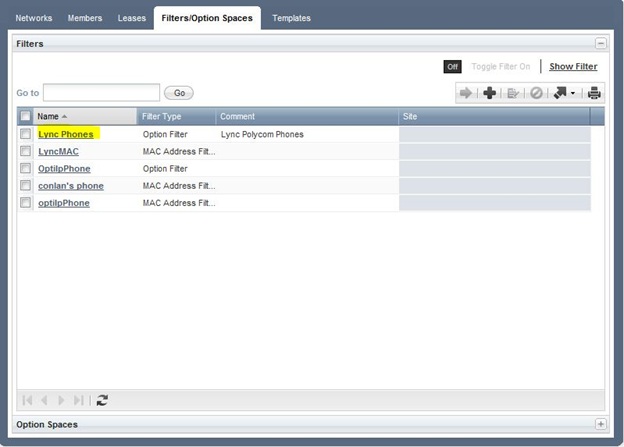
6. You will now need to create the Filter. Click on the "Filter" bar at the top of the page. It should look similar to the below. You might not have any filters already configured.
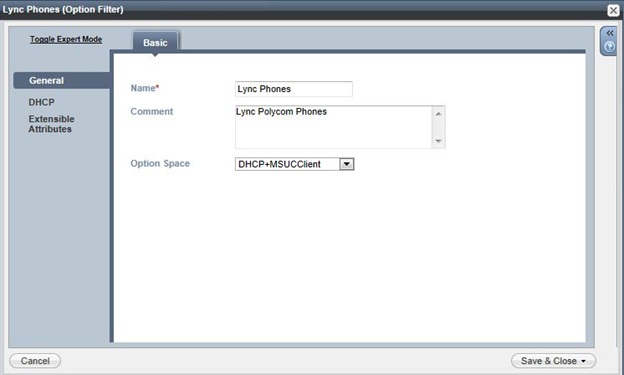
7. Here you will create the "Lync Phones" filter by clicking on the plus sign. If it’s already created, select it and then click on the edit button. You will only work within the general settings. The name is purely for management or recognition of use.
8. Now you will click on the “Lync Phones” Option Filter.
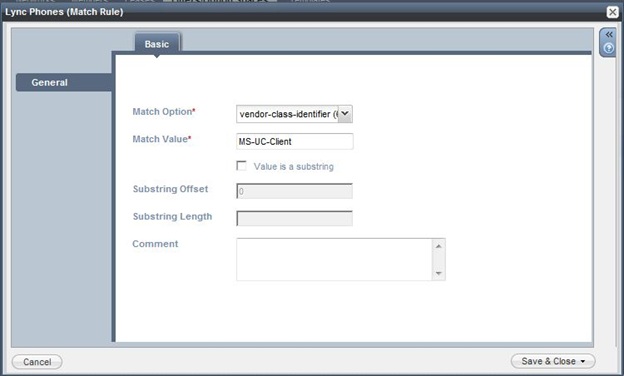
9. Now click on the add button. In the image below you will see it’s already created though.
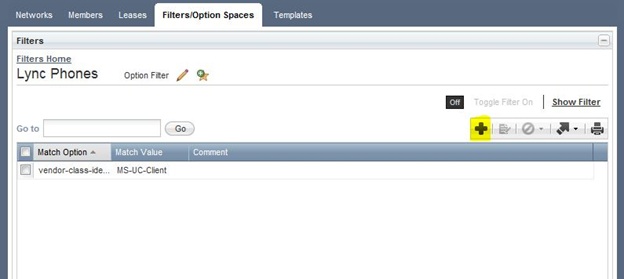
10. Details to be entered, select "vendor-class-identifier (60) string" for the match option from the drop down. Then the Match Value must be "MS-UC-Client", save and close
11. You will now need to modify the Grid DHCP Properties, on the right side of the screen is where you will find the option to select "Grid DHCP Properties", click on it.
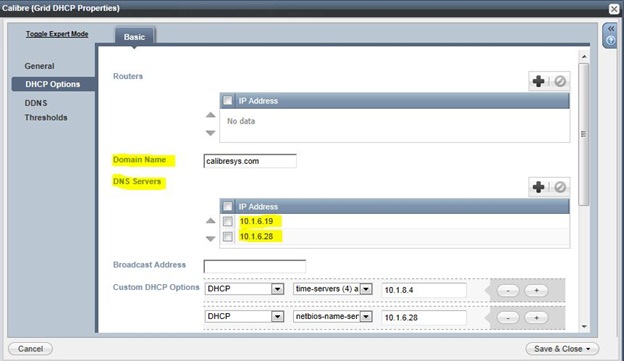
12. Then select DHCP Options on the left

13. Make sure your domain is populated and DNS servers IPs
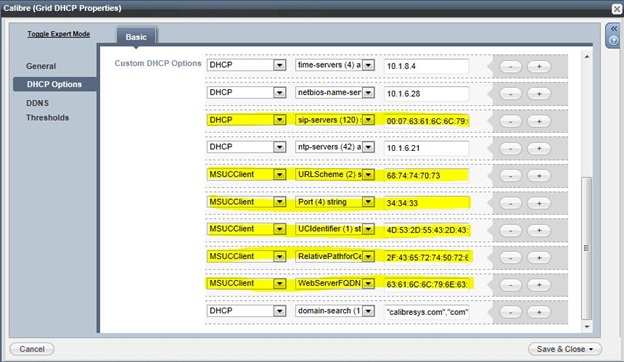
14. Scroll down so you can view all of your DHCP Options. You will want to make sure you have DHCP Options for 120, and 43 -MSUCClient and sub-options. To obtain the string values for these, you will need to use DHCPutil.exe. The link used to provide these directions is https://technet.microsoft.com/en-us/library/gg412828.aspx
15. You’ll use the above information to populate the fields below. Everything must be entered in hex format, for example port would be 34:34:33
If you configured the Option filter, you also need to add that filter to the range under by going to:
Data Management > DHCP > Networks > drill down and select the range with the Lync phones > toggle advanced options > IPv4 filters > add logic filter (select the option filter for the phones)
Note: In this blog post we configured the options at the Grid level. You can also configure the options on a network level, range level, or even in a network template. This way you can control where these DHCP options are applied.
At this point you can restart the grid and test signing in.