VorlonJS - A Journey to DevOps: Project Planning and Management with Visual Studio Team Services
If you have any question about this blog post series or DevOps, feel free to contact me directly on Twitter : https://twitter.com/jcorioland .
This post is part of the series “VorlonJS – A Journey to DevOps”
Share the information with the whole team!
Sharing the information between all the people that work on a same project is really important to help them working together, and the best way to do that is to make them use the same tool.
Visual Studio Team Services (VSTS) provides tools to plan a project, from the user stories creation, to the bugs report or to track the time of each task that contributes to the project. We thought that these systems where reserved to technical development tasks, but it may (should?) be used by all the actors in project. We have chosen VSTS to organize all the work related to implementing DevOps practices on Vorlon.JS. But, because the project is open source, we are using GitHub issues for development tasks and bug tracking.
Getting started with Visual Studio Team Services
If you don’t already have a VSTS account, you can create one from this page. Once you are connected, you can create a new team project. Basically, you have two choices to make:
- What process template to use: Scrum, Agile, CMMI?
- What version control provider you want to use: Team Foundation Version Control or GIT?
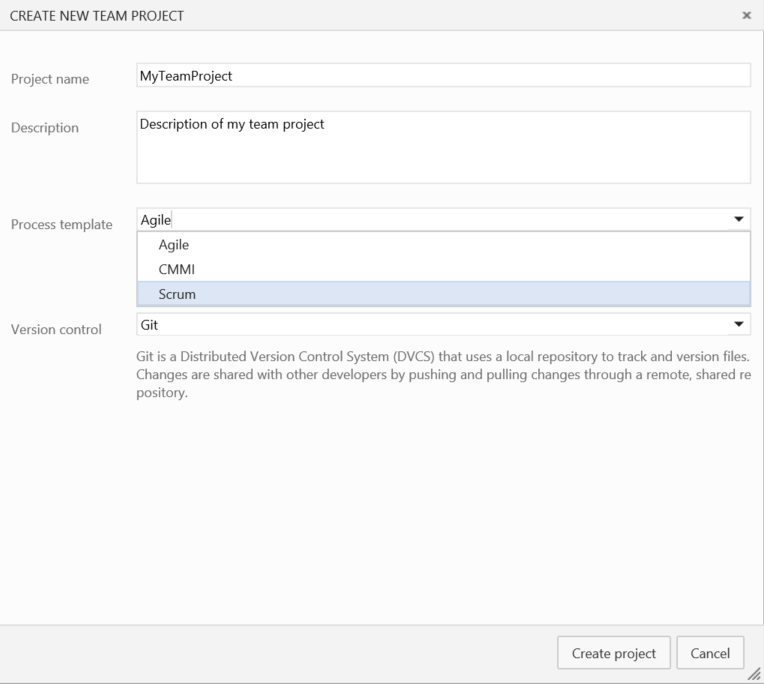
I have chosen the Scrum process template and GIT as version control provider. In fact, the version control is not important here, because we are using GitHub for the source of Vorlon.JS.
Once the project is created, you are redirected on the home page dashboard which allows you to pin tiles with some useful information about the project. For example, you can pin a tile with the result of the last builds that occur or with the number of opened work item or bugs.
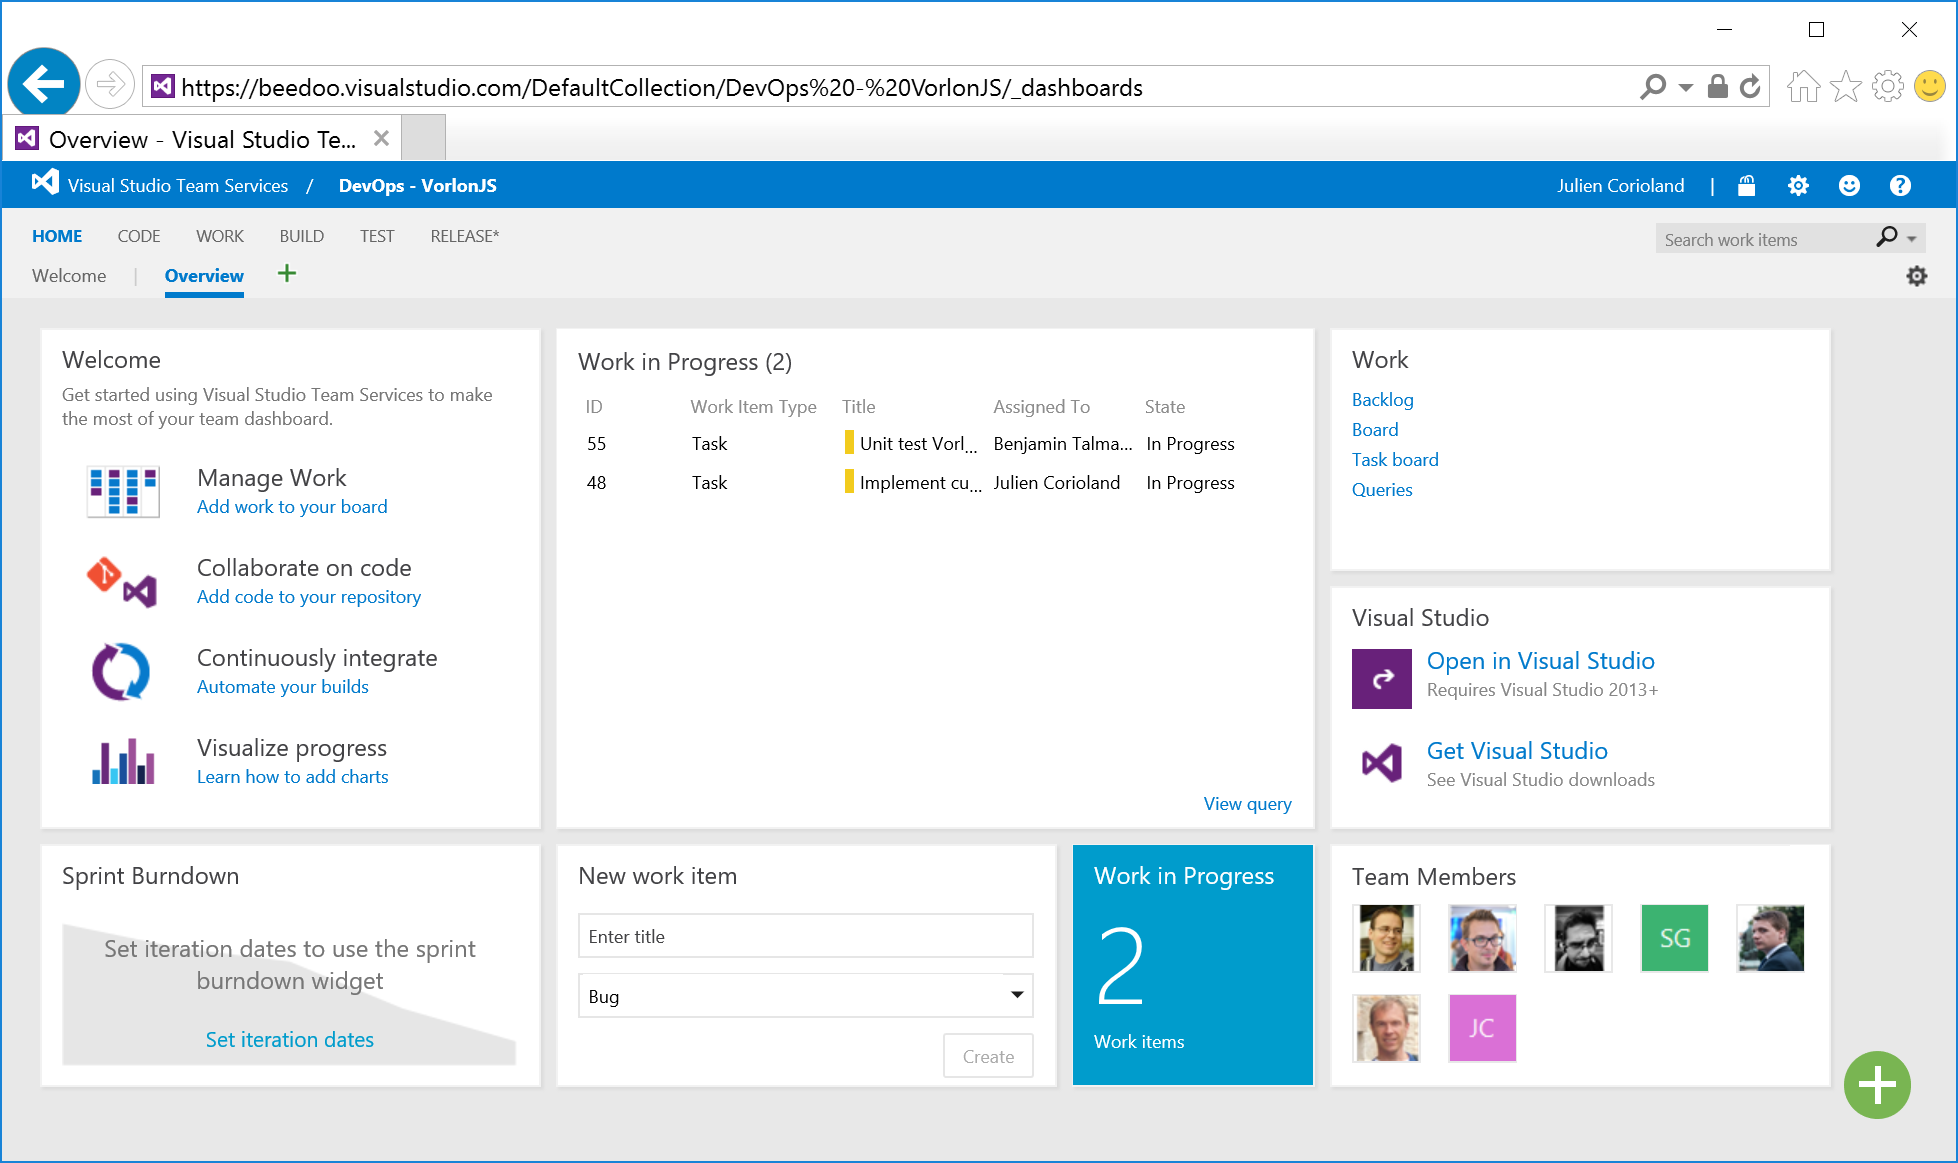
To help you to plan your project and work with your team, Visual Studio Team Services offers a Kanban dashboard that allows to manage user stories, tasks, bugs in a simple way, using drag & drop between columns and more! All the columns are customizable, you can totally tune it to fit with your requirements and rules.
Work with your team
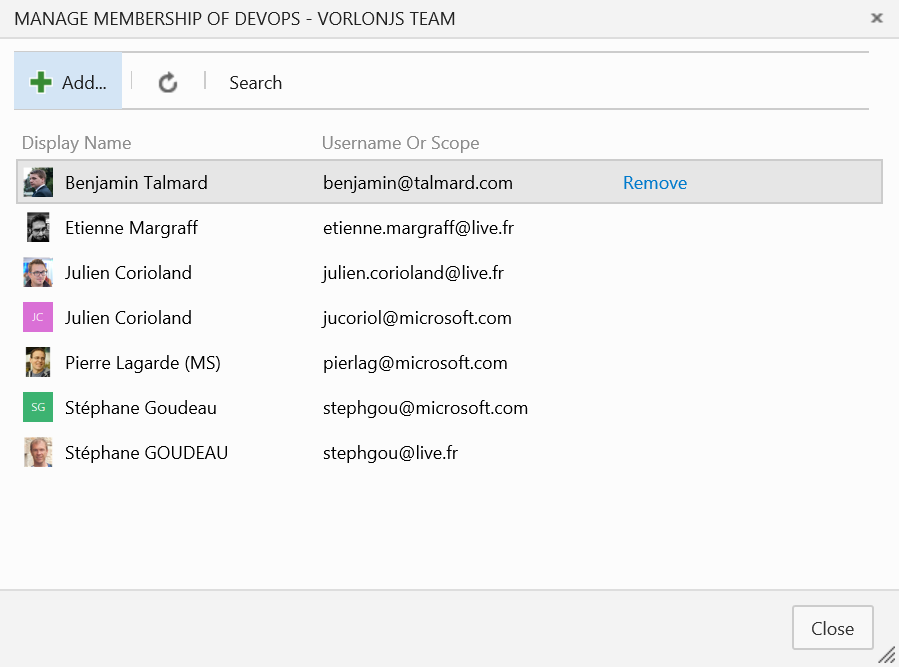
Before starting to create backlog items and sprints, you may want to configure your team. To do that, you just have to click on the Team Members tile on the HOME screen of the team project. A new window will open and you should be able to add new members using their email addresses:
Customizing sprint, work items and team capacity
Once you have defined the team members, you can customize the way you use Visual Studio Team Services to work with sprint, work items and more…
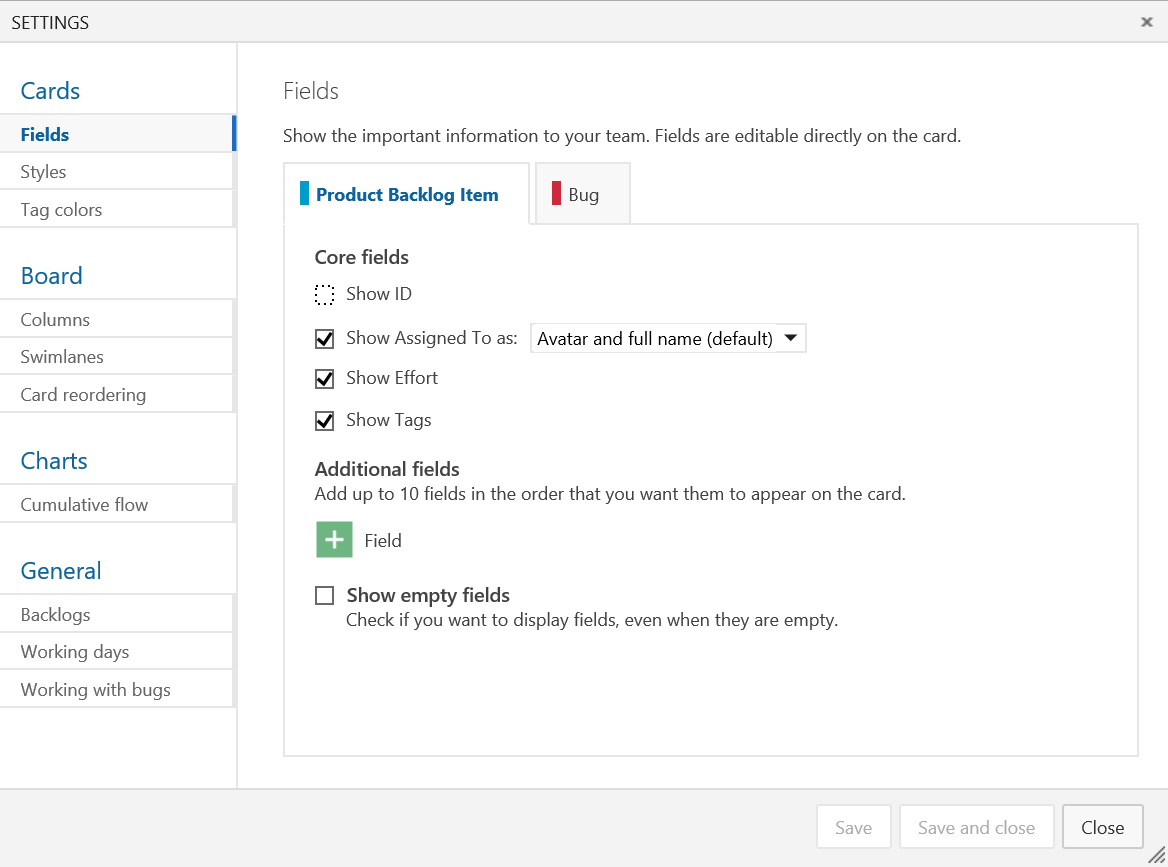
First, you need to go in the WORK section of the dashboard. On the Backlog view, you can click on the  icon. This action will open a new window where you can configure which information should be display on the cards, which columns you want on the dashboard and some other things like the working days of your team:
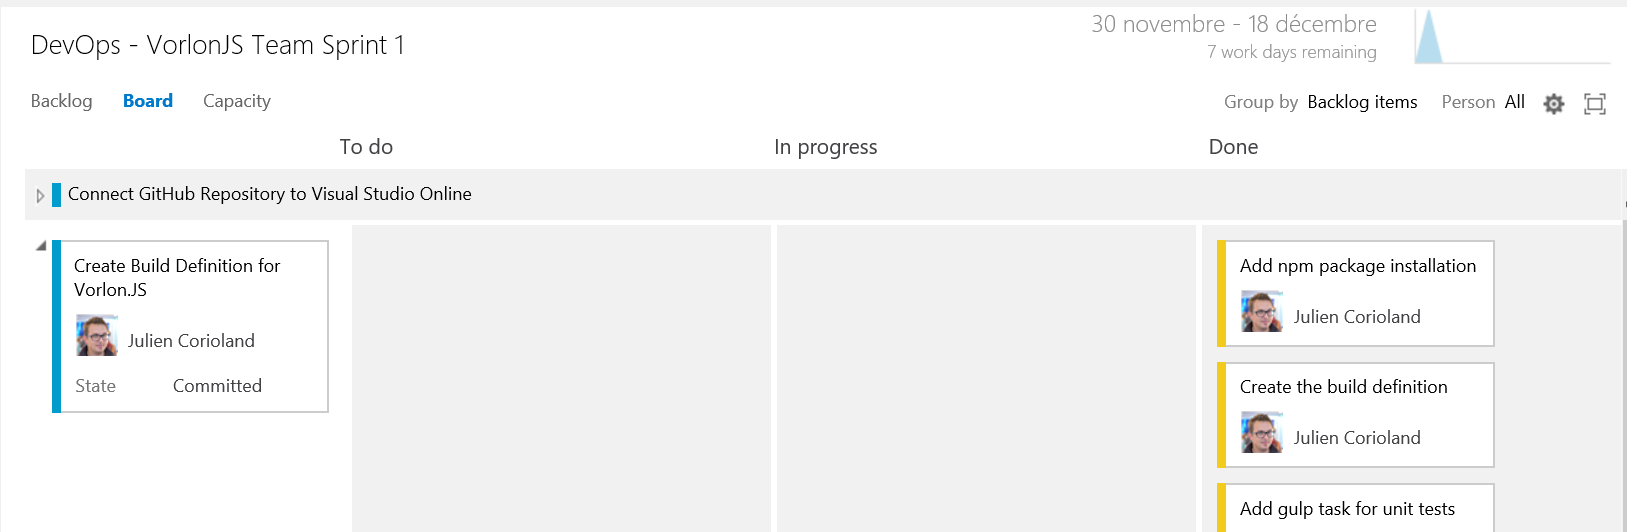
If you click a sprint of the left side, you can now click on a link that allows to configure the dates for this sprint and rename it, if needed:
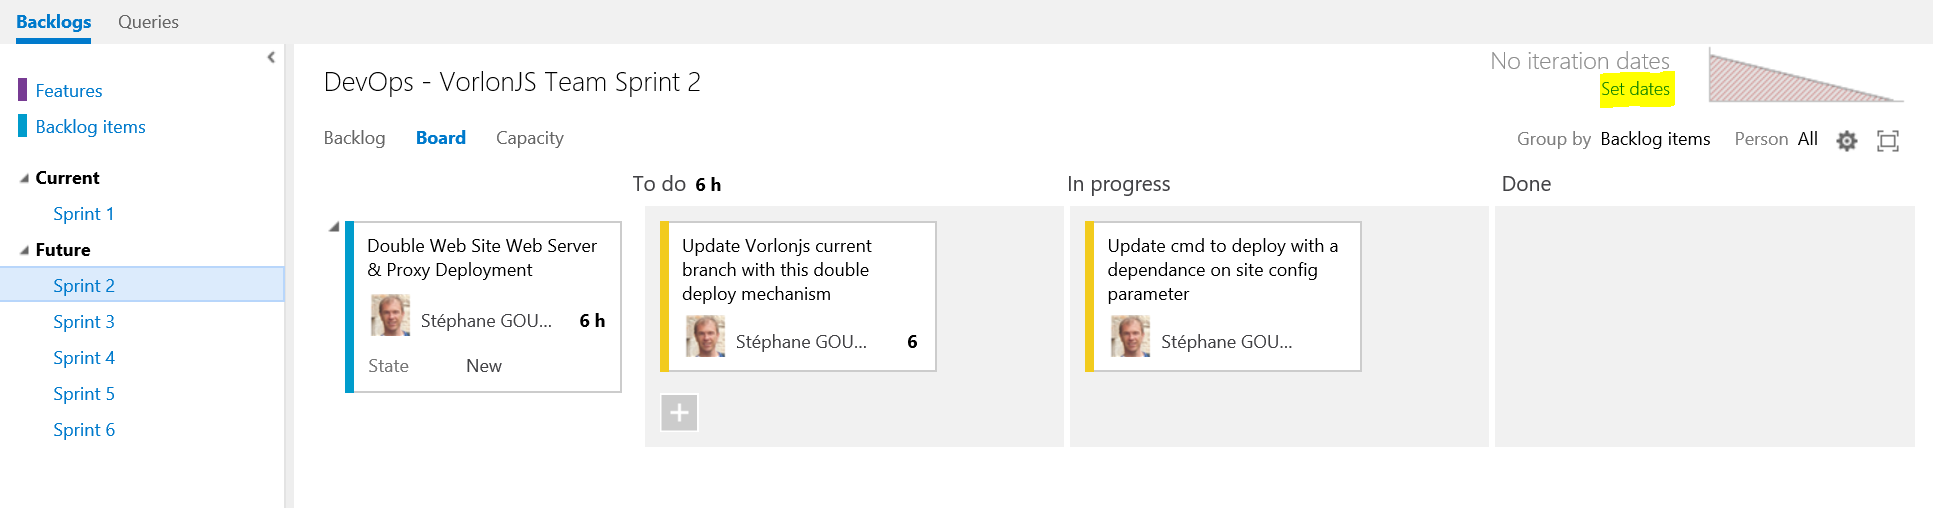
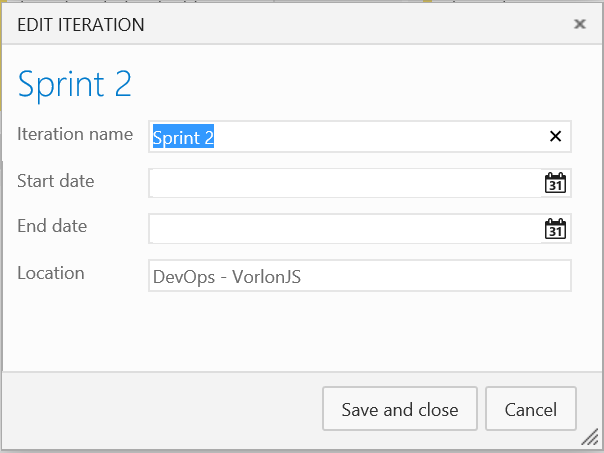
Once done, the date will appear at the top right of each sprint:
The Capacity tab allows to customize the number of hours each team member can work on the project and if they are some days off where they won’t work on the project:
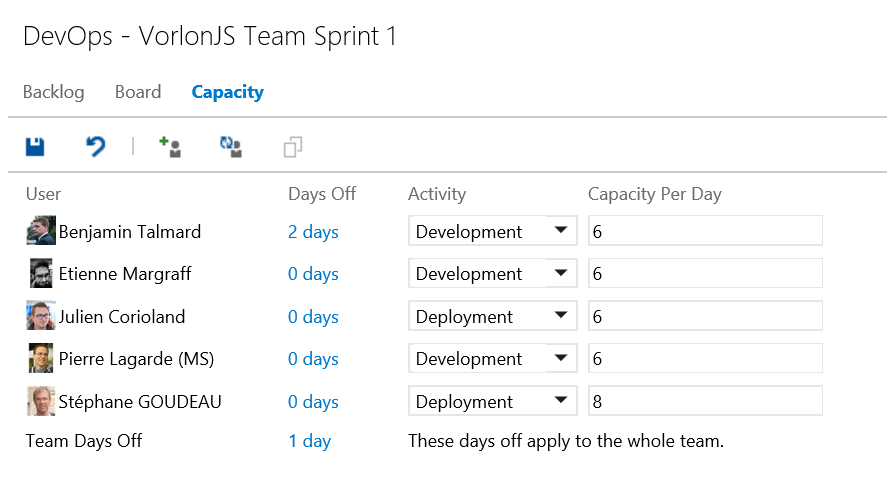
This information will be used to generate burn down graphics and all reports about the project’s planning.
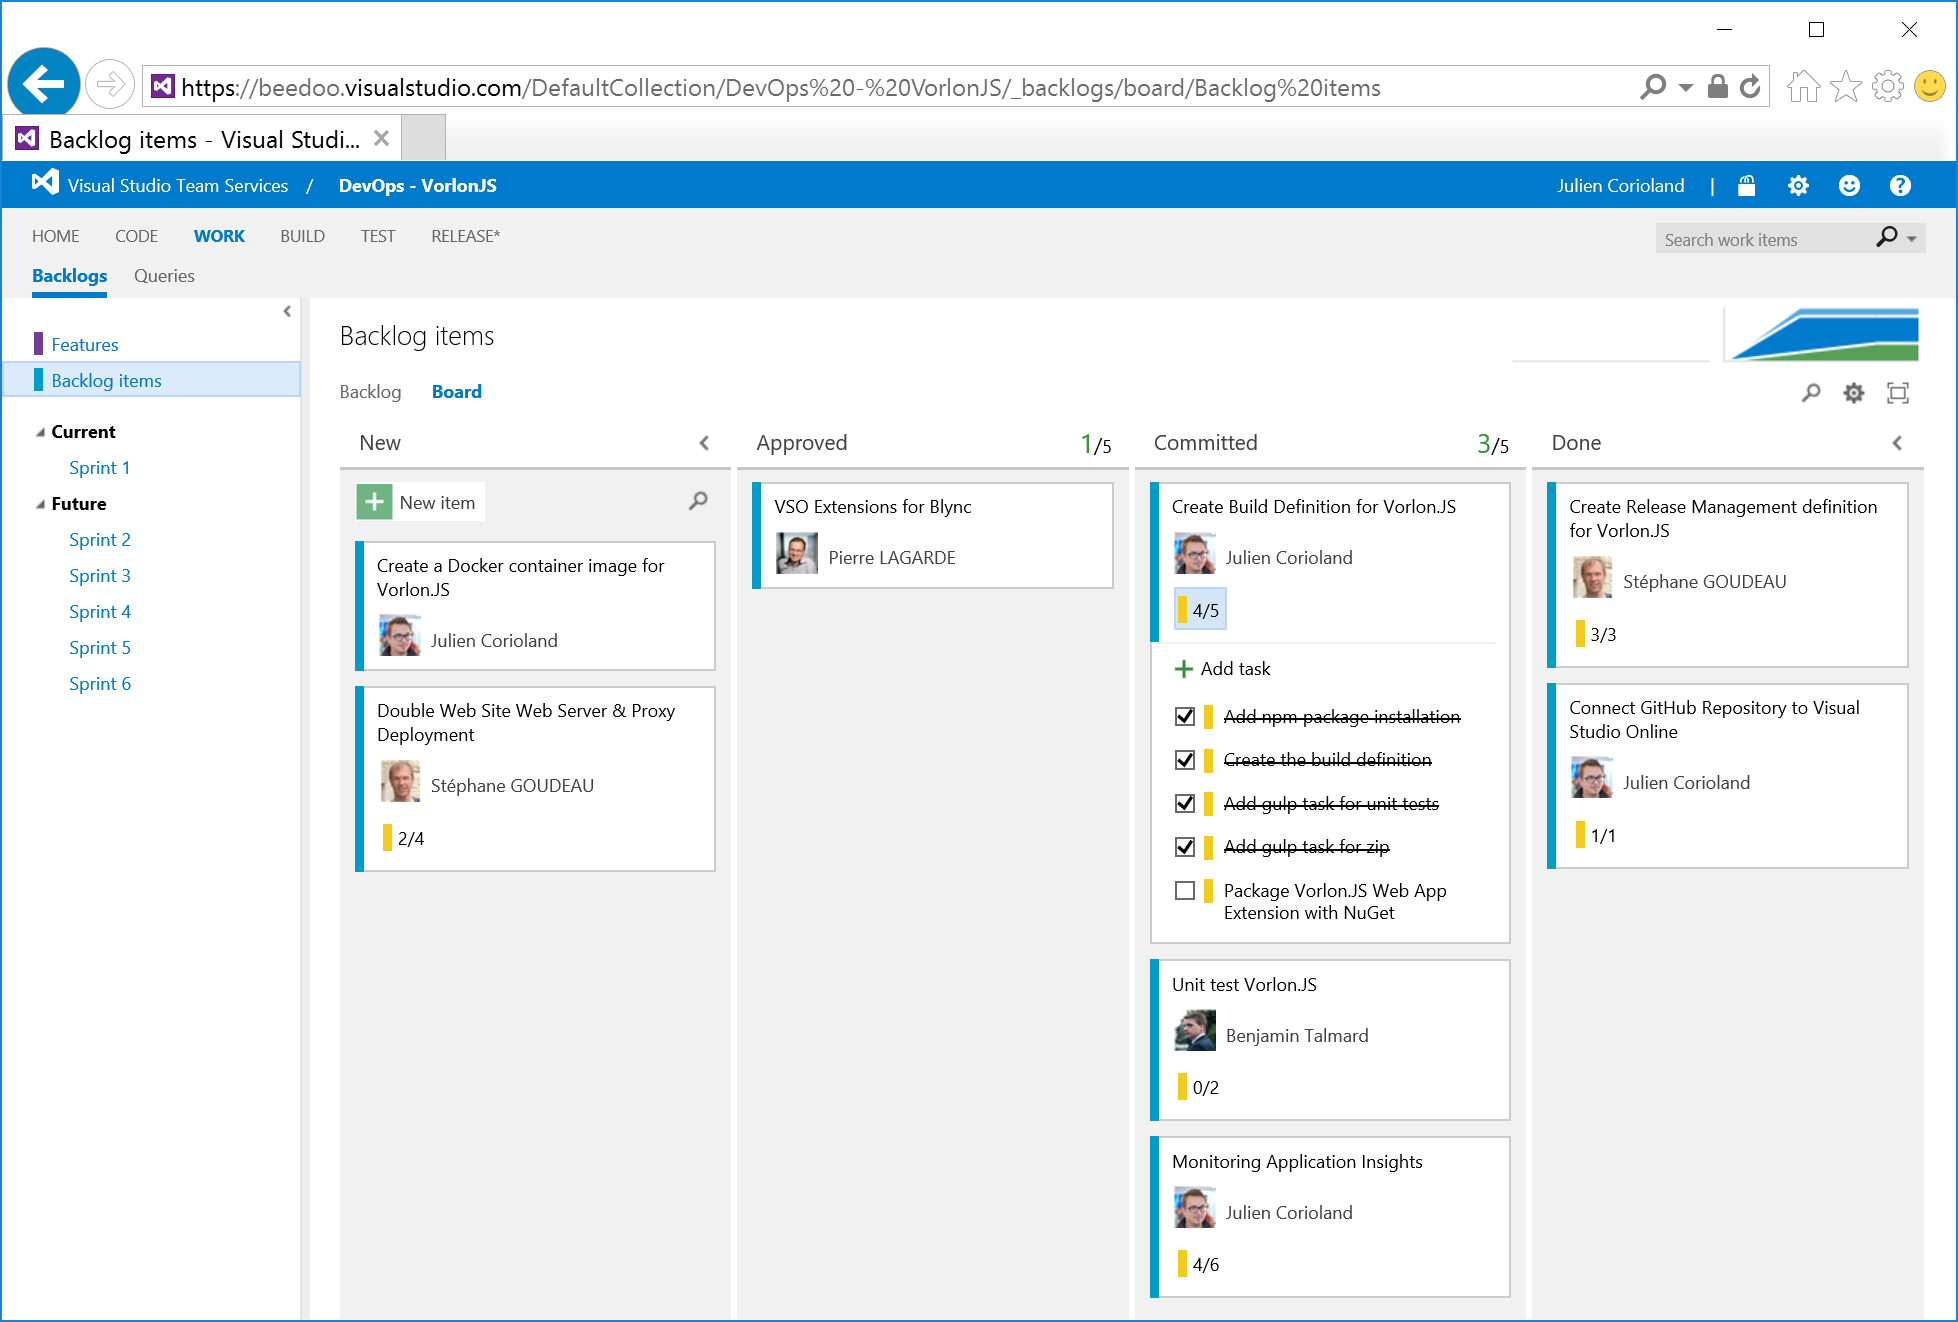
Create work items (user stories, tasks…) and assign them to teammate and sprints
Now that your sprints and team are well configured, you can start to create work items like user stories and tasks and assign them to your team members.
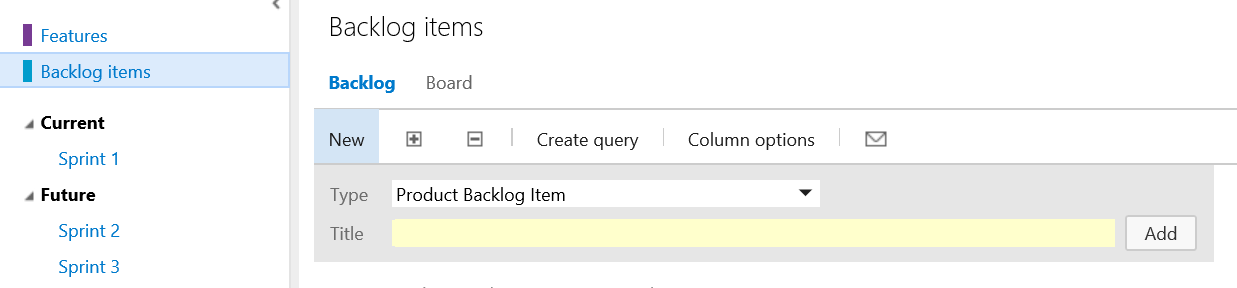
There are several ways to do that using the VSTS portal. The first one is to click “Backlog items” on the left and use the quick creation:
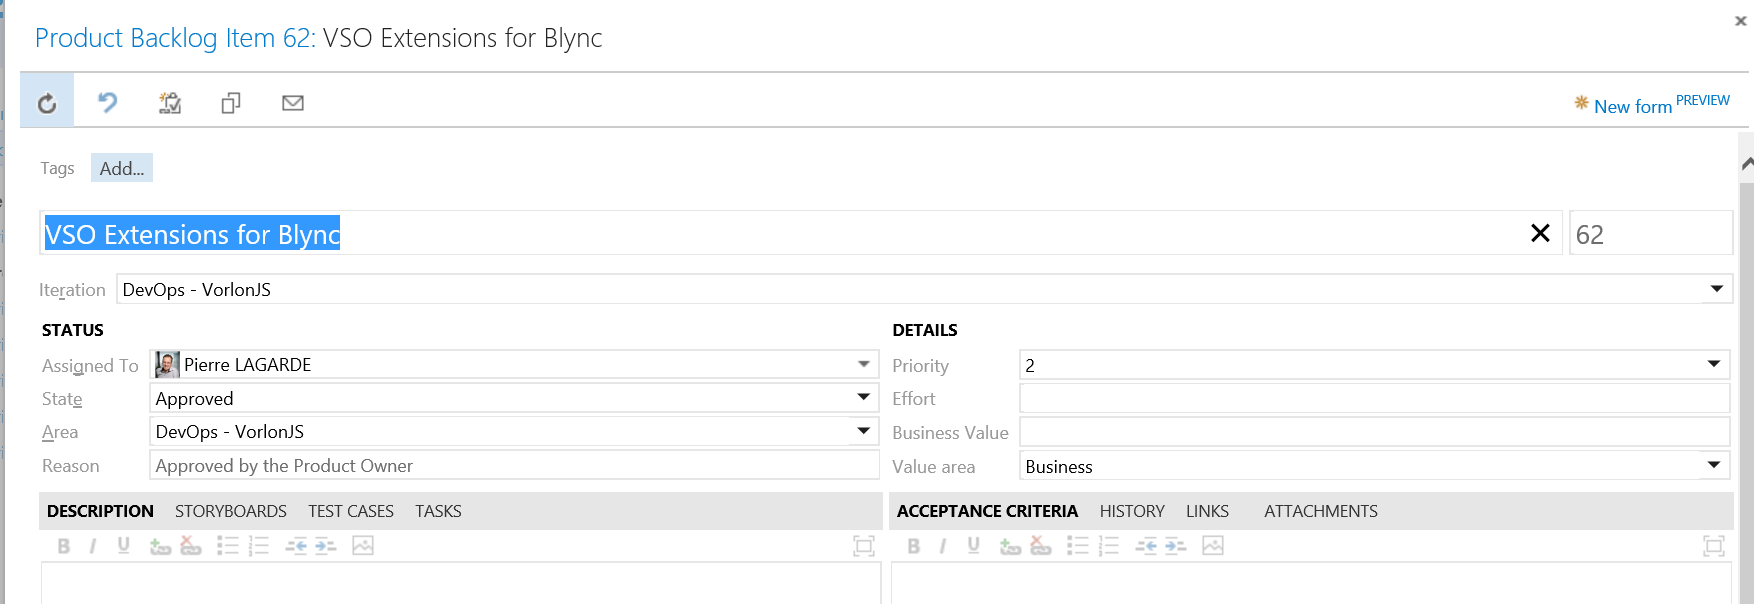
Once added, you can drag & drop items between sprint. Once added, you can double click on a line to open the details and assign the work item to a teammate or fill more information about it:
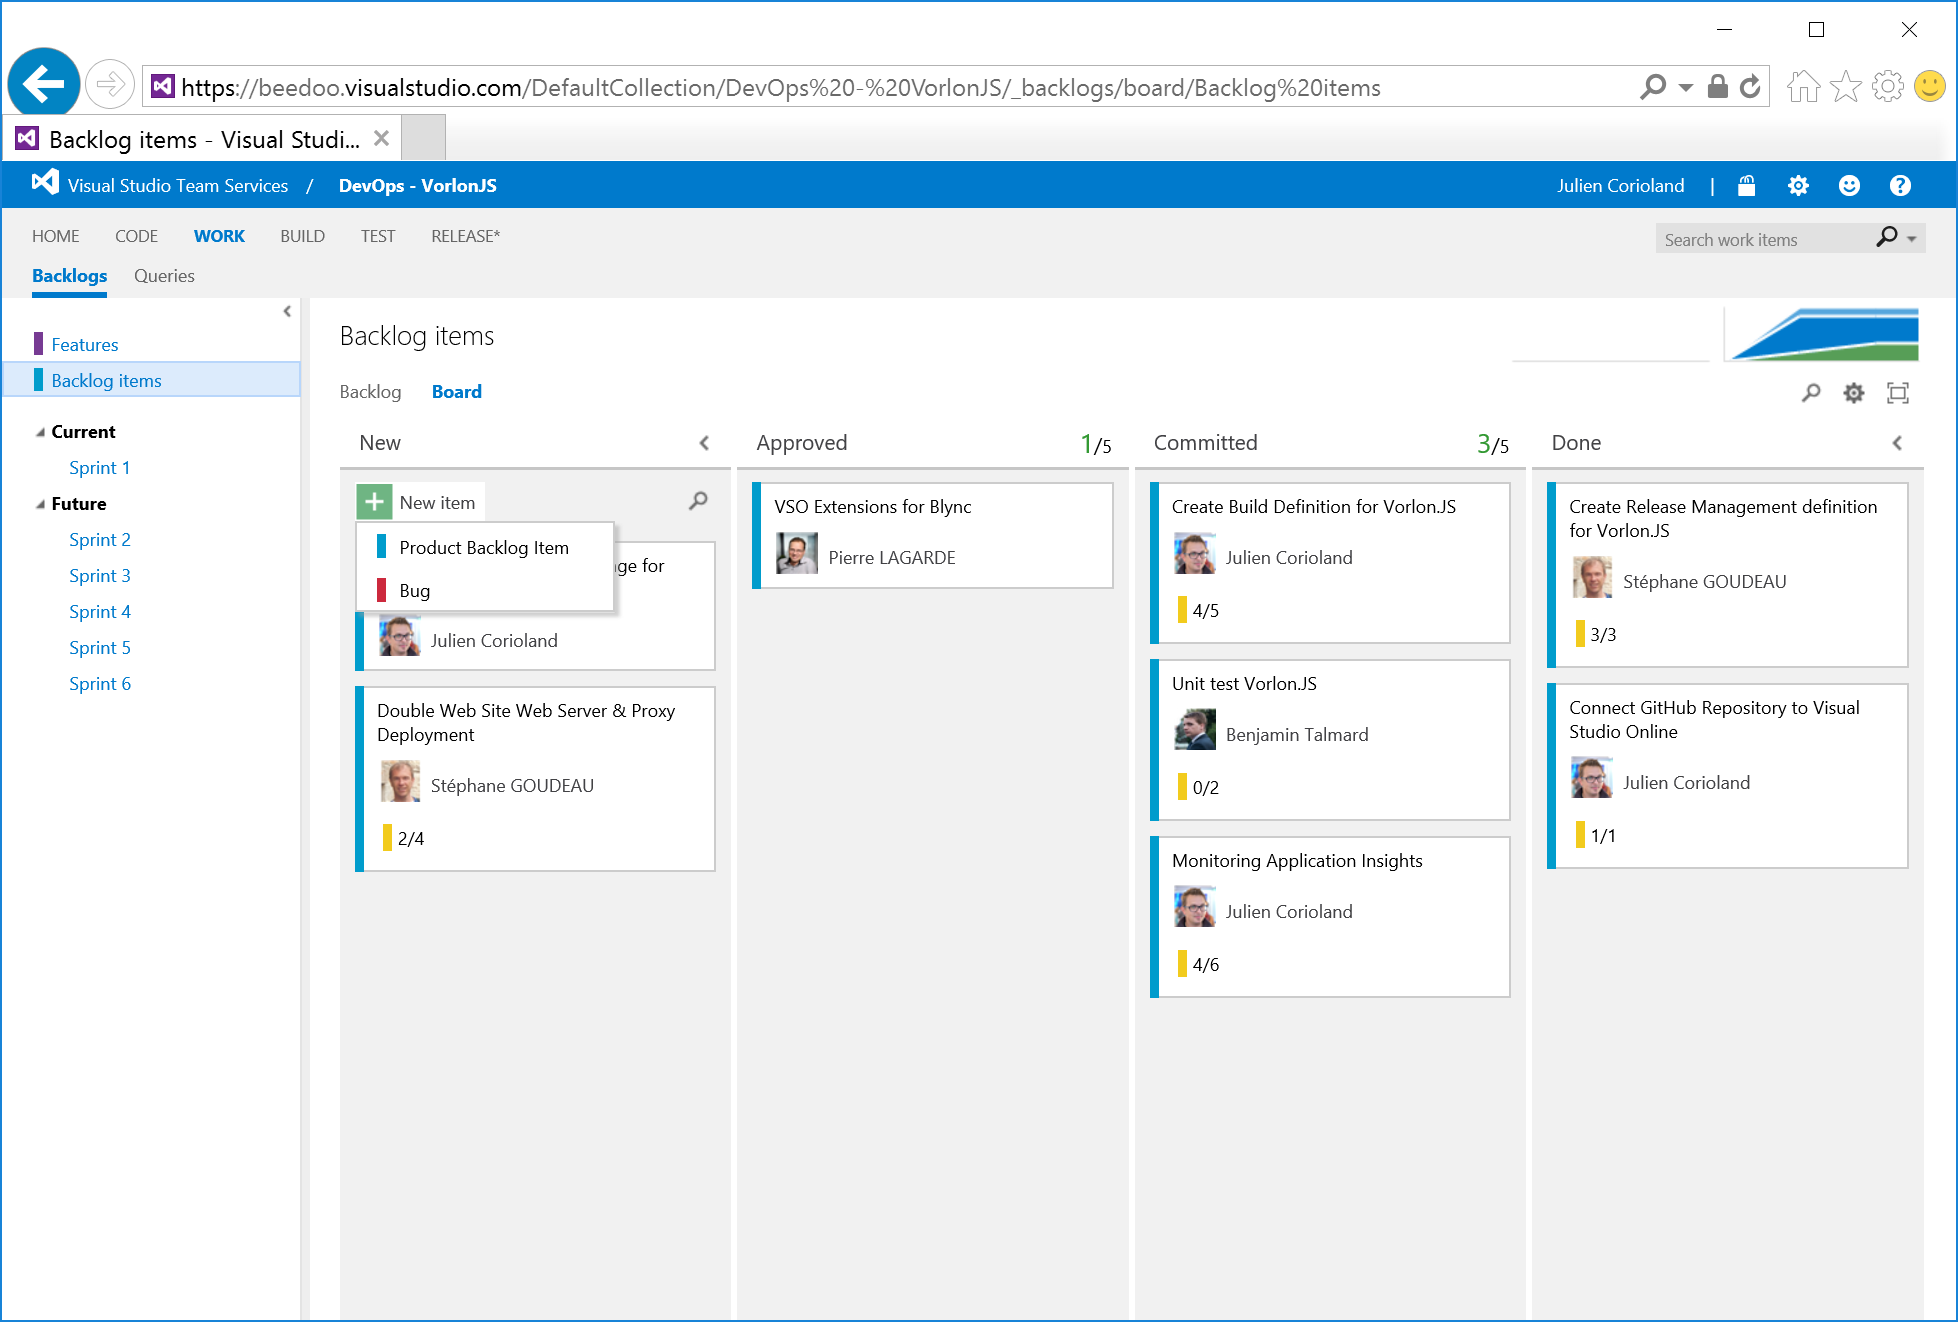
You can also switch to the board view and click the + NEW button:
Create custom queries and pin them to the team project dashboard
Visual Studio Team Services allows to create custom queries on work items and them pin there on the home dashboard to follow the evolution. For example, you may want create a query on the bugs reported for the current sprint.
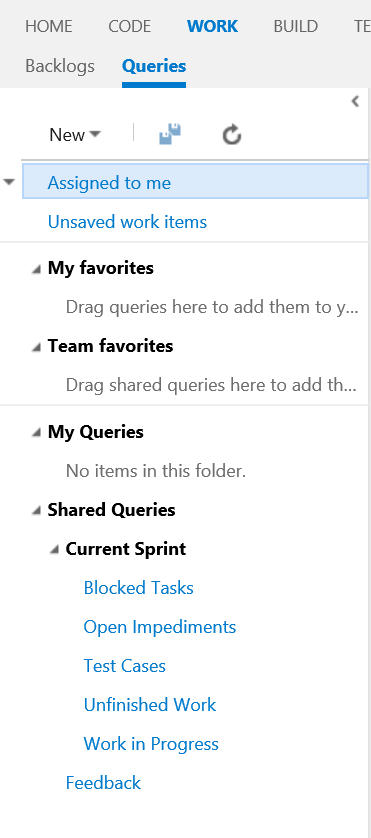
From the WORK tab, you can select Queries on the left. As you can see, some queries are pre created by VSTS:
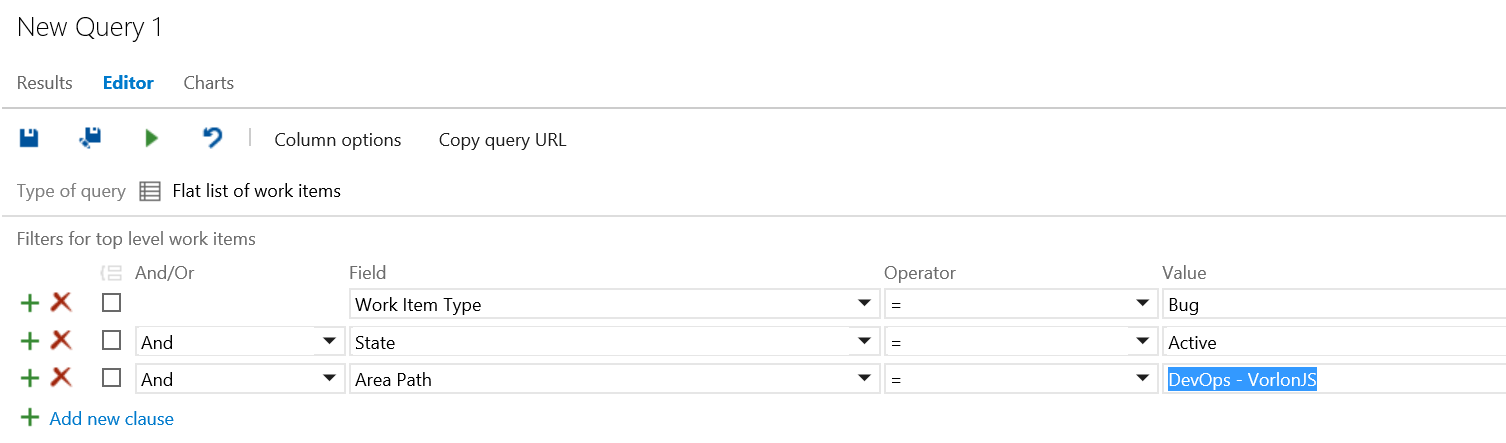
You can create a new one using the New button, for example one that retrieve the active bugs on the project:
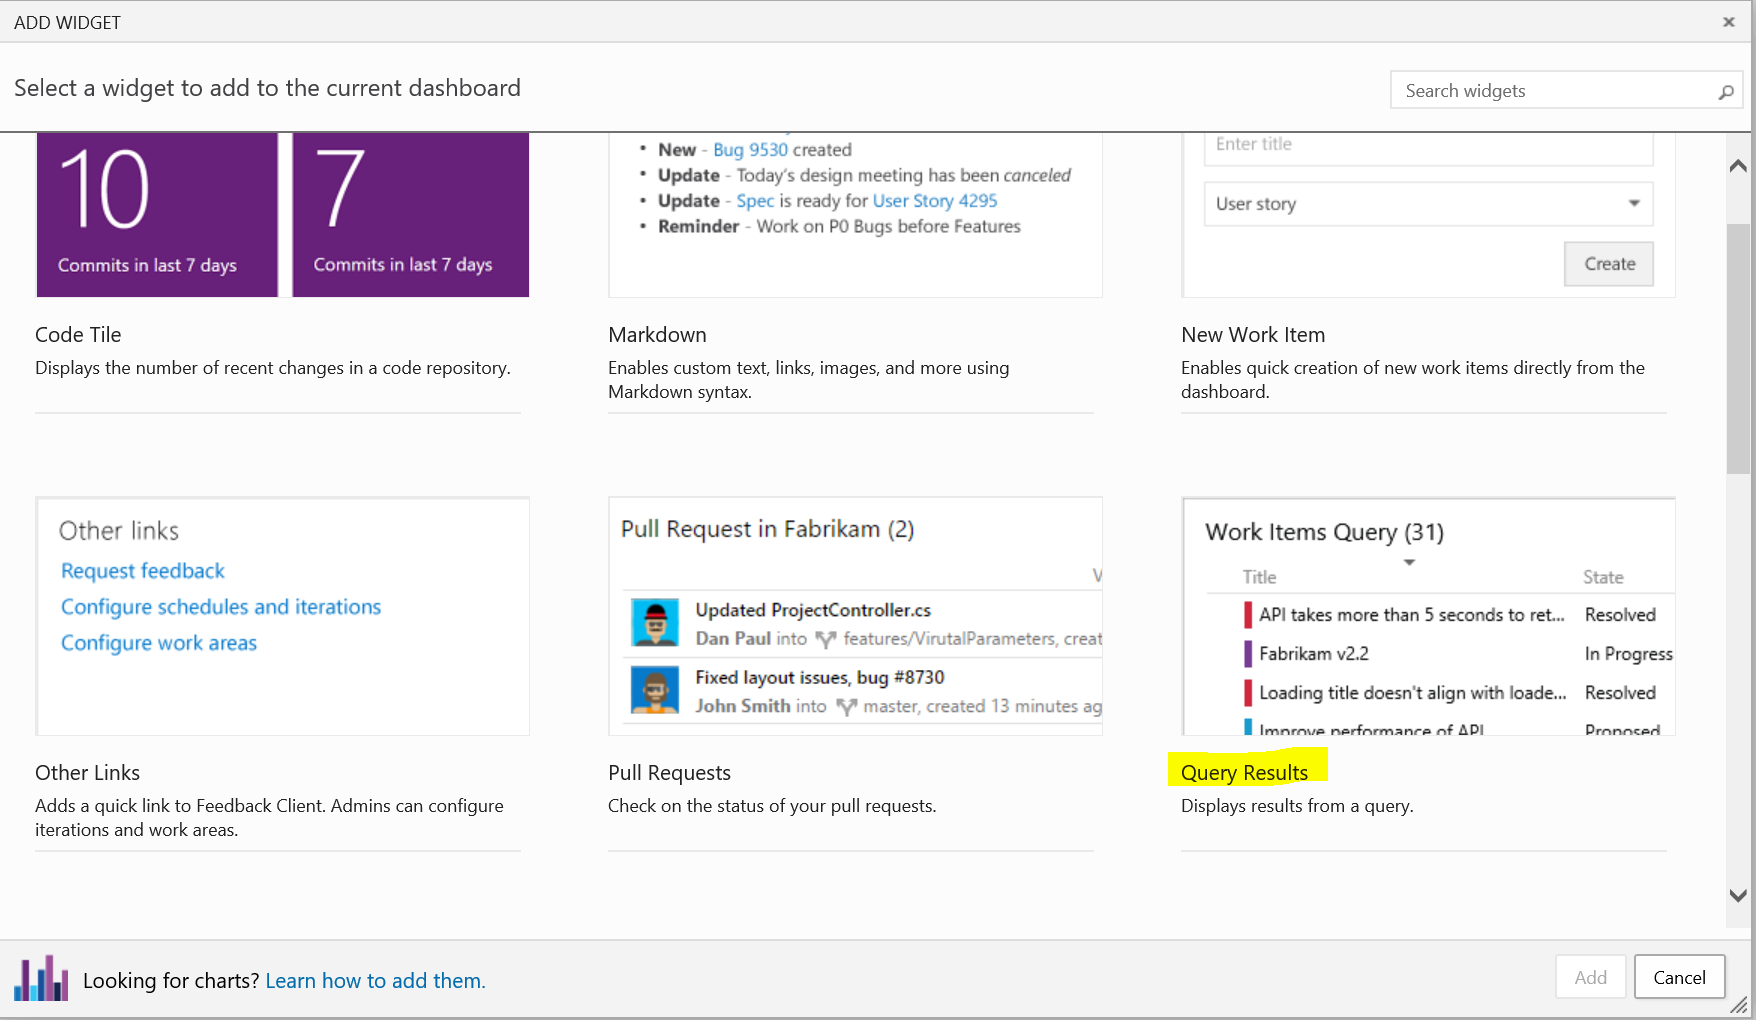
Once created, you need to drag & drop the query from “My queries” to “Shared queries” to make it available for the whole team. Then, you can go back on the Home dashboard and click the + button and select “Query results” in the window that opens:
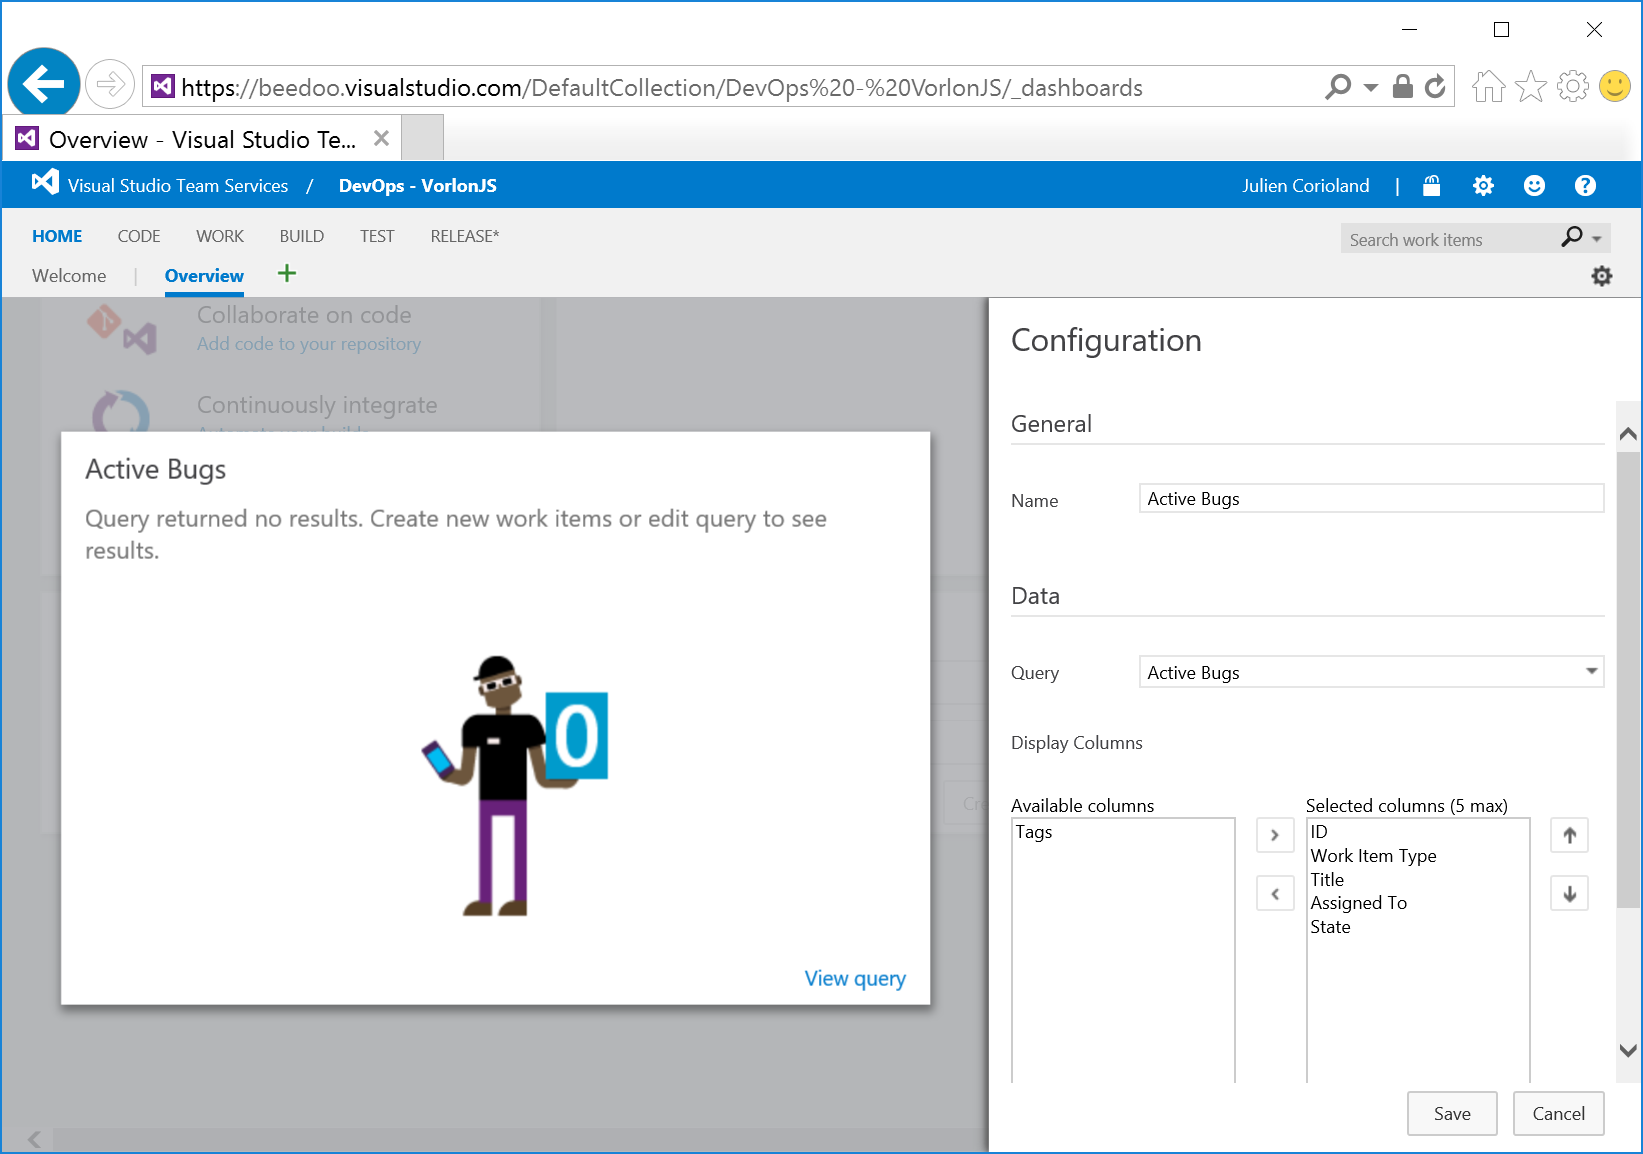
Click on the new widget to configure it. You can name the tile and choose the query to use and the fields to display:
Click the Save button, and that’s it!
Your team project is now well configured! You can declare all the work items you’ll need to do and customize your dashboard to make it fit your needs.
The next post will discuss about configuring continuous integration with Visual Studio Team Services, and a GitHub source code repository.
Stay tuned!
If you have any question about this blog post series or DevOps, feel free to contact me directly on Twitter : https://twitter.com/jcorioland .