Windows 8 BitLocker Deployment and PowerShell
With Windows 7 deployments, BitLocker installation for Operating System and data volumes has typically been configured as a post Operating System deployment activity – usually using the Enable BitLocker task sequence actions or by using the manage-bde.exe command line.
The impact on the Windows 7 deployment process is that the full volume encryption process may take several hours as BitLocker requires that all data and free space on the drive is encrypted. This is especially true with the large volumes.
With Windows 8, BitLocker can also be provisioned before the Operating System is installed, from within Windows PE. This is achieved by using a randomly generated protector that is stored clearly on the volume. The volume is then encrypted, all before the Windows setup process has started.
That’s a great feature, however you’ll be thinking it will still take time to encrypt your entire disk – however Windows 8 also includes the option to encrypt only used disk space.
When the Used Disk Space Only encryption option is configured during BitLocker setup, only the area of the drive that has data will be encrypted with free disk space remaining unencrypted. The result is that the encryption completes much faster – which will speed up the Windows provisioning process.
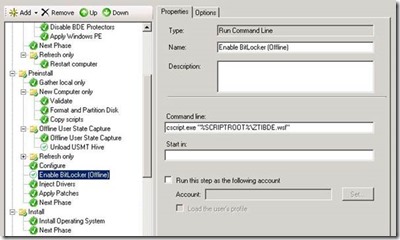
The great news is that MDT 2012 Update 1 will handle this for us. The ZTIBDE.wsf script is executed during the PreInstall phase and will automatically enable BitLocker Offline from with Windows PE, using the UsedSpaceOnly parameter (if the partition is not already encrypted). This will literally take seconds to run. The data written to the volume during OS and application installation is then encrypted as it is written to the disk, with a very small impact on performance (less than 1%)
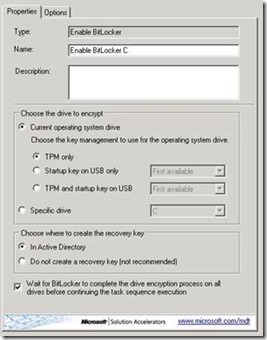
Once the OS image, applications and configurations have been installed, we include the standard Enable BitLocker task to configure the encryption protectors as required.
One challenge is configuring BitLocker on additional data partitions. Using the Enable BitLocker task sequence action will not allow us to set the parameters for Used Space Only. This is where we can use the new BitLocker PowerShell cmdlets.
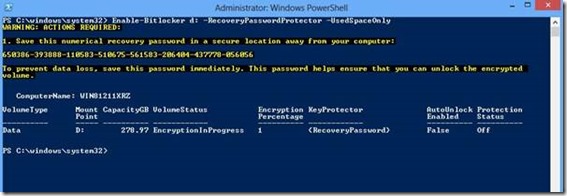
There are a host of new BitLocker cmdlets available in Windows 8, all described in the TechNet article at the end of this post. For this example, I am going to use the Enable-BitLocker cmdlet to encrypt my extra data partition and specify the –UsedSpaceOnly parameter.
Then literally by the time I had typed Enable-BitLockerAutoUnlock D: to configure Autounlock for the D partition, the encryption process had completed and the Protection Status had changed to On.
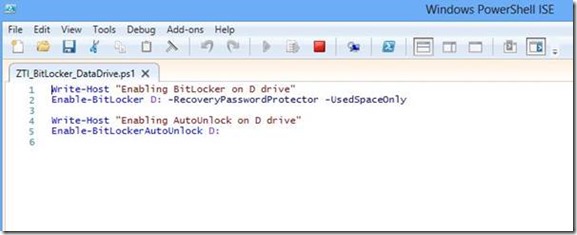
The PowerShell cmdlets can be called during the deployment process using the Run Command Line or even better, put together in a PowerShell script and called using the new Run PowerShell Script action in MDT 2012 Update 1 (thus making use of the integrated logging features with BDD.Log). A very simple example is illustrated below.
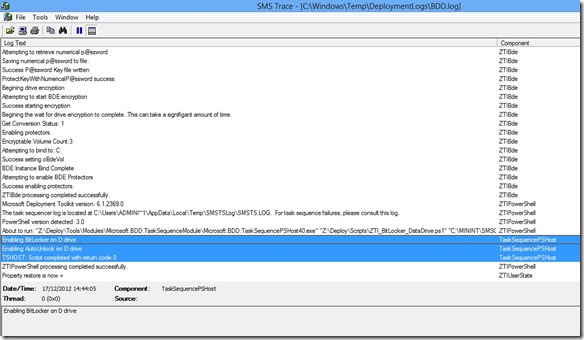
The output from the script will be logged into the BDD log file automatically, as highlighted below:
Take a look at the new BitLocker cmdlets documented in the following article:
https://technet.microsoft.com/en-us/library/jj647767.aspx#BKMK_blcmdlets
Disclaimer: The information on this site is provided "AS IS" with no warranties, confers no rights, and is not supported by the authors or Microsoft Corporation. Use of included script samples are subject to the terms specified in the Terms of Use
This post was contributed by Matt Bailey , a Consultant with Microsoft Services - UK .
